Pye Jirsa is the co-founder of SLR Lounge and Lin & Jirsa Photography, one of Southern California's most recognized wedding photography studios. He is the creator of SLR Lounge's full educational library and has trained over 20,000 photographers since 2008 across lighting, posing, editing, and business strategy. He is also the co-creator of Visual Flow Presets and has spoken at WPPI, PPA, CreativeLive, Fstoppers, and Adorama.
In today’s tutorial, I’ll be walking through how to use add “flash” to your natural light portraits using the AI masking tool in Lightroom.
Video: Adding “Flash” Using the AI Masking Tool in Lightroom
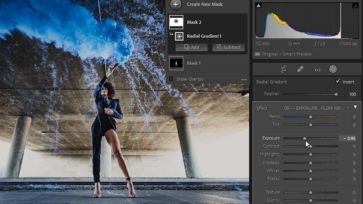
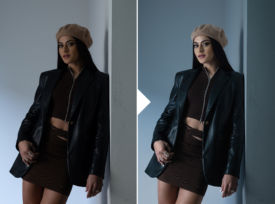
With the AI masking tool in Lightroom, we can select out our subjects with a click of a button. With a few tweaks to the color and light, we can enhance our natural light portrait of Kiara by adding the “flash” effect.
Let’s start with our global adjustments to the tones and color. I wanted to go for a cool look this time around.
Selecting Out Our Subject
To apply our “flash” effect, all we need to do is click “Select Subject” in our masking tools and Lightroom does all the heavy lifting.
After creating the mask, we can then apply our settings to raise the exposure on Kiara. This creates that “flash” look that separates our subject from the background.
Refining the Image
To enhance the effect, we can add a subtle radial burn and darken the edges of the image. This will help pull the attention to Kiara and emphasize the “flash” effect.
Lastly, make your final adjustments and see the final results! Here’s a before and after comparison.
Don’t miss our next episode of Mastering Your Craft on Adorama’s YouTube channel next week! If you want to catch up on all the episodes, make sure you check out our playlist!
With the size of the room and all the people around, wedding receptions can be challenging to photograph. In this video, I’ll be walking through a quick and easy single OCF lighting set up for wedding toasts and speeches.
Video: Quick Lighting Set Up for Wedding Toasts & Speeches
Today’s tutorial is a part of the Wedding Photography Training System from SLR Lounge Premium. There, we discuss every step from talking with the client to the final delivery of the photos. Today, we’ll be focusing on lighting toasts and speeches at the reception. Since there are so many angles to capture quickly, getting that consistent lighting can be a challenge. If we leave simply use an on-camera flash, we end up with bad lighting like this.
On-Camera Flash will result in overly bright foregrounds.
This is where we’ve created the OCF Fixed Pinned Lighting Set Up.
OCF Fixed Pinned Lighting Set Up
This lighting set up needs only a single light. This can be any light portable flash. I’m using the Profoto A1 on a lightweight Manfrotto Nanostand. I’m using a MagMod Grid & CTO with the MagGrip. The grid will prevent light spill and the CTO will match the warm lights of the reception room.
Position the flash (in red) roughly 20-30 feet away, depending on the size of the venue. Then, aim the light somewhere between the speaker and the couple to cover everybody. We want the distance to get even lighting on both the speaker and the couple. If we set the flash too close, per the Inverse Square Law, the light will be much brighter on the speaker.
Before (left) and After (right)
Then, photograph from the general positions shown in blue/green for both first and second shooters.
Depending on where the speaker will stand, you can simply mirror the entire lighting set up. It takes less than a minute, and don’t be shy either to ask the speaker beforehand to stand in a certain spot to ensure good lighting.
Here, I was in the green camera position behind the guests.Keeping the same lighting set up, I moved behind the couple.
From there, you can capture various angles keeping the same lighting set up throughout.
Conclusion
I hope you enjoyed this video/article. This was a part of the Wedding Photography Training System from SLR Lounge Premium. There, you’ll learn how to work with clients, photograph every aspect of the wedding, and deliver a great final product. You’ll also learn an expanded version of this lighting set up using two to three lights. So be sure to check that out among our other great photography courses.
Don’t miss our next episode of Mastering Your Craft on Adorama’s YouTube channel next week! If you want to catch up on all the episodes, make sure you check out our playlist!
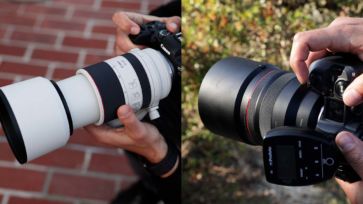
Two of the most popular lens options for portrait photography are the 85mm prime lens and the 70-200mm zoom lens. Both lenses offer unique advantages that can elevate your portrait work, but selecting the one that fits your style and needs can be challenging. In this article, we’ll break down the key differences between the 85mm and 70-200mm lenses, explore their strengths and weaknesses, and help you decide which one is best suited for your portrait photography.
Video: Which Portrait Lens is Right For You?
The 85mm prime lens has always been hailed as the perfect portrait lens. However, the popular 70-200mm zoom lens has been rising as a worthy contender. In this video, I’ll be comparing the two lens, and which one may be right for you.
Ask me a few years ago and I would’ve picked the 85mm. With today’s lens technology, zoom lenses are able to match the aesthetic quality of prime lenses. Ask me now, and I’d say the 70-200mm hands down, but that’s just me. Depending on what you photograph, the 85mm could be the better portrait lens.
1. Comparing Aesthetics
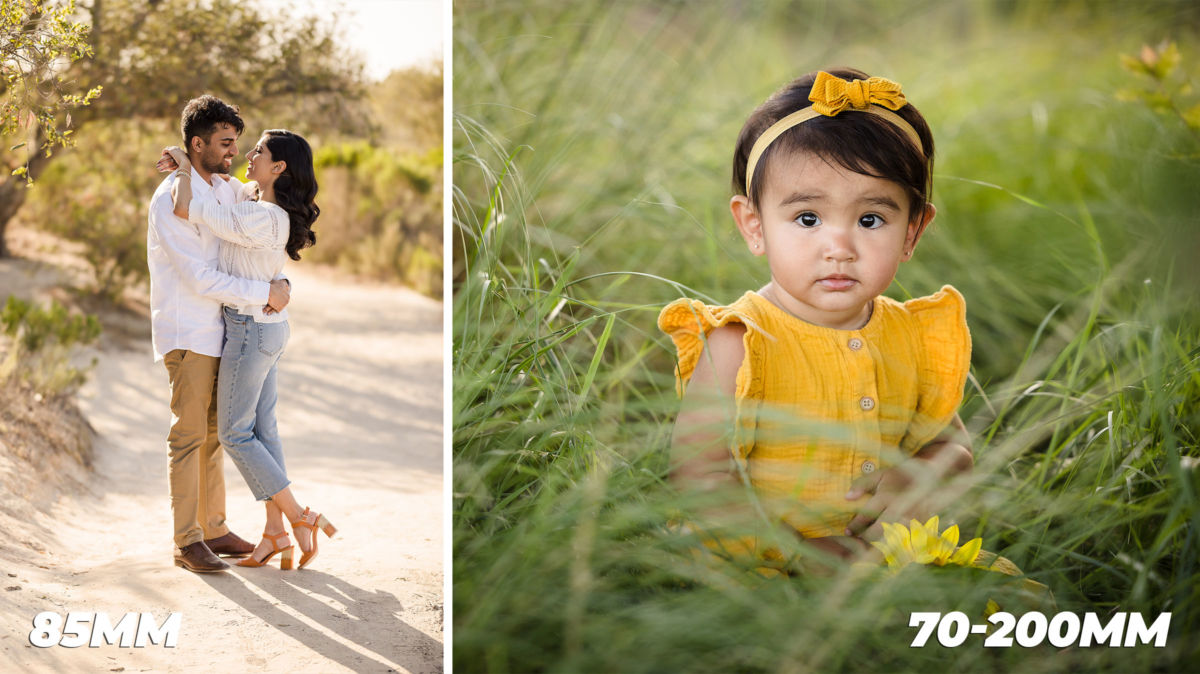
Prime lenses are known for their bokeh. The Canon RF 70-200mm f/2.8 is the first zoom lens that gives the 85mm a run for the money. Here are several side by side bokeh comparisons of each portrait lens.
2. What Are You Photographing?
Captured on 70-200mm.
If you are an event shooter, I would recommend the 70-200mm. The reason is versatility. The 70-200mm allows you to quickly shoot zoom in from various distances and the focus is lighting fast.
If you’re primarily a portrait photographer, the extra depth of the 85mm may be the best dedicated portrait lens. On top of that, if you photograph often in the evenings, the low light capabilities of the prime lenses will make a huge difference.
3. Distance to Your Subject
The 85mm lets me get great medium portraits from up close.
If you prefer to be closer to your subjects, the 85mm will help you get that beautiful blur from a short distance.
To get similar bokeh on a 70-200mm, I have to be quite far away.
To get the best bokeh from the 70-200mm, you’ll zoom in. That means you’ll have to be quite far from your subject. I captured this image at 135mm. Compared to the first image, you can see that I’m photographing from quite far away.
If you work in tight spaces or anywhere where space may be an issue, I’d recommend the 85mm.
So Which Portrait Lens Should You Get?
If you photograph both events and portraits, I’d say go for the 70-200mm. You’ll enjoy the versatility of the zoom while still capturing great bokeh at a distance.
If you photograph portraits with a focus on aesthetics, the 85mm wins hands down. You’ll enjoy the low light capabilities and the beautiful bokeh at closer distances.
Conclusion
I hope you enjoyed this article/video! Both of these are fantastic portrait lenses to work with and they leave me wondering what incredible lenses will be available in the future!
A message from Pye Jirsa, Co-Founder of SLR Lounge. I wanted to write and share this message personally. As a photography platform, we do our best to “stay within our lane.” News and politics do not usually fall within that lane, but as artists who communicate through portraiture and photojournalism, human beings are definitely within …
Looking to add some extra pop to your photography? Toss in some smoke bombs for epic portraits anywhere. In today’s video, I’ll be walking through a complete shoot-to-post guide to an epic smoke bomb photoshoot.
Video: Complete Guide to an Epic Smoke Bomb Photoshoot
For this smoke bomb photoshoot, we simply followed the C.A.M.P. process to compose and set our exposure. We’ve covered the framework to capture this image as well as the safety tips in a previous post so you can check out the steps here.
Captured at 1/1000 sec, f/2.8, ISO 800
This is our final shot that we’ll be editing in the next section.
Post-Production
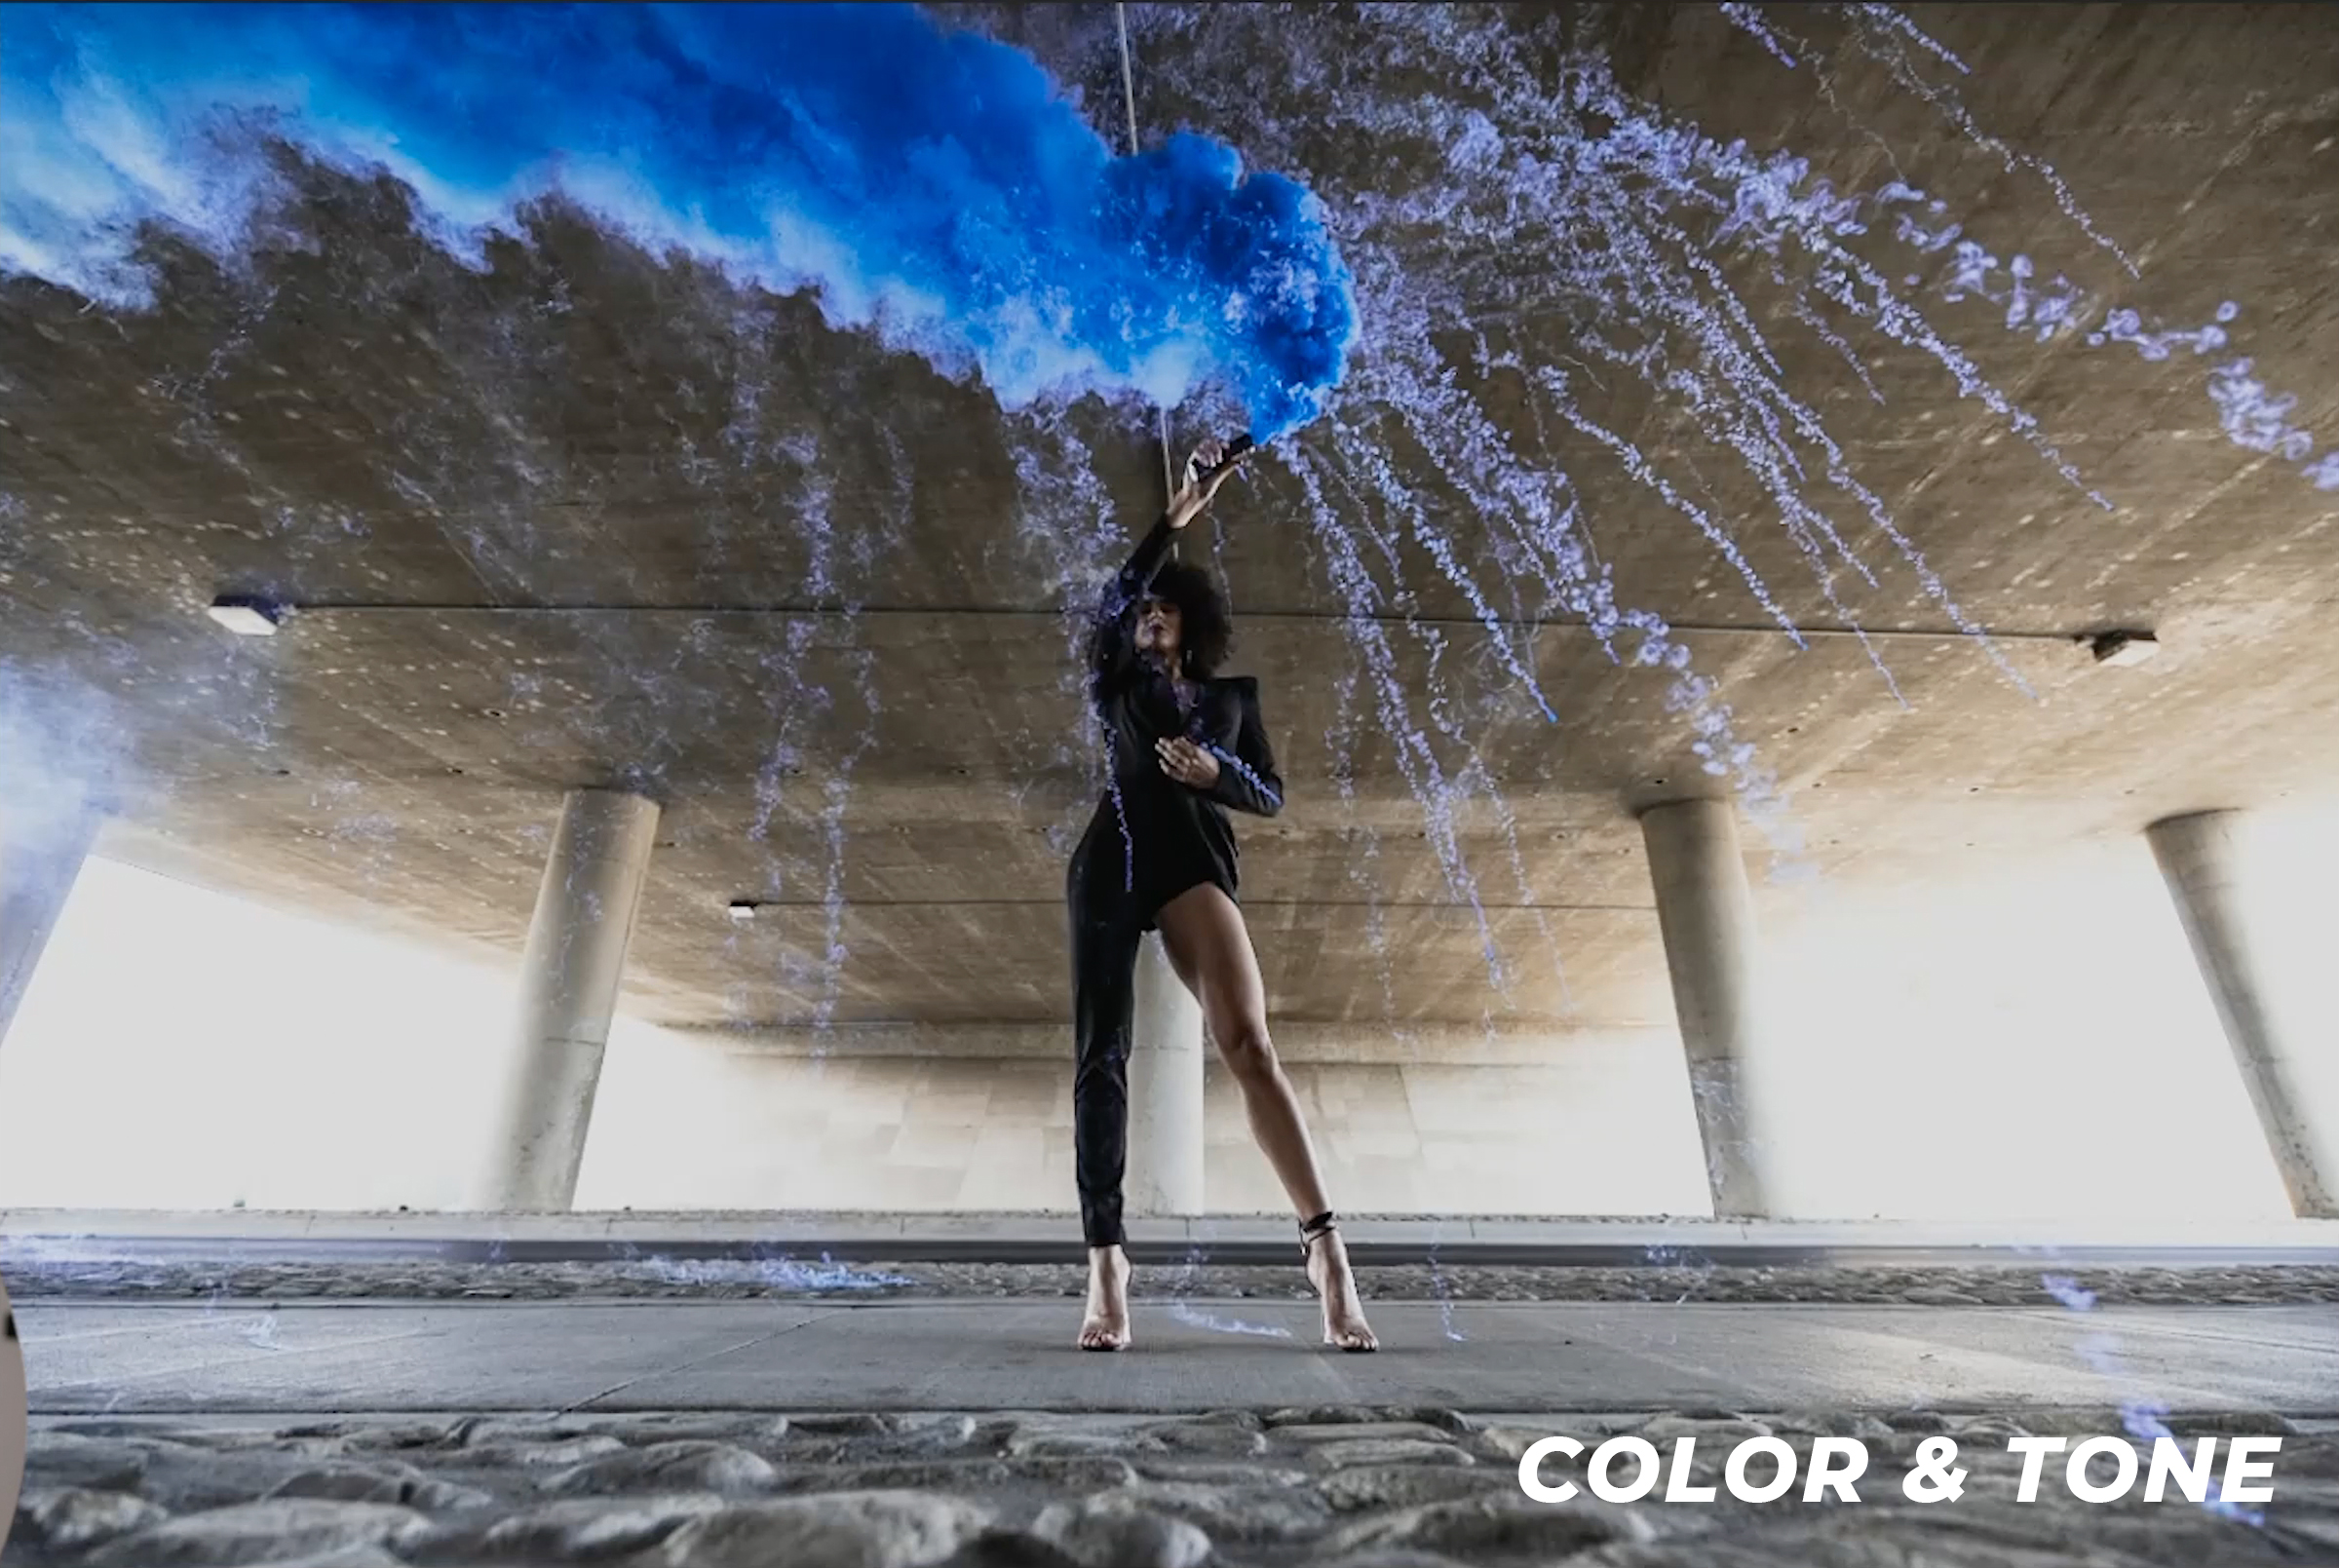
Our goal is to emphasize the detail and make the colors pop right out of the frame. Let’s start off first by applying our basic adjustments.
Here are the final settings.
Next, we’re going to make local adjustments using regular masks as well as Lightroom’s new AI Masking tools. For an in-depth guide on how to use the new AI masking tools, check out our previous post on Advanced Lightroom Masking.
First, we added color and tone on Kiara. Then, we darkened the background. Lastly, we lessened the highlights on her feet.
After some final tweaks, here is our final before and after comparison from our smoke bomb photoshoot.
Conclusion
I hope you enjoyed this article/video. A smoke bomb photoshoot is guaranteed to make your portraits and photos pop. Be sure to follow all the safety guidelines and capture images that are sure to impress! For a complete guide on Lightroom editing and more photography related courses, check out the SLR Lounge Premium Library. In addition, for intuitive presets for all lighting conditions, check out Visual Flow Presets.
Don’t miss our next episode of Mastering Your Craft on Adorama’s YouTube channel next week! If you want to catch up on all the episodes, make sure you check out our playlist!
What if I said that you can take great portraits anywhere, even in an ordinary garage? It’s all about understanding light and how it works. In this video, I’ll be walking through how to create dramatic portrait lighting anywhere in 4 simple steps.
Video: 4 Simple Steps for Dramatic Portrait Lighting Anywhere
Today, we’re going to take away all the excessive gear and run with just the fundamentals. No fancy lighting and I’m going to demonstrate these portrait lighting principles on my Canon EOS R5 as well as an iPhone. If we understand how light works, we can take great portraits anywhere. Just follow these easy steps.
Control the Light
Composition & Positioning
Control the Background Light
Layering Techniques
Before we start, head over to Instagram and give Kiara, our wonderful model today, a follow!
The Walk-Up Shot
Here’s where we’ll be starting. No portrait lighting techniques just yet. Simply the ambient light from an open garage. Basic, right?
Step #1: Controlling the Light
Portrait lighting often involves controlling light using flash or modifiers. Instead, we’re going to start by eliminating the light and to do this, I simply closed the garage. Then, I opened the side door which creates a makeshift strip-box. You can even open or close the door to control the width and light spread.
Step #2: Composition & Positioning
I moved Kiara beside the door where the light was lighting her perfectly. Then, I tightened the frame so we don’t see any unnecessary clutter in the background.
Step #3: Control the Background Light
By simply opening the door, I can allow more light to spill onto the walls. On the other hand, I can close the doors to tighten up the light and darken the background.
Step #4: Layering Techniques
To add depth to the shot, I placed Kiara against the wall and used the door to control the highlight behind her.
Don’t miss our next episode of Mastering Your Craft on Adorama’s YouTube channel next week! If you want to catch up on all the episodes, make sure you check out our playlist!
Two lights are all you need to capture great couple’s portraits. In this video, I’ll be walking through a simple and dramatic portrait lighting setup for some of my favorite looks.
For this simple two light set-up, all you’ll need are your camera, couple or models, two standard flashes, grids, and a gel. For an even simpler portrait lighting setup, check out Dramatic Lighting for Hollywood Style Evening Portraits.
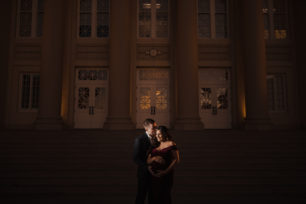
On camera left, I have a Profoto A10 with a grid. This is our primary light. On camera right, I have the other A10 set up with a grid and CTO on a separate channel. This is going to be our rim-light.
All of this is against the backdrop of a beautiful auditorium with fantastic vertical lines.
Posing Our Couple
Next, I brought in my couple, Salome and Chris. This composition is going to be layered, with the person in the background being the focus of the image.
Captured at 1/250 sec, f/2, ISO 50 @50mm
First, I placed Salome in the background and Chris in the foreground. Then, I powered on the flashes. The primary light is set at 1/8 power and the rim-light at 1/16 power.
Next, I switched Salome and Chris without moving the portrait lighting setup.
Capturing a Wide Shot
For our final shot, I placed Salome and Chris together in the center. I simply raised the ISO and powered down the flashes without moving them and got these images.
Compositing an Extreme Wide Shot
I wanted to finish off with a grand shot without the flashes being in the frame. To achieve this, I followed these steps:
Take the first image with the flashes in the frame. This shot will light your subjects.
Have an assistant remove the flashes from the frame. Be sure both you and your subjects stay in the same spot.
Take the plate shot without the flashes in the frame.
In post-production, use the plate shot to paint in the background without the flashes.
Combine the plate shot and the main shot for this final image.
Here is our final edit.
Conclusion
I hope you enjoyed this article/video. Simple and versatile portrait lighting setups can produce beautiful images. This technique becomes particularly useful when working in fast environments. For a full tutorial on lighting, check out the Flash Photography Training Course on SLR Lounge Premium. For more lighting-based presets and retouching tools, be sure to head over to Visual Flow.
Don’t miss our next episode of Mastering Your Craft on Adorama’s YouTube channel next week! If you want to catch up on all the episodes, make sure you check out our playlist!
Accidentally overexposed your shot? Are your highlights blown out? Don’t toss it just yet. Today, I’ll be walking through 3 steps to saving an overexposed photo.
Video: 3 Techniques for Saving an Overexposed Photo in Lightroom
Photographers are taught to avoid blowing out the highlights. Blown out highlights are areas of the frame that are too bright for the sensor to capture all the information. Sometimes, a scene just is so bright and contrasted, that we simply don’t have a choice. This results in pure white spots that can’t recover detail, even with the dynamic range of current cameras. Accident or not, we might think to just scrap the shot. However, there are three techniques I use to edit an overexposed photo in Lightroom Classic. Let’s jump in.
Before we begin, be sure to download the exercise file here and follow along as I edit.
Behind the Scenes Look
Let’s take a look at our image today, shot on the Fujifilm GFX-100. If you see the behind-the-scenes, you’ll notice right off the bat that the lighting situation is tricky. The model is in the shade while the background is lit by direct sunlight. When I expose for the model’s face, this results in the background being overexposed.
Step #1: Matte Finish
The Matte look is great for softening up a significantly overexposed photo. To achieve this, we use the tone curve to pull the white point down to a bright gray and push the black point slightly up. Then, we create an S-Curve to add in the contrast.
Be sure you’re using the “Point Curve” rather than the “Parametric Curve,” as you can see here.
Step #2: HDR + HSL
If your overexposed photo is RAW format and still retains plenty of information, this is a great technique to apply next. We begin by pulling the highlights down and the shadows up. I pull my white point slightly down as well as the black point to control contrast. This is an HDR (High Dynamic Range) technique of squeezing all the information closer together. However, this causes the colors to look hyper-saturated.
To fix the colors, we have to hop over to the HSL (Hue, Saturation, Luminosity) adjustments. Here, I’ll lower the saturation of certain colors to ring them back to normal.
Check out the difference so far.
Step #3: Selections & Local Adjustments
In this next step, we’re going to focus on specific parts of the image. We can start by simply lowering the exposure a bit.
Then, use Lightroom’s AI masking tool to “Select Subject.” Next, I adjusted the brightness of the model using highlights & whites. This creates a much more natural appearance than when adjusting the entire exposure. Then, with a touch of added shadow, we reach the final image.
Here is the final image next to where we first started.
Conclusion
I hope this tutorial was helpful. Next time you run into an overexposed photo, try these techniques out to get a final result that looks completely intentional. With this new skill in your toolkit, you can feel much safer while shooting in difficult lighting situations. To learn the full power of Lightroom editing, be sure to check out the Mastering Lightroom Course, available on SLR Lounge Premium. You can also check out Visual Flow for intuitive lighting-based presets as well as a host of retouching tools for full editing control.
Don’t miss our next episode of Mastering Your Craft on Adorama’s YouTube channel next week! If you want to catch up on all the episodes, make sure you check out our playlist!
Being a professional photographer lends itself to unexpected experiences on the job. The nature of the job is very fast paced and being prepared for any circumstances is a crucial skill to have. This holds especially true when shooting on-location in dynamic environments like the desert. It is imperative that you plan accordingly to successfully navigate such shoots, against whatever unfolds. During a recent engagement session, for example, we were hit by a sudden windstorm of up to 30 miles per hour. Today, I’ll be walking through some of my photoshoot tips for working in unexpected weather conditions.
Video: Photoshoot Tips for Working in Unexpected Weather Conditions
Be Prepared For Anything
What began as perfect weather and great photos turned into a wild windstorm that posed tons of challenges and caused us to change course. Fortunately, I had years of experience to help guide me through the rest of the shoot. We agreed to continue through the weather and captured this stunning image.
When it comes to shooting in extreme environments, I suggest, well… Don’t. Joking aside, always check the weather forecast. If the forecast predicts extreme weather, it’s best to steer clear and try again later. However, if the forecast is wrong or you absolutely must shoot, proceed with caution and follow these photoshoot tips.
Tip #1: Always Carry a Rain Shield
Rain shields don’t weigh much and it’s better to avoid ruining your gear and ending up with a hefty repair bill. They slip right over your camera and can protect against many elements including rain and sand. You can find them on Adorama here.
Tip #2: Switch to a Prime
Leaving the camera unprotected can result in a hefty repair bill.
Zoom lenses have many moving parts and this means that they’re more likely to be damaged by sand or water. While newer lenses are weather-resistant, they can still sustain damage if left exposed for too long. If you notice water or sand getting into the lens, stop using them. Continuing to use them may further damage the internal components and leave you with a large repair bill. Instead, switch to a prime lens.
Tip #3: Change Lenses While Under Cover
If you need to change your lens, be sure to do so under a covered area free from the wind. A car or some other shelter will work. Make sure your camera is turned off and that no additional elements make it into your camera body.
Tip #4: Shoot in Intervals
Unexpected weather can quickly turn the photoshoot into a high pressure environment. Be sure to communicate the plan with your team and your clients. If everyone is in agreement to continue, space out the shots into intervals. Keep exposure to the weather limited. Take frequent breaks to dry off, warm up, or clear the sand.
Tip #5: Use Frameworks
These sudden circumstances will put your experience and knowledge to the test. Extreme weather might limit your ability to experiment or try new things. Instead, You have to rely on what you know. A crucial photoshoot tip is to create a framework for your process. I relied on the C.A.M.P. framework to quickly set up this shot.
How I Captured the Shot in 30MPH Wind
C: Composition
I scouted for the perfect location for our final image while my clients waited in the car. Then, I found this perfect spot with the rolling hills, backlit by the sky, and the sand visibly blowing across the dune. I planned to place my couple directly in the center of the frame. The dark dune will help the couple stand out against the flash.
A: Ambient Light
Knowing I’m going to use flash, I exposed to keep as much detail in the sky as possible without losing shadow detail. My final settings were ISO 800, f/1.4, at 1/200 sec.
Always begin with “safe” shots before moving onto action shots.
Once that was done, I brought in my couple for the final images. I instructed them on the poses before bringing them out since communication would be difficult in the wind. If you have any action shots planned, be sure to rehearse them by the car or under shelter. I first began with a simple couple’s pose which will be our “safe” shot.
Then, we moved on to a lifting pose. Action shots can be difficult to get right, and extreme weather can make it even harder. Today’s final photoshoot tip is to begin with a “safe” shot. This way, if the action shot doesn’t work out, you’ll still be left with a great usable image.
Post Production
The exposure was perfect and left us with plenty of latitude to bring out all the details. I used Visual Flow’s Modern Presets to get this beautiful final edit.
Conclusion
I love the photos that came out of this great experience. The team had a great time and the couple had a great time despite the unexpected circumstances. At the end of the day, the photos represent a great memory shared between all of us. This is important for your clients as they will remember you not just for your photos, but the experience of capturing those photos. You can learn more about this in the Psychology of a Photograph where I explain how critical the client experience is for photographers running a business.
I hope you enjoyed these photoshoot tips for working in unexpected weather conditions. It’s important always be prepared, learn from mistakes, and build on every experience. You never know when or what the next surprise will be. For tutorials on wedding photography to learning how to work with clients and build a successful photography business, check out SLR Lounge Premium. You can also visit Visual Flow for more intuitive lighting-based Lightroom presets.
Don’t miss our next episode of Mastering Your Craft on Adorama’s YouTube channel next week! If you want to catch up on all the episodes, make sure you check out our playlist!
Free Newsletter
Tutorials, gear reviews & pro tips — straight to your inbox.


 Let’s start with our global adjustments to the tones and color. I wanted to go for a cool look this time around.
 After creating the mask, we can then apply our settings to raise the exposure on Kiara. This creates that “flash” look that separates our subject from the background.