3 Lightroom Features That Will Change How You Edit

lightroom features

Having an efficient and effective editing process is important for both professionals and hobbyists alike. In the last year, Adobe has introduced some new Lightroom features that just may change how you edit. Let’s check them out.

Video: 3 Lightroom Features That Will Change How You Edit

An efficient editing process is not only ideal but crucial when working with high volumes of images. Even for those who don’t work with high volumes, it never hurts to simply your editing process where you can! These Lightroom features will definitely shave some valuable time from your workflow.

Related Reading: Advanced Masking With Lightroom’s AI Features

Tool #1: The Amount Slider

lightroom features slider tool

The amount slider makes working with presets a breeze. Simply select a preset and use the slider to dial the effect up or tone it down. You’ll notice that it evenly adjusts all the settings on its own.

Tool #2: Subject Mask

lightroom features subject mask

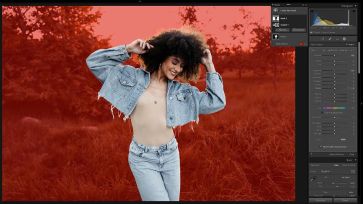
The subject mask has been included with the Lightroom features for about a year now. However, this time, I’ll show you how to use it to apply a dodge and burn effect. Start off by creating the mask.

Then, slightly lower the exposure and raise the highlight and white sliders to isolate those tones. Add a bit of clarity to boost the mid-tone contrast and you’re good to go.

Tool #3: Background Mask

lightroom features background mask

While there’s no specific tool within the Lightroom features for selecting the background, you can easily achieve this by selecting the subject again, and inverting the mask.

Then, make all your adjustments to your background without affecting your subject!

Before & After

Check out the final edit after using these intuitive Lightroom features.

Conclusion

I hope you enjoyed this article/video. Give these Lightroom features a try and see how much time you’re able to save from your own editing workflow! For a deep dive on Lightroom editing, check out the complete Mastering Lightroom course on SLR Lounge Premium along with a host of photography related courses! You can also visit Visual Flow for intuitive presets and retouching tools.

Don’t miss our next episode of Mastering Your Craft on Adorama’s YouTube channel next week! If you want to catch up on all the episodes, make sure you check out our playlist!
Photoshop AI vs. Pro Retoucher: Which is Better??

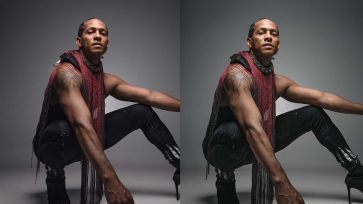
Adobe Photoshop has come a long way since its first release, its AI and third party plugins now rivaling professional retouchers. In this video, I’ll be using 5 Photoshop AI tools and plugins and comparing the results with a professionally retouched version.

Video: Photoshop AI vs. Pro Retoucher: Which is Better??

We’ll be comparing various Photoshop AI tools and plugins and seeing the results side by side. Be sure to download the exercise file here and try out Photoshop’s tools as you follow along.

Before we jump in, start off by dialing in a look in Lightroom or Camera Raw. I used Visual Flow’s Pure Presets. Let’s get started!

  1. Retouch4Me Clean Backdrop
  2. Content Aware Fill
  3. Neural Filters
  4. Portrait Volumes
  5. Skin Tones
  6. Comparison

Related Reading: Quick & Easy Headshot Portrait Editing in Lightroom & Photoshop AI

Tool #1: Retouch4Me Clean Backdrop

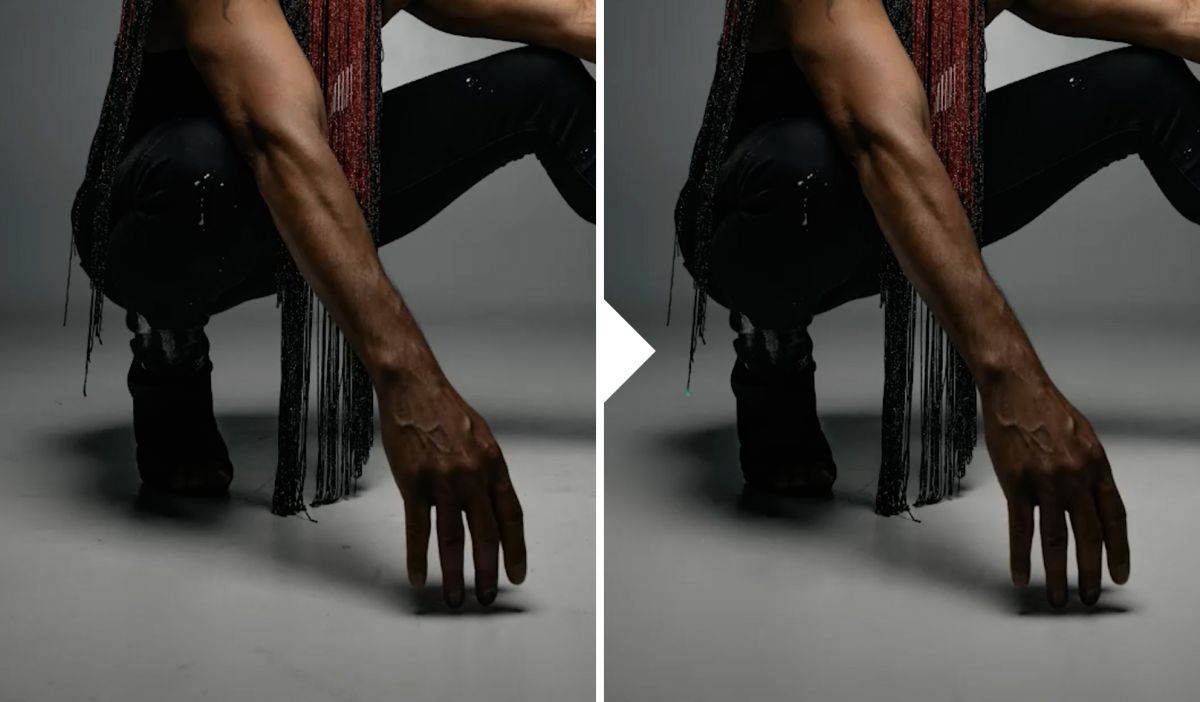
The plugin automatically removed most of the blemishes on the floor.

A messy backdrop is a common thing photographers have to deal with that would usually be manually fixed. Doing so manually can take a long time, especially when working with high volumes of images. Instead, I tried the Clean Backdrop plugin from Retouch4Me and instantly got great, though not perfect, results.

While the plugin got most of the marks on the backdrop and retained the grain texture, it did leave behind some artifacts that had to be manually fixed. However, this method can still save considerable time when working editing a large volume of photos.

Tool #2: Content Aware Fill

photoshop ai content aware

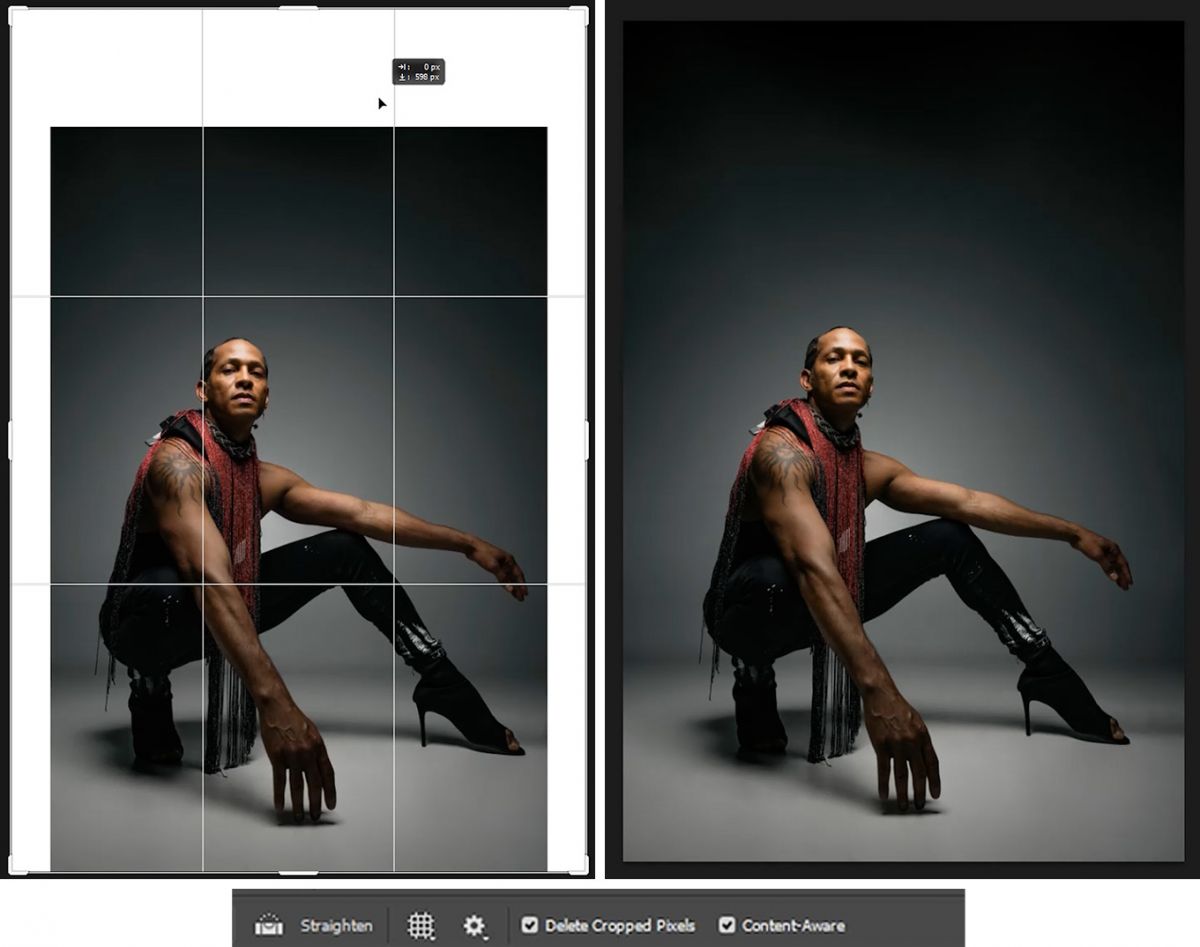
The content aware fill is a tool directly built into Photoshop. Using the lasso, I selected the unwanted elements in the photo including the ceiling and the v-flat to the right. Then, I hit Shift + Backspace/Delete to open the Fill dialogue and selected Content Aware with Color Adaptation checked. Use the patch tool to fix up what may have been missed.

Be sure to have “Content Aware” checked.

I even widened the crop and used Content Aware to naturally fill in the empty spaces.

Tool #3: Neural Filters

photoshop ai neural filters

Next, I used the “Skin Smoothing” feature from the new Neural Filters. I max out the settings on the feature, set it in a new layer, and use that layer opacity to adjust the intensity.

Tool #4: Portrait Volumes

Retouch4Me also includes “Portrait Volumes” which handles a bulk of the finer retouches such as dodge & burn, lift, heal, and smooth. I applied this to a new layer and used the layer opacity to adjust the overall intensity of the effect.

Tool #5: Skin Tones

Lastly, I used the “Skin Tones” plugin by Retouch4Me, which evened out much of the skin tones and removed some unwanted yellow tones from the entire image. We’ll compare the colors below.

Comparing Photoshop AI vs. Professional Retouch

Let’s compare the results. Note that all of my adjustments were done using Photoshop AI and not any manual retouching tools. This also means that I didn’t clone in or out any wardrobe parts on my model.

The Color

I personally prefer the skin color done using AI due to the extra yellow tones that were removed.

Skin Retouching & Smoothing

photoshop ai skin retouch

The professional retoucher did a much thorough job retouching the skin which is critical for commercial type jobs. She did a great job evening out the skin tones and smoothing out the overall detail.

The Floor & Backdrop

photoshop ai backdrop clean

Lastly, in my opinion, the AI did a much better job cleaning up the floors, especially in the shadows.

The Verdict

For most cases where the photos are viewed at a smaller scale or you’re handling high volume work, Photoshop AI may be the way to go. The high level of detail that a professional retoucher is able to accomplish is best for commercial type work. However, many regular portrait clients may not be able to tell the difference between Photoshop AI and the professional retouch, which goes to show just how far AI based technology has come.

Conclusion

I hope you enjoyed this article/video. Photoshop AI provides a reliable and efficient way to edit photos which can be useful when running a photography business or streamlining your editing workflow. Be sure to visit SLR Lounge Premium for complete courses designed to help expand your photography toolset! You can also visit Visual Flow for intuitive Lightroom presets and retouching tools.

Don’t miss our next episode of Mastering Your Craft on Adorama’s YouTube channel next week! If you want to catch up on all the episodes, make sure you check out our playlist!
Combining Compositional Techniques For Stronger Portraits

compositional techniques

A good composition can make all the difference in a portrait. In this video, I’ll be walking through how to bring together multiple compositional techniques to capture strong and unique portraits.

Video: Combining Compositional Techniques For Stronger Portraits

In a previous video, we went over portrait ideas and concepts you can do in any park. Today, we’ll be taking these compositional techniques and “stacking” them to get strong and dynamic portraits using a Sony A74 with a Tamron 70-180mm f/2.8 lens.

Before we dive in, be sure to give Sabrina, our model, a follow on Instagram.

Related Reading: 5 Simple Portrait Ideas For Any Outdoor Park

Step #1: Backlight

Backlighting Before > After

Backlighting is a great compositional technique to draw your subject out. I placed Sabrina underneath the blotted sunlight coming through the trees, creating a nice edge light.

Step #2: Find Leading Lines

Use leading lines to guide the focus to the subject.

You can use leading lines to help guide the focus to your subject. Here, I used the train tracks to do exactly that. You can also use a low angle to exaggerate the effect.

Step #3: Brightest Spot in the Frame

Our eyes are naturally drawn to the brightest part of the frame. Notice how Sabrina stands out from the background when placed in the light.

Step #4: Compress the Background

Left @ 70mm, Right @ 180mm

Use your telephoto lens to zoom in and bring the background closer while exaggerating the depth. This compositional technique can also be useful to minimize a busy and distracting background.

Step #5: Posing

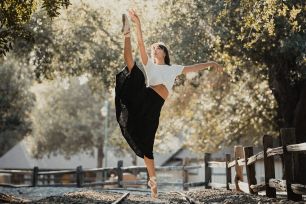
compositional techniques final images
Edited with Visual Flow > Mood Pack

Add the final touches by posing your model to create interesting shapes and movements.

Before & After Comparison

compositional techniques final before after

Let’s compare where we started with the final result!

Conclusion

I hope you enjoyed this article/video! Be sure to visit the SLR Lounge Premium Library for full courses on photography related topics such as starting a photography business or Lightroom editing. You can also visit Visual Flow for the full library of intuitive Lightroom presets and retouching tools to give your photographs that perfect look.

Don’t miss our next episode of Mastering Your Craft on Adorama’s YouTube channel next week! If you want to catch up on all the episodes, make sure you check out our playlist!

Studio Portrait Lighting Fundamentals and Posing Tips

studio portrait lighting

Today, we’re talking about the fundamentals of studio portrait lighting and more. In this video, I’ll be showing you how small adjustments to your lighting, framing, and posing can completely transform your images.

Video: Studio Portrait Lighting Fundamentals and Posing Tips

We’ll be working with a simple one-light setup. I’m using the Westcott FJ400 with a medium sized softbox. I’m also shooting with the Canon EOS R5 with the RF 28-70mm f/2, however, any light, lens, and camera will work great.

Our model today is my friend Jhesus. Be sure to give him a follow on Instagram here. Let’s dive in!

The Lighting

Let’s start with the lighting. When working with studio portrait lighting, it’s all too common for photographers to simply throw up a flash, aim it at the model, and start photographing.

studio portrait lighting angle
Bring the light forward for more even light on your subject.

This kind of side lighting isn’t bad per se, however, I want to go for a more high-fashion look. I moved my light to a “paramount” position, or top-down down the middle. Be sure to angle the light, however. This will help even out the light on your model.

Add some negative fill by placing V-Flats on each side for some extra drama.

The Pose

studio portrait lighting posing

Next, let’s add some interest to our model by adjusting the pose. Start small with a hand in the pocket, or a “bodyguard” stance with hands together, or fold the arms.

Then, make the pose more dynamic by having your model lean to either side.

An extra tip is to make sure your model’s expression matches the body language.

The Camera Angle

Use a higher camera angle for an “approachable” look. On the other hand, use a lower camera angle for a “strong” look.

A final tip is to move the light up and down with your model, should you have them crouch or lay down closer to the ground. A general rule of thumb is to keep your model at the same distance as the width of your softbox for the perfect light.

Putting it All Together

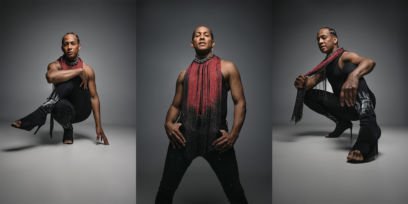
studio portrait lighting poses
Edited with VF Presets > Pure Pack

Let’s take what we learned about studio portrait lighting, posing, and camera angles, and put it all together. Jhesus is in a strong outfit and is also a talented dancer so I want to convey that strength. Following these steps, I captured these awesome final images.

Conclusion

I hope you enjoyed this article/video. For a complete course on off-camera lighting, check out the Flash Photography Training System on SLR Lounge Premium. Also, you can visit Visual Flow for a complete library of intuitive Lightroom Presets, designed to give you the perfect look for any lighting situation.

Don’t miss our next episode of Mastering Your Craft on Adorama’s YouTube channel next week! If you want to catch up on all the episodes, make sure you check out our playlist!
Simple Posing Guide for Natural and Authentic Portraits

simple posing guide

The pose and expression are essential for portraits to feel authentic. In this video, I’ll be walking through a simple posing guide for “selling the shot” with realistic and convincing movements.

Video: Simple Posing Guide for Natural and Authentic Portraits

This simple posing guide focuses on the subtle tweaks to the body language as well as tapping into the true emotions present at the time. When done right, it should be easy to forget that the photos were posed at all. Let’s jump right in.

Place the Couple

I wanted to capture a sweet moment between the couple. To do this, I placed them beside a large door where most of the light is coming in from. Then, I placed the bride in the light and the groom in the shadow by staggering them.

Related Reading: Foundation Posing – What It Is and Why You Need It

Adjust the Body Language

simple posing guide hand placement
Simply adjusting the hand placement can make the image appear more natural.

If you notice that the photo feels off, you’re not alone. The hand placement is a bit awkward and they’re looking off in odd directions. My first adjustment was for the bride to “roll the wrist” and cup the groom’s face from underneath. This is an immediate improvement.

Next, when a person who is out of focus looks directly at the camera, the eyes will tend to appear strange. To prevent this, I had the bride look down and toward the light.

Dial in the Composition

We want the focus of the portrait to be on our couple rather than fighting with the background. I simply turned toward the wall on camera-left. When we do this, we see a perfect profile of our groom against the clean wall. I also asked him to slightly turn toward her hand, opening up his profile in a natural way.

simple posing guide composition

I love this example in particular because of the way the image is composed. Notice that the groom’s eyes leads us to the bride’s eyes which leads us to her arms and back to the groom. All of this keeps the viewer focused right on our couple.

Cue the Expression

simple posing guide cue action
Simple action cues can bring out authentic expressions.

To get natural movements, I asked the bride to pull the groom in for a kiss. This naturally draws out the perfect expression from the moment for a convincing and authentic portrait.

Final Images

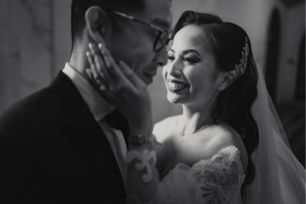
simple posing guide

Check out our final images. We began this simple posing guide with an image that felt “posed” and ended up with a portrait that feels completely natural and authentic.

Conclusion

I hope you enjoyed this article/video! Posing is an essential part of portraiture. In addition to this simple posing guide, check out our Posing Workshop at the SLR Lounge Premium Library for a comprehensive tutorial on posing couples. For a wide library of intuitive Lightroom Presets to get that perfect look, you can visit Visual Flow.

Don’t miss our next episode of Mastering Your Craft on Adorama’s YouTube channel next week! If you want to catch up on all the episodes, make sure you check out our playlist!

Understanding the Qualities of Light

The foundational knowledge about light qualities starts with an understanding of hard light, soft light, diffused light and specular light. You might have heard these terms before. Often soft light and diffused light are used interchangeably as well as hard light and specular light. This is mostly acceptable, but not always.   Wondering what the difference …

Read more

5 Reasons for Editing in Black and White Vs. Color

Black and white can drastically change the mood of an image. But when should you edit in black and white over color? In this video, I’ll walk through 5 situations where editing in black and white may be the best option.

Video: 5 Reasons for Editing in Black and White Vs. Color

Black and white fundamentally behaves differently than color and should be approached differently. Without color, the image relies completely on tones and contrast and as a result, the final photo can feel entirely different. If you’re unsure about which direction to take your edit, here are 5 scenarios where you may prefer editing in black and white over color.

  1. The Image is “Timeless”
  2. Bad/No Color
  3. Emphasizing Light Quality & Texture
  4. Emphasizing Shapes & Patterns
  5. Accentuating Detail

Scenario #1: The Image is “Timeless”

Editing in black and white may be great for images that lack features that distinguish a specific time period (such as a car).

Before imageediting in black and white timeless

In each example, there’s a sense of “timelessness,” as though each photo could’ve been taken during any particular time period.

Scenario #2: Bad Color / No Color

If your scene has a bad mix of colors or simply lacks color altogether, black and white may be the best option.

Before imageediting in black and white bad color

This may happen at events where you might not have much control over the light.

Before imageediting in black and white no colo

Here’s another example where the only color is the model’s skin tone. In this case, editing in black and white seemed to be a better fit.

Scenario #3: Emphasizing Light Quality & Texture

Before imageediting in black and white light quality

In this example, I loved the soft light falling on my daughter. Eliminating color brought more focus on the softness of the light as it falls into shadow.

Before imageediting in black and white light patterns

This next example features strong textures created by the hard light, especially in the walls and the shadows from the tree. Removing the colors in this situation helps use the tone to bring out the contrast in the textures.

Scenario #4: Emphasizing Shapes & Patterns

Before imageediting in black and white emphasizing shapes

In each of these examples, color can be a bit of a distraction and there’s no real reason to keep the color in the image.

Before imageediting in black and white emphasizing patterns

Removing the colors helps focus in on the shapes and patterns in the photos.

Scenario #5: Accentuating Detail

Before imageediting in black and white emphasizing detail

This is another scenario where editing in black and white can remove the distraction of color. Without clashing colors, black and white can bring the focus into the details in the image through contrast.

Before imageediting in black and white emphasizing detail

If your photo involves strong details such as tattoos, water, or intricate clothing, black and white may be your strongest option.

Conclusion

I hope you enjoyed this article/video. It’s important to remember how editing in black and white can completely change the feeling of your photo. These were all edited using Lightroom and for a complete course on editing, visit SLR Lounge Premium for the Mastering Lightroom course. You can also visit Visual Flow for the Black & White Mixer which we used to edit today’s example images.

Don’t miss our next episode of Mastering Your Craft on Adorama’s YouTube channel next week! If you want to catch up on all the episodes, make sure you check out our playlist!

Creative Portraits with Plexiglass and an Off-Camera Flash

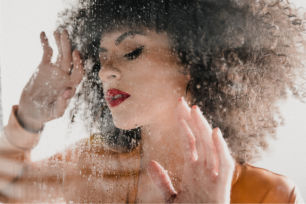
creative portraits feature image

Let’s get creative with portraits. In this video, I’ll be showing you how to set up, light, and photograph your own creative portraits using plexiglass and a single off-camera flash.

Video: Creative Portraits with Plexiglass and an Off-Camera Flash

Let’s create an interesting foreground element using plexiglass and water. The idea is to create a window effect that we’ll be shooting our creative portraits through. To do this, we’ll need:

  1. Camera & lens of your choice. I recommend a lens with a short focus distance to allow you to get up close to the plexiglass. I’ll be using the Canon EOS R5 with the RF 28-70mm f/2L lens.
  2. Off-camera flash. Any studio style flash will work. I’ll be using the Westcott FJ400.
  3. Plexiglass and spray. You can find these in any general hardware store.
  4. Stand and clamps for mounting. I’m using a basic Matthews C-Stand with A-Clamps. You can find A-Clamps in any hardware store as well.

Before we jump in, be sure to give our model today, Kiara, a follow on Instagram.

Composing the Shot

Following the C.A.M.P. framework, let’s begin with the composition. This will be fairly simple. All we need to do is place Kiara in front of a blank white wall.

Lighting the Scene

Since we’ll be using the studio flash, we want to cut all ambient light. After turning out the room lights, the camera settings at 1/200 sec, f/4, ISO 200 gave me a nearly blacked out image.

creative portraits lighting

I set up the Westcott FJ400 in the back camera-right and aimed it directly at the wall. This will light up the wall behind Kiara and give me a slightly silhouetted effect.

Setting Up the Plexiglass

After hanging the plexiglass between myself and Kiara, I used a small bottle to spray water on the surface. Be sure to let the water drip to get realistic textures. You can wipe away small areas to shoot-thru.

Shoot Your Creative Portraits

creative portraits final images
Edited with VF Presets > Pure Pack

Time to photograph away! Have fun with this effect. Get close, step back, and everything in between! Here are some of my favorite images from this set-up.

Conclusion

I hope you enjoyed this article/video. Don’t let gear get in the way and have fun with creative portraits! To get even more creative with your photography, check out Advanced SFX Photography on SLR Lounge Premium. There, you’ll learn how to do all sorts of great in-camera special effects for incredible results. You can also visit Visual Flow for our full library of Lightroom presets such as the Pure Pack which we used for our portraits today.

Don’t miss our next episode of Mastering Your Craft on Adorama’s YouTube channel next week! If you want to catch up on all the episodes, make sure you check out our playlist!

How to Create a Convincing Tilt Shift Effect in Photoshop

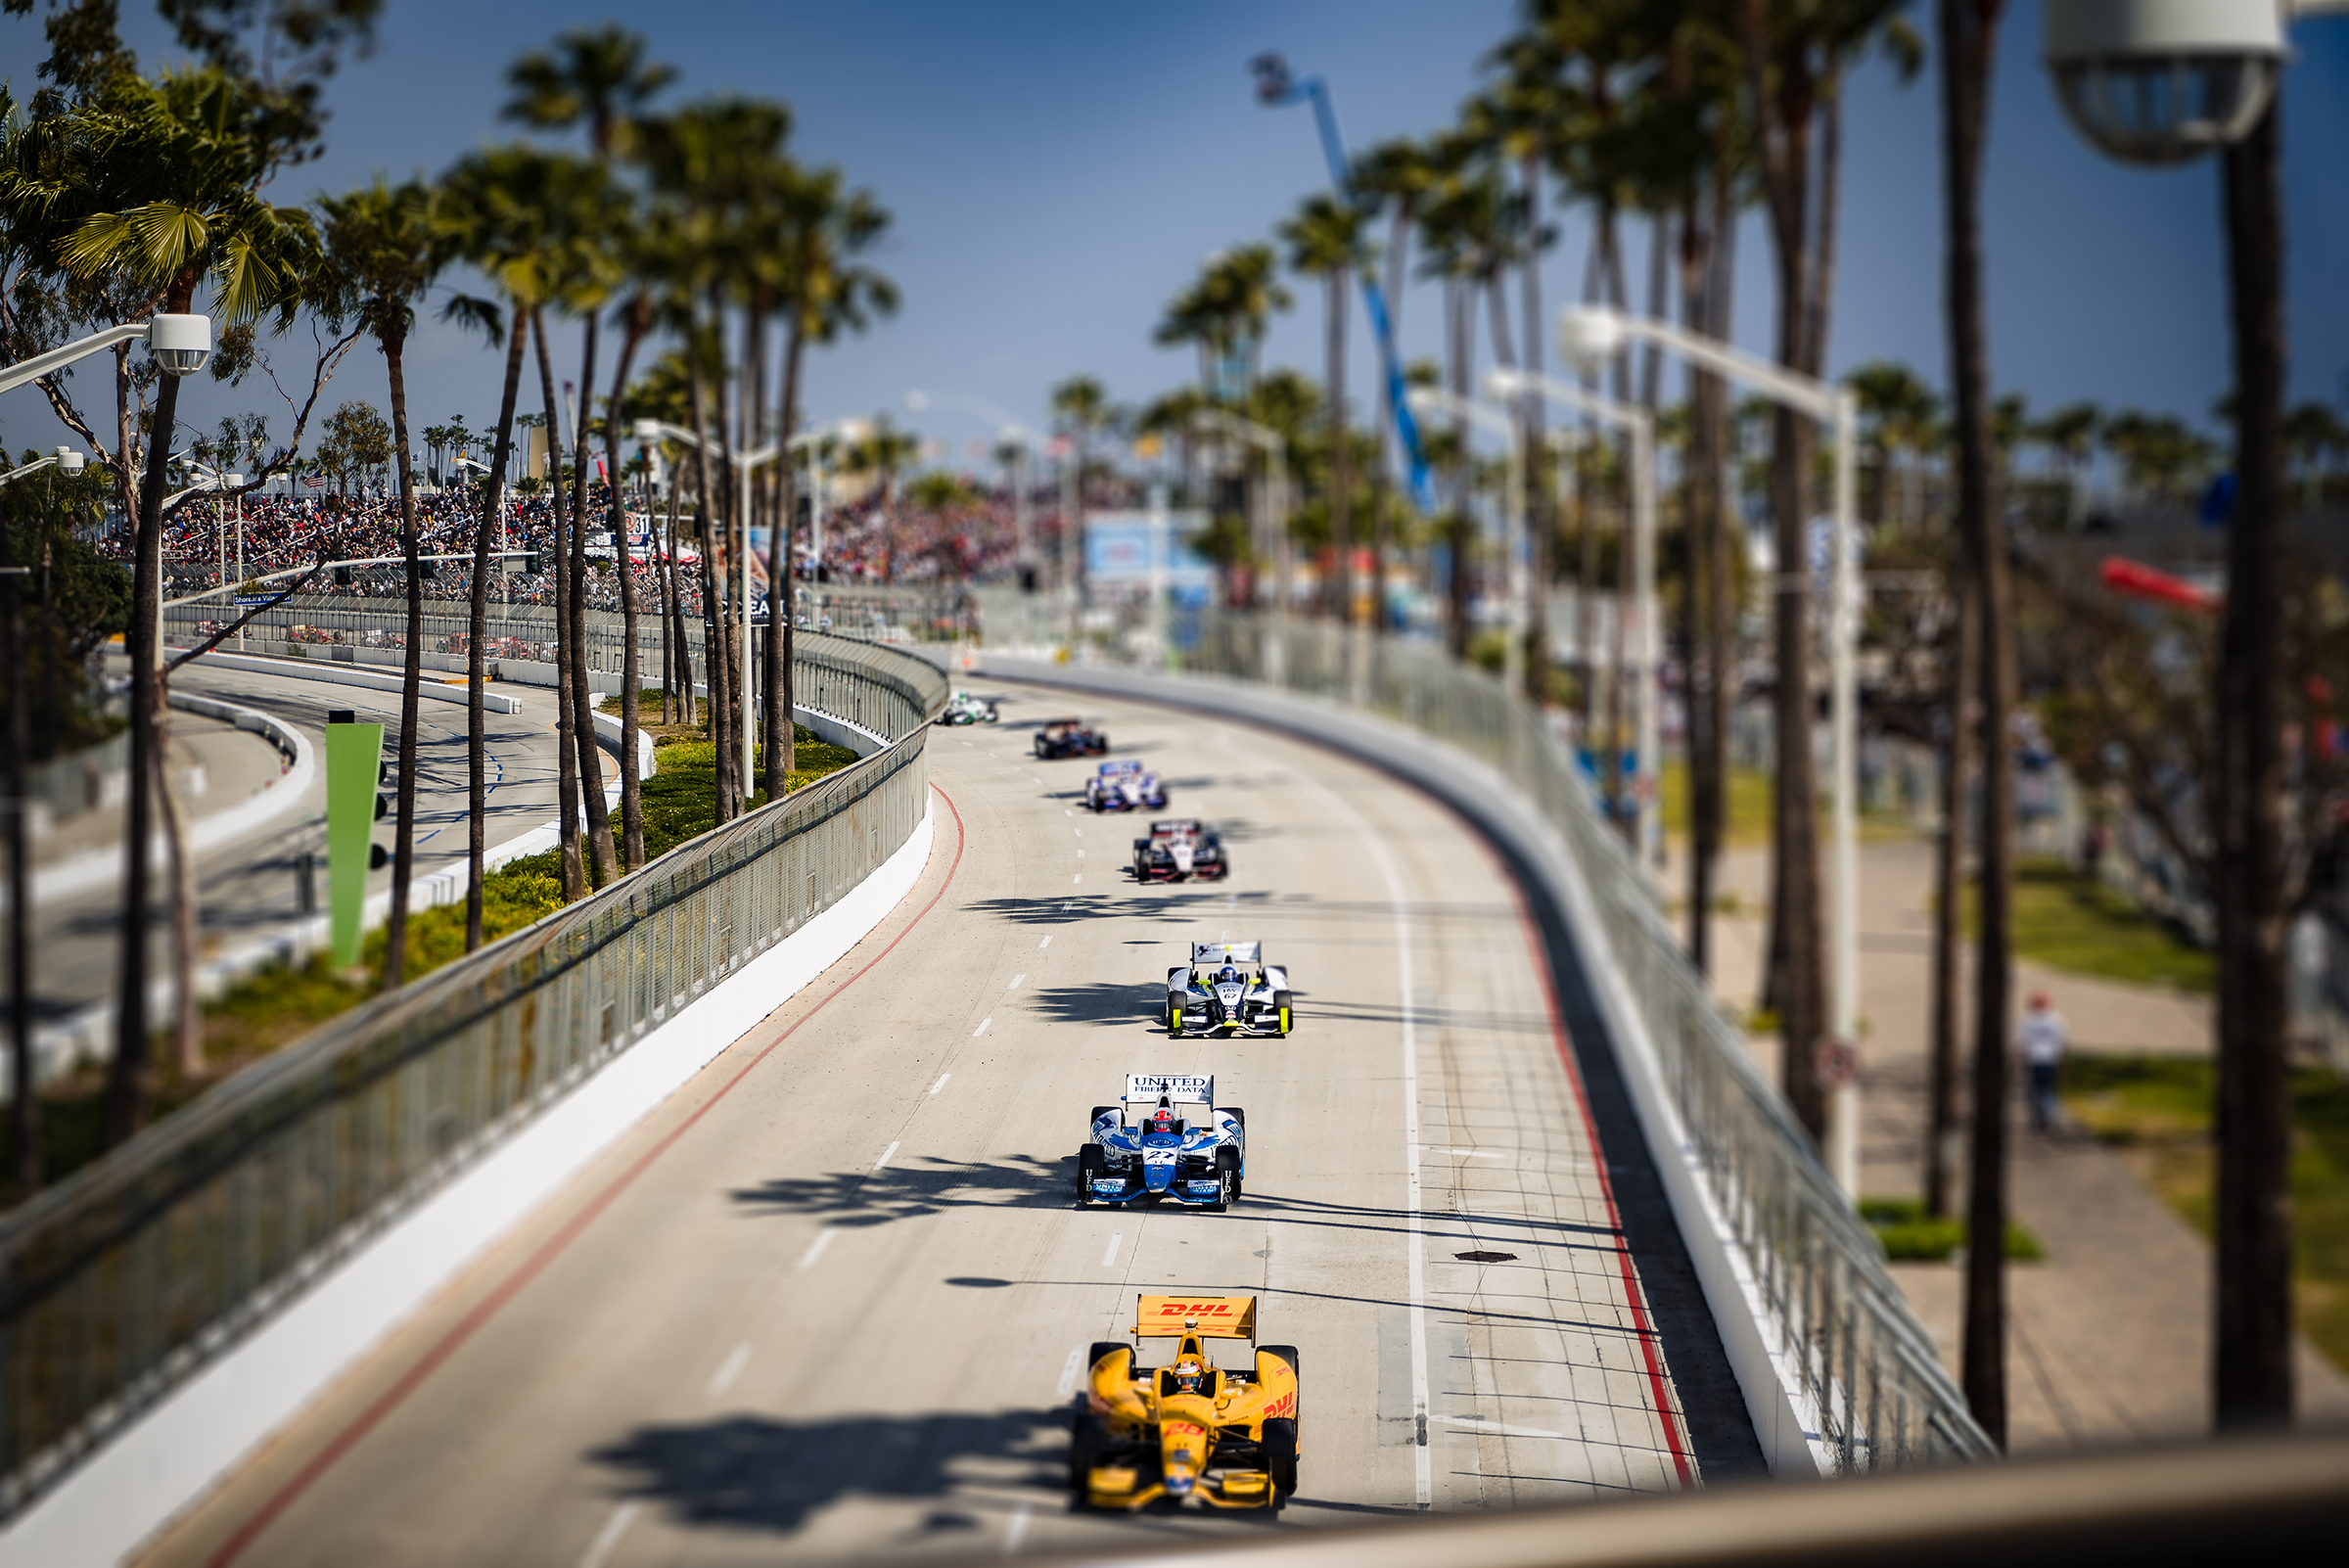
tilt shift effect

Tilt-shift lenses create a unique distortion effect that makes the scene appear miniature. It’s a fun creative effect that can actually be done without a tilt-shift lens. In this video, I’ll walk through how you can create a convincing tilt shift effect in Photoshop.

Video: How to Create a Convincing Tilt Shift Effect in Photoshop

Shooting for the Tilt Shift Effect

tilt shift effect raw capture

  1. Capture a wide scene. It’s ideal to shoot on a wide angle lens or zoomed in while stepped back. The key is to capture a scene that contains a lot of detail.
  2. Shoot from a high perspective. Getting your shot from a higher perspective will help create a more realistic miniature effect.
  3. Shoot for depth. Use an aperture that captures as much depth in your image as possible.

Applying a Look/Preset

Before we head into Photoshop, I’m going to apply a look to the image using Visual Flow’s Crush Preset.

Creating the Tilt Shift Effect in Photoshop

In Photoshop, go to Filter > Blur Gallery and select Tilt Shift.

This will drop a pin in the image with adjustable lines that approximate where the effect will be applied. Go ahead and move the pin to the focus of the image. From there, you can rotate the direction of the blur and adjust the feathering.

tilt shift effect final settings

Once you decide on the shape of the blur, increase the blur amount until the effect appears convincing.

Before & After

Before imagetilt shift effect photoshop

Conclusion

I hope you enjoyed this article/video. Give this effect a try and see what great scenes you can capture! For more tutorials and guides on photography-related topics, check out SLR Lounge Premium. There, you’ll find full courses on Wedding Photography, Creative iPhone Photography, Lightroom Editing, and more. In addition, you can visit Visual Flow for the full library of intuitive Lightroom presets and retouching tools.

Don’t miss our next episode of Mastering Your Craft on Adorama’s YouTube channel next week! If you want to catch up on all the episodes, make sure you check out our playlist!

Studio Lighting Tips and Fundamentals for Creative Portraits

studio lighting tips

Photography lighting is one of the most powerful tools a photographer can have in their arsenal. Studio lighting opens up the realm of possibility – you can create beautiful scenes from scratch to capture the perfect photo. A studio light setup comprises of various light sources, ranging from small LEDs and flashguns to large soft boxes and umbrellas. Each type of light is used for a different purpose, for example; fill lights to reduce harsh shadows or backlights to provide a glowing backdrop. When used creatively and effectively, studio lighting will elevate photography to levels only ever imagined.

Video: Studio Lighting Tips and Fundamentals for Creative Portraits

Off-camera flash can be intimidating, especially when using more than one light source. In this video, I’ll be going over some studio lighting tips for capturing creative portraits.

Whether it’s two, three, or four lights, following these studio lighting tips can help create the right light for your creative portraits. Let’s begin with today’s gear.

  1. Camera and lens of your choice. Today, I’ll be going with the Canon EOS R5 with the RF 28-70mm f/2L lens.
  2. Two off-camera lights. I’ll be using two Westcott FJ400 flashes.
  3. Light modifiers. For our creative effects, I’ll be using the Lindsay Adler Optical Spot as well as a regular Westcott Octabox.

Our model today is my wonderful friend, Jhesus. Be sure to give him a follow on Instagram!

What Not To Do

Let’s begin with what not to do when working with studio lighting.

I commonly see photographers set up one flash and begin shooting right away. I set up an FJ400 with the optical spot without any other setup and got this shot. Notice the odd hue on the wall created by the ambient room light. Let’s try cutting the room light.

When we cut the room light, we end up losing the details in the shadows outside of the spotlight. It’s missing fill light to bring back shadow details.

Studio Lighting Tip #1: Light the Shadows

Let’s start with a clear set. First, I brought in my other FJ400 with a softbox aimed at the ceiling to bounce the fill light back into the room.

Taken at 1/200 sec, f/4, ISO 400

Next, I set the exposure and flash power to where I want my shadows to be.

The fill light from the softbox creates an even effect. Compare this to using the ambient window light for the fill. The window light casts odd shadows on the wall.

Studio Lighting Tip #2: Add Your Main Light

studio lighting tips modeling light

I brought back the main light with the optical spot. Use the modeling light to aim and get the right shape. Here, you can add gobos, gels, and any additional creative lighting effect.

Studio Lighting Tip #3: Adding Additional Light Sources

This is where you would bring in additional light sources. Add them in one at a time for maximum control of each light. Make minor adjustments as necessary.

Final Images

studio lighting tips final photos

Check out some of the final images after we’ve refined our lighting.

Conclusion

I hope you enjoyed this article/video. Working with flash can be incredibly easy once you have the fundamentals down pat. Give these studio lighting tips a try next time and see how they can help you refine your creative portraits! For a full course on lighting with flash, check out the Flash Photography Training System on SLR Lounge Premium. There, you can also find complete training guides for Wedding Photography and the Business of Photography. You can also visit Visual Flow for intuitive Lightroom presets and retouching tools.

Don’t miss our next episode of Mastering Your Craft on Adorama’s YouTube channel next week! If you want to catch up on all the episodes, make sure you check out our playlist!

Re-editing a Decade Old Photo With My Current Editing Style

editing style feature image

Have you ever wondered how your editing style has changed over the years? In this video, I’ll be taking a photo I took over 10 years ago and giving it a fresh and updated look in Lightroom.

Video: Re-editing a Decade Old Photo With My Current Editing Style

It’s fascinating to see how my editing style has changed over the years. Your photography will surely evolve, especially over 10 years and will keep evolving as you continue your journey. Today, I’m going to give a photograph taken in 2009 an updated look with my current editing style: A modern HDR look.

Before we begin, be sure to download the exercise file here and follow along as I edit!

The Original Edit

editing style before 2009

Here is the original edit from 2009. You can see how punchy and nuclear the colors are. This was our style at the time.

Step #1: Base Tone Adjustments

editing style basic adjustments

Let’s start fresh. I’m going to begin with the global adjustments by bringing back as much detail in the highlights and shadows as I can.

Step #2: Tone Curve

editing style curves adjustment

Next, I’ll bring back contrast using the tone curve. I like a subtle matte look for my editing style. To do this, I gently pull the black point up and white point down.

Step #3: Presence & Color Temperature

Here, I boost clarity and de-haze. My editing style is still on the warm side so I then slightly increase the temperature.

Step #4: HSL Adjustments

Next, let’s tighten up the colors a bit. I’ll slightly pull both the oranges and blues towards the green hues, then mute some of the punchier colors.

Step #5: Color Grading

Here, I refine the color palette in the color grading panel. A subtle touch of warm/orange to the highlights and cool/teal tones to the shadows is perfect.

Step #6: Final Adjustments & Comparison

editing style then and now

Lastly, I made my final adjustments including adding sharpness and vignettes. I darkened the sky as well using Visual Flow’s Retouching Toolkit. Let’s check compare the final edit with the original edit.

Conclusion

I hope you enjoyed this video/article. It’s so much fun to look back at old work and see how much your editing style has changed. I’d suggest giving an old photo a re-edit to see how your own style has developed. For a complete course on Lightroom editing, head over to SLR Lounge Premium. There, you’ll find courses on photography topics such as the Business of Photography, Wedding Photography, and Family Photography. You can also visit Visual Flow for great presets and a complete Retouching Toolkit.

Don’t miss our next episode of Mastering Your Craft on Adorama’s YouTube channel next week! If you want to catch up on all the episodes, make sure you check out our playlist!

Refine Your Portraits With This Simple Backlight Lighting Tip

Today, I’ll be showing you how a little kiss of backlight lighting can add the perfect final touch to your portraits.

Video: Refine Your Portraits With This Simple Backlight Lighting Tip

Let’s begin with the gear I’ll be using today. Keep in mind that you can use any kind of camera or flash to achieve the backlight lighting effect.

  1. Canon EOS R5
  2. Sigma Art 50mm f/1.4 lens
  3. Profoto A10 On/Off Camera Flash
  4. MagMod CTO Gel

Our models today are Taylor and Harrison. Be sure to check them out on Instagram and give them a follow!

The Before Shot

backlight lighting before
Captured at 1/800 sec, f/1.4, ISO 100

I composed this shot of Taylor and Harrison underneath this tree. With the sun coming in from behind, the tree becomes the brightest point in the frame. I framed Taylor and Harrison right in front of that bright point.

Both bright and dark looks can be styles of their own.

I kept the exposure natural, meaning not too bright and not too dark. While both of the bright and dark shots can be great shots by themselves, an exposure in the middle will create a much more natural effect with the backlight lighting.

Adding the Flash

Place the flash behind your subjects aimed up through a CTO gel.

I placed the flash on the ground right behind Taylor and Harrison with a CTO to warm it up. Then, I aimed it upward and in between the two so that it lights them evenly. I then had both Taylor and Harrison turn slightly toward the light to pick up as much of the light as possible.

backlight lighting final images
Edited with VF Presets > Mood Pack

Check out the final images after we added that touch of flash.

Conclusion

This backlight lighting effect works great in this scene because it appears natural. The scene is already backlit by the sun and the flash simply enhances it and adds that perfect final touch.

I hope you enjoyed this article/video! For more tips on working with flash, check out the Flash Photography Training System on SLR Lounge Premium. There, you’ll also find more courses on topics such as Wedding Photography, Business, and Lightroom Editing. For a full library of great Lightroom presets, be sure to visit Visual Flow.

Don’t miss our next episode of Mastering Your Craft on Adorama’s YouTube channel next week! If you want to catch up on all the episodes, make sure you check out our playlist!