Two lights are all you need to capture great couple’s portraits. In this video, I’ll be walking through a simple and dramatic portrait lighting setup for some of my favorite looks.
Video: Simple & Dramatic Couple’s Portrait Lighting Setup
For this simple two light set-up, all you’ll need are your camera, couple or models, two standard flashes, grids, and a gel. For an even simpler portrait lighting setup, check out Dramatic Lighting for Hollywood Style Evening Portraits.
Here is the list of gear I’ll be using today.
- Profoto A10 (x2)
- MagMod MagShoe (x2)
- Manfrotto Nanostands
- MagMod Gel & Grid Kit
- Canon EOS R5 Mirrorless Camera
- Canon RF 28-70mm f/2 Lens
The Light Setup

On camera left, I have a Profoto A10 with a grid. This is our primary light. On camera right, I have the other A10 set up with a grid and CTO on a separate channel. This is going to be our rim-light.

All of this is against the backdrop of a beautiful auditorium with fantastic vertical lines.
Posing Our Couple

Next, I brought in my couple, Salome and Chris. This composition is going to be layered, with the person in the background being the focus of the image.

First, I placed Salome in the background and Chris in the foreground. Then, I powered on the flashes. The primary light is set at 1/8 power and the rim-light at 1/16 power.

Next, I switched Salome and Chris without moving the portrait lighting setup.
Capturing a Wide Shot

For our final shot, I placed Salome and Chris together in the center. I simply raised the ISO and powered down the flashes without moving them and got these images.
Compositing an Extreme Wide Shot
I wanted to finish off with a grand shot without the flashes being in the frame. To achieve this, I followed these steps:
- Take the first image with the flashes in the frame. This shot will light your subjects.
- Have an assistant remove the flashes from the frame. Be sure both you and your subjects stay in the same spot.
- Take the plate shot without the flashes in the frame.
- In post-production, use the plate shot to paint in the background without the flashes.
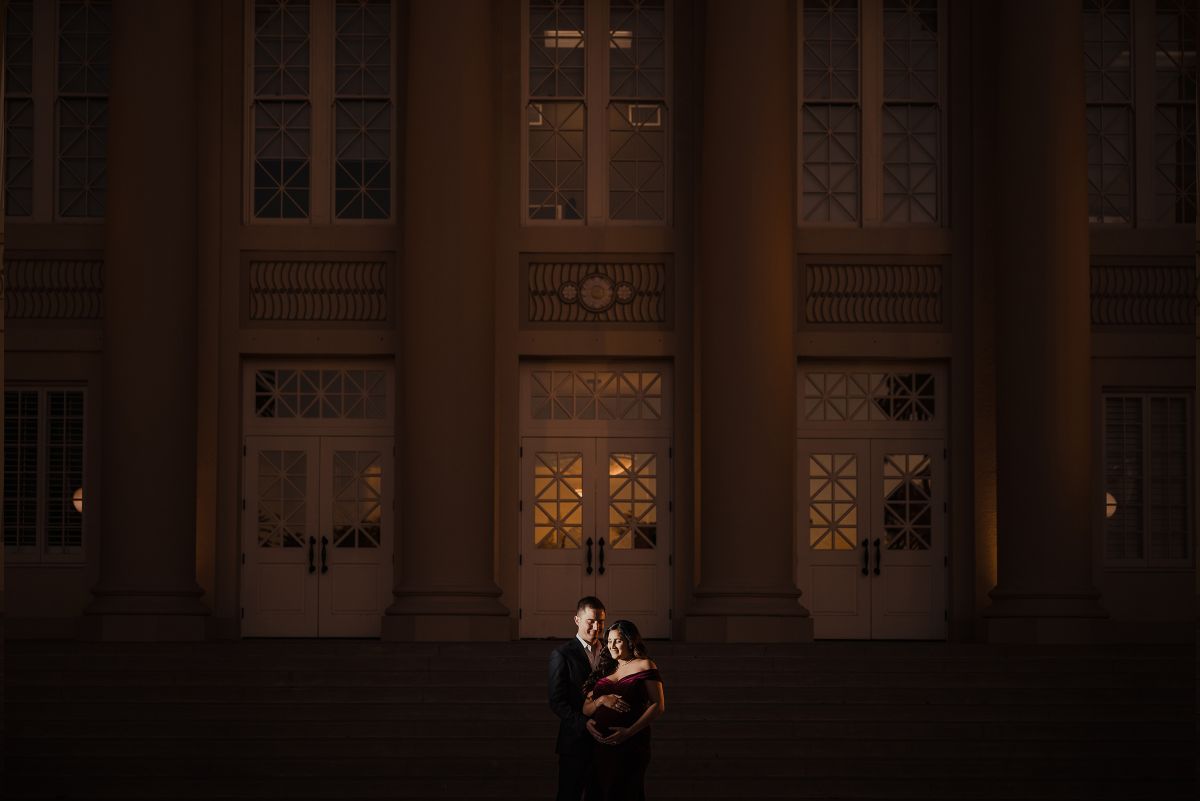
Here is our final edit.
Conclusion
I hope you enjoyed this article/video. Simple and versatile portrait lighting setups can produce beautiful images. This technique becomes particularly useful when working in fast environments. For a full tutorial on lighting, check out the Flash Photography Training Course on SLR Lounge Premium. For more lighting-based presets and retouching tools, be sure to head over to Visual Flow.
Don’t miss our next episode of Mastering Your Craft on Adorama’s YouTube channel next week! If you want to catch up on all the episodes, make sure you check out our playlist!


Get Connected!