**This updated post was originally published in June 2016
What is a tilt-shift lens?
Simply put, a tilt-shift lens is a lens that tilts and shifts, and throws the focus plane off. Sounds interesting, but what is the purpose, and how, or why would you use a lens like that? Well, I’m going to tell you – at least how I use one, and why it’s become such an important tool in my arsenal.
*Canon has just released 3 new tilt shift lenses. Check them out here and at the link below. Also find a list at foot of article.
[RELATED: CANON ANNOUNCED NEW 85MM F/1.4L, 3 NEW TILT-SHIFT LENSES, & A NEW MIRRORLESS CAMERA]

A tilt-shift lens is a little tricky to understand at first, but truly understanding how a focus plane works is the biggest hurdle. Also known as a ‘perspective control lens’, tilting and shifting the lens gives you the ability to maneuver the focus plane which is usually parallel to the camera’s sensor.
Without getting in too deep, a regular lens gives you a focus plane parallel to your sensor; When you shoot at a wide aperture of f/1.4, you can easily see the depth of the focus plane, but as you bump the aperture up, that focus plane becomes deeper and deeper. With a tilt-shift lens, you can tilt the lens on an angle (usually around -/+ 8 degrees), giving a different perspective. You can also shift the lens, from side to side, usually as much as -/+ 12 degrees.

Yes, this can be a bit confusing, you’re not alone. The shift part is usually a little easier to grasp, and isn’t used as much as the tilt. Shifting the lens from side to side helps when you have lines in your image that can often get distorted. Usually, when you have tall buildings, houses, or even tall trees, distortion can cause the lines to be distorted and look unnatural. Shifting the lens helps to straighten those lines out, and correct perspective distortion.

As far as the tilt goes, that’s usually a bit trickier for most. The best description I can give is, imagine the focus plane is represented by a large sheet of glass parallel to the camera’s sensor. Remember, the focus plane is infinite, so that large flat sheet of glass goes on forever. Now, if you tilt the lens, that sheet of glass tilts with it, staying parallel with the front element and not the sensor. That is how the focus plane will look with a tilt-shift lens. The same rules apply with adjusting your aperture and focusing. With the focus plane tilted, adjusting your aperture affects the depth of that sheet of glass, adjusting the focus moves it closer or farther away. Hopefully, that helps, that’s how I used to imagine it when I was first trying to understand it.
Why Use a Tile Shift?

Initially designed by an Austrian military officer who developed the technique to correct distortion in his aerial photographs, the first lens manufactured for an SLR camera was in 1961, by Nikon – the 35mm f/3.5 PC-Nikkor.
Today, there are actually many reasons why a photographer would use a tilt-shift lens. It’s a popular lens among architecture photographers for its ability to straighten lines and control distortion, and it’s a favorite tool amongst Landscape photographers as it allows deeper depth of field at a lower aperture to avoid diffraction, as well as just generally being sharper lenses overall.
Over the past several years, it’s become more popular among portrait photographers to give more a creative and unique look that can’t be achieved with a regular lens. Being able to control the focus plane allows for a portrait photographer to use a non-traditional perspective to put more emphasis on his subject. Just like with a normal lens, a shallow DOF (depth of field) allows the viewer’s eye to focus more on the focus point, while everything else falls away. A tilt-shift lens can do the same thing, just in a more creative way that most viewers aren’t accustomed to seeing. A tilt-shift lens is also a great tool for macro photography, which can come in handy for wedding photographers like myself.
[REWIND: USING A TILT-SHIFT FOR FOCUS CONTROL]
How to use it

Just like with anything else, it takes practice to get good shooting with a tilt-shift lens. The primary question I’m asked by photographers who are interested in purchasing a tilt-shift lens is, “What is the learning curve?” Truly, the learning curve is going to be different for everyone, so I always recommend trying one first before jumping into a purchase. It’s also a lens that a lot of photographers don’t use all that much and it ends up sitting in their bags more than on their camera. This is especially true for portrait or wedding photographers. Getting good at shooting tilt shift is only half the battle, and learning how to incorporate it into your shooting is the other half.

A tilt-shift lens doesn’t have to be tilted, or shifted, it can be used like a normal lens when it’s not. There is no auto-focus, so focusing is always manual (someone I know just returned the one they bought because they thought it had AF). For myself, someone who uses a TS lens for portraits and wedding photography, I’ve found the trick is shooting in Live View. Shooting in Live View gives you the ability to not only see how tilting the lens affects the image and how the focus plane looks, but you can also zoom in to nail your focus.

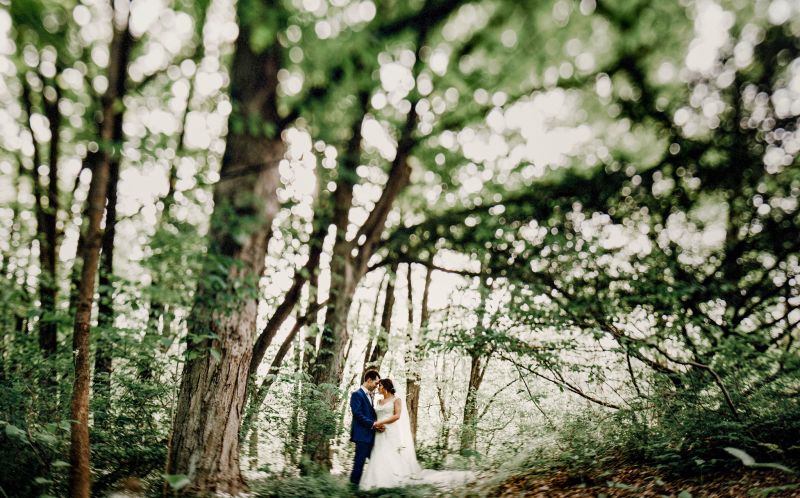
At first glance, looking at an image shot with a tilt-shift lens looks as if there is a line of focus parallel to the ground. It can look like the focus plane is cutting through the image, making the top and bottom areas out of focus. This is the look that many try to replicate in editing software or even Instagram filters. The problem is, that isn’t the case. The focus plane isn’t parallel to the ground, it’s on an angle. Because of this, it’s almost impossible to truly replicate the look in software such as Photoshop. Yes, in some cases you can, depending on the image, but in most cases, you can’t. It’s also because of the tilt that you can get multiple focus points in a single image, which I will explain more below.
The Two Ways That I Use The Tilt Shift

1. Selective Focus
One way that I use a tilt-shift lens (which is also the most popular way), is to tilt the focus plane up or down to give the look of a line of focus like the popular Instagram filters. I use this technique in two scenarios, giving me a different approach to drawing my viewer’s attention to my subject.
Since my subjects are mostly two people, either for an engagement shoot or a bride and groom at a wedding, I try to bring the attention to them. Whether it be their faces, or like in the image below, their hands. Using this technique you can blur out the surrounding distractions that would normally be in their same focus plane with a regular lens.

2. Multiple Focus Points
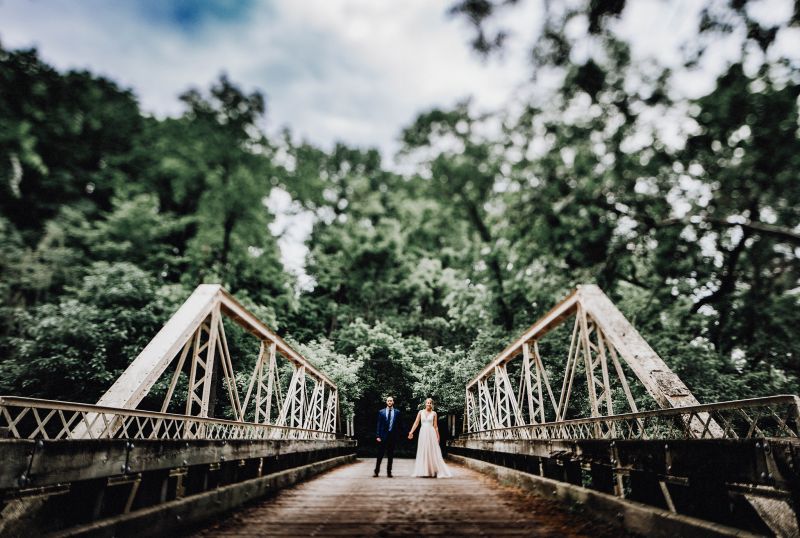
My favorite way to use a tilt-shift lens is one that I typically don’t see that often, and it can’t be replicated in Photoshop or any other software that I’m aware of. Since tilting the lens puts the focus plane on an angle, you can create an image with multiple points of focus. The purpose of creating multiple focus points is simply to help your image tell a story. Rather than just having my couple in focus, I also try to be creative and bring in a 2nd point of focus that adds to the image. This is difficult to do, and took a lot of practice, but I can pull it off pretty easily now that I have a good idea of where the line of focus will be going and how to pose my clients.

In the image above, I have the lens tilted up, which results in the focus plane being on an angle going downward away from me. I shot this with the Canon 24mm ts-e f/3.5 II lens and used Live View to position myself just right to get both faces of my subjects in focus.
In the first sample image below, I used the 45mm ts-e lens to focus on my clients, as well as the stone wall in the background that they loved so much. In the 2nd image, I was close to nailing the shot I wanted, but it’s not quite there. I wanted to get the bride and groom along with the faces of everyone in the bridal party. It’s close, but not quite.


Conclusion
Tilt-shift lenses are tricky to use, can be considered gimmicky when overdone, but can also make a great tool to have with you for many reasons. I have been shooting weddings and engagement shoots with a tilt-shift lens for years now, and I’m using it more and more these days. I used to have both the Canon 45mm and 24mm tilt-shift lens, but recently sold the 45mm since I slowly stopped using it. I love being able to shoot the 24mm tilt-shift to artisticely create images that help tell a story. Wide lenses are great for storytelling, and using the techniques I mentioned above help me to not only enhance that, but do it in a not so traditional way.

A tilt-shift lens is a great tool to have in your arsenal, along with your other tools. While I take wide shots to help tell a story, I also usually have an 85mm prime lens handy to get up close for a more intimate shot.
Learning new tools is always fun and reminds us why we love this photography thing so much. If you’re looking for something new to add to your camera bag, a new creative tool, give the tilt-shift a try. It might be a little frustrating at first, but what isn’t? As always thanks for reading, and feel free to let me know if you have any questions below.


Canon’s Tilt-Shift Lenses:
- Canon TS-E 24mm f/3.5L II Tilt-Shift Lens
- Canon TS-E 17mm f/4L Tilt-Shift Lens
- Canon TS-E 90mm f/2.8 Tilt-Shift Lens
- Canon TS-E 45mm f/2.8 Tilt-Shift Lens
Brand New Tilt Shift Lenses (and Macro):


Get Connected!