With the rise of the DSLR and processing on the computer using tools like Adobe Photoshop the art of shooting on film and developing images has diminished drastically. With that many old techniques have gone the way of film and are no longer used or needed. One feature that is possible on some of todays higher end DSLR’s is the technique of double exposures. This technique of layering images on top of each other can be used to create some really amazing and creative images.

Digital Double Exposure Images
Get inspired by the incredible double exposure images by Sara K Byrne, an Idaho based wedding photographer below. Photographs have been used with permission for SLR Lounge. Do not copy, modify or re-post this article or images without express permission from SLR Lounge and the artist.
 Photo by Sara K Byrne
 Photo by Sara K Byrne
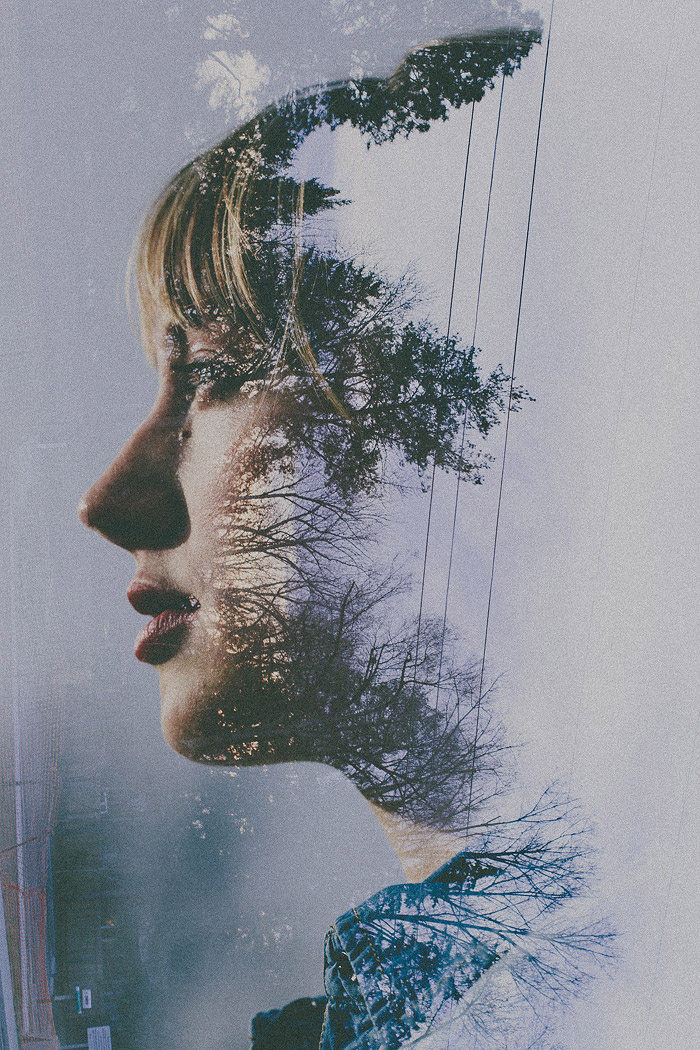 Photo by Sara K Byrne
 Photo by Sara K Byrne
 Photo by Sara K Byrne
Quick Double Exposure Tutorial
The Double Exposure photography technique is a good match for creative, abstract photography. Photographer and SLR Lounge Writer, Tanya Goodall Smith, applied the technique perfectly on her conceptual shoot of a “Grim Reaper,” and she was kind enough to share her double exposure steps below:
CREDITS: The images below are by by Tanya Goodall Smith are copyrighted and have been used with permission for SLR Lounge. Do not copy, modify or re-post this article or images without express permission from SLR Lounge and the artist.
 Final Double Exposure Image
I’m a big fan of the theatrics, especially the costumes, of Halloween. Heading down to the lake, and then to a nearby cemetery, with my model in a hand-made Grim Reaper costume, seemed like a great opportunity to try out in-camera double exposures for the first time.

Here is the first image I took, following the “silhouette” method from the video tutorial at the link above. I tried to blow out the background as much as possible without over exposing the subject. I used the Canon 24-70mm f/2.8L lens for this one.

When I got to my second location (the cemetery), while in the multiple exposure menu, I selected my first image and then pressed the live mode button on the camera. This allowed me to choose the composition of my second image while the first image was displayed on the LCD and gave me a pretty accurate preview of what the final image would look like. I found that under exposing the second image slightly produced a better result.

Here’s the straight out of camera double exposure. No Photoshop needed to produce some pretty funky effects. After looking at my images post-process, I decided to enhance them somewhat using the SLR Lounge Preset System. Here’s the final image…
I only had a small amount of time to try out this technique, but honestly, I could do it all day. It was a lot of fun. Here are a few others that turned out quite nicely. The one on the left is straight out of camera, on the right has been edited post-process just for fun.


I used my Canon 85mm f/1.8 lens for the Grim Reaper shot on these.


Have you tried this technique? I’m trying to think of more instances where I could incorporate this into my work. What would you use it for? Oh, and in case you’re wondering about the Grim Reaper costume for my 6’4″ (awesome) model, I actually made it using this Simplicity Sewing Pattern with a few modifications. The scythe came from a farm implements auction somewhere in the middle of Idaho.
Related Articles to Double Exposure Definition

Creating Double Exposures In-Camera w/ Nikon (+ Image Inspiration)

Cherry Blossom Photoshoot Tips | Capturing the Beauty of Spring

12 Creative Photography Ideas & Techniques to Try

How To Create a Double Exposure Image In Photoshop


