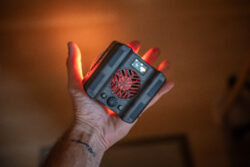
The term ‘hacks’ has sort of been bludgeoned to death over the past few years, with every unusual way to do something referred to as a hack – good or not. (Want to diffuse your pop-up flash? put a plastic bag over it – hack) But as much as I’d like to sit here and disparage them all there really are times when these little know-hows come in handy. The one addressed here looks like it could be one such, albeit a little more complicated. It’s using your hand as a light meter when you don’t have one, err, on hand.
It should be stated now clearly that this is not a full substitute for a dedicated light meter, but can be useful for occasions where you want to have some manner of reference for correct exposure and don’t have all the tools you’d like.

[REWIND: Why You Want A Dedicated Light Meter & How to Turn Your Phone Into One With Lumu]
The video comes via Wolfcrow by way of Sareesh Sudhakaran, and he breaks down the usage into 3 distinct methods, and all have to somewhat be calibrated initially with or against a grey chart. Check out the video for full representation of the methods but see a breakdown here:
*You’ll hear him frequently mention the initialism IRE which is used to refer to refer to the measuring lines/units in a waveform monitor used to measure composite video signals as a percentage of total voltage. The letters are derived from the Institute of Radio Engineers who came up with the standard.
https://www.youtube.com/watch?v=HuJtzA4OUR0
Methods
- Using the palm of your hand is the first method discussed, and in some ways the easiest, primarily because the palms of the hand doesn’t really change much in color, or at least not with the same frequency and inconsistency as say the skin on the back of the hands. This fact makes it a good choice for consistent measure. The problem, however, is that you’ll have to get into the scene each time to use it, making it impractical.
- Using the back of the hand which is similar but can be better because it can allow for better skin tone reading. Sareesh suggests this is not the best for exposure but for judging light on skin.
- The next method is to have your subject use the back of their hands. Essentially what you’re doing here is calibrating your subject’s hand with a grey chart and since they’re always in scene you can have access continually.
All that said, have a watch of the video so get a better practical sense of it all, and you can see more detail in the full bog post here.