
If you’re a photographer, then you likely know that the golden hour is one of the best times to take pictures. The lighting is soft, directional, and whimsical; and the colors in the sky are beautiful and rich. While every photographer in the world likely has access to golden hour, not all of them use it the same. In this article, we’ll give you some essential tips to help you get the most out of your golden hour photography.
To inspire your journey into golden hour photography, we’ve included several images created by our SLR Lounge Premium Members. We’re honored to be a part of their photography journey and incredibly proud of the images they’ve created. These members exemplify our belief that investing in your education and skillset is important, even for established professionals, creating much of the imagery you see below. To get featured in articles like this and to learn more about our program, check out SLR Lounge Premium.
What Is Golden Hour?
For photographers and cinematographers, golden hour is the hour just following sunrise or just before sunset where the sun is low on the horizon. At this point its light travels a further distance/depth of atmosphere which has the effect of softening the light and giving off warmer tones – all desirable qualities for photographing.
Overview of the Golden Hour Photography Tips
Here are the concepts we’ll be covering in this article.
- Be patient with timing and plan ahead
- Shoot against the light (with the sun as backlight)
- Don’t forget to also shoot with the light
- Work with Sun Flares
- Capture the full scene and story (wide/medium/tight)
- Use manual white balance
- Use a lower (wider) aperture
- Capture silhouettes in the sunset
- Recreate your own with flash if necessary
- Avoid common golden hour mistakes
Be Patient with Timing and Plan Ahead
The most important tip for shooting during golden hour is to be patient and plan ahead. By planning ahead, you can ensure that you’ll have the time to set up your shot and won’t miss the perfect light. In your planning, be sure to know the following:
- What time the sun sets
- Where exactly the sun sets (using the Sun Seeker app)
- Whether there are any mountains or buildings that could obstruct your view of the sunset.
It’s also important to be patient as the light changes throughout the golden hour. The best light often occurs right before the sun is below the horizon. If you’re on a client shoot, it’s easy to “panic” or rush the session and go through all of your poses and locations prior to the best light.
Shoot Against the Light (Using the Sun as Backlight)

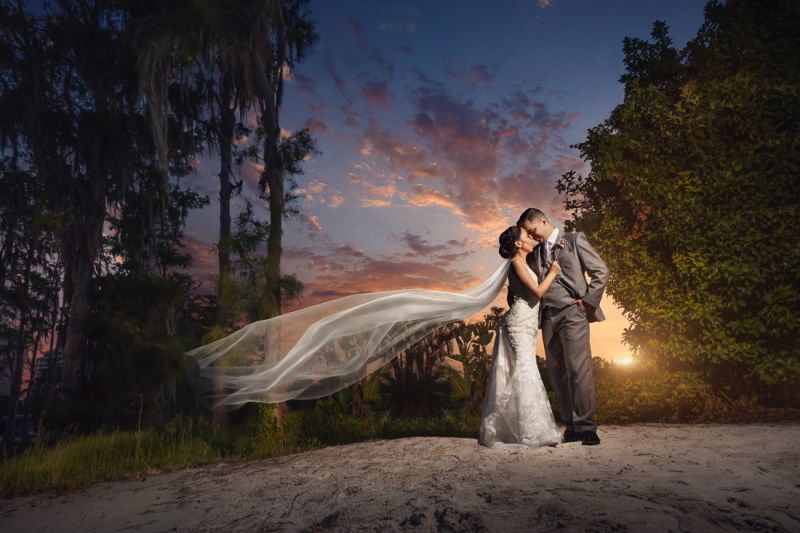
One of the most flattering and interesting lighting scenarios for portrait photographers is to shoot with the golden hour sun behind your subject. This creates a beautiful halo or rim light around your subject’s hair, which can really make them pop in the photo.


Don’t Forget to Also Shoot with the Light
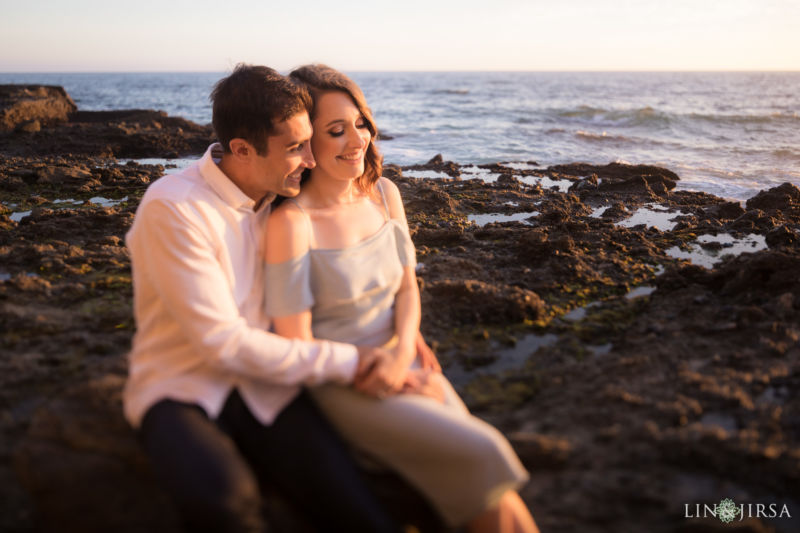
While the gorgeous backlight on your subject will likely be the best choice for most of your golden hour portraits, don’t forget to turn around and get a few images with the sun as well. This soft light can also be interesting, flattering, and warm.

Work with Sun Flares

Shooting into the sun can create some beautiful lens flares. These can either be avoided or embraced as part of the image. Avoid the flares by shooting from a shaded area where there is no direct light entering the lens. Embrace them by letting the light flow into the lens, making sure to adjust the overall exposure as you see in the image above.


Capture the Full Scene and Story (Wide/Medium/Tight)

As with all of your photography, remember to shoot for the story. This means getting a variety of wide, medium and tight photos that bring cohesiveness and context to the set of images. It may even mean getting images of just the scene without any subjects in the photo.
Use Manual White Balance

Golden hour lighting can often trick your camera’s white balance, resulting in an image that is either too blue or too orange. By setting your white balance manually, you can ensure that your images are accurate and true-to-life. In general, start with a white balance of around 6000K-6500K (or roughly the Kelvin range of the cloudy or shade settings on your camera) and adjust up and down from there.

Use a Lower Aperture and Maximize Bokeh

When shooting portraits during golden hour, a low, wide open aperture of F/2.8 or lower (ideally 2.0 and below), can create a gorgeous bokeh that adds to the “magic” feel of the moment. With golden hour vibes already creating a dreamy aesthetic, the shallow depth of field takes it to another level.
Capture Silhouettes in the Sunset

At some point in the golden hour session, there should be an opportunity to capture a silhouette of the subject. This is an interesting creative technique to use that adds to the variety of the image set. To do this, simply position the subject so that the sun is behind them. Expose for the background without adding light to the subjects, so that all you see is the shapes of their bodies.


Recreate Your Own Golden Hour if Needed

And of course, if the weather is not cooperating or you can’t make the golden hour window, there are ways to create your own. We cover this extensively in other articles, which we’ll refer to below:
With the right knowledge and tools, you should be able to get a convincing golden hour look to your images, regardless of the time of day. We even have a full course dedicated to recreating golden hour in our premium membership.
Avoid Common Golden Hour Mistakes
Here are a few common golden hour photography mistakes:
- Not location scouting properly – With timing being so important, it’s critical to scout the location. Golden hour could be much earlier or non existent if there is something obstructing the view of the sunset, such as a mountain.
- Being too hasty – Slow down with your golden hour photography. In particular, focus on getting a series of great photos with a variety of poses, expression, and compositions in a single location rather than running around traveling from spot to spot.
- Overexposing photos – Let some of your golden hour imagery be a little more dark and moody. Try not to blow out the skies unless that is your style of photography.
For more inspiration, also see our Golden Hour Portraits article. For more portrait photography education, be sure to check out SLR Lounge Premium.


Get Connected!