One of the biggest reasons that I don’t miss owning a DSLR is (was) the frequent need to calibrate each lens for “front focus” or “back focus” problems. Thankfully, mirrorless cameras have almost entirely eliminated this common issue! If you still own a DSLR, however, or you just bought one for a bargain, then you need to know how to calibrate your lenses!
The most common technical question in all of photography might just be, “why are my images blurry?” Usually, the most likely answer to this question is the most simple one: missed focus! Your autofocus didn’t nail the shot perfectly. The question is, …did your autofocus actually THINK it was nailing focus perfectly? I’ll explain what I mean by that in a minute.
Simply put, if you’ve already tried all of the tips we provided on how to take sharp photos and your images are still coming out blurry, you may need to calibrate your lenses. In this article, we’ll teach you how to calibrate your camera autofocus, with each of your lenses, in just a few easy steps.
NOTE: This procedure is mainly for DSLR users. However, it can sometimes be necessary to perform this same process on a mirrorless camera, but it is extremely rare. Leave a comment below if you have any questions!
Why Are My Images Blurry?
Unfortunately, even when you buy a brand-new lens, sometimes the DSLR body and lens just aren’t perfectly calibrated to each other. In other words, your camera’s autofocus might be working perfectly, but there might be a slight physical misalignment in the lens, or the camera’s AF module itself, that is causing subjects to be out of focus.
This is due to the fact that DSLR autofocus is actually performed off-sensor, using a combination of mirrors that bounce light onto a separate phase-detect module that is dedicated to AF.
If any of these physical parts is the slightest bit out of alignment, your images might be blurry even if your autofocus thinks it nailed AF perfectly. This can be extremely frustrating, especially when, every now and then, you do get a photo that is perfectly in-focus. However, if your images are usually off by a similar amount, whether front or back-focused, that is actually great news because lens calibration WILL solve the issue!

How To Calibrate Your Lenses
Calibrating your lenses is actually very simple, and it is indeed very important for any DSLR user; even that expensive flagship lens might need calibration! I know there are a lot of you out there that might never have calibrated your lenses, especially if you’re just buying your first DSLR now. (And again, as I mentioned earlier; mirrorless lenses usually don’t need calibration; even the beginner-level ones.)
In fact, almost every DSLR lens that I have ever owned one that didn’t need at least a slight adjustment, especially after 6-12 months of heavy use. Whether Canon, Nikon, or especially third-party lenses for those mounts, there is no avoiding this process. Right out of the box, sometimes, I’ve had lenses that needed at least some micro-adjustment.
Is It Safe To Calibrate Your Own Lenses? (Do You Need To Pay For Professional Lens Calibration?)
Most photographers simply don’t understand how the process works, or think that it’s a risky adjustment that could only make their photos’ sharpness/focus get even worse. The good new is, it’s a very simple process and you’ll get the hang of it in no time.
Furthermore, even while you’re trying to learn how to calibrate your lenses, it’s a feature that can be completely turned off if you decide you’re not yet confident in the adjustment. So, quite simply, nothing bad can happen, and you only stand to gain tack-sharp photos!
Having said that, there are some scenarios in which you will need to send your lens into a professional service center. Simply put, if the focus troubles you’re getting are completely erratic, and you get front-focus half of the time, but you get back-focus the other half of the time, …then you can’t fix the problem with just one adjustment number, of course. That camera/lens needs professional service…
Some DSLR cameras do offer multiple calibration points, but this is usually for zoom lenses. It allows you to calibrate a lens at its wide end, for example, yet keep it un-calibrated at the telephoto end, or even calibrated it in the opposite direction.
Say, for example, that your 24-70mm has a back focus issue at the 24mm end, but a front focus issue at the 70mm, you could calibrate both ends separately. (And just pray that it turns out alright in the middle! Otherwise, it’s back to the professional service center…)
Either way, you don’t need to pay for professional lens calibration if the problem is a simple, obvious, front-focus or back-focus issue. Of course, so if you’d rather not deal with the problem at all, then you certainly can consider paying someone else to do it! (I used to calibrate lenses and clean sensors for my wedding photographer friends, but virtually all of us have switched to mirrorless at this point.)
Do You Need a Calibration Device? (Auto Focus Calibration Target)
The question you might have now is, do you need any special calibration tools? Good news: NO! You don’t need any special tools, you don’t need to buy special calibration software, or an expensive calibration target.
NOTE: there are a few third-party lenses that do offer USB connection “docks” that attach to your lens and allow for very extensive calibration. However, this is a pretty advanced technical procedure with innumerable adjustments, because it can calibrate a lens to behave differently whether focusing near or far, and at multiple focal lengths throughout a zoom range. However, this is usually a bit overkill, and it is also something that we do recommend leaving to a professionals.
All you really need is a sturdy tripod, and a few minutes or an hour in a well-lit park with a tree and some grass. No, seriously! Allow me to elaborate…
Lens Calibration Step 1: Set The Scene
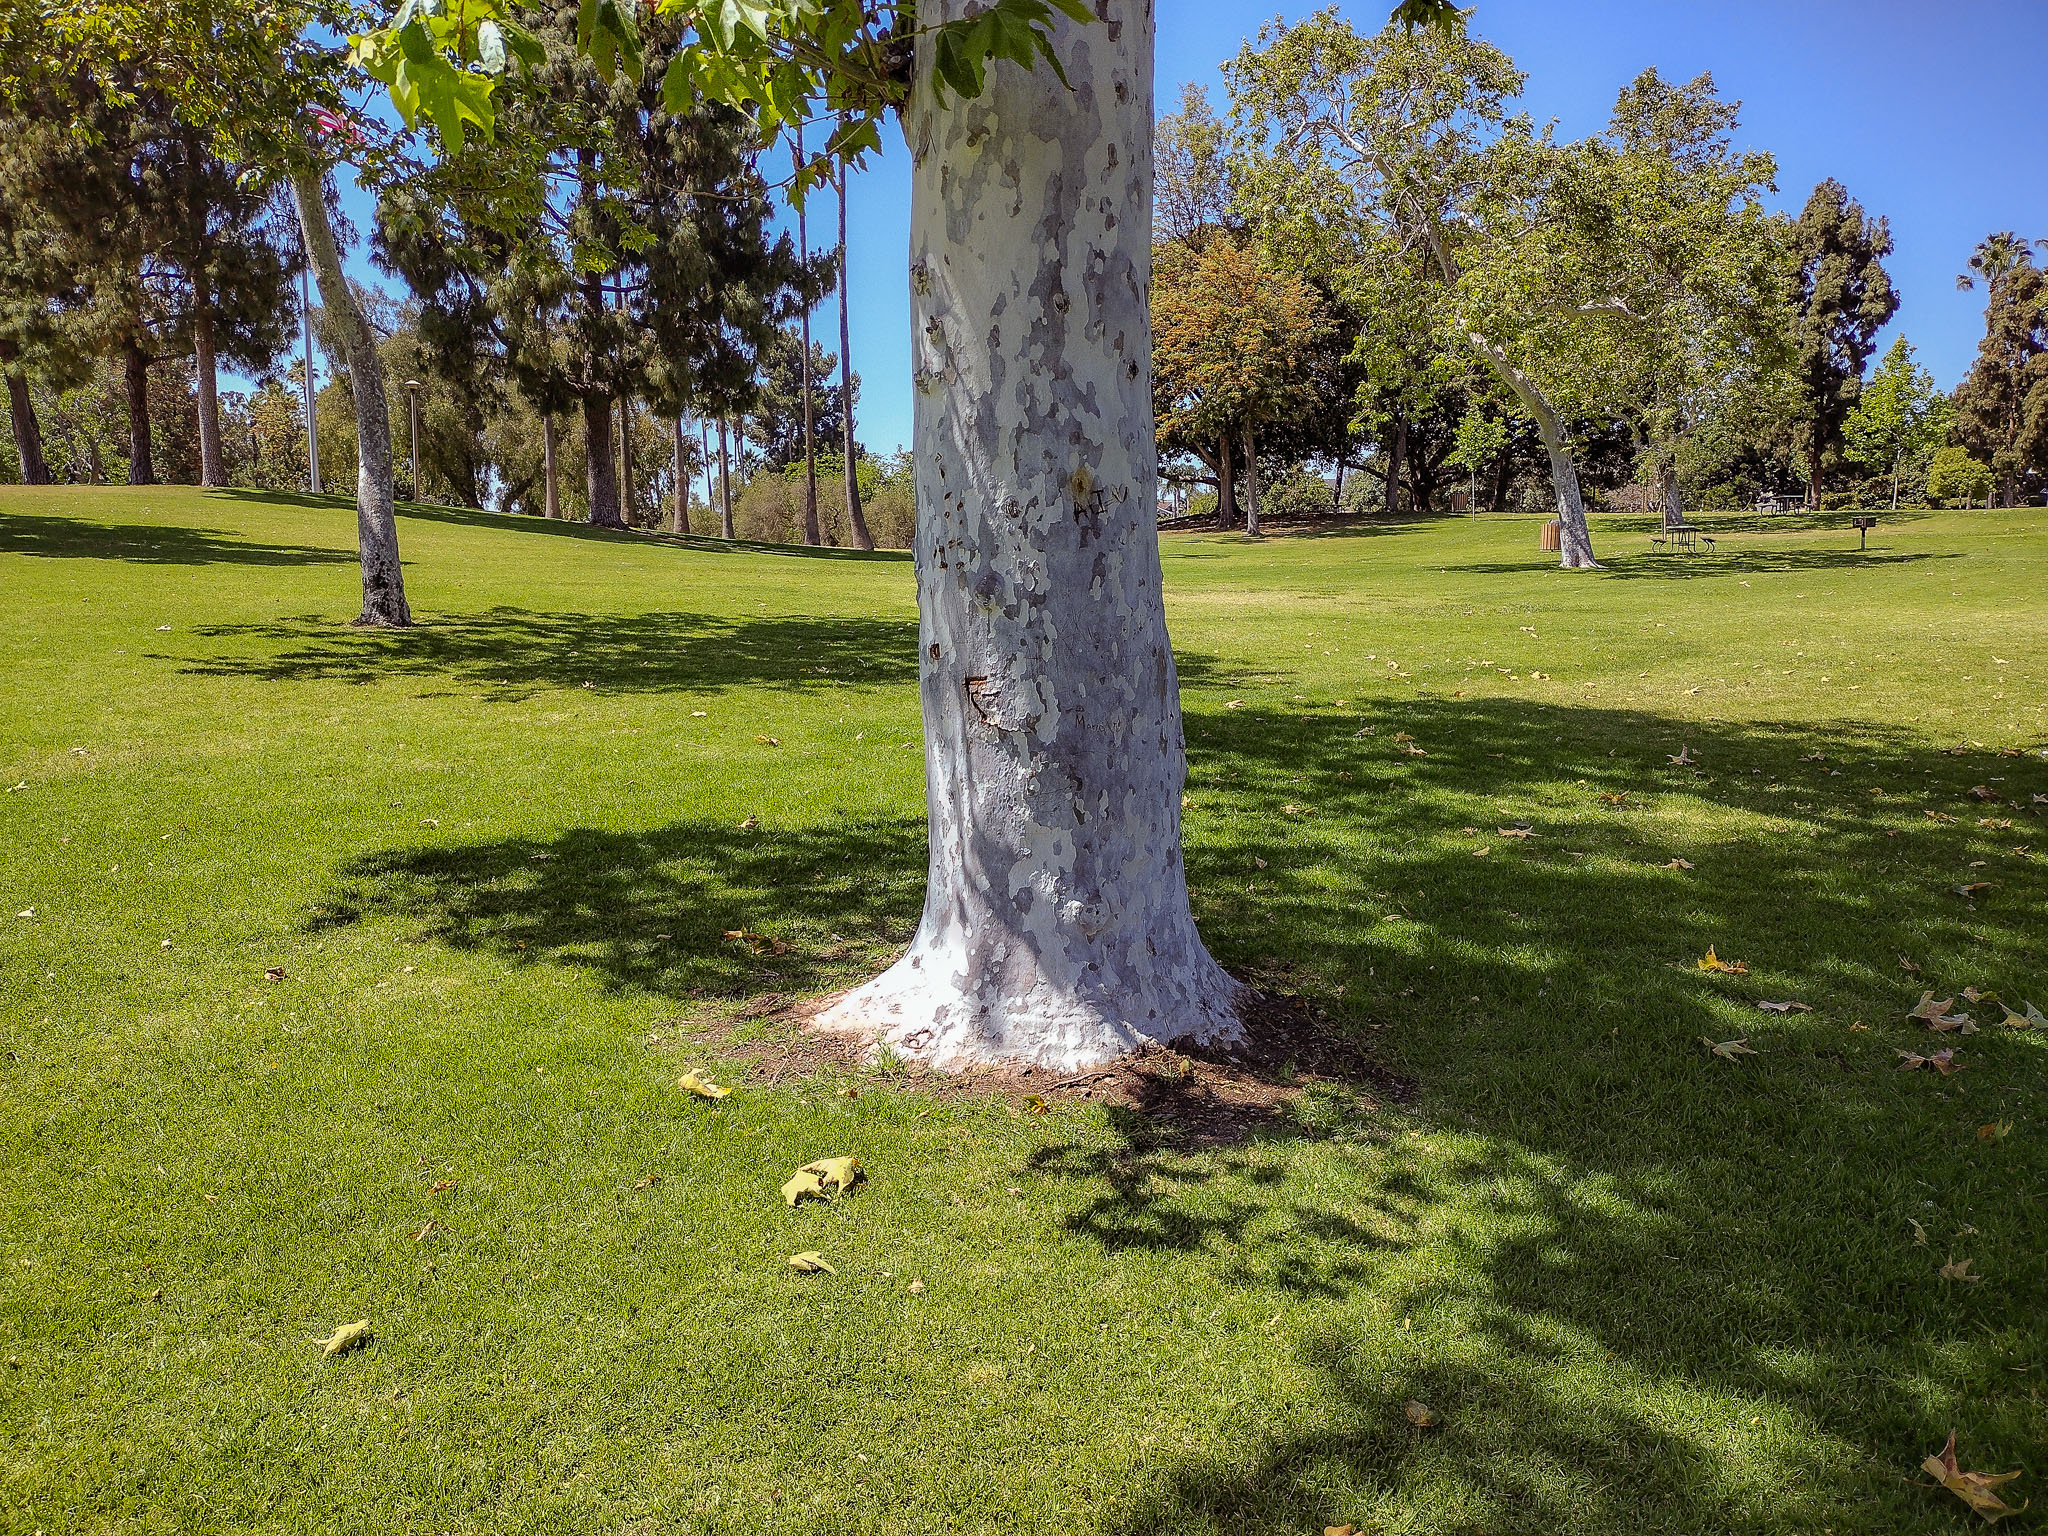
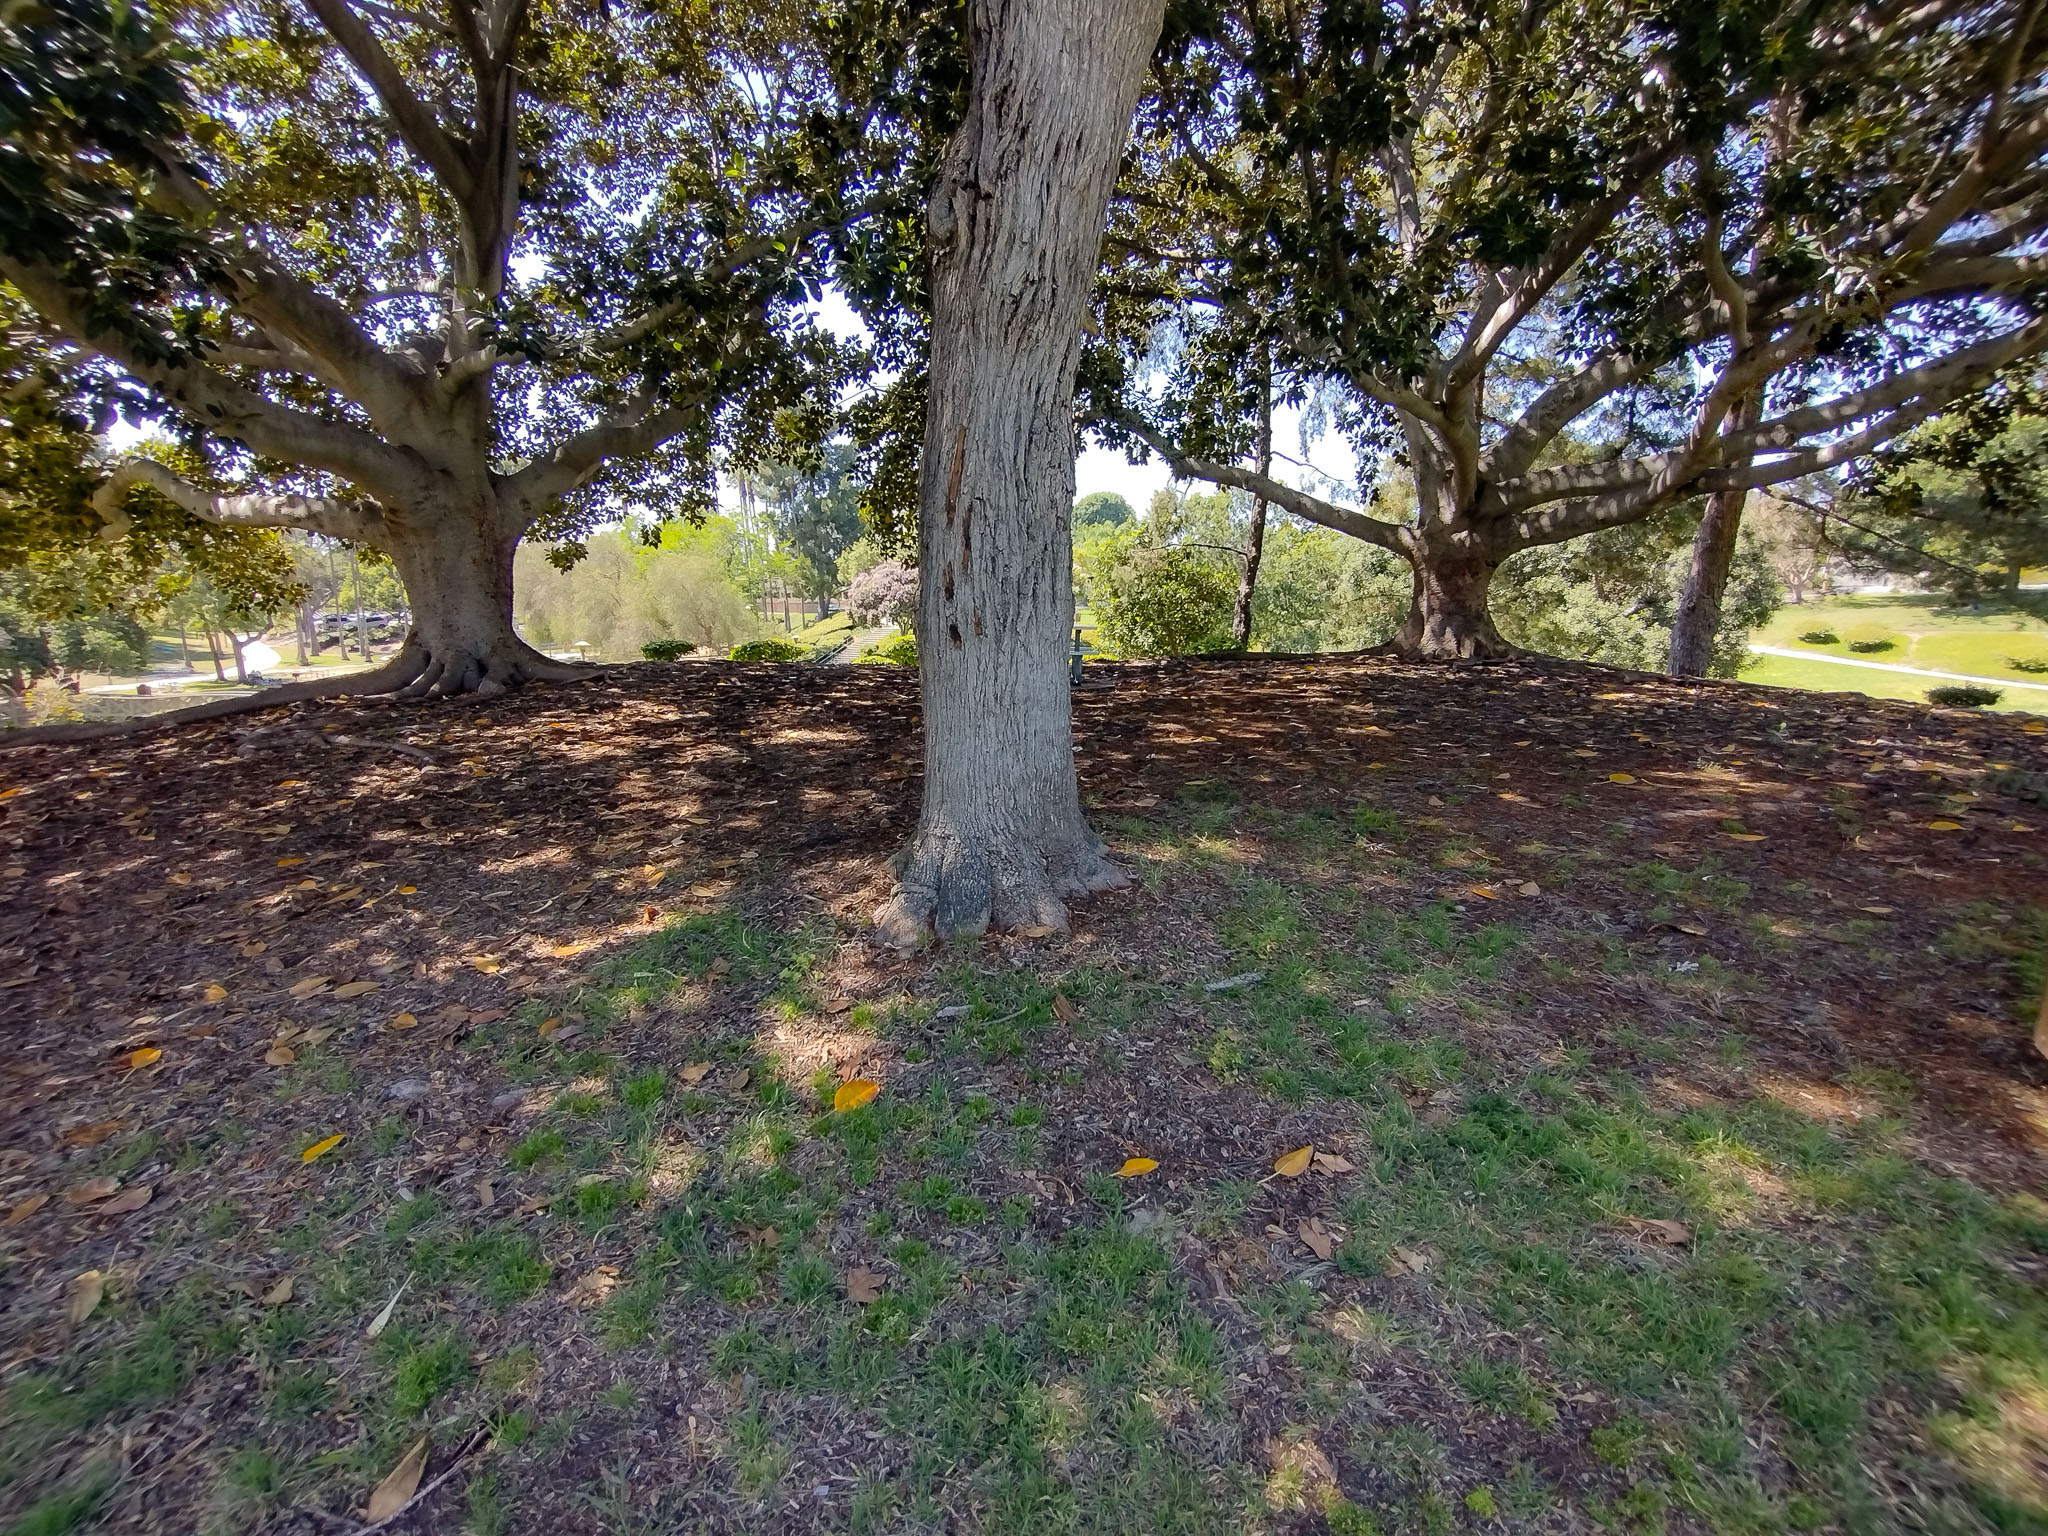
The concept is simple: You want a subject that your autofocus cannot miss. A tree is a great example of this, because it has a lot of texture in the bark, and from a distance of ~20 ft away, (for a ~50mm lens, more about this later) …the focus point will not have any room for error. It can’t accidentally focus on the background, and the surface of the tree, although rounded, is a relatively flat plane when you are the right distance away.
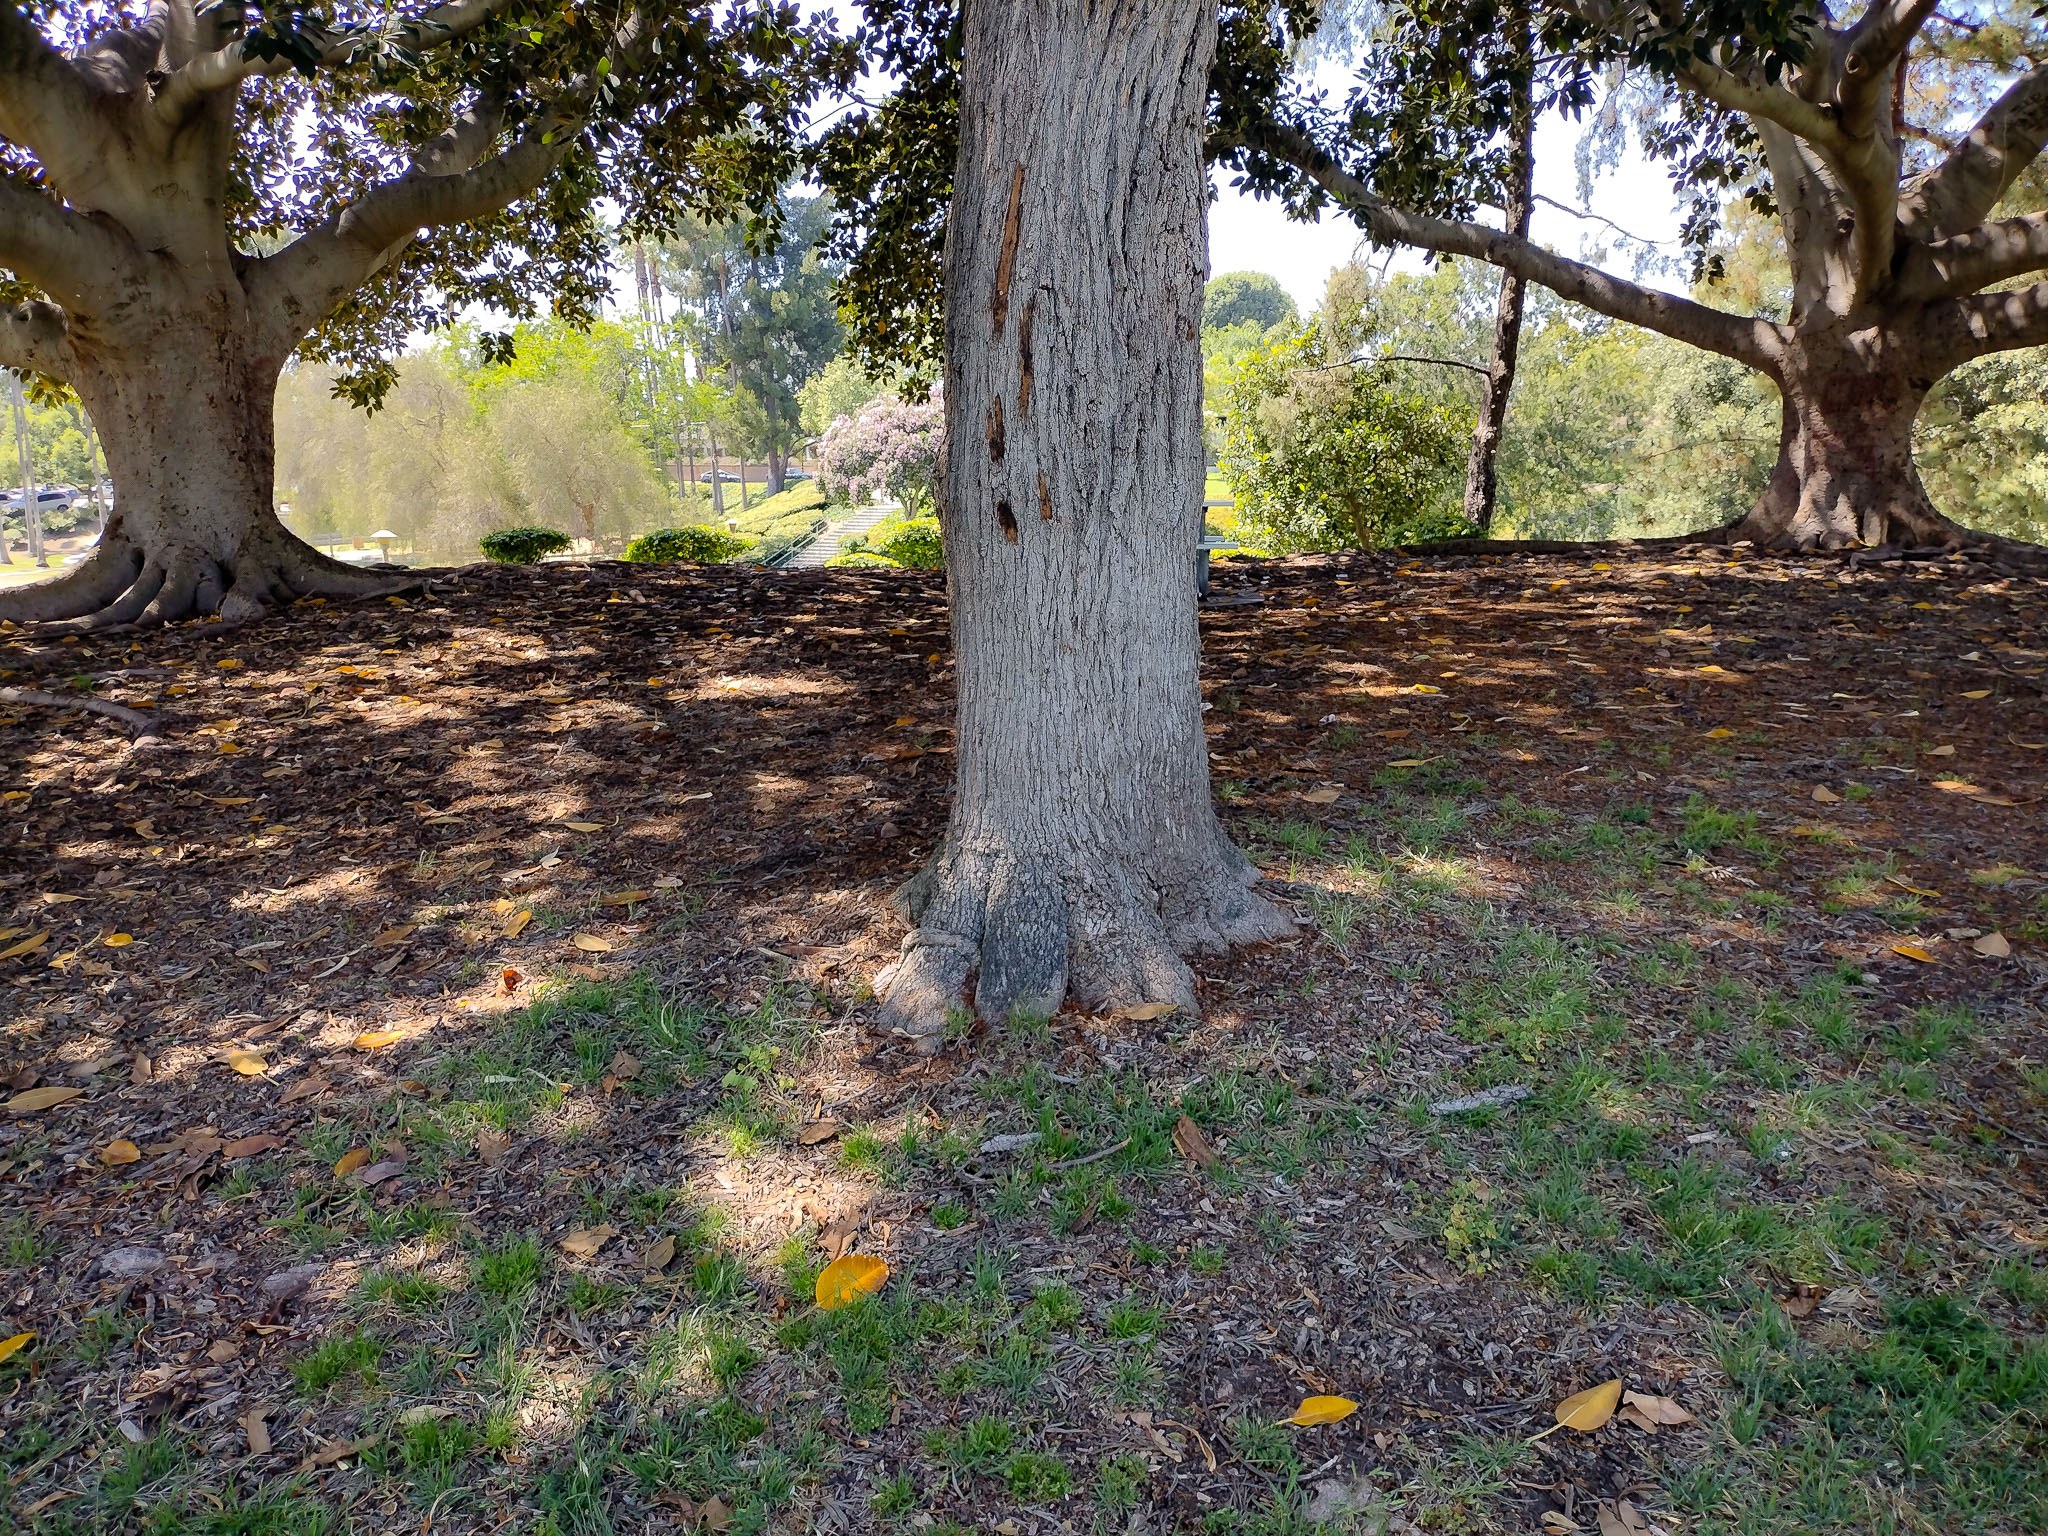
So, get your camera on a tripod, point the center AF point at the tree so that the trunk more than covers the whole AF point, and ensure that you also have a clean view of flat, textured ground at the foot of the tree. (Grass, bark chips, pine needles; again, anything with texture will do!)
Autofocus Using The Viewfinder
Make sure that Live View is not on, and only focus using your viewfinder. Live View uses a different autofocus system, and any adjustments you make won’t be noticeable when using Live View. Keep it turned off through the entire process. This is very important!
Inspect The Image, And Adjust
PRO TIP: Before you begin, go into your camera’s image processing menu, and crank the sharpening setting all the way up. This won’t harm your raw files in post-production, but it will ruin fine detail in your JPG and video files, so be sure to turn it off later! The reason to do this is, it greatly enhances your ability to see sharpness in-camera, so that you don’t have to go running between your test scene and your computer.
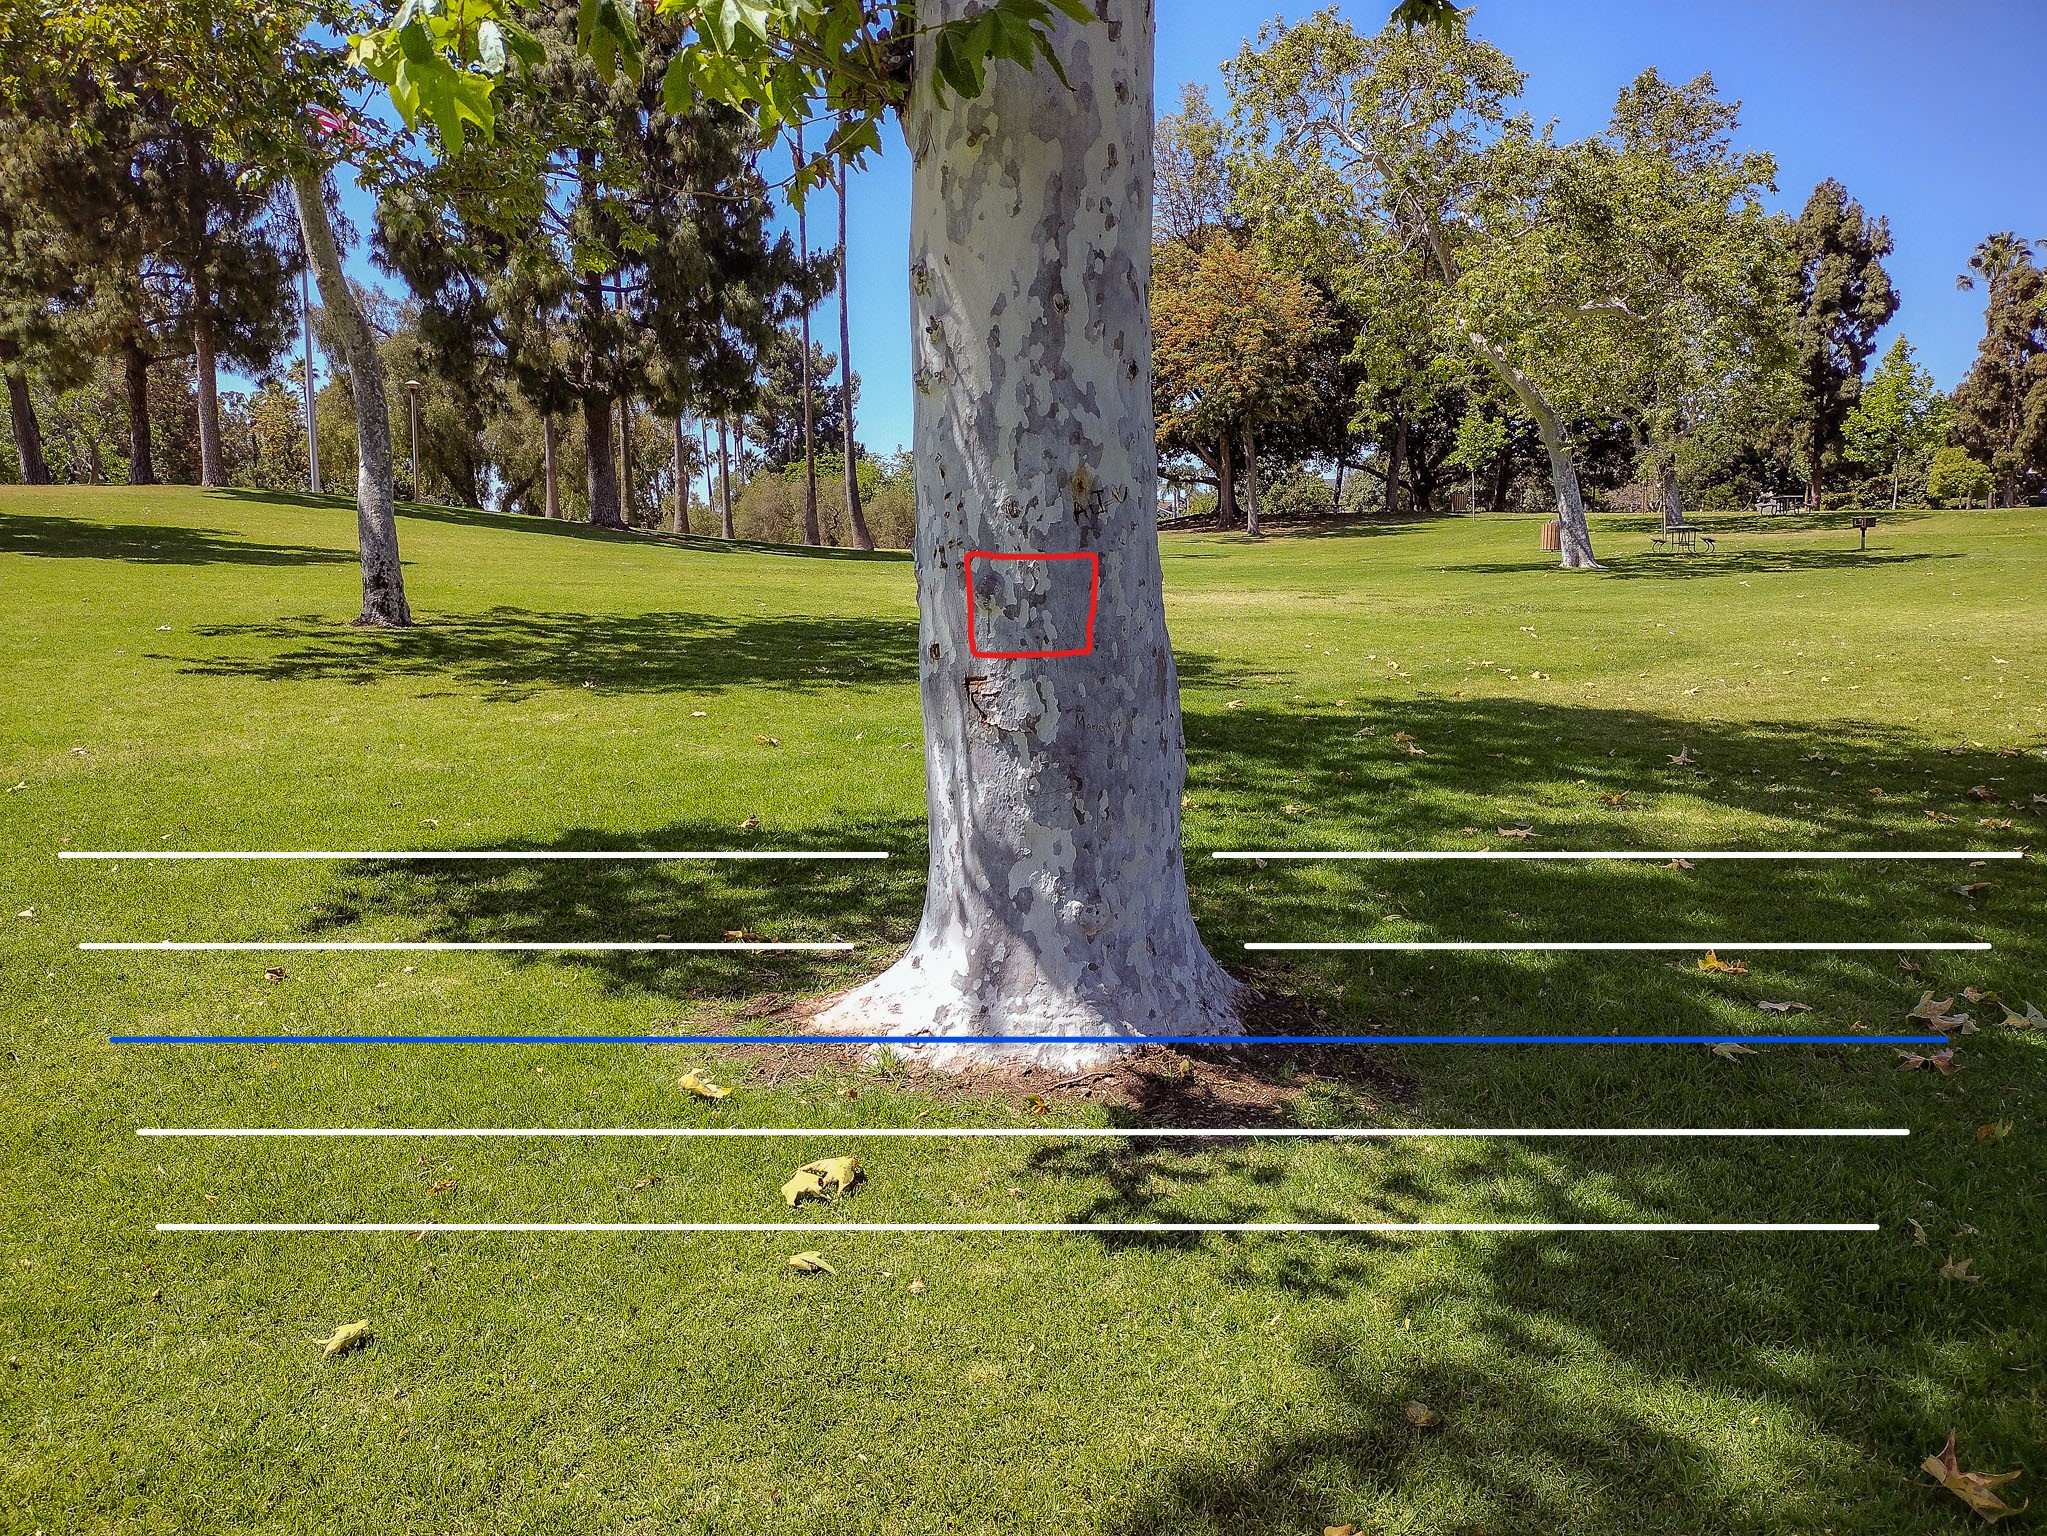
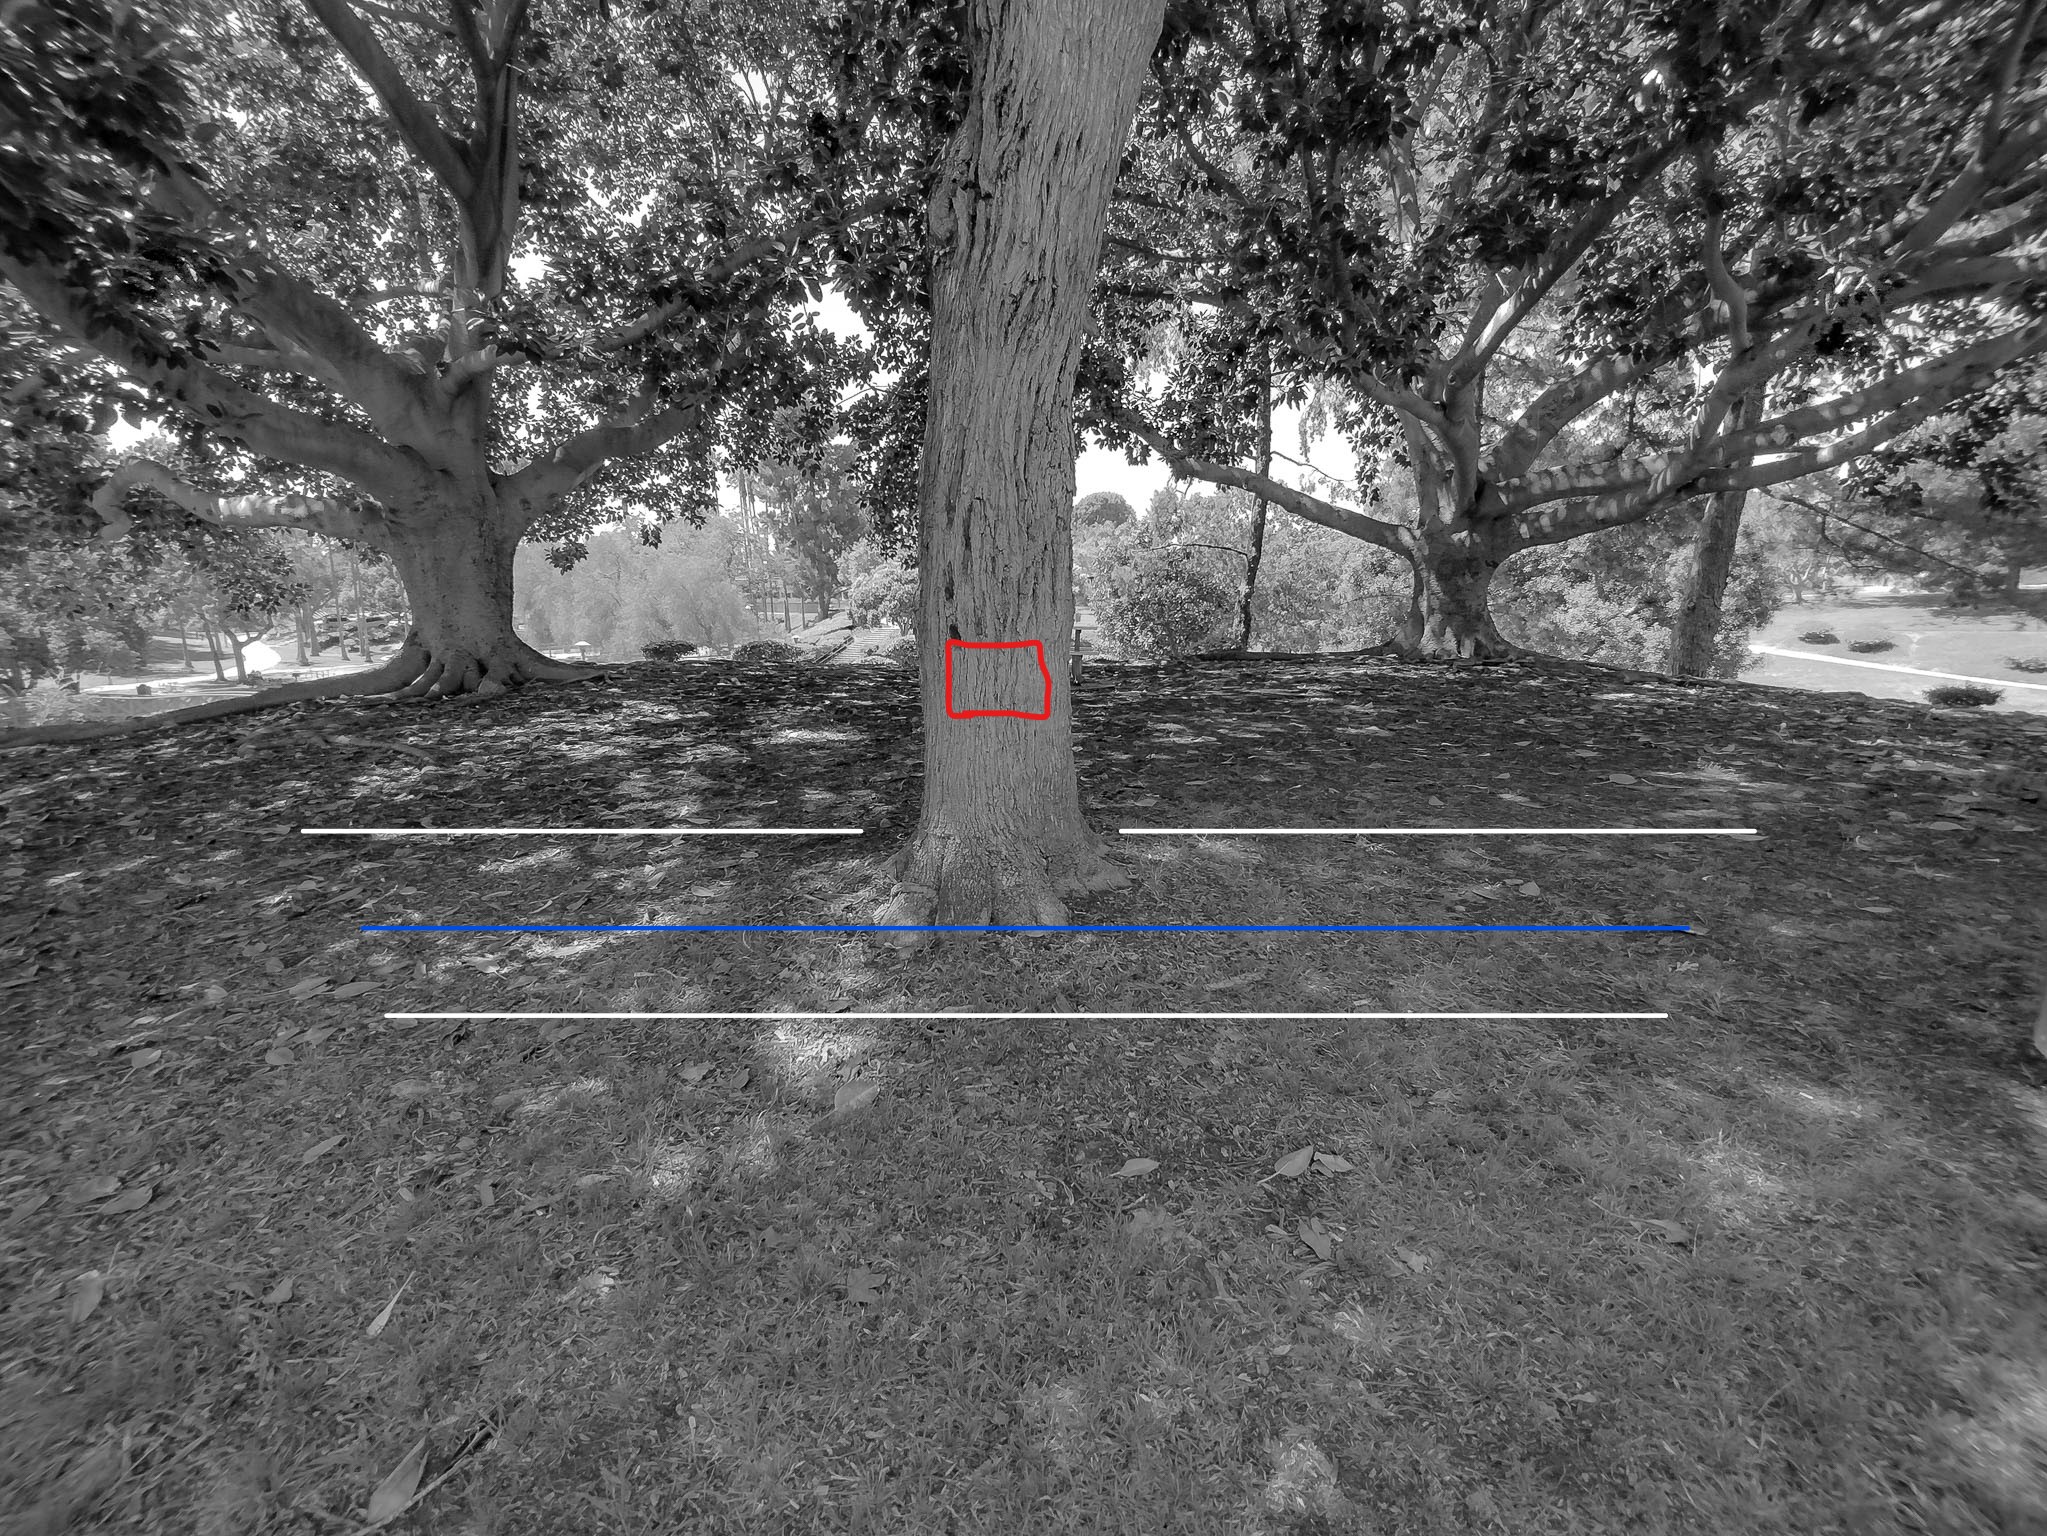
While looking through the viewfinder, with the camera set to single (one-shot) focus and the lens at its widest aperture, click a photo. Hit play, zoom in to 100%, and don’t worry too much about the tree; look at the grass. You want to carefully scrutinize the transition from foreground to background, and see if you can discern where perfect focus lies. (With the in-camera sharpening maxed out, even the softest lenses should reveal where their true plane of focus is!)
t can be a little tough at first, but but if you’re just completely un-sure, and want a “test sample”, it’s okay to switch to manual focus, go into live view, magnify the tree, and manually focus until the tree is absolutely tack sharp. As long as you’re using a tripod, and there is no wind, (all stabilization off, use 2-sec timer!) …you should be able to see 1.) what truly PERFECT focus should look like, (using the manually focused image as a reference) …and, 2.) where your autofocus is front-focusing or back-focusing, if that is the case…
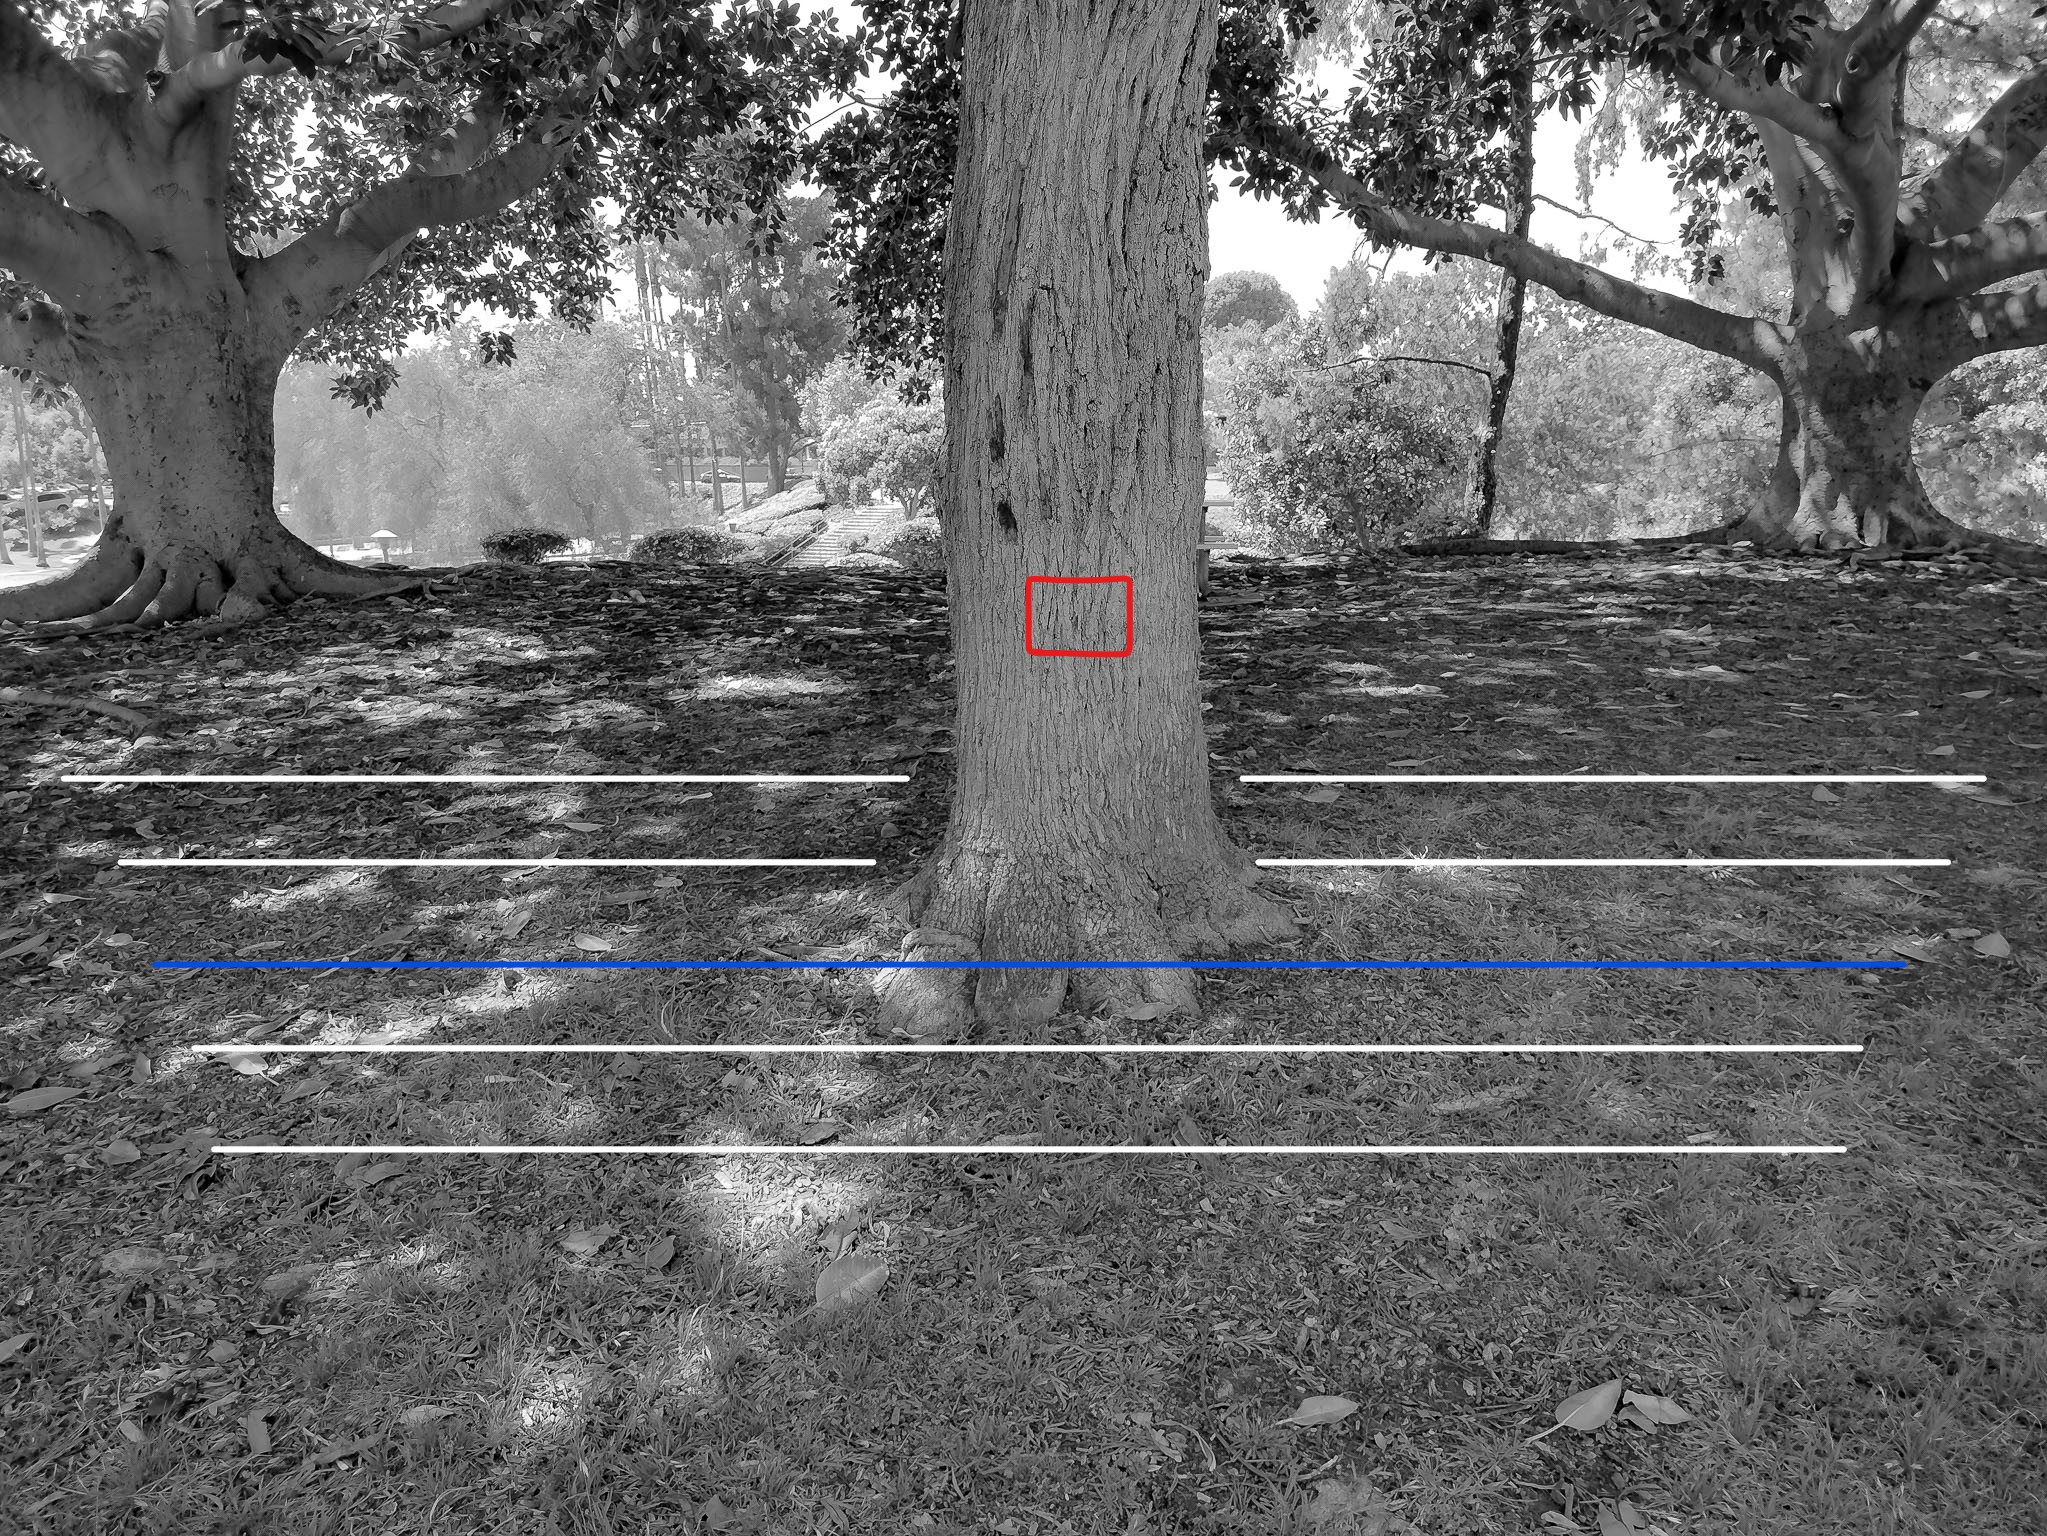
Once you see whether it is front focusing or back focusing, you can go into your camera settings and make the necessary adjustments to correct for this error. The default correction is zero, of course. If focus falls on one of the white lines in front of the blue line, then I’d be dialing in a positive compensation to “push” focus farther towards where it should be. If focus falls beyond/behind the correct plane, I would dial in a negative compensation/correction, to “pull” focus forward and bring it back to where it should be.
Simply test and repeat, test and repeat… Keep taking test shots and fine-tuning until you have the center line perfectly in focus. Just to be sure your focus is consistent, capture 5-10 photos and check them all.
Maybe also try AF-C (Continuous Servo) if you use that mode a lot, but keep in mind that this focus mode doesn’t always like perfectly static scenes; maybe take your camera off your tripod and hand-hold the same type of test to confirm that AF-C is working correctly.
Last but not least, you can try testing your off-center AF points, if you use those a lot, however keep in mind that if your center AF point is working perfectly but you discover that your off-center AF point is way off, …that means it is indeed time to take the camera/lens to a professional service center.
That’s it! Simple as that, no more blurry images, at least for now. Once you get the hang of it, the process should only take 5-10 minutes per lens, and you should only need to repeat this process once a year, or once every few months, depending on how heavily you use your gear. Or, for you extremely high-volume shooters, maybe consider calibrating all your lenses once every 10,000 shutter clicks. Either way, the good news is that you now know how to calibrate your lenses!
Focus Calibration For Ultra-Wide Lenses
If you’re trying to do this same process with a 16mm or even a 14mm or 12mm lens, just keep in mind that everything can be greatly exaggerated. Instead of a backfocus issue that is just barely focused on the grass a few feet behind the focused-on tree, you might find that focus is all the way at infinity!
Don’t panic, the correction scale of +/- 20 is a sliding scale, so, dialing in a -20 calibration on a 14mm lens will pull focus WAY more than dialing in a -20 calibration on your 70-200mm lens. So, almost every time, you should be okay.
Having said that, there are a few final thing to watch out for, especially when calibrating lenses that are 24mm or wider, or 35mm if it’s an f/1.4 lens. And that is, you’ll want to check BOTH the left and right edges of your frame, to make sure that the plane of focus is, indeed, flat and perpendicular to you.
Due to the nature of how wide-angle lenses are made, their optics can be more prone to misalignment that can cause a severe front-focus issue on the left, yet a severe backfocus issue on the right. I’m not talking about if you move the focus point around, either. I’m talking about, if you perfectly focus dead-center, and that is sharp, …but then you go to inspect the rest of the image and find that the front-left close-up corner is in focus, yet on the the right edge, it is the far, distant area that is in-focus. YIKES! (This plagued the Canon EF 16-35mm f/2.8 mk1 and mk2, for example; don’t buy those lenses used if you care about off-center sharpness.)
If you notice this, then, yup, you guessed it… Time for professional service! Because even if your autofocus works correctly when focused anywhere in the viewfinder, your plane of focus itself is skewed, so you literally cannot effectively photograph, say, a group of people at f/2.8; you’ll always have out-of-focus people on either the left or right. If you’ve ever experienced this frustration, my most heartfelt condolences go out to you; I know that pain and it is no fun. The good news is, that’s mainly an issue with much older lenses, namely the older generations of 16-35mm and 24-70mm lenses. Stick to the newest options, and you’ll usually be alright.
Autofocus Calibration Menu Settings For Nikon (AF fine-tune)
For Nikon, it’s under the wrench or setup menu. It’s labeled as AF fine-tune and has a diagram showing you where you are moving the focus point. You want to only change the saved value, and make sure that the fine-tune is turned on. It will remember the changes each time you put that lens on, so you should only have to adjust it once.


Menu Settings For Canon
For Canon cameras, it’s very similar. You make the changes in the Function then Auto Focus settings, and the rest is the same as when done with to a Nikon body. Remember, though, if you have multiple cameras, you are making the adjustment in the camera, not the lens, so you need to calibrate each lens on each camera.
Summary
Here’s a quick summary on How To Calibrate Your Lenses:
- Get your tripod and head out to a park!
- Find a flat level area with a tree large enough that your AF point shouldn’t miss (10-20 ft away)
- Autofocus with the center AF point, in Single Focus mode, using the viewfinder. (Not Live View AF)
- With the in-camera sharpening turned up to the max, and your lens aperture wide-open, inspect the grass (flat textured surface) for where focus truly is
- Adjust focus to be closer (if backfocused) or farther (if front-focused) and re-test.
- Repeat until you’ve calibrated “too much”, then dial it back to perfection!
- Triple-check everything, and finally, take your camera off your tripod and hand-hold a few more test shots, just to make sure all is well for your most common photography conditions.

ACCESS TO INDUSTRY-LEADING EDUCATION
Let us guide you in your photography journey with the best photography education and resources. Browse our complete, comprehensive solutions below and take the next step in your photography.
BROWSE WORKSHOPS