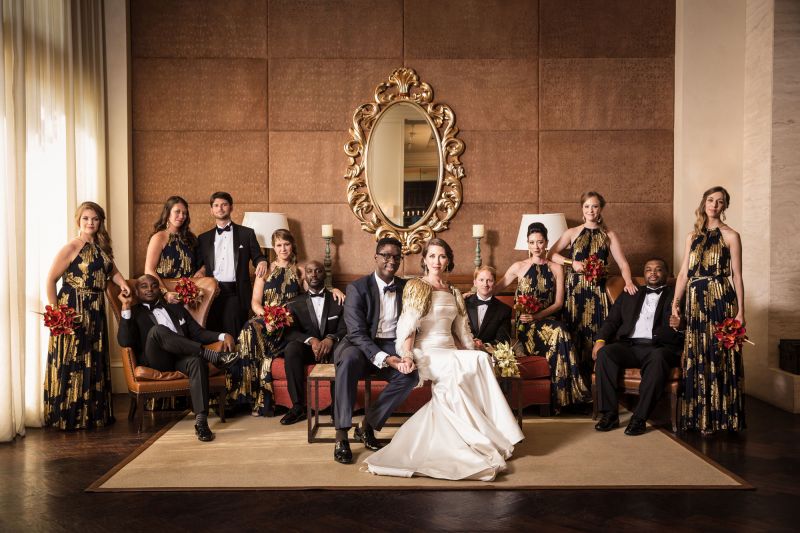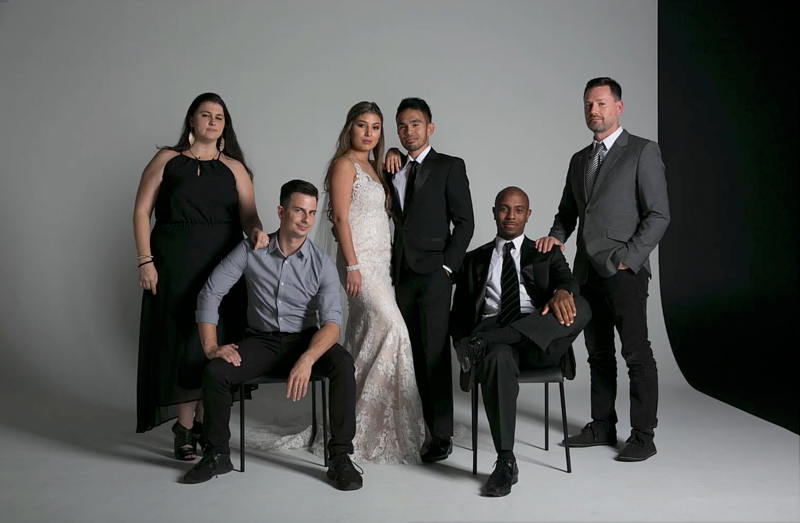
Editorial posing in photography is a style of posing that utilizes layers, connection points and different expressions to create a unique editorial look that you might see in a magazine. Editorial posing is the opposite of standard, symmetrical posing, where all subjects in the photo are placed in a straight line with symmetry on both sides. In this article, we’ll give you editorial posing tips and show you examples of editorial poses to use on your next photoshoot with multiple subjects.
The Pros and Cons of Editorial Poses
- Pros
- Higher production value
- More visual interest
- More likely to be used in your portfolio
- More likely to be shared by the subjects in he photo (marketing and brand impressions)
- More likely to be printed into albums and on wall-art
- Cons
- Execution is more challenging and time consuming
- More pressure and stress to manage and perfectly pose each member of a large groups
Step-by-Step Summary For Editorial Posing

The step-by-step guide for editorial posing is relatively simple, but it is also in-depth.
- Pre-light/expose for your scene (bright and airy vs. dramatic, etc.)
- Start w/ posing objects (select/add objects like chairs) – If chairs are not ideal, don’t worry. Chances are the subjects in the frame will conceal most of the chairs when the group is posed)
- Place primary subjects (couple)
- Rough position group on each side – Getting people into an approximate position while working out the pose helps keep things in motion and working towards the final pose
- Build poses (each pose varies)
- Watch overlap/touchpoints
- Test balance
- You may not have an even number of people on each side of the couple, but the group can be balanced with careful spacing and positioning
- Don’t confuse balance with symmetry
- Adjust positions/re-balance
- Ensure that subjects in the frame are not mirroring one another with the exact same hand positions, poses, etc. Instead, direct the subjects into a variety of poses
- When lighting the group, try to light top-down from higher up to avoid casting shadows from one subject to the next
- Direct for look, shoot
- Change look/repeat
- Get multiple expressions in one scene to deliver a wider variety of images at the end of the day
When it comes to the editorial images that you will want to capture, there are four primary shots that you will create in the editorial style:
Wedding party

Both immediate sides with editorial poses

Fitting editorial shots in the timeline should only add a maximum of 30-40 minutes, though this can be reduced drastically depending on the group and situation.
Editorial Posing Tips

Tip 1: Get into the Right Mindset
The mindset you’re in when going into a shoot and placing your group into an editorial pose can make all the difference between success or failure. If you believe this type of posing is not fun and worry that it’s too difficult to execute (or not worth the reward), then it is likely you’ll have a harder time successfully capturing an editorial group portrait. Instead, we recommend trying to recognize the unique opportunity you have of capturing images of people who are dressed their best in an immaculate location (supposing you are photographing a wedding or similar event in a formal setting) and making the most of the situation. Use these opportunities to create images with great visual interest and production value. It would be pretty difficult (or at least costly) to set this type of shot up on your own.
These images in this post were captured during a one-minute posing challenge and demonstrate some flaws. Can you spot them? Name them in the comments.

Tip 2: Create Interactions and Connections
With a single subject, you must think about the subject’s relationship with the camera, but when you add more people to a scene you have to start taking into account how the subjects are interacting with one another as well. In our example images, we have three couples; a bride and groom with two additional couples. In this case, we want the bride and groom to be the focal point – they are the ‘stars’ of the photo. In our first example, we have the bride and groom seated with their friends surrounding them, but this has the effect of the friends “upstaging” the couple.
Subject’s connection to one another should also be considered. If there is space between subjects, it implies emotional distance. If they are touching, where and how are they connected? Are they leaning toward or away from each other? Where are they looking?
[REWIND:] POSING TIPS | THE THREE-POINT CHECKLIST
Tip 3: Mind the Gaze of Each Subject
Where you tell your subject to direct their gaze has a profound impact on the dynamic of a photograph. There is a natural tendency to look where a subject is looking, and if multiple subjects are looking in different directions, it keeps the viewer’s eye moving around the image.
Tip 4: Pay Attention to Heights and Layers
You can use props like chairs and posing stools (or really anything photogenic, get creative!) to shake up the height dynamic among subjects. For an editorial look, staggering heights is an effective way to add compositional interest. Don’t forget to adjust your own height for different perspectives – try kneeling to shoot from waist height or climbing on a stool, for example.
Tip 5: Mind The Wardrobe
As with single subjects, a photographer must keep their eye for detail at the ready for wardrobe malfunctions. Of course, with more people, your visual scan for attire that looks “off” will need to last a little longer and be a little more thorough. If your group is at a wedding, the placement of the bride’s dress train needs to be taken into account and arranged so as to look polished and intentional, not sloppy. Jackets should be checked for bulges and mis-buttoning. Clothing that has shifted oddly with the subject when you posed them should be adjusted.
Tip 6: Watch for Floating Appendages
The more people, the more limbs, amounting to a greater number of opportunities to visually separate a body part from its owner, resulting in a creepy disembodied hand or another body part that appears from seemingly nowhere. When directing subjects into poses, be sure to account for hands, arms, heads, legs, and feet to ensure that nothing is awkwardly placed. When posing groups, there are many details to mentally corral, but if you can manage, it’s well worth it.
Conclusion
Posing is an art wherein subtle nuance speaks volumes, and the tiniest changes can make a world of difference. Even the pose of a single subject contains much complexity when you get into the small details, and working with a group increases the care needed to properly pose. The more moving parts to deal with, the more pieces of the posing puzzle to take into account when thinking about your final image. Every detail you have to notice when working with a single subject is amplified with each added subject.
For more content like this, be sure to check out our Complete Posing Workshop, and if you’d like access to our full collection of Premium workshops, become a subscriber!


Get Connected!