-
Term: Shutter Drag
Description: A Shutter Drag, also known as a Long Exposure, is a photography technique that uses a slower shutter speed to expose for dark scenes or capture motion of moving objects.
Shutter Drag
How to Create Rad Reception Images: Drag Your Shutter & Light Up Their Party
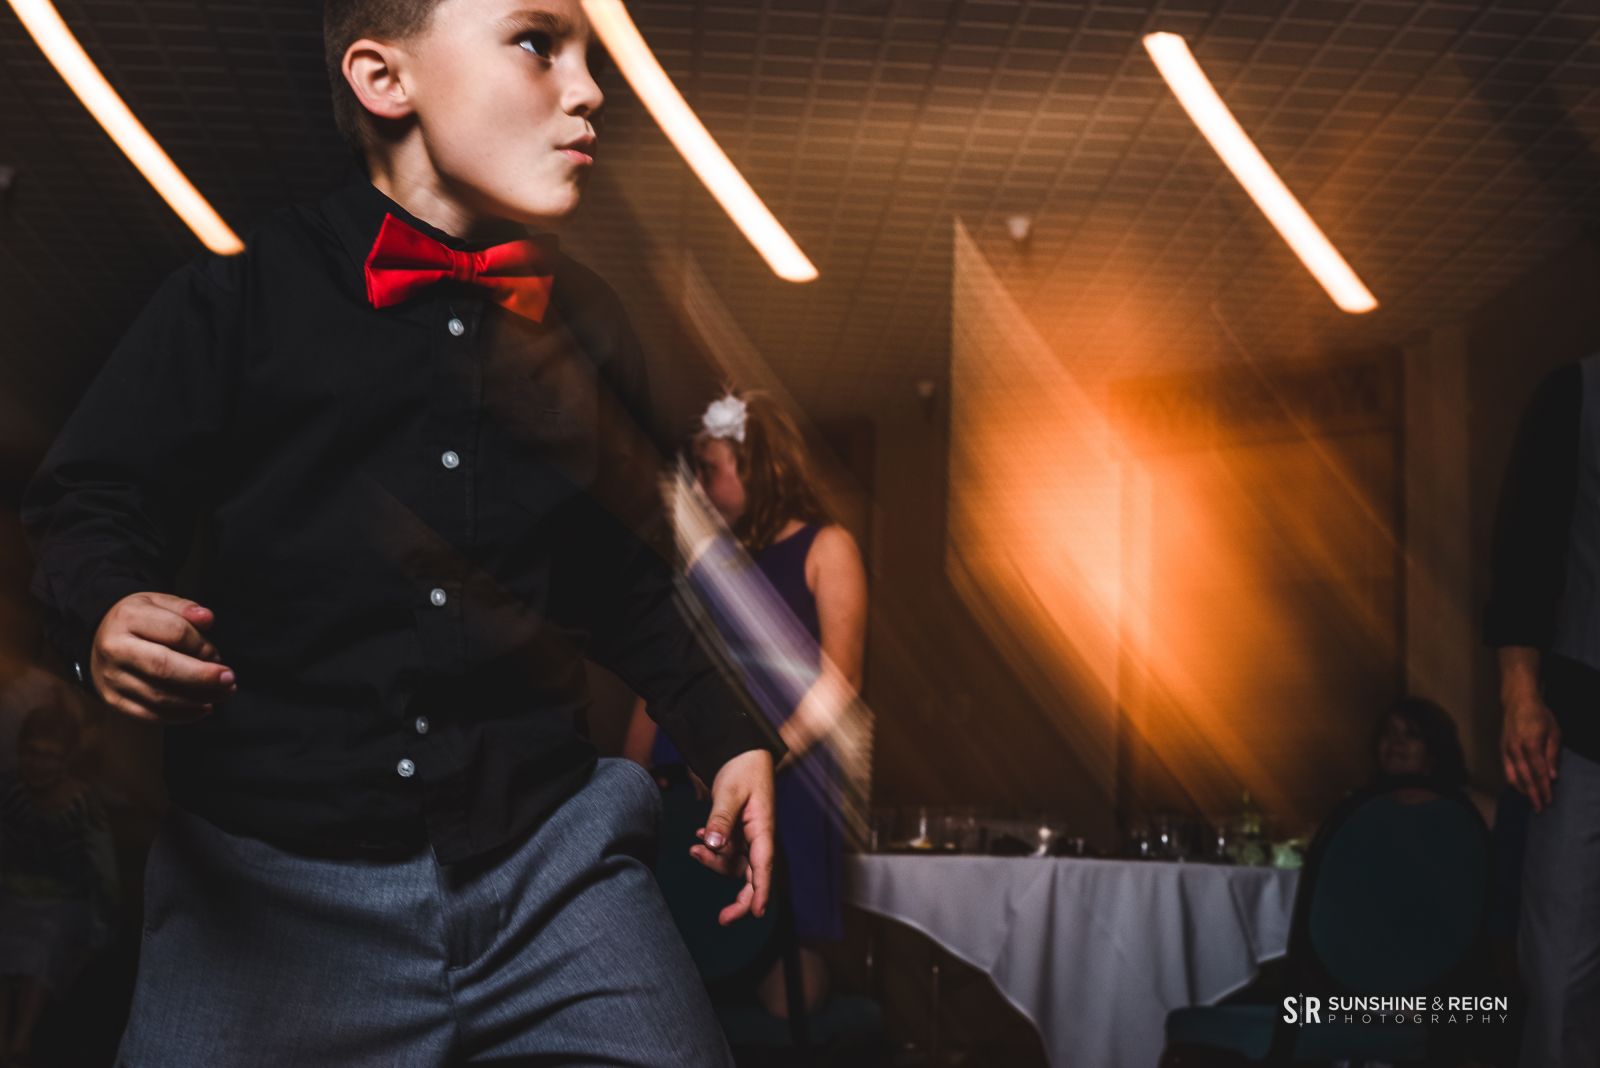
We love to add to the story of our clients’ wedding day by recreating the party atmosphere of their reception with our images, i.e. we try to light up their party (and not just with our winning personalities, ha!). To accomplish our “reception image style,” we’re all about dragging the shutter. And even though the technique is fairly simple, we up the ante a bit by using rear curtain sync (+ off camera flash) and actually get out on the dance floor & get moving ourselves!
If you’ve checked out Lighting 101, then you already know about the basic concept of “shutter drags” (i.e. creating motion). When we execute this technique at receptions, what we’re doing is slowing down the shutter speed in order to blur (or trail) the DJ’s lights. And note: there are plenty of options for light sources if your DJ doesn’t bring the funk with some dope lighting (ceiling lights, strings of lights, etc.). Heck. We’ll even use the limo’s lights if that’s where the party takes us!
The photos below are by Sunshine & Reign Photography

(Trailing the DJ’s Lights: Nikon D750, 24mm f/1.4, ISO 800, f/11, 1/3 sec)
(Trailing the Ceiling Lights: Nikon D750, 50mm f/1.8, ISO 200, f/9, 1/20 sec)

(Trailing the Limo’s Lights: Nikon D750, 24mm f/1.4, ISO 125, f/11, 0.4 sec + PARTYAID)
How To DO This Technique
You’re gonna want to start with a shutter speed of anywhere between 1/15 of a second to 3 seconds (somewhere around 1/5 of a second is almost always perfect) and quickly move your camera as you click the shutter (the slower the shutter speed, the longer the light trails). The key is to move your camera as fast as possible and in different ways so you can own the light trails and make them go wherever you want! Btw, we use prime lenses (our favorites for the reception are our Nikon AF-S Nikkor 24mm f/1.4G ED Lens and our Nikon AF-S Nikkor 50mm f/1.8G Lens), but if you rock zoom lenses, you can create some additional, amazing effects by taking your zoom from the longest focal length to the shortest focal length very quickly as you click your shutter.

(Nikon D750, 24mm f/1.4, ISO 100, f/5, 1/5 sec)

(Nikon D750, 24mm f/1.4, ISO 125, f/5.6, 1/13 sec)

(Nikon D750, 24mm f/1.4, ISO 800, f/11, 0.8 sec)
Off-Camera Lighting
In our experience, off-camera flash is always best, and we always rock a lighting assistant, who carries an Impact QuickStik+ with a Nikon SB910 Speedlight and a Westcott Rapid Box – 26″ Octa Softbox to soften the light. If you slow your shutter speed down, you’ll definitely be able to show the party atmosphere with awesome light trails, but how do you keep your subjects from blurring? That’s where flash comes into play. You can certainly use on-camera flash, but we prefer to get our flash off-camera to create images that have beautiful, directional light.
Rear Curtain Sync
The real key to lighting your subjects while dragging your shutter speed is to use rear curtain sync. Rear curtain sync, in the simplest of descriptions, means the flash goes off at the end of the shutter duration, creating light trails like in the image below.
(Rewind: 10 TRICKS YOU DIDN’T KNOW YOUR CAMERA COULD DO)
 (Nikon D750, 24mm f/1.4, ISO 100, f/5, 1/5 sec)
 (Nikon D750, 24mm f/1.4, ISO 800, f/10, 1/13 sec)
 (Nikon D750, 50mm f/1.8, ISO 100, f/5.6, 1/10 sec)
Okay, Let’s Do This!
Here’s our “user-friendly, pick up your camera and try this” method (we use Nikon D750s): remove your flash or trigger (we use PocketWizard PlusX Transceivers) from the hot shoe. Next, press the “flash button” on the side of the camera (the first time you press it, the built-in flash will pop up/the second time you press it a flash mode/compensation screen will appear), and rotate your back dial until the flash mode says “rear.” Then, put your flash or trigger back onto the hot shoe, and you’re ready to go! Remember that aperture controls flash, so if you have your flash set to 1/1 (full power) and it seems just slightly too bright, for example, you might try bumping up your aperture a step or two before reducing your flash’s power. And as far as ISO, anywhere from 100-800 usually works well for these types of shots, but you can definitely experiment depending on how light you’d like the environment (and depending upon your flash’s settings).
 (Nikon D750, 24mm f/1.4, ISO 100, f/5, 1/5 sec)
Conclusion: Getting Out on the Dance Floor
Here’s the deal: if you wanna do this and make some super legit images, you’re gonna have to get down! For most of the reception, you’ll find us on the dance floor, literally on our knees and shooting upwards. From this position, we’re able to get the lights to trail in a ton of rad ways. And since we’re kinda nuts, we’ll definitely be feeling the vibe of the music so that we’re flipping our wrists with the beat.
Here’s an additional tip: since you won’t be looking through your viewfinder when you’re executing this technique, you’ll need to decide about how far away you want to be from your subjects (since we get “right up in there” during the party, it’s usually anywhere from 2-5’). Make sure your camera is focused for the length you choose (we’ve found it best to keep the aperture somewhere between f/4 and f/8 so that you’ll have some play with the distance while still being able to nail focused images). And be sure to continually look at your playback screen as you snap and make adjustments to your flash, shutter speed, body position, focus, etc. (as needed).
You’ll definitely need to release control when shooting a reception this way, but once you become comfortable with this technique, we’re solid on the fact that you won’t go back to making boring reception images! So, give it a go!
Related Articles to Shutter Drag Definition
Long Exposure Phone Photography Tip! From Shoot to Post
It’s a matter of focusing on the creative process, not the gear. Follow along as we capture and edit a long exposure image – all on an iPhone 11 Pro.
7 Waterfall Photography Tips to Expand Your Creative Vision
Have you ever tried to photograph waterfalls and been disappointed with the results? Do you want to know how to…
3 Phone Photography Hacks (for DSLR & Mirrorless Cameras, Too)
You’ve no doubt heard the saying the best camera is the one you have with you. These days, pretty much…
Monopod Vs. Tripod | When to Use Each
What’s the difference between a tripod and monopod (besides the number of legs), and when should you use each? Find out here.
3 Ways to Level Up Your Creativity Without Buying Additional Gear
You can use these simple techniques and the gear you already have (a camera, a lens, and maybe a tripod) to level up your creativity. Check it out!
How to Get Correct Exposure in Photography | Exposure Triangle, Part 2
In this article (the second of four), we’re going to walk you through a series of images to help you gain a practical understanding of the exposure triangle and how it relates to composition in the real world.
How To (Safely) Spray Your Lens To Make Great Images Even Better
There are numerous ways to light and shoot the same scene, but you can take your creativity a step further by introducing special effects.
Daytime Shutter Drags! How We Shot and Edited It
How I Shot and Edited an Engagement Photo in Downtown LA In this video we’re going to be discussing the…


Get Connected!