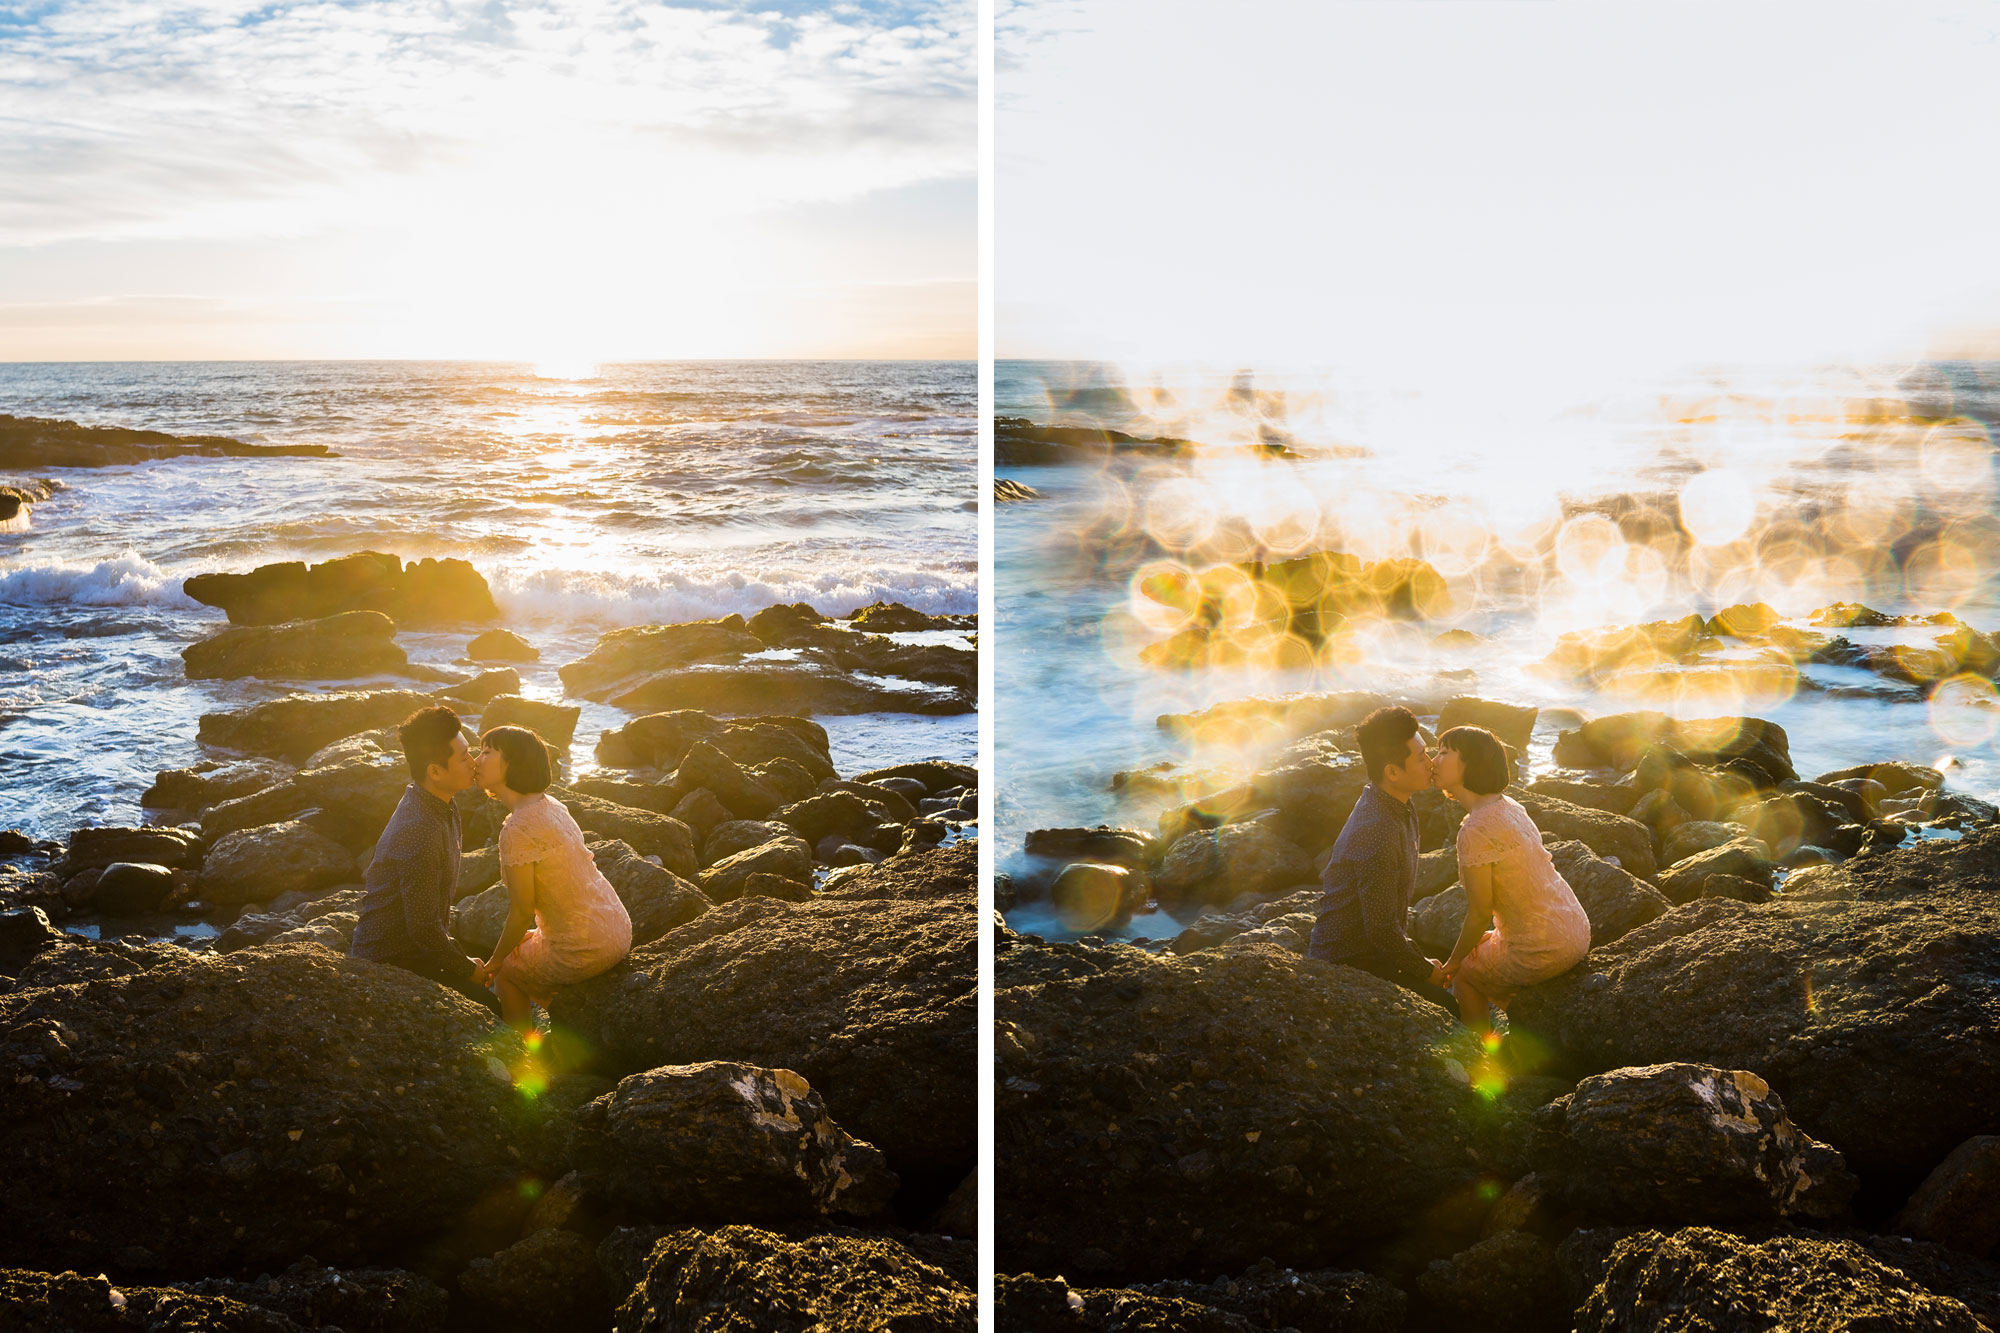
If you’ve ever tried shooting portraits at a popular location during its busy season you’ve probably noticed several other photographers using the location for similar purposes. It makes sense when the scenery is beautiful; however, while picturesque locations can provide fantastic backdrops for portraits, a great backdrop alone does not make an amazing image. If it did, there’d be no need for creativity and most of the images shot in that location — however great they might look — would look the same.
Problem: photographers limit creativity based on location
One might expect great locations to inspire photographers to exercise their creativity and showcase their talent. In many instances, this is the case. Unfortunately, there are even more occasions when photographers rely solely on the location “as is” to do the work and sell the image. The creativity tends to lack in several areas: perspective, lighting, posing, etc.
[REWIND: 5 Everyday Items For Creative Photo Effects]
Solution: use special effects & POST to enhance images
So, how do we push our creativity and produce unique images in popular locations? There are numerous ways to light and shoot the same scene, but you can take your creativity a step further by introducing special effects. Special effects offer a whole new level of possibilities for taking unique and memorable images. As photographers continue to experiment with and test new tools, from prisms to LED light strings, the possibilities also continue to expand.
It is worth noting that some occasions or locations are better suited for certain effects than others. At the beach, for example, a water-misted bokeh effect complements the story unfolding in the frame rather than distracting from it.
Click right in the box below to see a behind-the-scenes video:
A post shared by SLR Lounge (@slrlounge) on
Here is how we used water from a spray bottle to add interest to our image:
Step #1: Shoot from the shadows
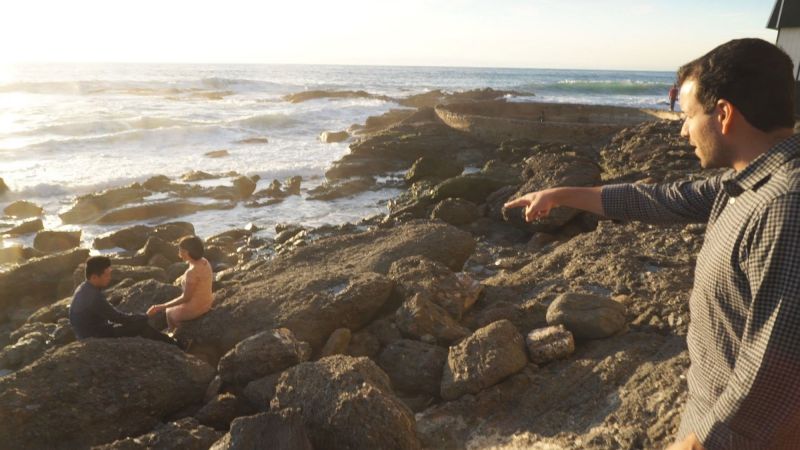
When deciding where to position your subjects, always consider light direction. More often than not, I recommend shooting from the shadows to showcase highlights. If you shoot from the shadows and expose for the face/skin tones, you will get nice highlights in the subject’s hair. When you do the opposite and shoot from the light toward the shadows, the lighting is flat and bright with minimal dynamic range. If that is what you’re after, then that is the way to go.
Note: Make sure to enable Highlight Alert in-camera to see how far you can push your exposure.
STEP #2: Dial in ambient exposure for the plate shot

Once you’ve determined where to position your subjects, dial in the ambient exposure for your plate shot. For this shot, we exposed for the couple’s skin and tried to maximize dynamic range by retaining as many highlights and shadows as possible.
Note: Because the final image will be a composite consisting of two or more images, you should probably use a tripod to stabilize your camera and consistently frame the scene.
STEP #3: Direct SUbjects into Pose

Whether your subjects are standing or seated, you can still refer to foundation posing to direct your subjects into a pose that suits the image you want to capture. For this image, our couple is facing one another in a seated pose to keep them low in the frame and leave more room to add the water spray effect to the top of the image.
STEP #4: Dial in ambient for Special effects shot

For the second shot, I wanted to slow the shutter to smooth out the waves. Because it was bright and a slow shutter speed of 2 seconds would have otherwise left the image overexposed, I stopped down the aperture to f/16 and used a 4-stop ND filter. The narrow aperture also creates more condensed bokeh circles to emphasize the effect, as you will see in the next step.
STEP #5: Add Special Effects
Using a basic spray bottle set to mist, spray filtered water across the top front of the lens. There are other effects, such as LED string lights, sparklers, copper pipes, or prisms that can add interesting light flares to an image, but the sprayed water bokeh effect fits perfectly with this beach scene. See how we use some of these inexpensive items here.
[REWIND: Perfect In-Camera, Then Photoshop]
STEP #6: Create Composite in post
Combine the images and mask the layers in Photoshop until you arrive at your final image. You can find more information on how to create a composite image in post here.
Conclusion
The use of special effects tools should serve to enhance your images rather than carry them. Before you rely too heavily on special effects to get more out of your locations or your images in general, I recommend getting better acquainted with your camera and mastering the fundamentals of photography. If we only possess minimal knowledge on how to use our gear, then we can’t know its limitations or how to make the most of its features. As photographers, it is in our best interest to understand how to use our gear, from our camera to our editing software, so that we can more consistently create incredible images.
Join PremiumTo help you expand your photography education, SLR Lounge Premium offers world class workshops on everything from learning the core fundamentals in Photography 101 to lighting and posing your subjects in the Complete Posing Workshop.


Get Connected!