
If you’re thinking about starting up a video podcast or YouTube channel, you’re going to want to learn how to make your set (shooting space) look its best. A big part of that will have to do with lighting. The best part about this is that it doesn’t have the break the bank and you can get creative and find lots of DIY alternatives. In this video, we’ll show you how to master video lighting for YouTube or podcast sets in four simple steps.
Video: Master Video Lighting for YouTube or Podcast Sets in 4 Steps
I recently launched a new podcast called 12-Week Relationships, a place where better relationships are made stupid-simple. In this passion project, I’ve partnered with a Doctor of Psychology and University professor, Dr. Glen Hong, to discuss happiness, fulfillment, and connection. You can listen and connect in the following places:
- Youtube (Where you can see the lighting setup)
- Spotify
- iTunes
- Weekly Newsletter
The podcast has little to do with photography or cinematography beyond gaining a better understanding of people and psychology. But it does offer the chance to create and study how to light a set for video and film-making. I mean, what better way to explore the topic of lighting a set than with a real-world case study?
C.A.M.P. Framework
If you’ve watched any of our previous videos, you may already be familiar with our C.A.M.P. Framework.
- Composition
- Ambient Light
- Modify/Add Light
- Photograph/Press Record
We will put this same 4-step framework that we use to light photography sets to work to light our video set. This process works equally well for lighting a set for cinema (whether it’s for YouTube, documentary films, or a home-podcast set). Follow these steps to get a great look, right in your camera.
Let’s get into it.
Gear Used in Video Lighting for YouTube or Podcast Sets
You can find the gear used for this video/article in the links below or neatly gathered in one place in our SLR Lounge Studio Build Store on B&H.
Lights
- Luxli Timpani 1×1 RGBAW LED Light
- Luxli Taiko 2×1 RGBAW LED Light
- Genaray SSL-36B Soft Strip Bi-Color LED Light (4 x 36″)
Light Modifiers
- Angler Collapsible Softbox for 1×1′ LED Lights
- Luxli Softbox for Taiko 2×1 LED Panel
- Luxli Barndoors for Timpani² LED Light
- Luxli 2×1 Grid for Taiko TSB-110 Softbox
- Angler Grid for the Collapsible Softbox for 1×1′ LED Lights
- Luxli Diffuser for Taiko 2×1 Panel (Heavy)
- Luxli Diffuser for Taiko 2×1 Panel (Light)
Light Cases
- Luxli Travel Case for Timpani Two-Light Kit (Black)
- Luxli Travel Case for Taiko 2 x 1 LED Light (Black)
Light Stands
Light Stand Accessories
- Impact Heavy-Duty Baby VESA Monitor Mount
- Impact Filled Saddle Sandbag (15 lb, Orange)
- Impact 40″ Extension Grip Arm (Black)
- Impact Grip Head for Lights and Accessories – 2.5″ Diameter (Black)
Budget Options
- Genaray Hex Lighting 36″ Soft Strip 6-Light Pro Kit with C-Stands
- Genaray Twin Sun 1×2 Bi-Color Soft LED Panel
- Genaray Spectro LED Essential 500IIB Bi-Color LED Light
- Genaray Spectro LED 800B1 Bi-Color Studio LED Light
Step 0: Building the Set
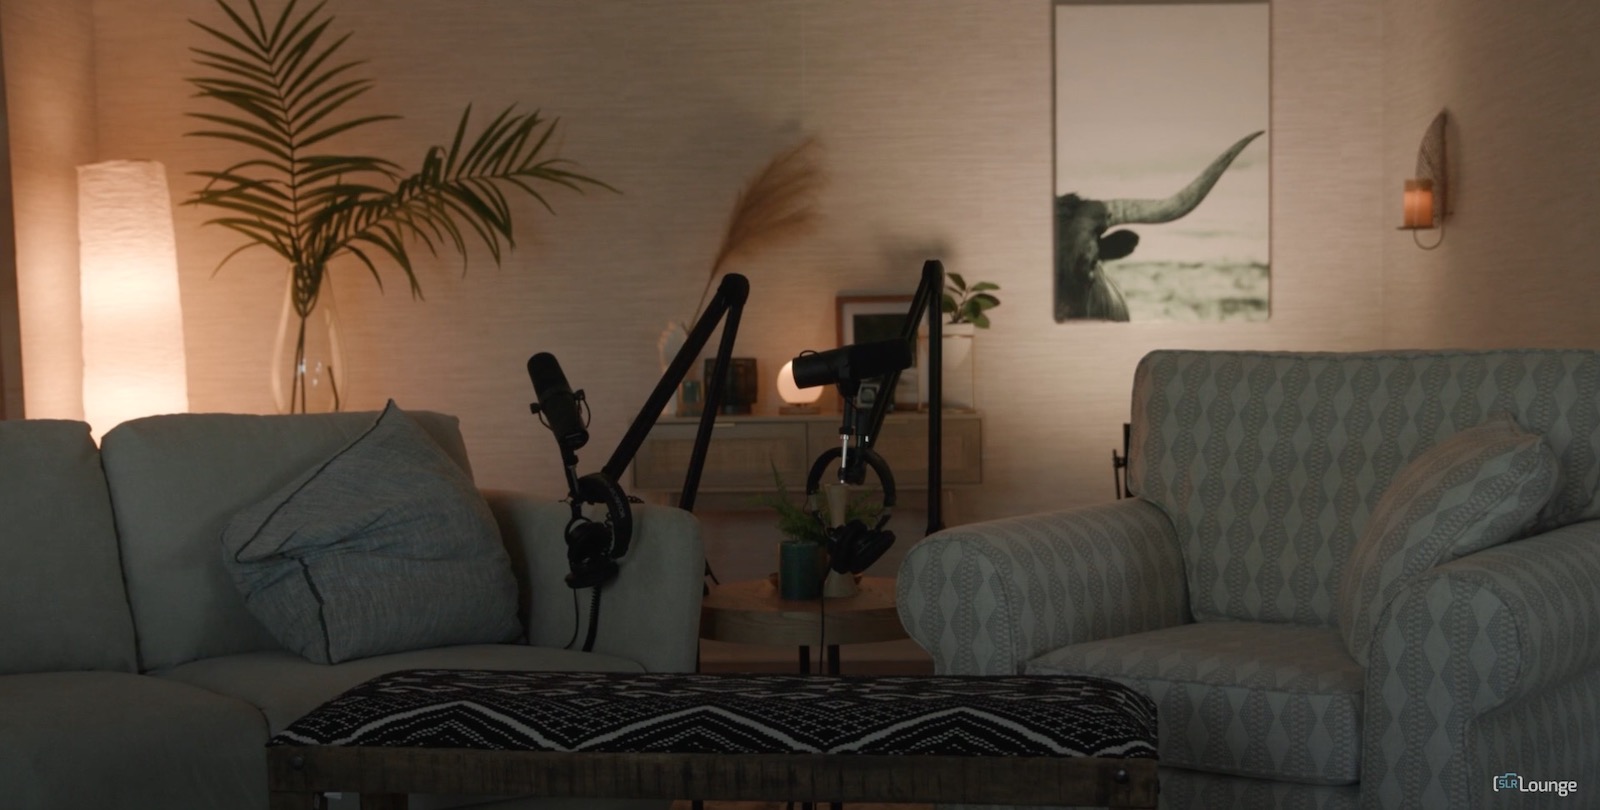
Before we can light our set, we’ll need to build and/or design it. And before we do that, we need to consider the theme of our production. The new podcast, 12-Week Relationships, focuses on relationships (obviously) and the psychology behind them. As such, we wanted the look of the set to reflect a comfortable environment in which to discuss these matters, like a household living room.
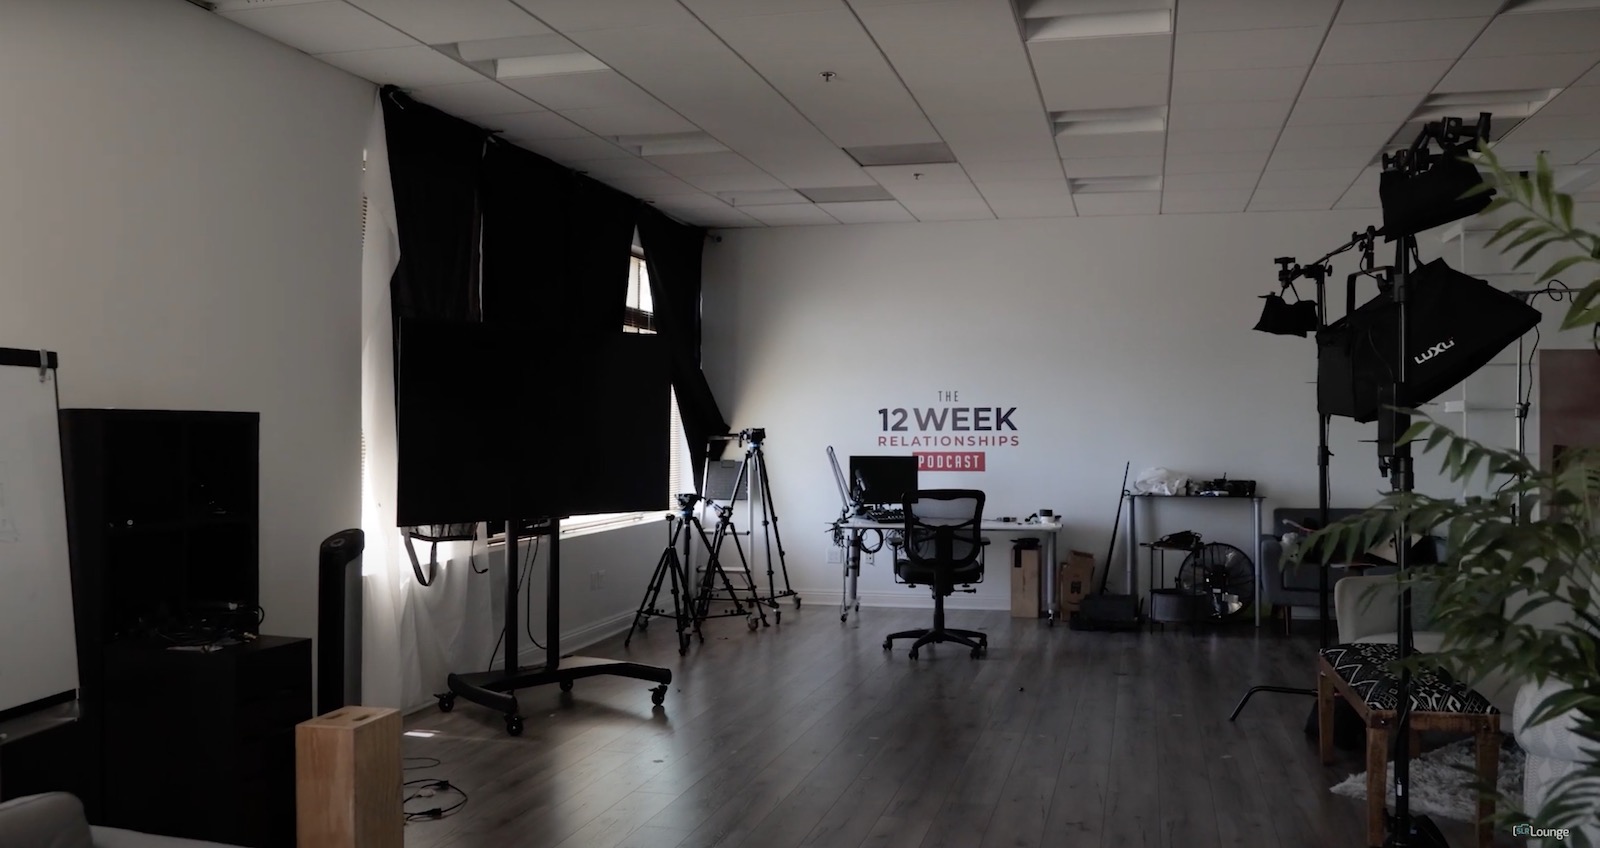
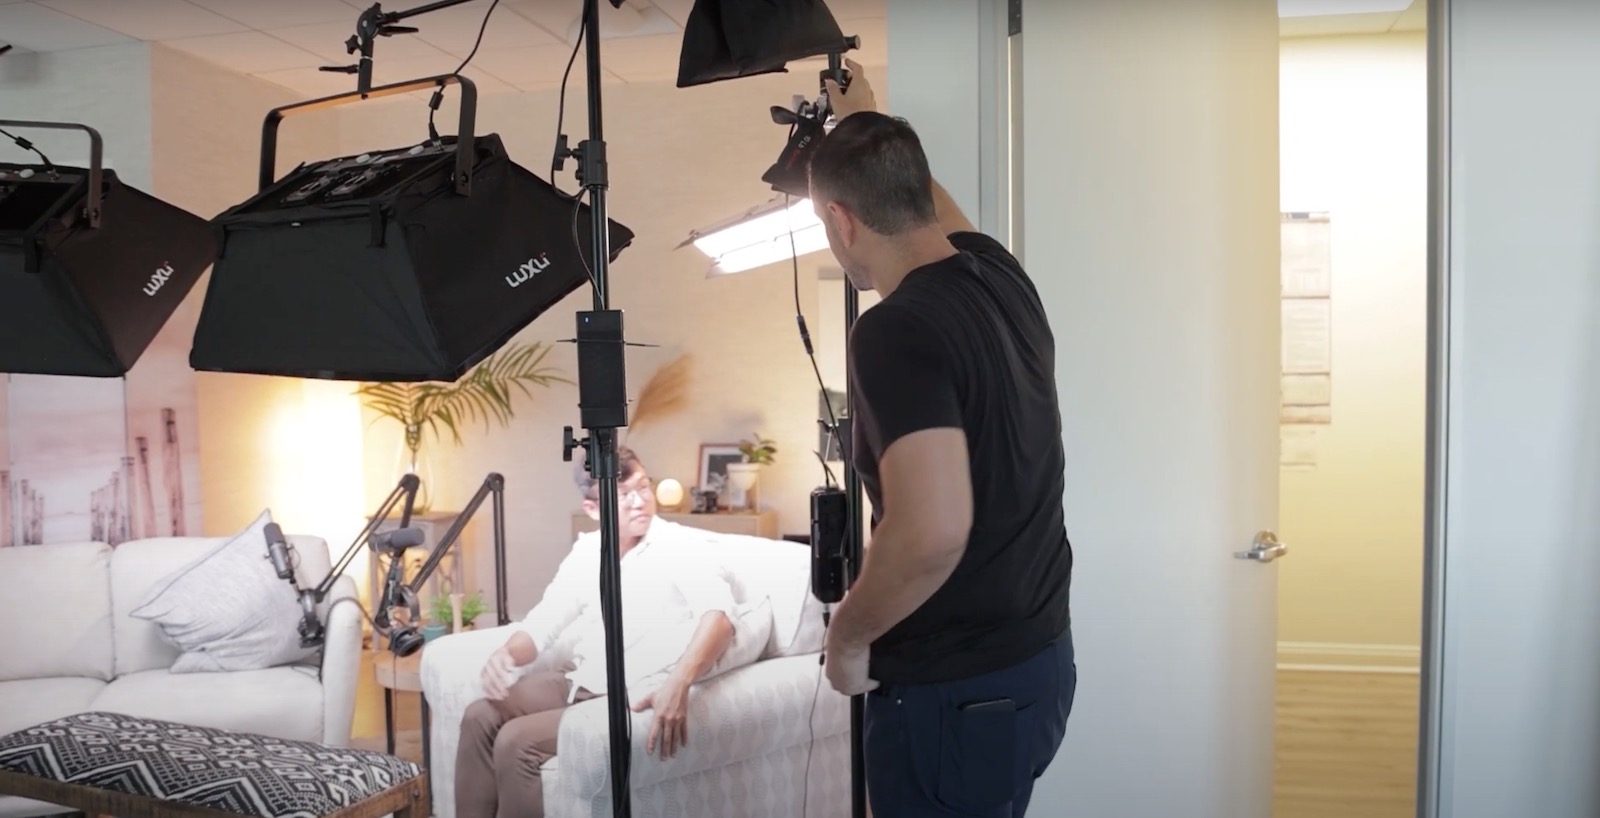
As you can see in the image above, the set location is a typical office space that doesn’t really lend itself to the vibe we wanted to create. To remedy this, we put up some simple wallpaper, added a couple of pieces of furniture, some sofas, and that’s pretty much it.

This gave the space the look of a home setting, but the overhead office lighting still didn’t create the right ambiance. So with the set design in place, let’s get into the process of lighting it.
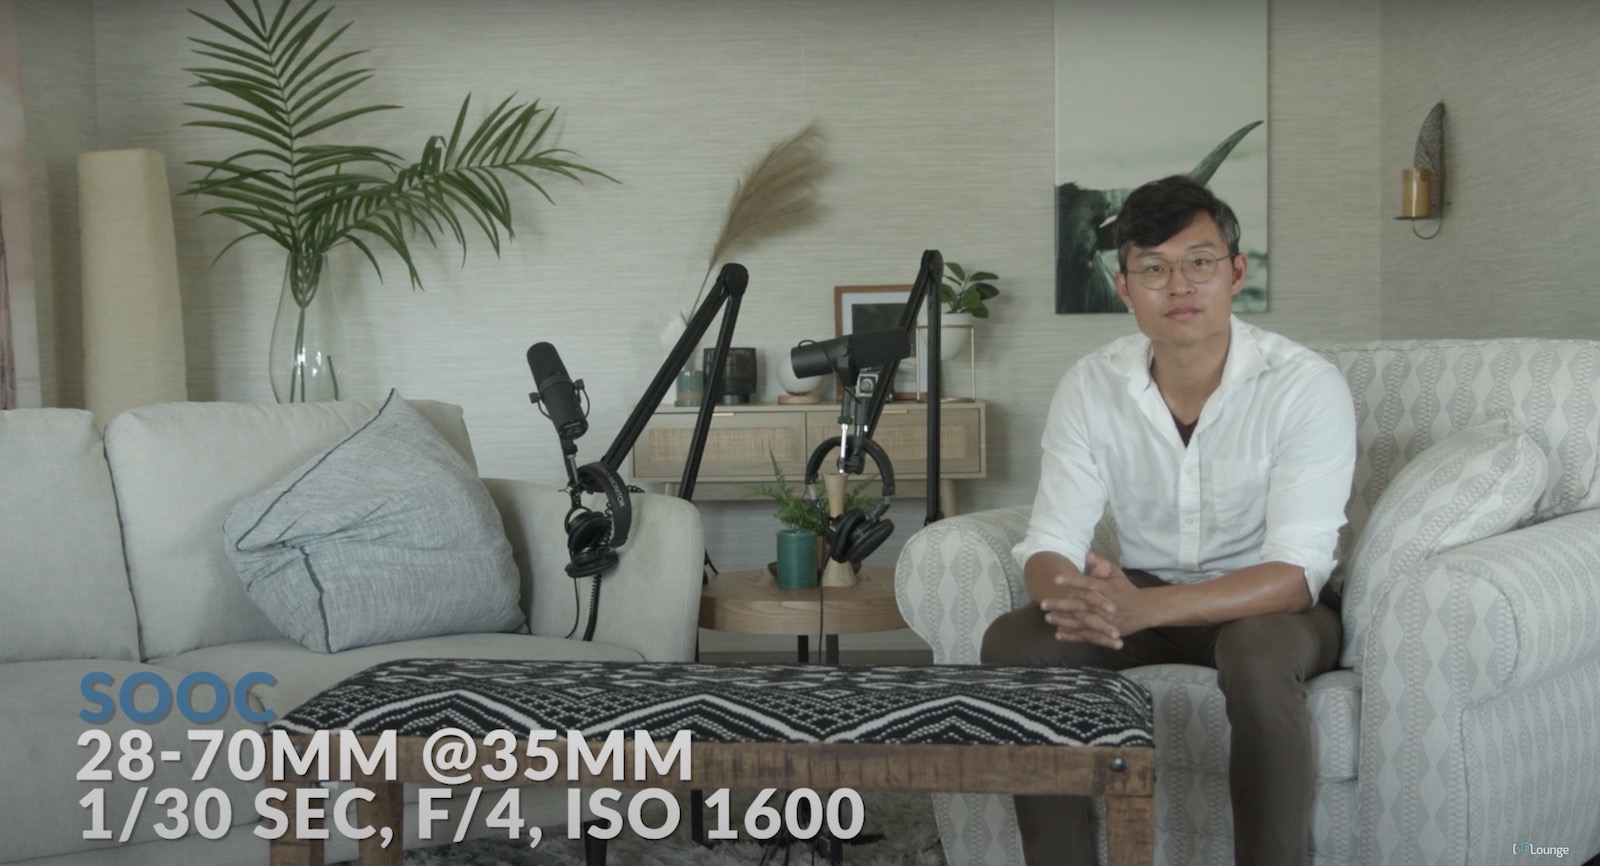
Step 1: Composition
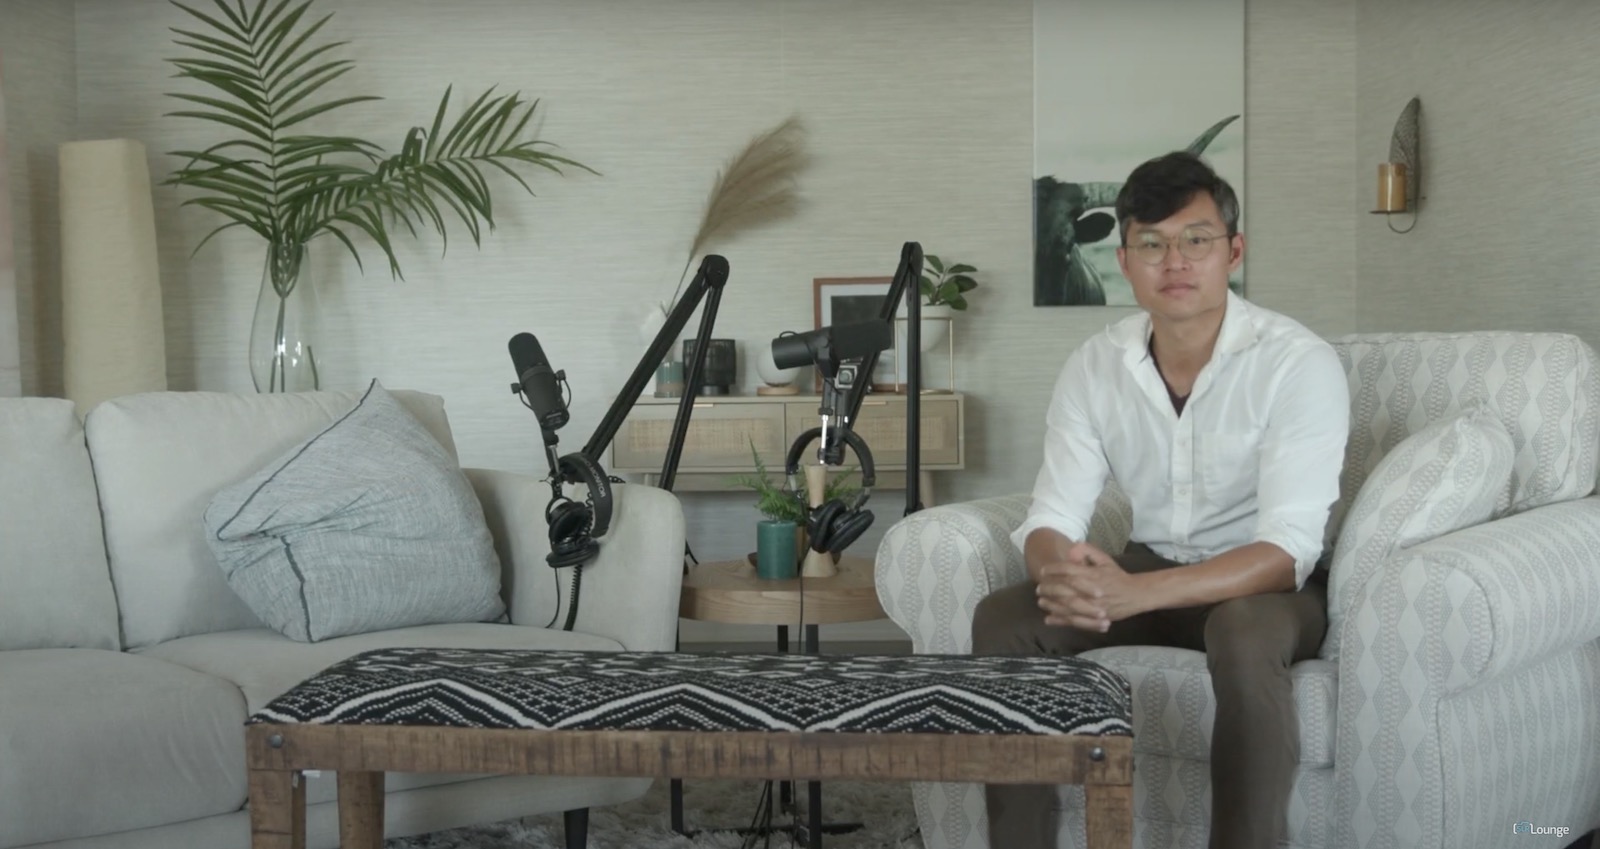
I always like to start with a rough idea of my composition. We placed a Canon C200 with a 24-70mm lens up on a tripod and started with a basic wide shot that framed the sofas and microphones. Keep in mind that you don’t have to perfect your composition right away, we just want a place to start so we can start placing lights in the right places. Exposing for ambient light, this is what the scene looks like without any added lighting.
Step 2: Ambient Light
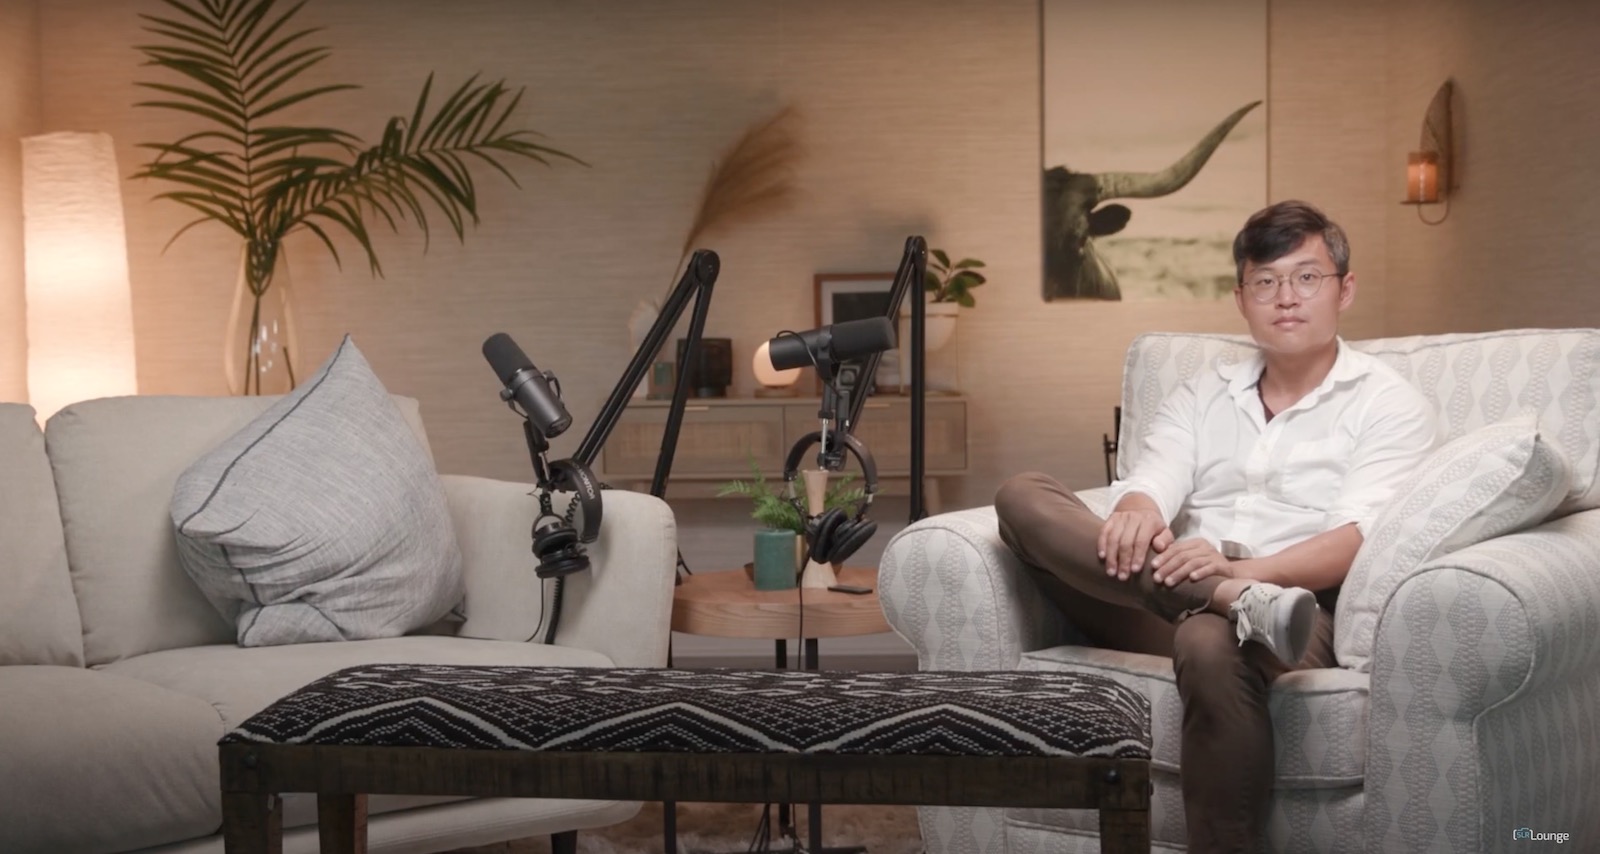
Step two is ambient light, but we haven’t yet placed any lights to create an ambiance. So this is where I like to place “practical lights” for environmental effect. Practicals are lights used on set that are both in the shot, but also add light to the scene. You can see the three lights in the picture below.
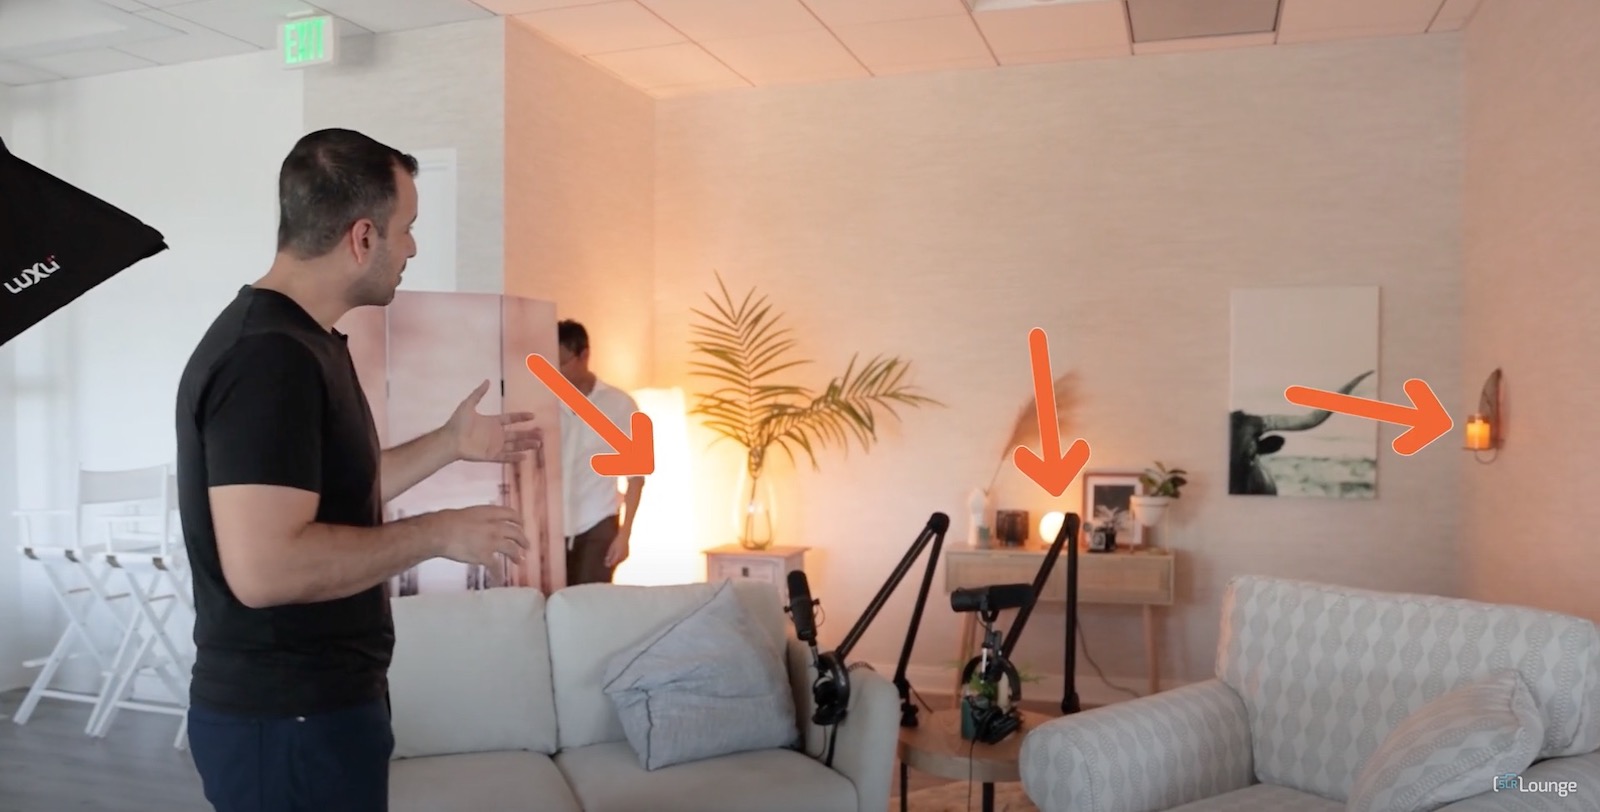
With these lights on, we can now dial in the camera’s ambient light exposure. This is where you’re setting the “intention” of the scene. If you want a more dramatic look and feel, go with a darker ambient exposure. On the flip side, a brighter ambient exposure will have a more light and natural vibe.
I wanted to aim for a darker evening sort of feel with a bit of warmth to the scene. So for this set, we started with ISO 1600, a shutter speed of 1/30, and an aperture of f/4. This felt like an appropriate starting place, although we knew we were going to make adjustments to better capture the vibe we were trying to create.
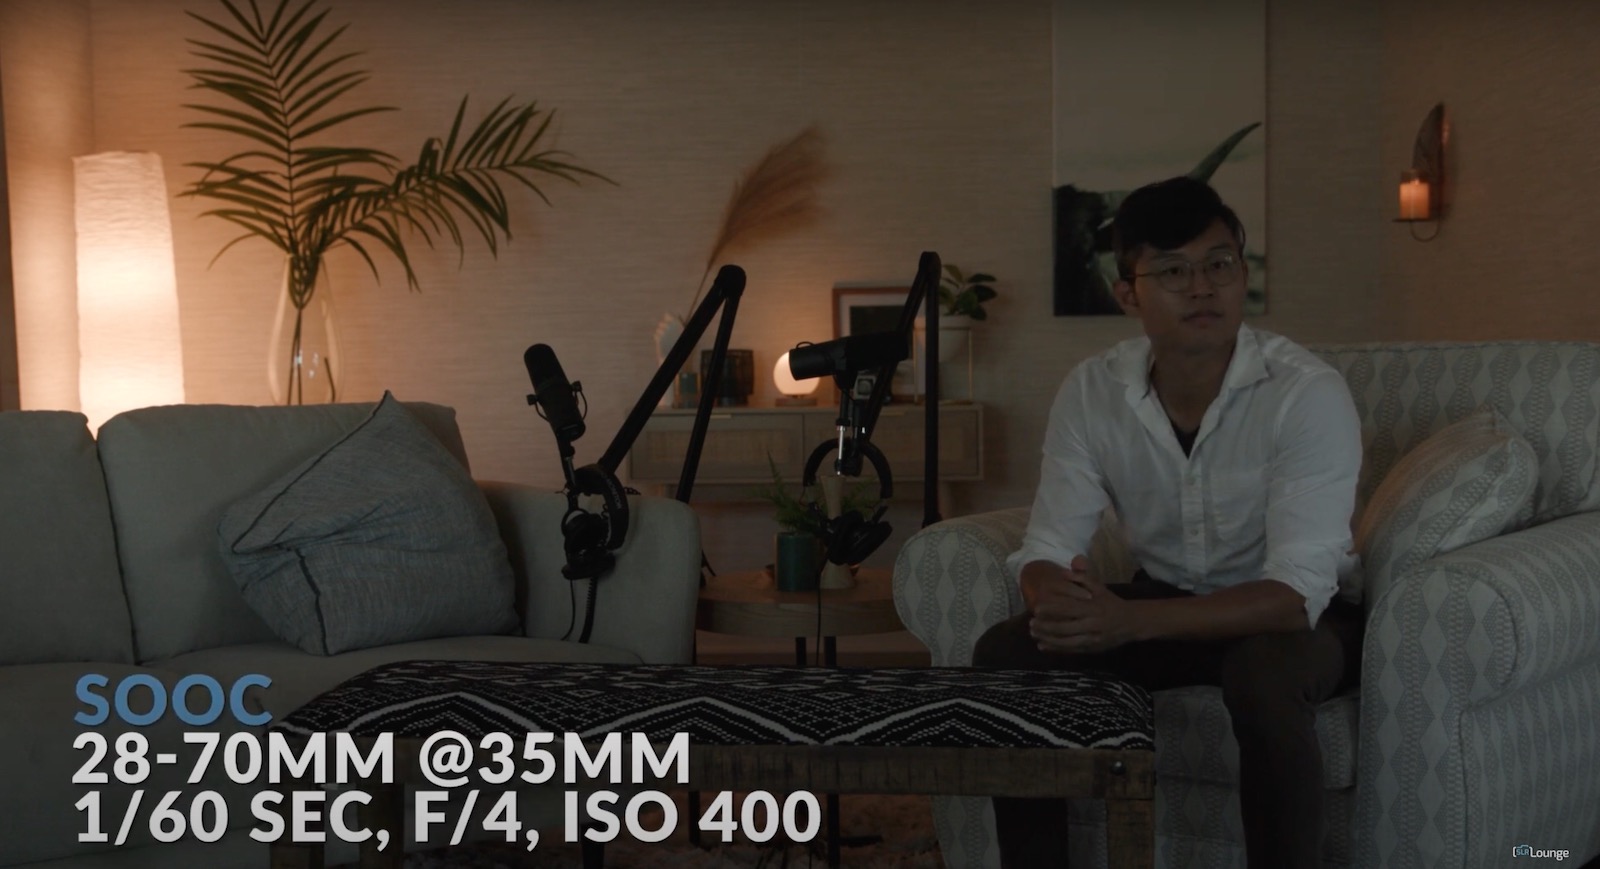
With the ambient exposure mostly dialed in, I like to check if we need any additional light sources to balance out the scene. In the picture above, I noticed the painting behind Anthony was a bit dark, so we added a 1×1 on the ground to light it up a bit as you see below.
The first light we added was a Luxli Timpani 1×1, just behind the chair on camera right. Our first priority with adding this light is to simply place the light and make sure it’s lighting the scene the way we want it. Then, when the light is positioned correctly, we can dial in the colors and other details.

One of my favorite features of this light is that Luxli has a “Composer” app with 150 digital filters that allow me to control all of the lighting adjustments from my phone, including the light color, intensity, and so on. It allows me to see the adjustments in real-time, which streamlines the process.
With the ambient light exposure set, this is where you have a clear picture of how to Modify/Add light to finish out lighting our subjects on the set.
Step 3: Modify/Add Light
Now, with our ambient light fully dialed in we can see the light that’s necessary for our subjects. In this case, we’ll be sitting on the sofas during the podcast, so that’s the place where we need to add light. When adding light for a photograph or video, it’s important to only add one light at a time. This keeps the process simple as you’re only controlling one variable with each change.
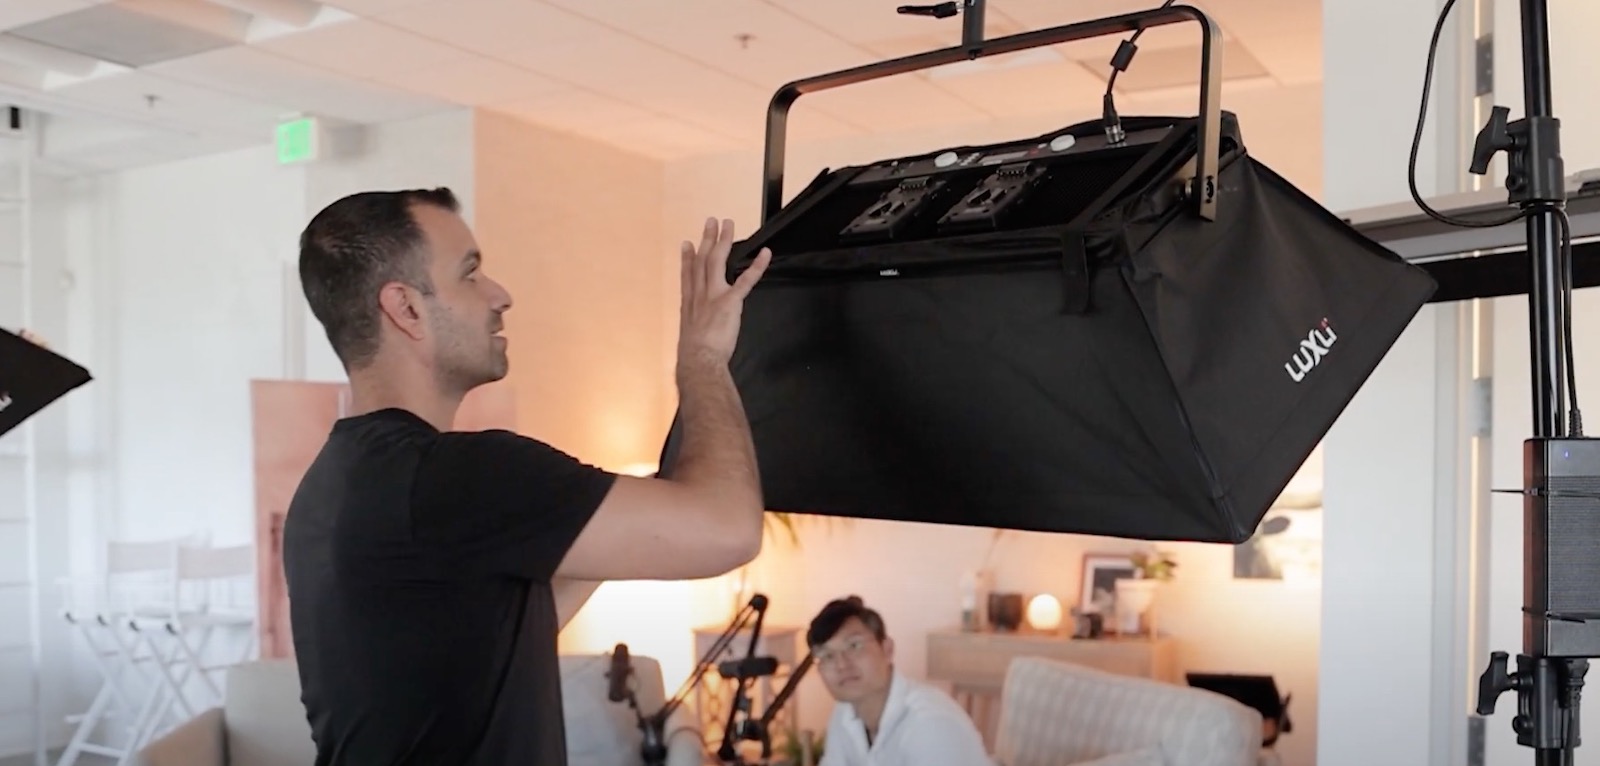
We started with a Luxli Taiko 1×2 in a corresponding softbox, and placed it on an Impact C-Stand. These lights might not fit within your budget, and that’s okay. You can also consider options like those we’ve included in our studio lighting guide at B&H. Luxli lights, which work with the app I mentioned earlier, make this lighting setup very convenient and easy to use if you have room in the budget to pick one up.
Grids
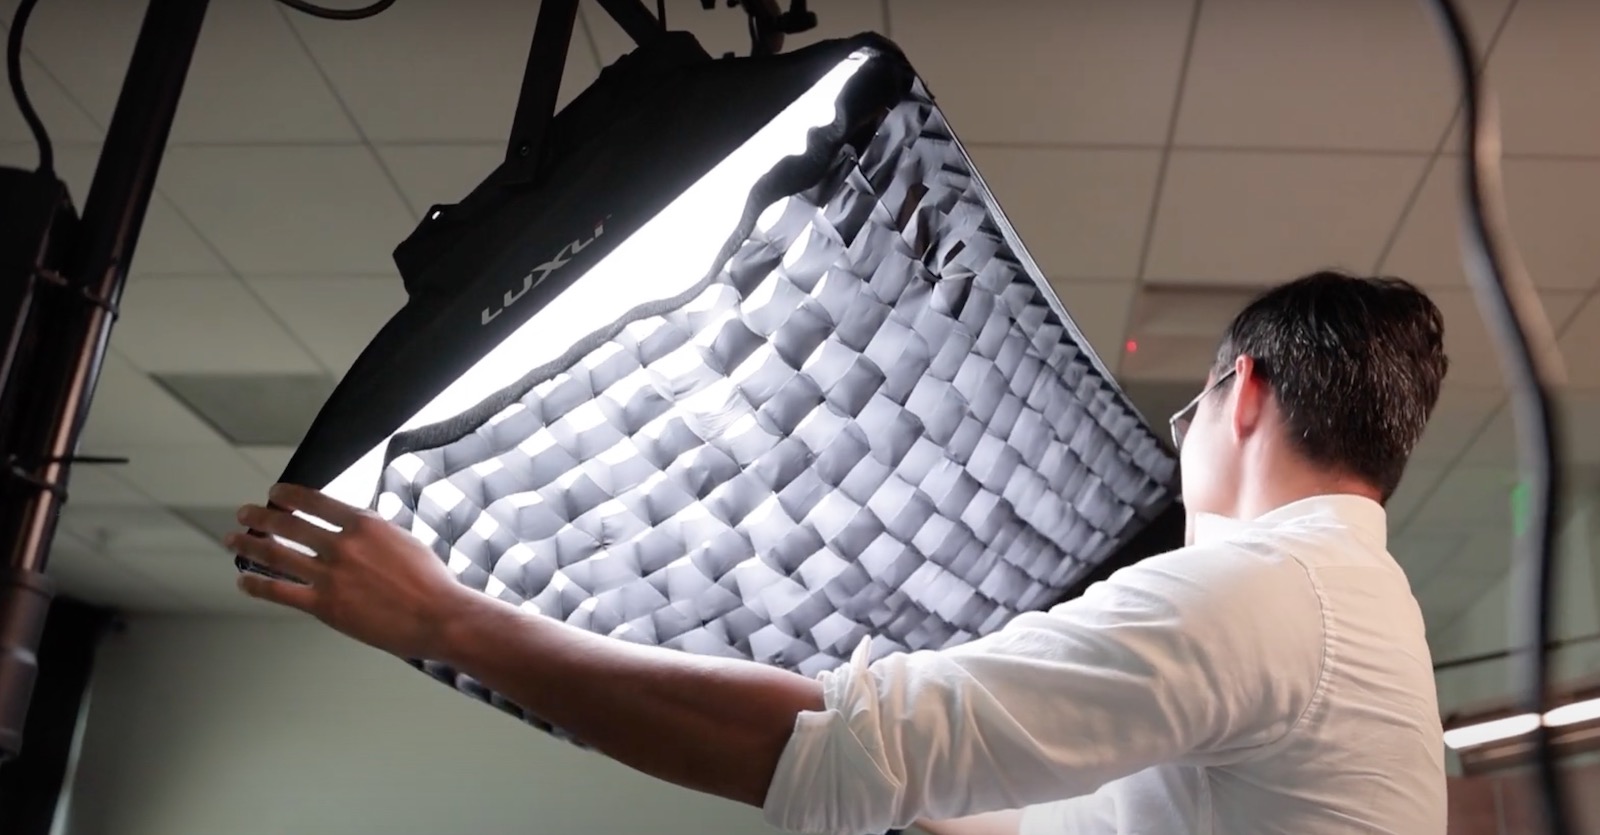
The added light looks great, but I found that too much light was spilling onto the background and affecting the overall ambiance of the room. The quick solution for this is to place a grid on the softbox.
A grid will help funnel the light directly onto the chair and minimize light spill. At the same time, however, grids also impact the intensity of the light.
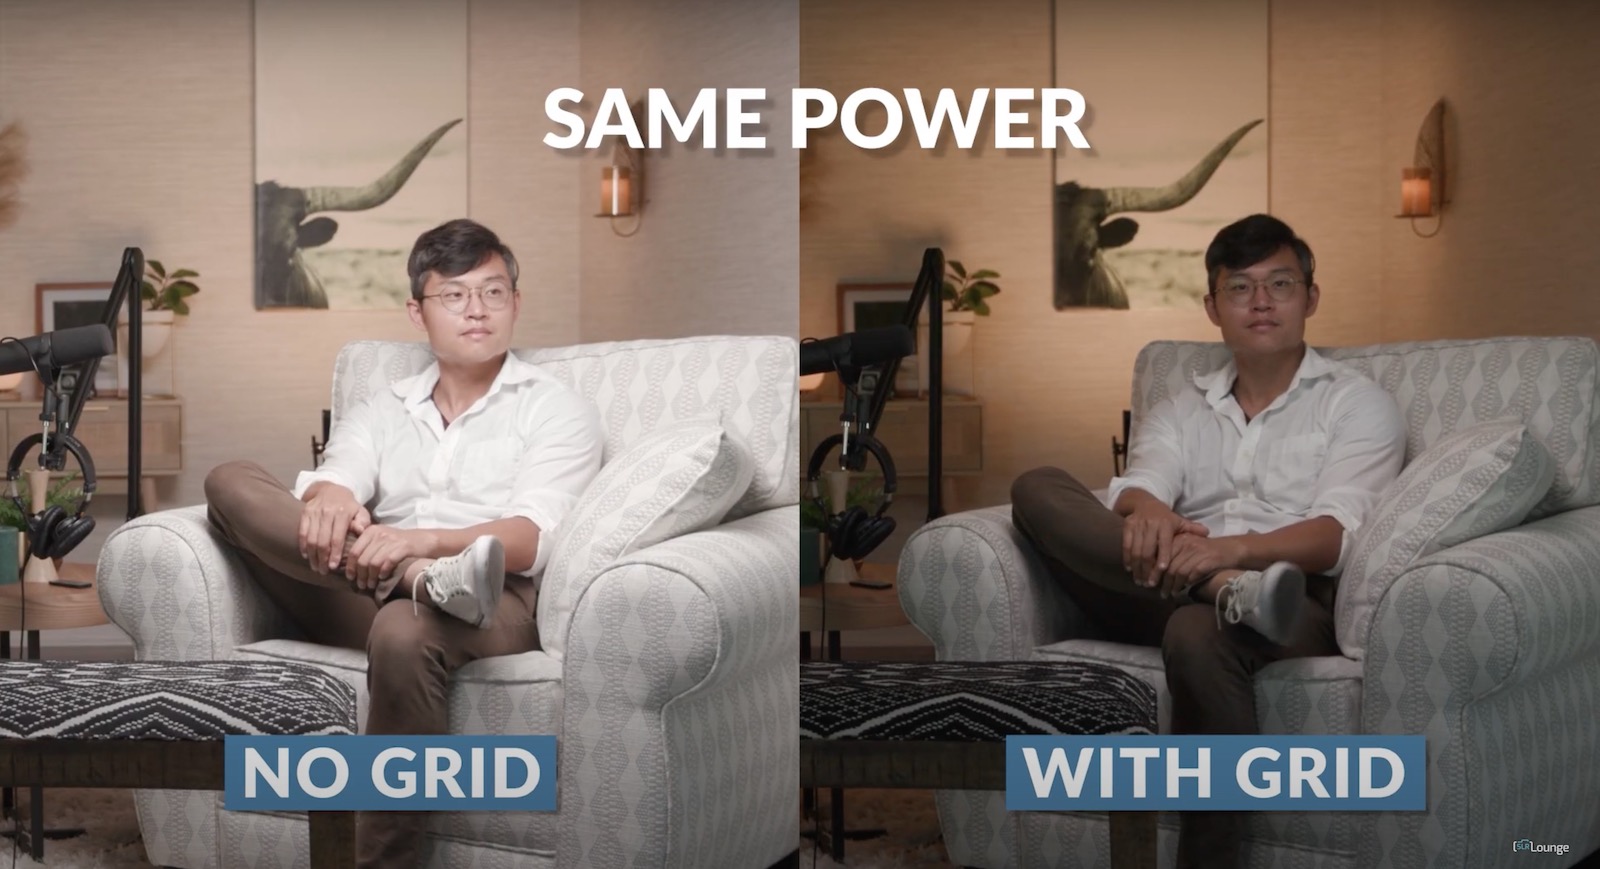
This means we’ll have to bump the power a bit to get the exposure up to where we want it (see the images above). A way to save time here is to place the grid on the softbox before you start adjusting the light intensity. A good rule of thumb when it comes to the brightness of your main light is to light your subject so they are a little brighter than your background as you see above.
Because we’re focusing on video lighting for YouTube or podcast sets, this time featuring a two-subject set design, we will duplicate what we’ve done above and set up another light in a similar fashion for the second subject.
Accent Light
Remember, we’re still in the Modify/Add step. After setting up our main lights, I decided I wanted to add an accent light to serve as a sort of rim light for the subjects in the scene. For this purpose, I brought in a Genaray SSL-36 strip light, which is an LED light that includes features like white balance control. I placed the light just over and behind the subject.

One of the reasons I love using LED lights is that they’re generally lighter and smaller in size, and they produce much less heat than other light sources. You can dial in the rim lighting to taste or avoid it altogether if you don’t feel it’s needed.
Also, it’s worth remembering to be mindful of the angle of your light source. You’ll want to angle it onto your subject to minimize light spill (which the grid will help with), but you don’t want to use too extreme of an angle, such as a top-down angle like midday sun that can cause issues with shadows for people with deeper inset eyes.
Step 4: Photograph…or Press Record
With everything in place, this is the time to fine-tune your setup! If you need to perfect your composition or make some adjustments to the lighting setup, this is the time to do it. When you’re done, the last step in the C.A.M.P. Framework is to pose and photograph, or in this instance, press record.
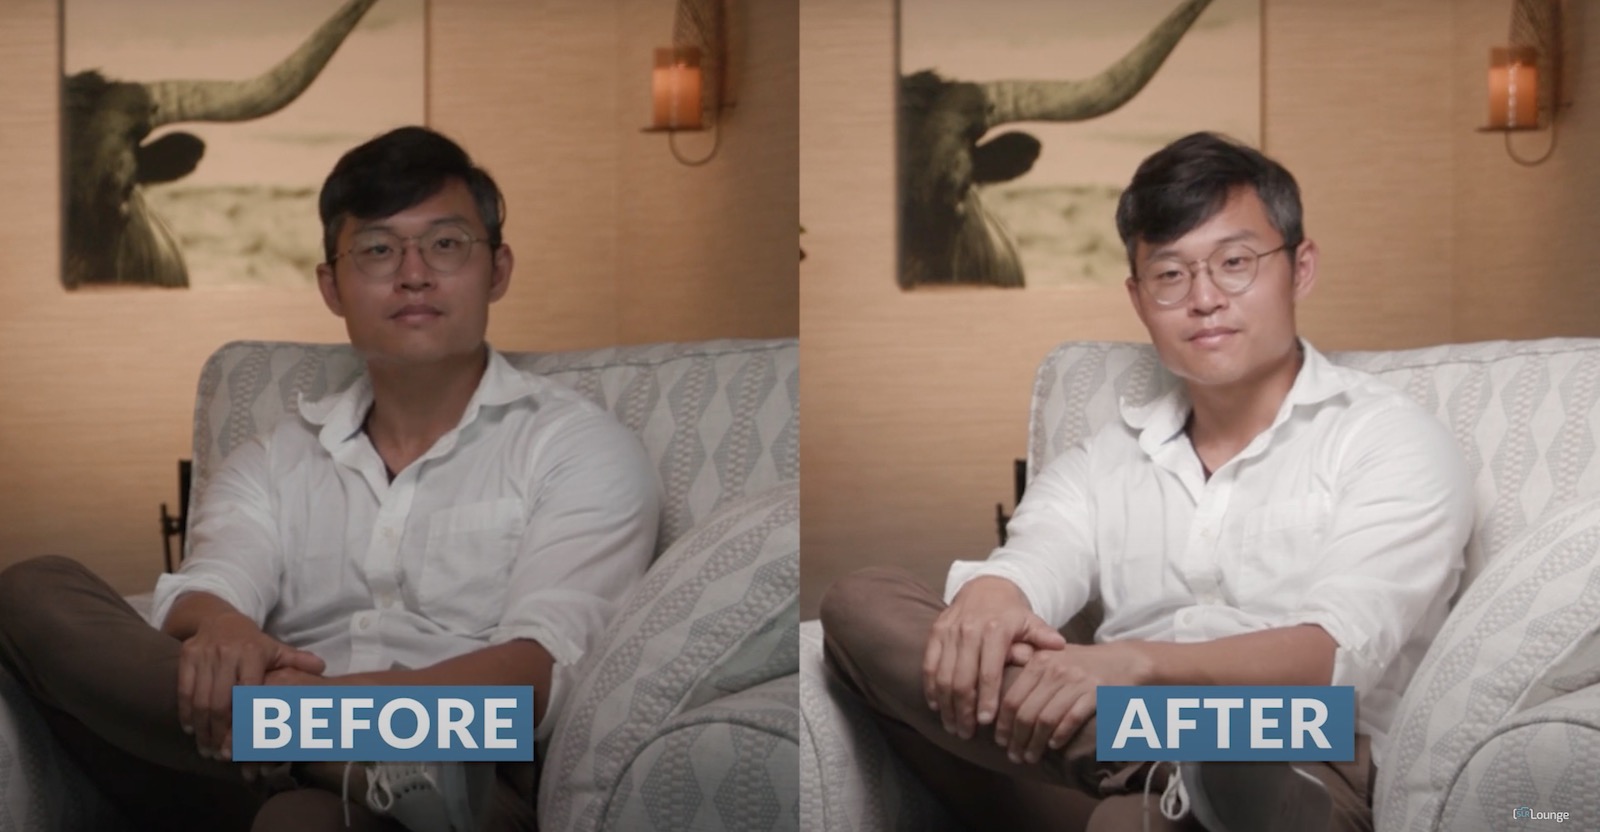
To fully illustrate the impact of these four steps on video lighting for YouTube or podcast sets, here’s a look at the before and after for the 12-Week Relationships Podcast.
Conclusion
I hope you enjoyed these four steps for mastering video lighting for YouTube or podcast sets. Remember, if you use the C.A.M.P. Framework when setting up your lights, you can get similar results, regardless of the actual gear you’re using. Be sure to check out our SLR Lounge Studio Build Store on B&H for the lighting gear we mentioned above as well as a host of other budget-friendly options. And, for more A-to-Z photography education, check out SLR Lounge Premium.


