Before you grab that flash, we want to show you 5 techniques that are guaranteed to level up your portrait photography using natural light.
1. Find A Shaded Spot
This one is easy, and most of us probably already do this. All we have to do is move our subject from the hard and unflattering direct light and bring them into the shade. Once there, face them towards a light source to create a soft and flattering flat light on their skin.
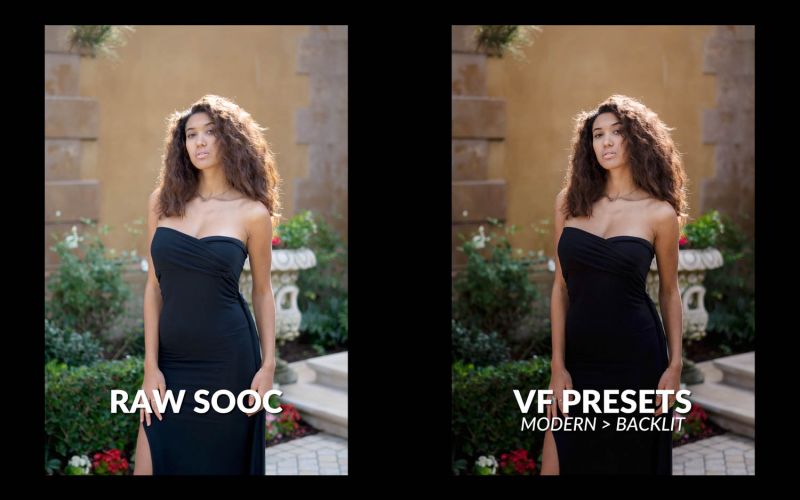
With just that quick adjustment you’ll be blown away with the difference in your image! Now we’ll just apply the Visual Flow Modern Soft Light Preset to finish up. This is by far the easiest and most frequent scenario for portrait photography using natural light because you can find shade pretty much anywhere.

[Related Reading: How to Light & Shoot a Dramatic Portrait by Yourself]
2. Refine Your Shade Lighting
Not all shade is equal. Now that your subject is standing in a great spot, place them into a position where you can find a natural hair light entering from the back of the scene, and then frame them against a darker background so that natural hair light really pops.

With this simple adjustment, you’ve technically setup a 3 light portrait using only natural light.

3. Scrim Hard Light
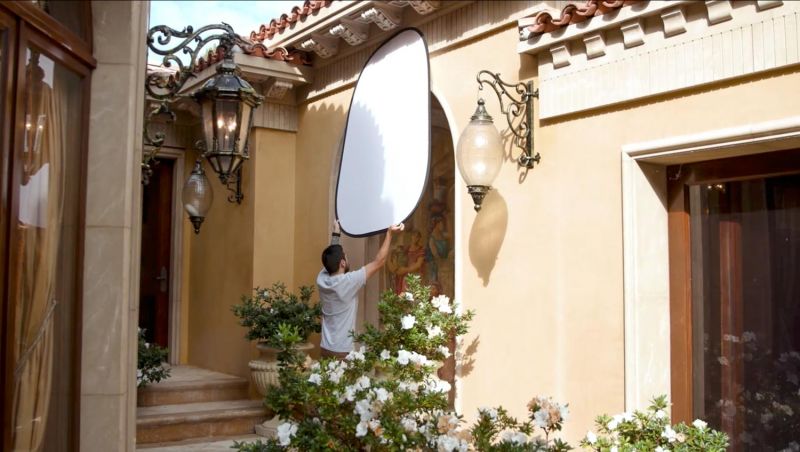
When you have a harsh and nasty hard light entering your scene, grab the scrim from your 5-in-1 reflector and flag off your light source. A scrim/reflector is going to be your best tool for portrait photography using natural light.
You can flag the light and use that scrim to turn the hard light source into a large key-light.

The only difference in this before and after is having that scrim in place! Now check it out with a quick V-Flow preset edit.

4. Scrim to Modify The Color / Modify with Bounce
Look for natural reflectors! If you’re shooting outside, there will be a lot of objects around that will naturally bounce light for you. Sometimes though, the color of the object or wall may be too warm, and as such, will affect the color of the light being bounced.

To clean up the light source, we’re using the white side of the same reflector as before to place against the wall, thus neutralizing the color of that warm light source.

[Related Reading: 6 Techniques to Create Great Images Anywhere]
5. You Don’t Always Need to Expose for Skin
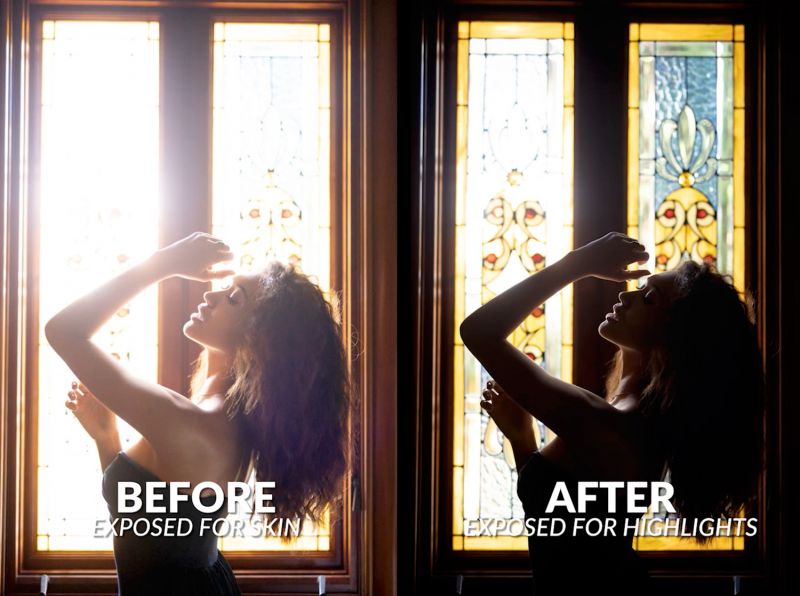
You don’t always need to have your shot bright and “properly” exposed for the skin. Sometimes you can just expose for the highlights and use the shadows to draw attention to form and figure.
Expose darker, use the highlights to create interesting silhouettes, and don’t be afraid to play!
If you enjoyed this video teaching you techniques on portrait photography using natural light and want to see more like it, please let us know in the comments below. Also, if you’re interested in more photography education, check out our world-class library of workshops, all of which are included as part of SLR Lounge Premium. For more information on a wide range of lighting techniques, don’t miss our Flash Photography Training System, a go-to collection of four lighting courses that will teach you how to use flash on and off the camera with expert precision using the gear you have available.


Get Connected!