
Lighting with intention is a cornerstone of good portrait photography. Lighting shapes the subject, sets the mood, and can turn an ordinary scene into a piece of art. In this guide, we’ll break down the fundamentals of effective portrait lighting, teaching photographers at any level to capture stunning portraits. Understanding these principles is paramount, as they serve as the building blocks for crafting not just images, but stories. Light, in its various forms and colors, carries the power to evoke emotions, highlight beauty, and sculpt the space within which the subject resides.
1. Understand the 5 Portrait Lighting Setups
J.P. Morgan from the The Slanted Lens shares the fundamental lighting positions. If you’re learning for the first time or revisiting the topic, this is worth the time. None of these setups is a golden rule. As Morgan demonstrates, you have the liberty to bend the rules of each technique to your vision.
LED Light used in the video: Aputure 120D – $645
1 – REMBRANDT LIGHTING
 Bearing the name of the famous painter who invented it, this lighting technique is recognizable because it leaves a triangle of light under the subject left eye.
2 – SPLIT LIGHTING
 Split lighting will light half the face and leave the rest in shadow and create a moody image. This is also one the techniques that give you more room to bend the rules, as you have leeway to fill the shadows with a reflector as little or as much as you want.
3 – BROAD LIGHTING
 This approach will have you position the portion of your model’s face closet to the camera. This technique also gives you plenty of shadows to play with in your image.
4 – PARAMOUNT LIGHT
 Also known as the Paramount light, calls placing your light higher above your subject which causes your subject’s nose to cast a shadow underneath that resembles a butterfly. It is particularly flattering to women because it evenly lights the face and defines the cheekbones.
5 – LOOP LIGHT
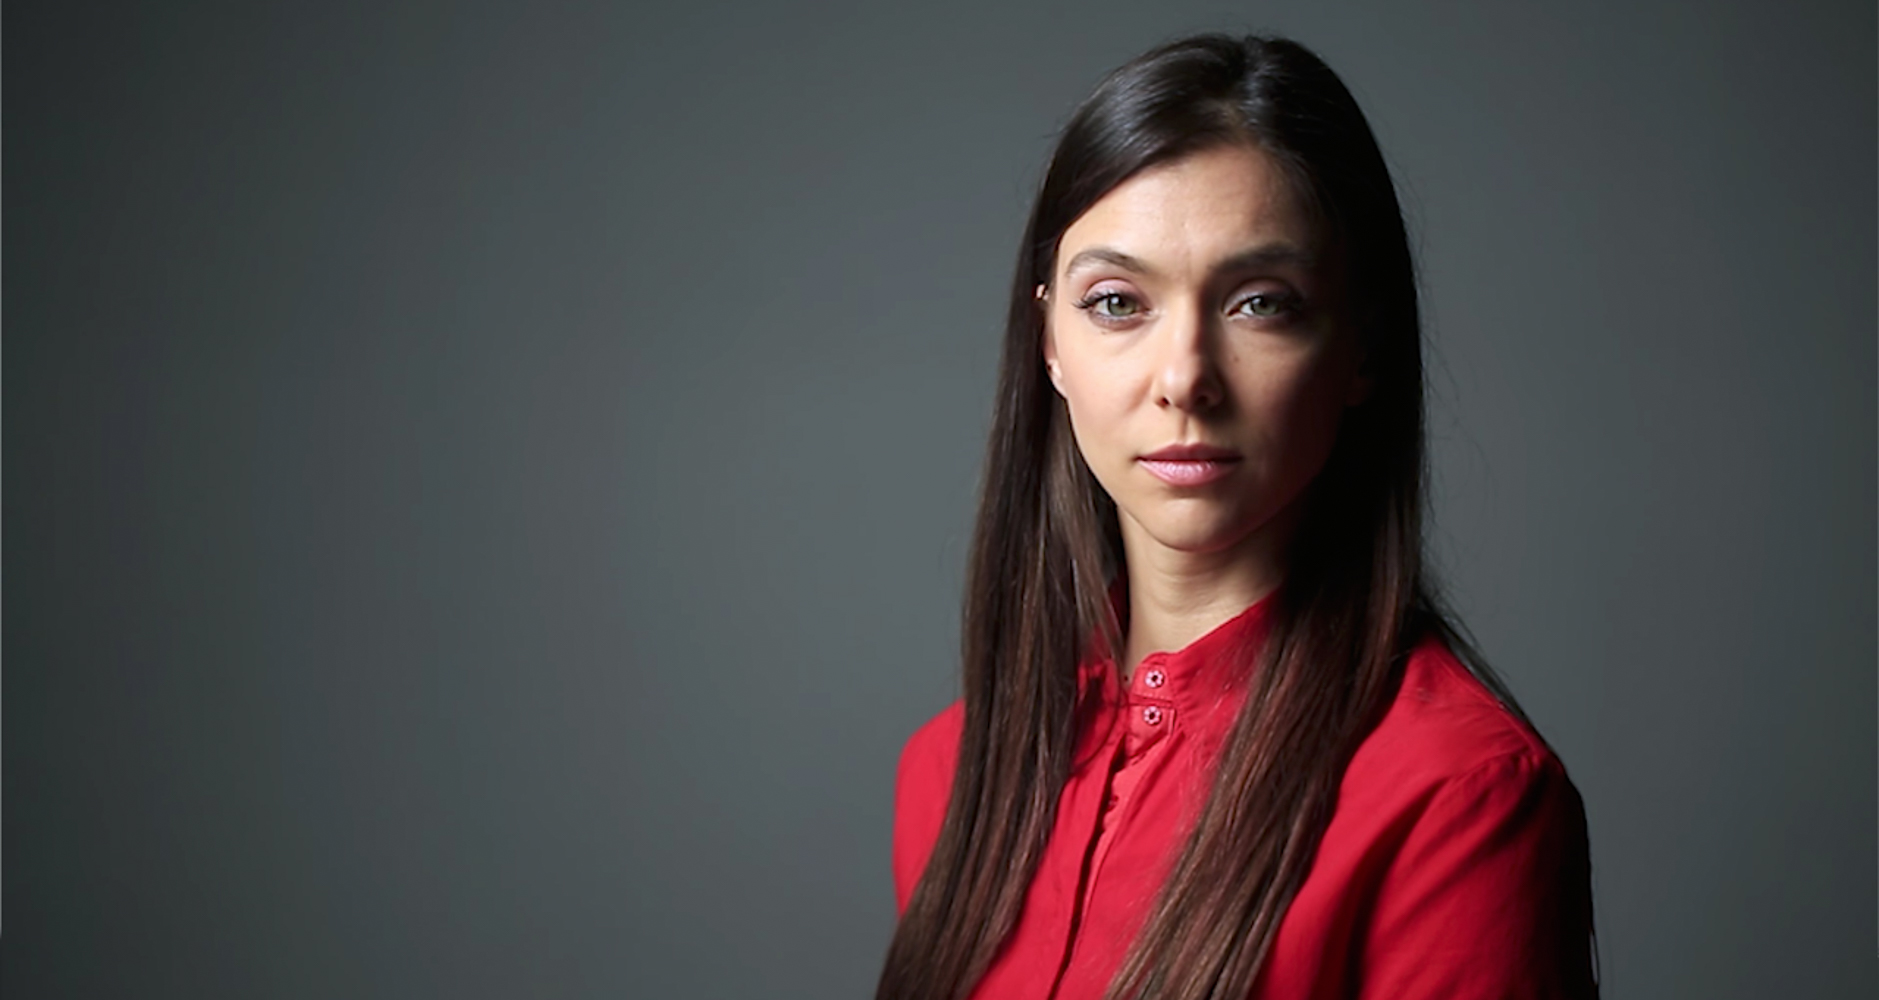 The Loop light is very similar to the Rembrandt, however, it doesn’t result in the triangle highlight under the left eye. You’ll see triangle start to form, but the highlight will not be closed. For more information, see our full article on key lighting patterns.
2. Learn the “Hand Test” For Finding the Light Direction
Even with very minimal sunlight, there is always light direction. Simply hold out your hand in front of your face and turn and study the direction of light wherever you are and to see where the falls onto your hand. Although you may look like a crazy person for a couple of seconds, it is a useful portrait photography lighting trick to avoid unflattering shadows.
Portrait lighting tip: Learn to work with the shadows and use hard light as your key light source instead of placing your subjects’ backs to the sun.
3. Learn How to Use a Reflector

Reflectors are easily the best modifier/lighting tool that portrait photographers can have on hand. With the ability to modify light in more than one way, you are already receiving an invaluable portrait photography lighting tool for an inexpensive price. Check out the top 10 reasons why every photographer should a reflector. Portrait lighting tip: Use the silver side reflector layered with a scrim on top to get a more diffused fill light.
4. Use Hard Light to Separate Subjects from Backgrounds
A light that qualifies as soft or hard is quite simple, it is the transition from light to shadow on a subject. If the transition is sharp and quick like in the pictures above, then it is a hard light. This sharpness can be clearly distinguished from the shadow under the chin. Using available hard light can help create separation from the background as well as a more editorial, edgy feel.
Portrait lighting tip: Differentiate between hard light and the other light qualities by watching this quick video.
Use Colored Gels in Your Portrait Lighting
Gear used in this video: Rotolight AEOS II LED Lights, Canon EOS R5 with the RF 28-70mm f/2L lens. dive in. Here’s how to get the light you see in the video.

- Placed the first light, set to blue, on camera-left.
- Consider using a V Flat for fill
- Set the second Rotolight to red and place it on the opposite side of of the model, aimed to light up both the model and the background.


Tweak the settings and positioning of the lights to your liking for your own complementary color portraits, and then start photographing!
Conclusion
Portrait lighting is an art that requires patience, practice, and a willingness to experiment. This guide has laid the foundation, but the journey to mastering lighting is personal and ongoing. Embrace the learning process, experiment with different techniques, and develop your unique style. Remember, the goal is not just to illuminate your subject but to bring your creative vision to life.
Be sure to check more lighting techniques in the links below. For more in-depth learning on lighting, check out the Lighting 101 course in SLR Lounge Premium.


Get Connected!