Most portrait photographers spend the bulk of their attention on posing and expression — and for good reason. But light placement is what separates a flattering portrait from a forgettable one. Specifically, where you position your key light determines the shadows on your subject’s face, which controls mood, drama, and how flattering the image actually feels.
This guide covers the five core portrait lighting patterns every photographer needs in their toolkit, how to position each one, when to use them, and how to put them into practice with one-light modifier setups you can build in under 10 minutes. We teach these same patterns in detail across our studio and on-location work at Lin and Jirsa Photography, and they form the foundation of almost every portrait lighting decision we make.
5 primary key light patterns: video overview
Watch the video below for a visual walkthrough of all five patterns and the purpose behind each one.
The 5 portrait lighting patterns
Think of these five patterns as a spectrum. On one end, flat lighting casts almost no shadows and produces the softest, most flattering result. On the other end, split lighting divides the face dramatically between light and dark. Everything between is a matter of how far you rotate the key light around your subject’s face.
1. Flat lighting
Flat lighting places the key light directly in front of the subject, at the same angle as the lens. The result: minimal shadows, softened skin texture, and a look that fills in lines and imperfections more effectively than any other pattern. Of all five, flat lighting is generally the most universally flattering.
Position the light so it lies “flat” on the face — same horizontal plane as the lens, angled in from slightly above. Lighting from dead-on at eye level works, but lighting from slightly above is almost always more natural. Lighting from below creates an unflattering, unnatural look that you want to avoid.


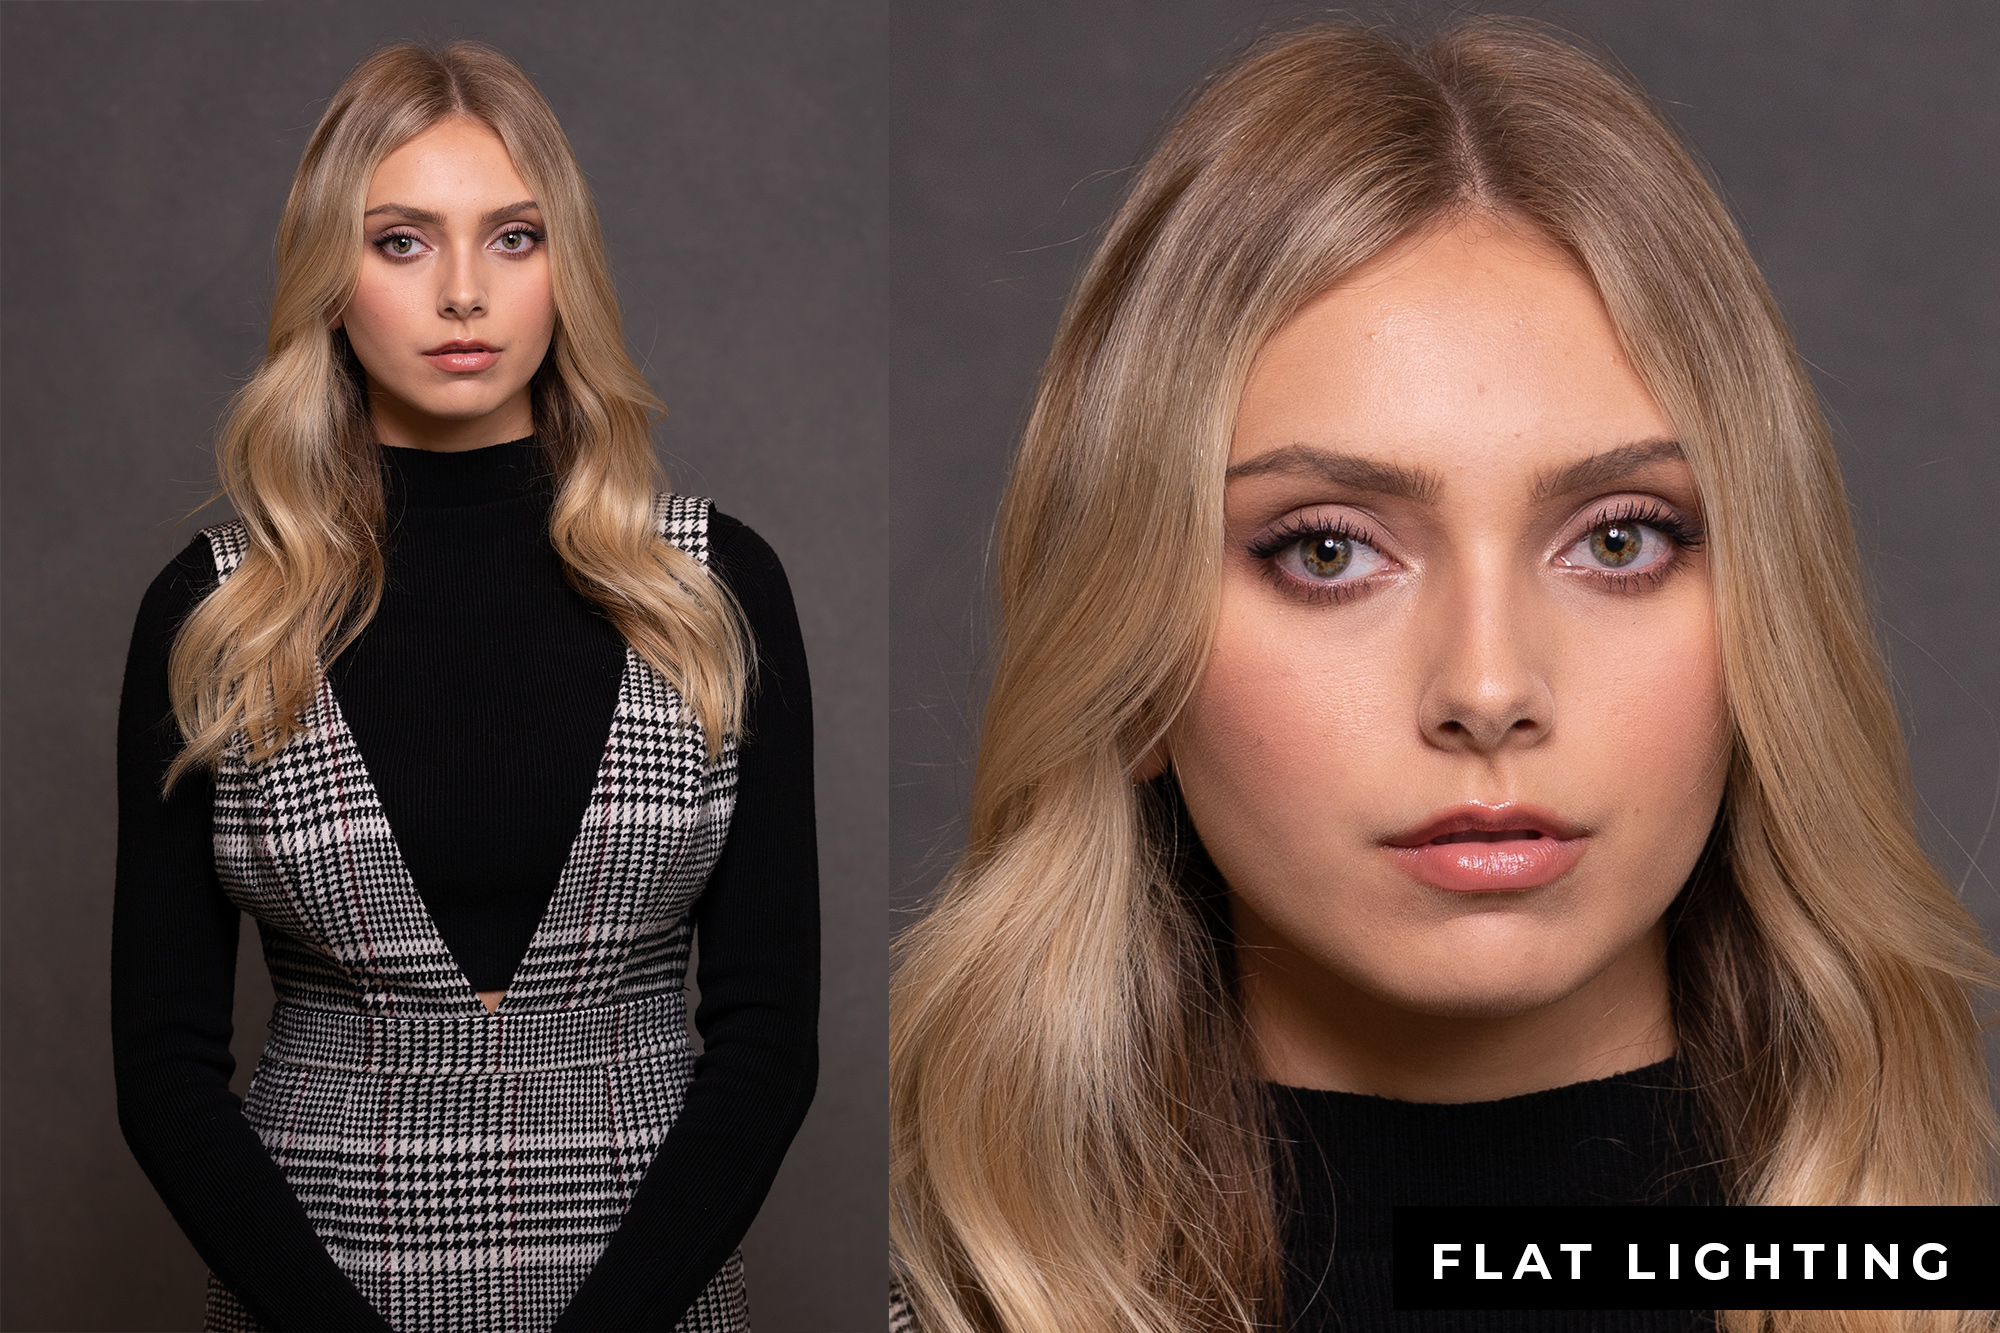

Camera settings reference: 1/200, f/4, ISO 100 | Flash Power = 1/8
Best for: Headshots, beauty and glamour editorial, any subject who wants skin looking its smoothest. Because flat lighting fills wrinkles and softens skin texture, it’s the default choice for fashion and beauty work. If a subject is self-conscious about skin imperfections, start here.
2. Butterfly lighting (Paramount lighting)
Butterfly lighting starts from the same front-facing position as flat light, then the key light gets raised until you see a small butterfly-shaped shadow appear directly below the nose. That shadow is the tell — it’s where this pattern gets its name.
It’s also called Paramount lighting, and that name has a real history behind it. Paramount Studios used this pattern almost exclusively for celebrity headshots in the 20th century. The slightly elevated angle adds just enough shadow under the cheeks and chin to create contour and definition, while still remaining flattering and front-facing.


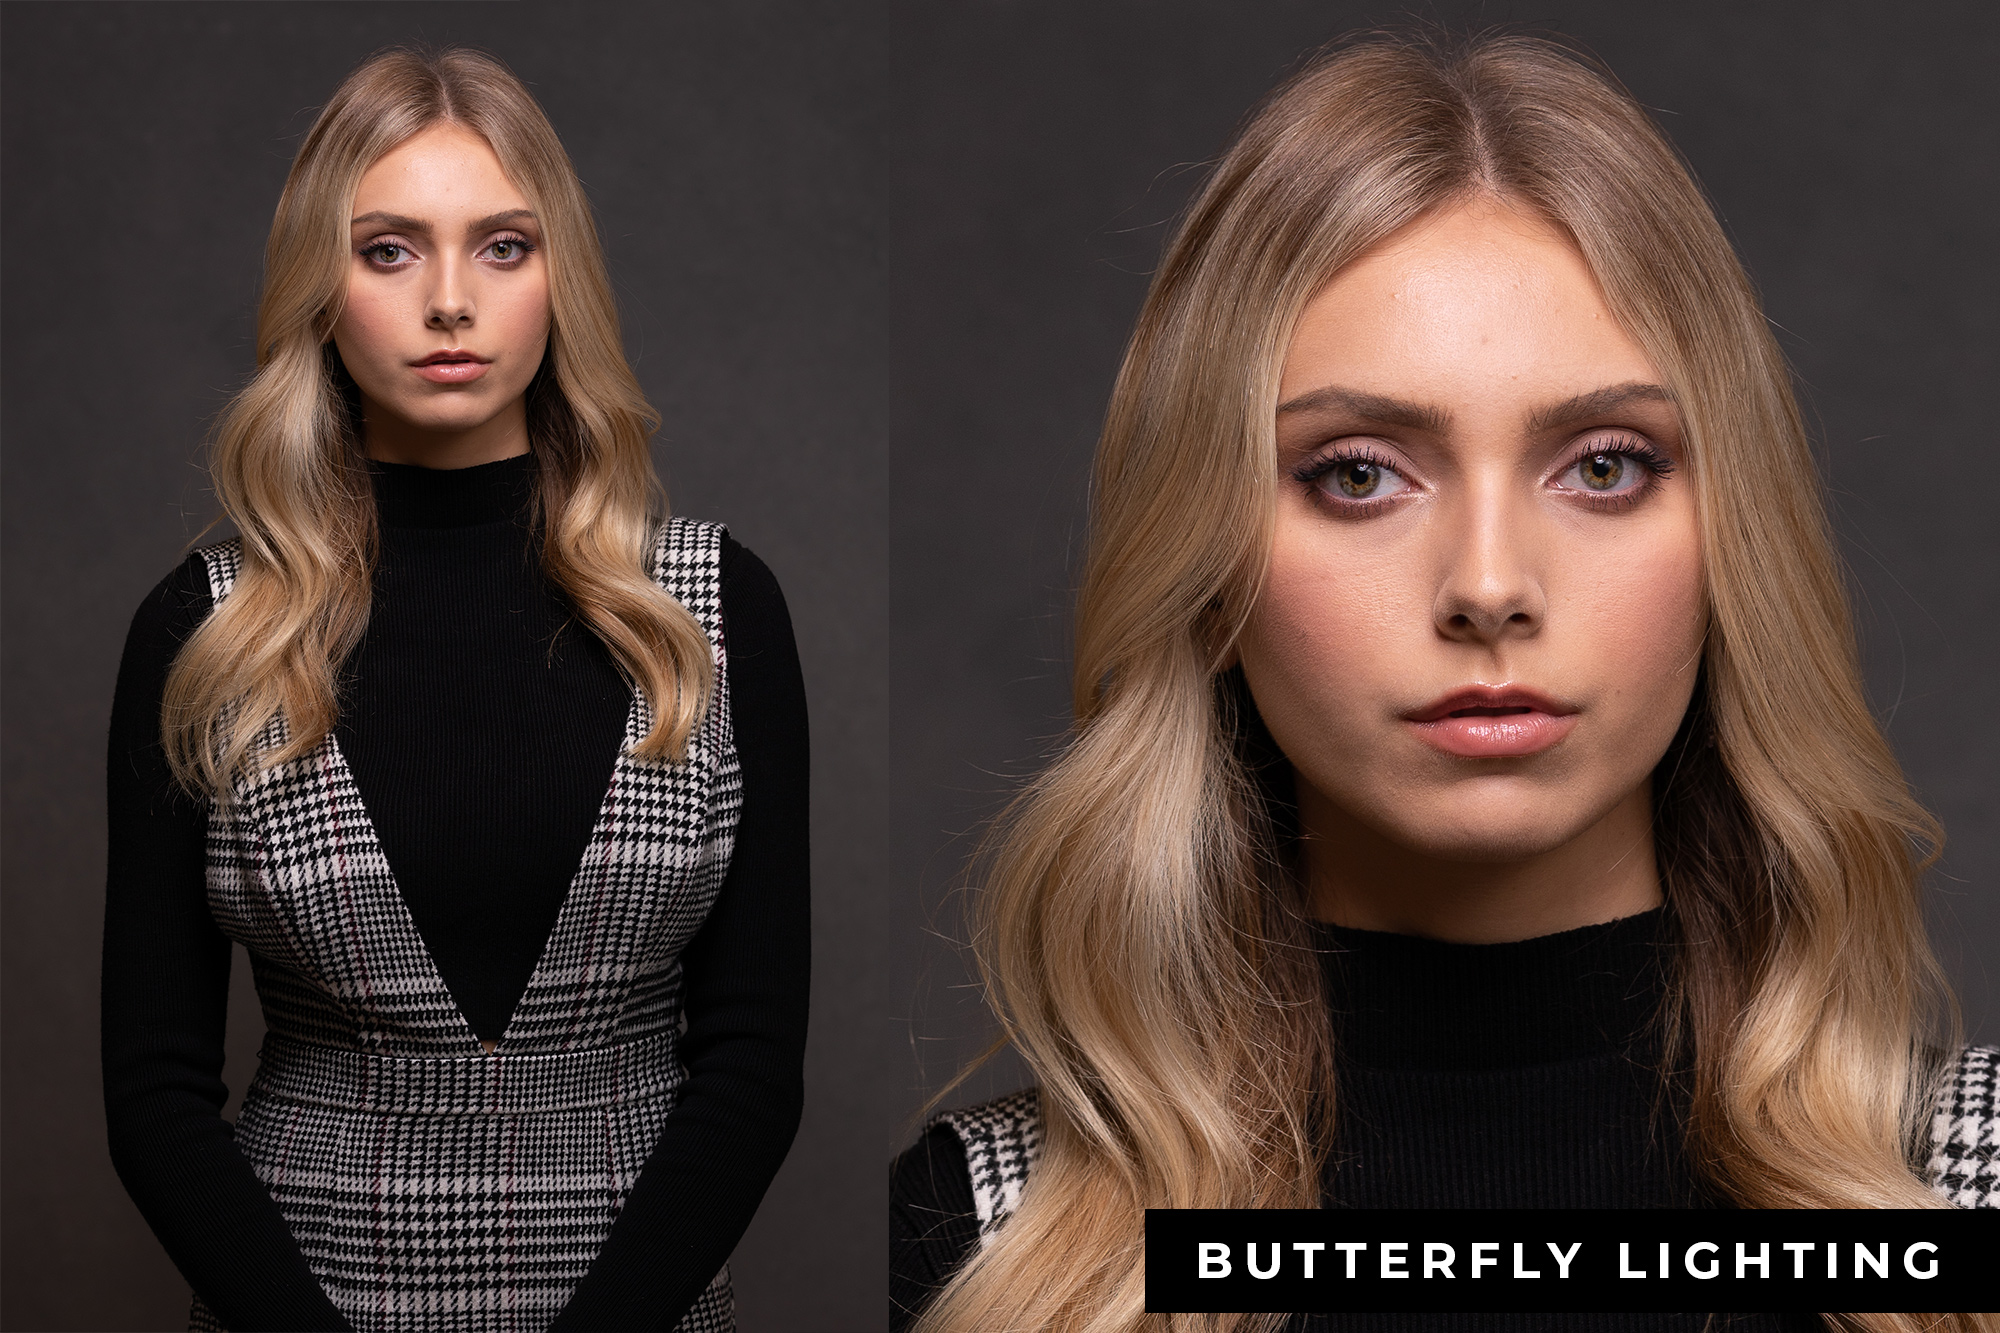

Camera settings reference: 1/200, f/4, ISO 100 | Flash Power = 1/8

Best for: Beauty shots, especially with a reflector added underneath to fill the chin shadow. The combination of a high key light and a low reflector is sometimes called clamshell lighting — we cover that setup in the one-light section below. This pattern also works well for subjects with strong cheekbones, as the slight downward angle from above accentuates them naturally.
3. Loop lighting
Loop lighting is probably the most commonly used pattern in portrait photography, and for good reason. It sits right in the middle of the dramatic spectrum — enough shadow to define the face, not so much that it feels heavy.
To get there from butterfly, move the light roughly 25 to 50 degrees to the left or right of the subject’s face while keeping it angled slightly downward. The shadow of the nose will drop and shift, creating a small loop-shaped shadow on the cheek. That shadow, along with the directional falloff on one side of the face, gives you definition without losing the overall brightness of the portrait.


Camera settings reference: 1/200, f/4, ISO 100 | Flash Power = 1/8

One practical advantage of loop lighting: the directional angle lets you favor a subject’s preferred side of their face. Position the key light so the lit side is the side they want featured. The shadow falls on the other side — which tends to minimize asymmetry rather than draw attention to it.
Also worth noting: the intensity of the shadows in any of these patterns is partly controlled by your fill light. With little or no fill, the shadows run deep. Add a reflector or a low-power fill light and those same shadows soften considerably. The pattern stays the same; the drama dial is in your hands.
Best for: General-purpose portraiture, environmental portraits, outdoor sessions, and anytime you want a balanced, three-dimensional look without going fully dramatic. This is the pattern we default to most often at Lin and Jirsa for outdoor bridal portrait sessions.
4. Rembrandt lighting
Rembrandt lighting takes its name from the Dutch master painter who used this exact light quality in many of his portraits. The distinguishing feature is a triangle of light that appears on the cheekbone and eye of the shadowed side of the face. It’s a specific, identifiable shape — and achieving it requires the nose shadow and the cheek shadow to just barely connect.
From the loop position, continue rotating the key light around the subject until the shadow from the nose reaches and touches the shadow on the far cheek. At that point, a triangle of light should be visible on the far cheekbone and eye. Fine-tune it by adjusting the subject’s face angle: turning slightly toward the light increases the triangle, turning slightly away reduces it.


Camera settings reference: 1/200, f/4, ISO 100 | Flash Power = 1/8


Rembrandt is the pattern many of us land on as a personal favorite — it’s dramatic without being harsh, and the triangle of light on the far cheek adds visual interest that flat and loop can’t match. It’s also the pattern most commonly used in athletic portraiture, where you want the subject to look strong and defined rather than soft and commercial.
Best for: Dramatic portraits, athletic portraits, editorial and fine-art work. Also strong for male portraiture, where deeper shadows tend to read as strength rather than harshness.
5. Split lighting
Split lighting is the most dramatic pattern on the list. The key light moves to 90 degrees — directly to the side of the subject’s face — and divides the face cleanly down the middle. One half is fully lit, the other fully in shadow. There’s no Rembrandt triangle, no gradual falloff. Just light on one side and dark on the other.
Because of that hard divide, split lighting exaggerates texture and definition. The same wrinkles and skin details that flat lighting fills in, split lighting makes more pronounced. Used intentionally, that’s a feature — it’s exactly why this pattern works for athletic portraits that emphasize muscle definition and physical presence.


Camera settings reference: 1/200, f/4, ISO 100 | Flash Power = 1/8
That said, split lighting is not well-suited to wedding or general commercial portrait work. The intensity reads as confrontational in contexts where you want warmth. Use it deliberately, with a clear creative reason — not as a default.
Best for: Athletic portraits, editorial and conceptual work, light-versus-dark imagery, and any situation where drama is the point.
Short vs. broad lighting: one more variable to control

The five patterns above describe where the light is positioned relative to the subject’s face. Short and broad lighting describe which side of a turned face the light is hitting — and the difference has a significant effect on how the subject’s face reads in the final image.
Short lighting illuminates the side of the face farthest from the camera. Because that side is narrower in the frame, short lighting makes the face appear slimmer. Most portrait photographers default to short lighting for this reason — it tends to be more flattering across a wider range of face shapes.
Broad lighting illuminates the side of the face closest to the camera. That side takes up more of the frame, so the face appears wider. It has its uses — particularly for subjects with very narrow faces — but it’s less commonly chosen as a default.
In our experience, any of the five patterns above can be applied as either short or broad lighting. The pattern controls the shadow shape; short vs. broad controls the face’s apparent width. Both decisions together determine how flattering the final portrait is.
Light angle: one practical rule worth remembering

Regardless of which pattern you’re using, keep the light source positioned roughly one foot above the subject’s eye level and angled slightly downward. This replicates the natural direction of light we’re conditioned to see — sunlight, overhead fixtures, windows — and the brain reads it as more natural than light coming from below or dead-on at eye level. From there, adjust for your specific subject and the mood you’re after.
5 one-light studio setups to put these patterns into practice
Knowing the patterns is one thing. Having a repeatable process for setting them up in the studio is another. The five setups below cover the most useful one-light configurations — you can run through all of them in under 10 minutes, which makes them a solid warm-up routine before any studio session.
For these setups, a Profoto A10 was used as the flash, but any strobe or speedlight works. Modifiers are intentionally basic — mainly an umbrella — with alternatives noted throughout.
You can find the model, Sammy, on Instagram (@boom_shenanigans). Camera settings used across all setups: 1/200, f/4, ISO 100 — ambient fully cut, so the only light in the image is coming from the flash.
Setup 1: Rembrandt lighting

Place the flash at an angle so light falls primarily on one side of the face, with just a triangle of light reaching the far cheekbone and eye. A simple trick: ask your subject to look straight into the camera, then position the light so you can only see a small sliver of their far cheek from the light’s position.

Add a standard shoot-through umbrella to the flash — these run around $10 and are the most versatile modifier you can own. To fill shadows, place a v-flat on the opposite side of the subject to bounce light back. No v-flat? A 5-in-1 reflector with the white side facing the light source does the same job on a stand.
Control the triangle size by adjusting face angle. Turn the subject toward the light for a larger triangle; away from it for a smaller one.

Setup 2: Butterfly (Paramount) lighting

Place the flash directly above the subject’s head, angled slightly downward, with the same umbrella. The light highlights hair and contours cheeks and chin naturally. Watch the eyes — if they’re going dark, lower the light slightly until you get enough fill into the eye sockets. The butterfly shadow under the nose is your confirmation that you’re in the right position.
Setup 3: Clamshell lighting

Start from the butterfly position and add a reflector below the subject’s face — held at waist height or rested on their lap if seated. The reflector bounces light back up and fills the chin and neck shadows while adding catchlights in the lower part of the eyes.
Silver side up gives you more aggressive fill; white side up gives you something softer. Control the intensity by moving the reflector closer to the face (more fill) or farther away (less). No reflector? Foam core, poster board, or any white surface does the same job.

Setup 4: Square lighting

Square lighting wraps fill around the subject from all angles. Add v-flats on both sides of the subject to the butterfly/clamshell setup — the overhead key light bounces off all three surfaces and fills shadows across the entire face. A professional square lighting rig can cost thousands of dollars. This configuration achieves essentially the same result with one flash, one umbrella, and two v-flats (or three reflectors if you don’t have v-flats).
The result is extremely even, shadow-free light — ideal for headshots where you want the focus entirely on the subject’s face and expression, not on the light quality.
Setup 5: Backlit flat lighting

This one requires a small modification: cut a hole in the center of a reflector. It costs around $30 to replace one if you’d rather not, but it’s worth it. Place a flash behind your subject, angled down to skim just over their head and bounce off the reflector — which you or an assistant hold in front, shooting through the hole.


The effect is flat, shadow-filling light on the face with a subtle hair light coming from behind — essentially a two-light look from one flash. Get a reflector stand if you plan to use this regularly. Holding it yourself while shooting is possible, but your arms will remind you it was a bad idea by the second hour of a session.
How fill light changes everything
One detail worth internalizing before you start experimenting with these patterns: the shadows you see in each setup are partly a function of how much fill light you’re allowing into the scene. In our example images, most shots were captured with ambient light fully cut and no fill — which is why the shadows read as deep and defined.
Add a reflector, a v-flat, or a secondary fill light and those same patterns look considerably softer. Rembrandt with strong fill becomes almost loop-like. Split lighting with a white reflector on the shadow side loses much of its drama. The pattern you choose sets the baseline; the fill controls the intensity. Both decisions together determine the final mood of the image.
Putting it together: choosing the right pattern for the situation
Here’s a quick reference for how these patterns map to real shooting scenarios:
- Beauty, fashion, headshots where skin texture matters: flat or butterfly, with fill
- General portrait work, environmental portraits, weddings: loop, short lighting preferred
- Dramatic portraiture, editorial, athletes: Rembrandt or split
- Subject is self-conscious about face width: short lighting applied to whichever pattern fits the mood
- Studio headshots with maximum shadow fill: square lighting setup
- Want flat fill with a hair light from one flash: backlit flat lighting
Once you’ve internalized where each pattern lives on the spectrum, you’ll start seeing the light in existing photos and being able to reverse-engineer the setup. That’s the goal — not memorizing diagrams, but building an instinct for how light direction shapes a face.
If you want to go deeper on studio lighting and off-camera flash technique, our Flash Photography Training System covers all of this in detail — including the gear setups, modifier choices, and the decision-making process we use on real commercial and wedding jobs.
For more on how portrait lighting works outdoors or in mixed natural light, see our Portrait Photography Guide and our full breakdown of flash photography fundamentals.
Frequently asked questions
What is the most flattering portrait lighting pattern?
Flat lighting is the most universally flattering pattern because it casts the fewest shadows and fills in skin texture, wrinkles, and imperfections. For subjects who want their face to look its smoothest, flat or butterfly lighting with a fill reflector is the standard starting point in beauty and fashion photography.
What is the difference between loop and Rembrandt lighting?
Both patterns have the key light positioned to the side of the subject, but at different angles. Loop lighting sits at roughly 25 to 50 degrees from center and creates a small loop-shaped nose shadow on the cheek. Rembrandt lighting moves further around — past 45 degrees — until the nose shadow and cheek shadow connect, leaving a distinct triangle of light on the far cheekbone and eye. Rembrandt is more dramatic; loop is more balanced.
What is short vs. broad lighting in portrait photography?
Short lighting illuminates the side of the face farthest from the camera, which makes the face appear slimmer. Broad lighting illuminates the side closest to the camera, which widens the apparent face shape. Short lighting is the more common choice because it’s more flattering for most face shapes. Either approach can be applied to any of the five key light patterns.
Can I use these lighting patterns with natural light?
Yes. All five patterns apply equally to natural light — a window, a doorway, or an open shade. The same principles of light angle and shadow shape apply regardless of the source. Position your subject relative to a window the same way you’d position them relative to a studio strobe: flat at the angle of the lens, rotated progressively further to the side as you move through butterfly, loop, Rembrandt, and split.
What lighting pattern is best for athletic portraits?
Split lighting and Rembrandt lighting are the standard choices for athletic portraiture. Both patterns create strong directional shadows that emphasize muscle definition, bone structure, and physical presence. Split lighting produces the most dramatic result. Rembrandt adds visual interest through the triangle of light without going fully high-contrast.