Skylum has just announced their newest addition to Luminar Neo, the Panorama Stitching extension! It is a big milestone for the platform, and today we’re going to be doing a review and a bit of a tutorial. We’ll tell you what makes this pano stitching app different from others, how it works, and what we like & don’t like.
In short, Luminar Neo’s Panorama Stitching offers useful functions such as Mercator and Fisheye projections, in addition to the usual Spherical and Cylindrical projections. Also, one of the most unique features is the ability to create panoramas from any video clip in which you literally “pan” across a scene! There’s a lot more to discuss, so, let’s dive in!
What Is The Luminar Neo Panorama Stitching Extension?
Most photographers will be familiar with the Skylum suite of photo editing software, and Luminar Neo is their latest, most advanced, and most comprehensive app yet. This Panorama Stitching extension is exactly that– an extension that you can add to Luminar Neo.
As an extension, it automatically became available (on July 20th) to existing Luminar Neo Pro subscribers, which is a $99/year subscription. (Note: Skylum is currently offering a discount of just $49 for your first year of a Pro subscription.) You can also acquire this Panorama Stitching extension as a standalone package for $99, with Luminar Neo, however, standalone purchases do not become eligible for upgrades later, including additional extensions which are often priced at $49.
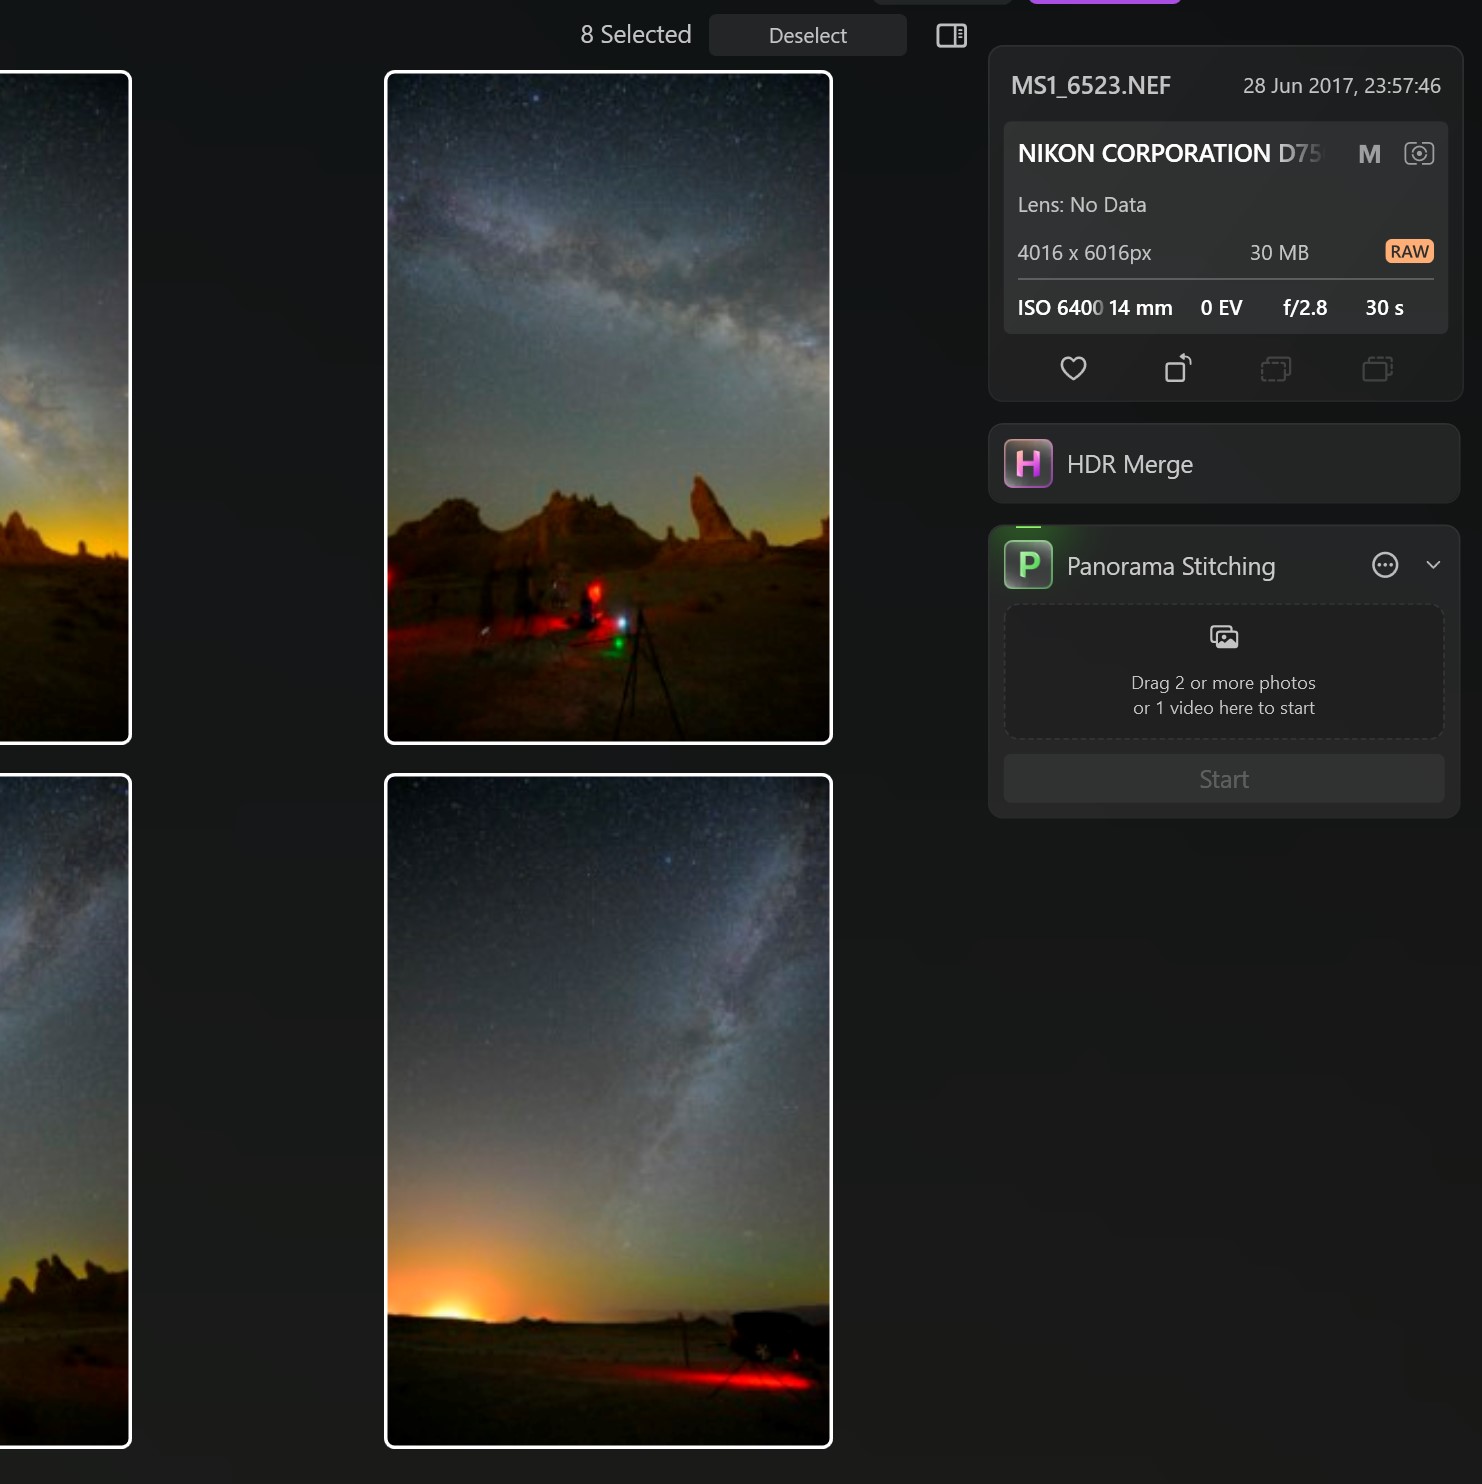
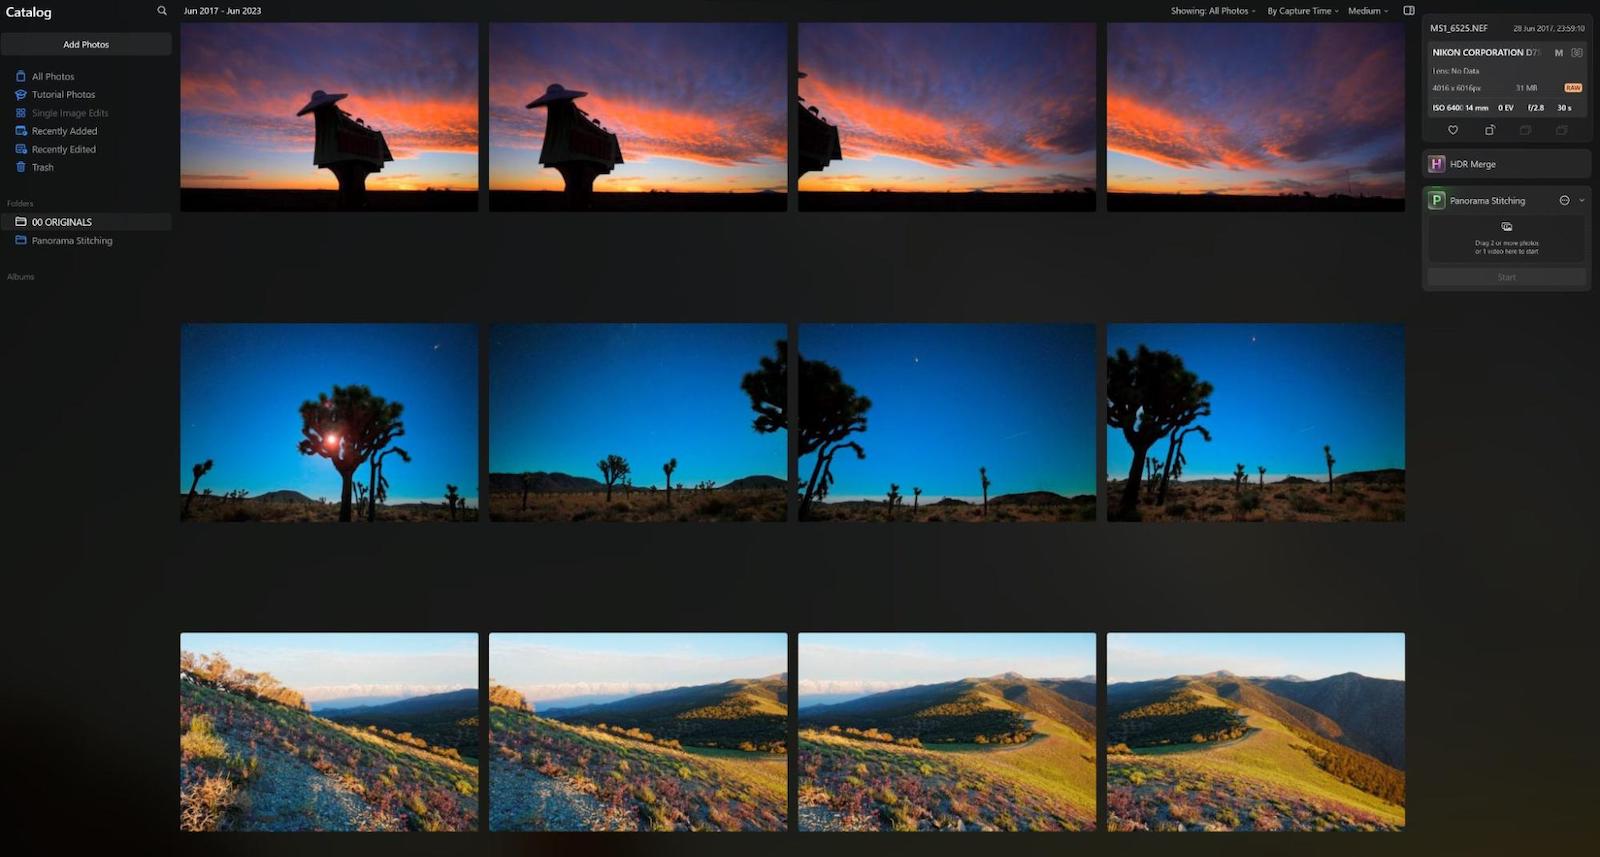
The Panorama Stitching extension fits in perfectly with the Luminar Neo workflow: Simply import your original images into your catalog, whether they are raw or JPG stills, or even video clips. Then, in the right-hand tab of the Catalog, look for the Panorama Stitching module, in the same place as other extensions such as HDR Merge. It is literally as simple as dragging and dropping your imagery to the extension, and hitting “Start”.
Note: If you don’t see Panorama Stitching yet, simply install it by clicking on the “Extras” (a puzzle piece icon) and looking for it in that menu.
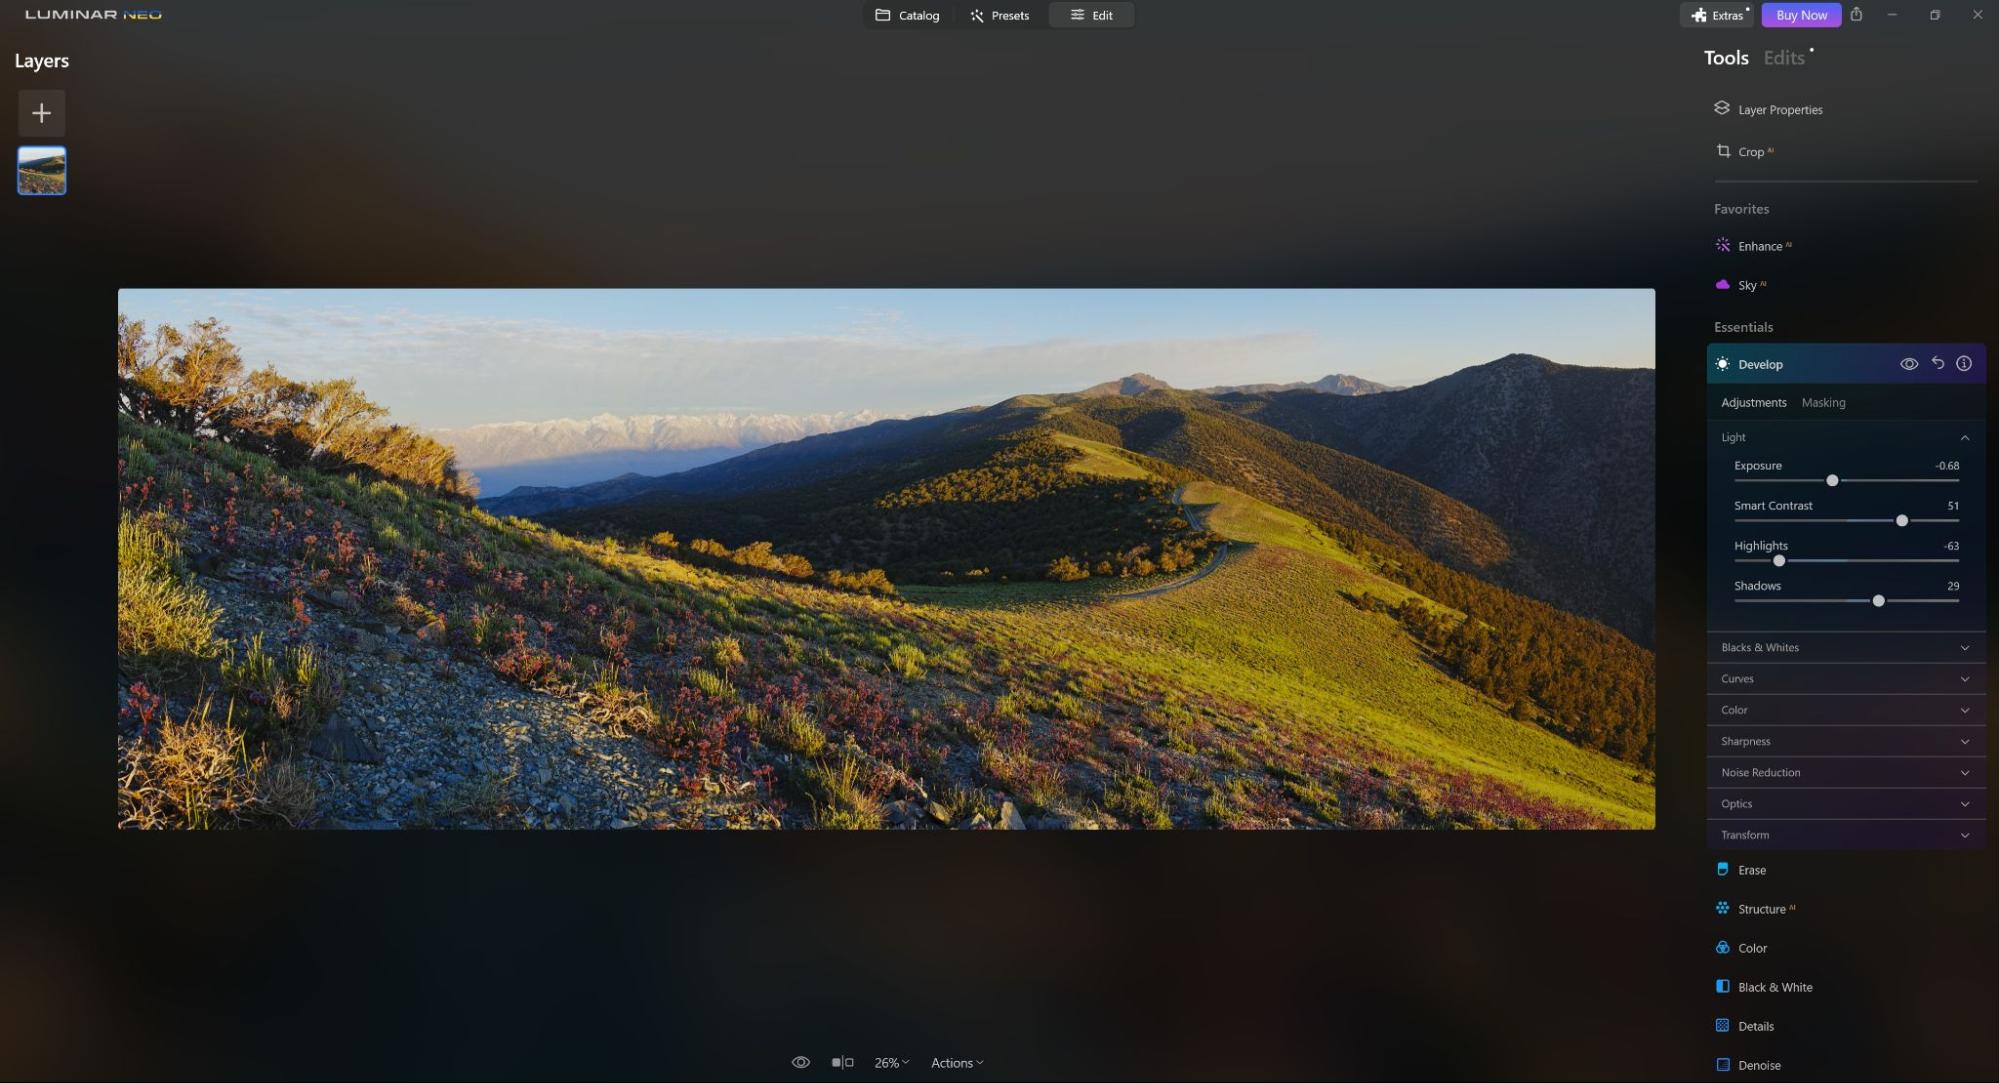
Once you’ve entered the Panorama Stitching interface, you’ll be able to follow the easy steps to generate a final panorama image. The interface will then return you to your Luminar Neo catalog, and you can take the resulting panoramic image from there into the Edit module for further adjustments to color, dynamic range, etc.
How To Use Luminar Neo Panorama Stitching
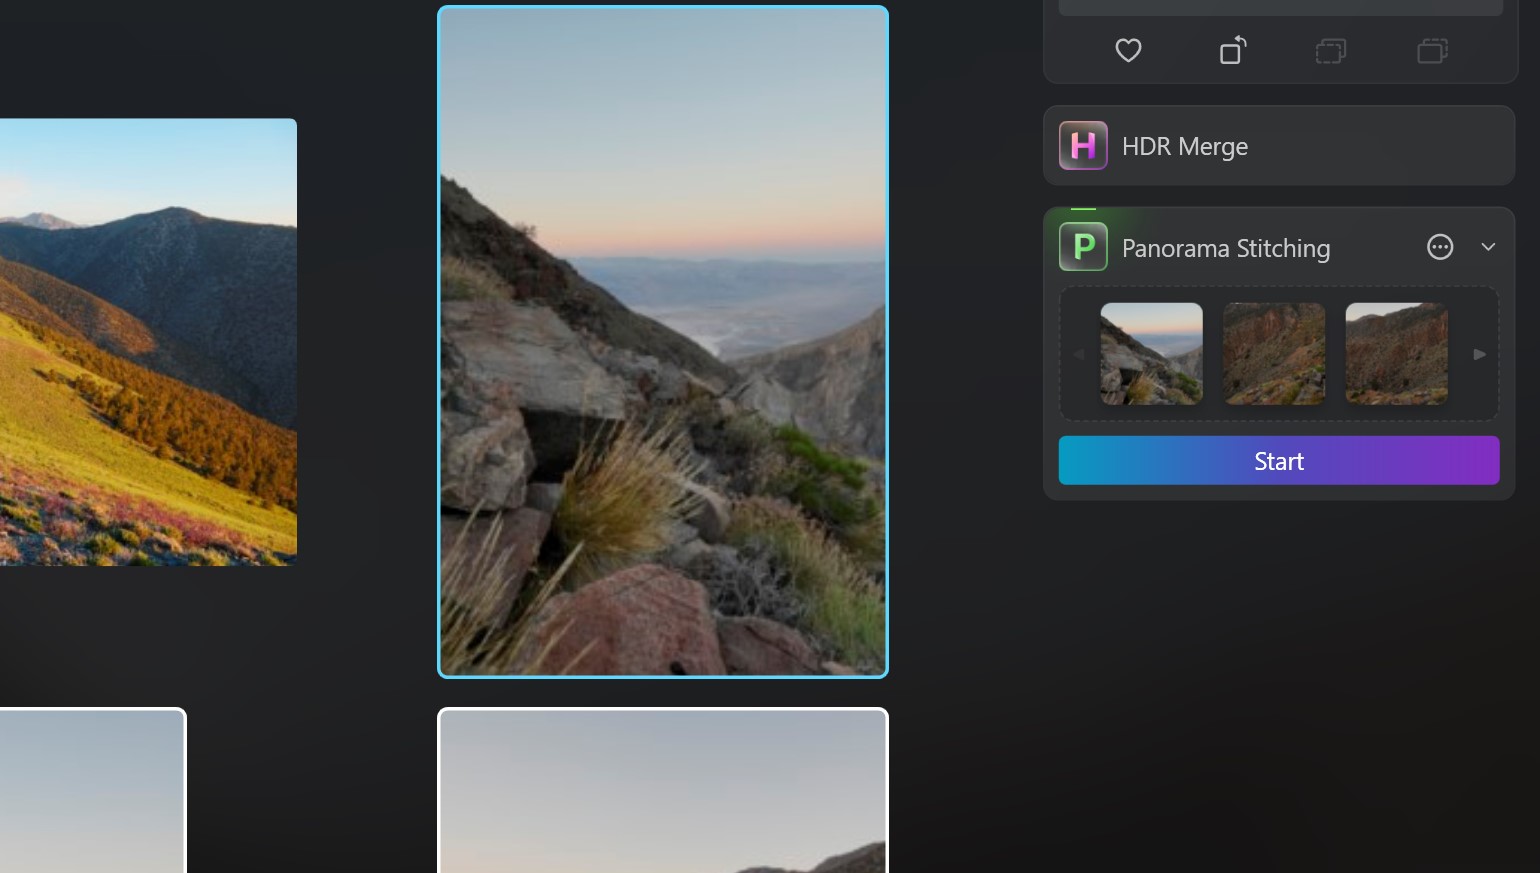
As we mentioned, the process begins intuitively, just the same as you would begin your workflow for any image editing. Import the original images or videos into your catalog, and then drag and drop them to the Panorama Stitching extension.
NOTE: Before hitting start, you might want to check the initial options, for lens distortion & vignetting corrections, and ghosting compensation. You’ll find these options in a pop-up menu that is accessed by clicking on the three dots icon at the top of the extension panel.
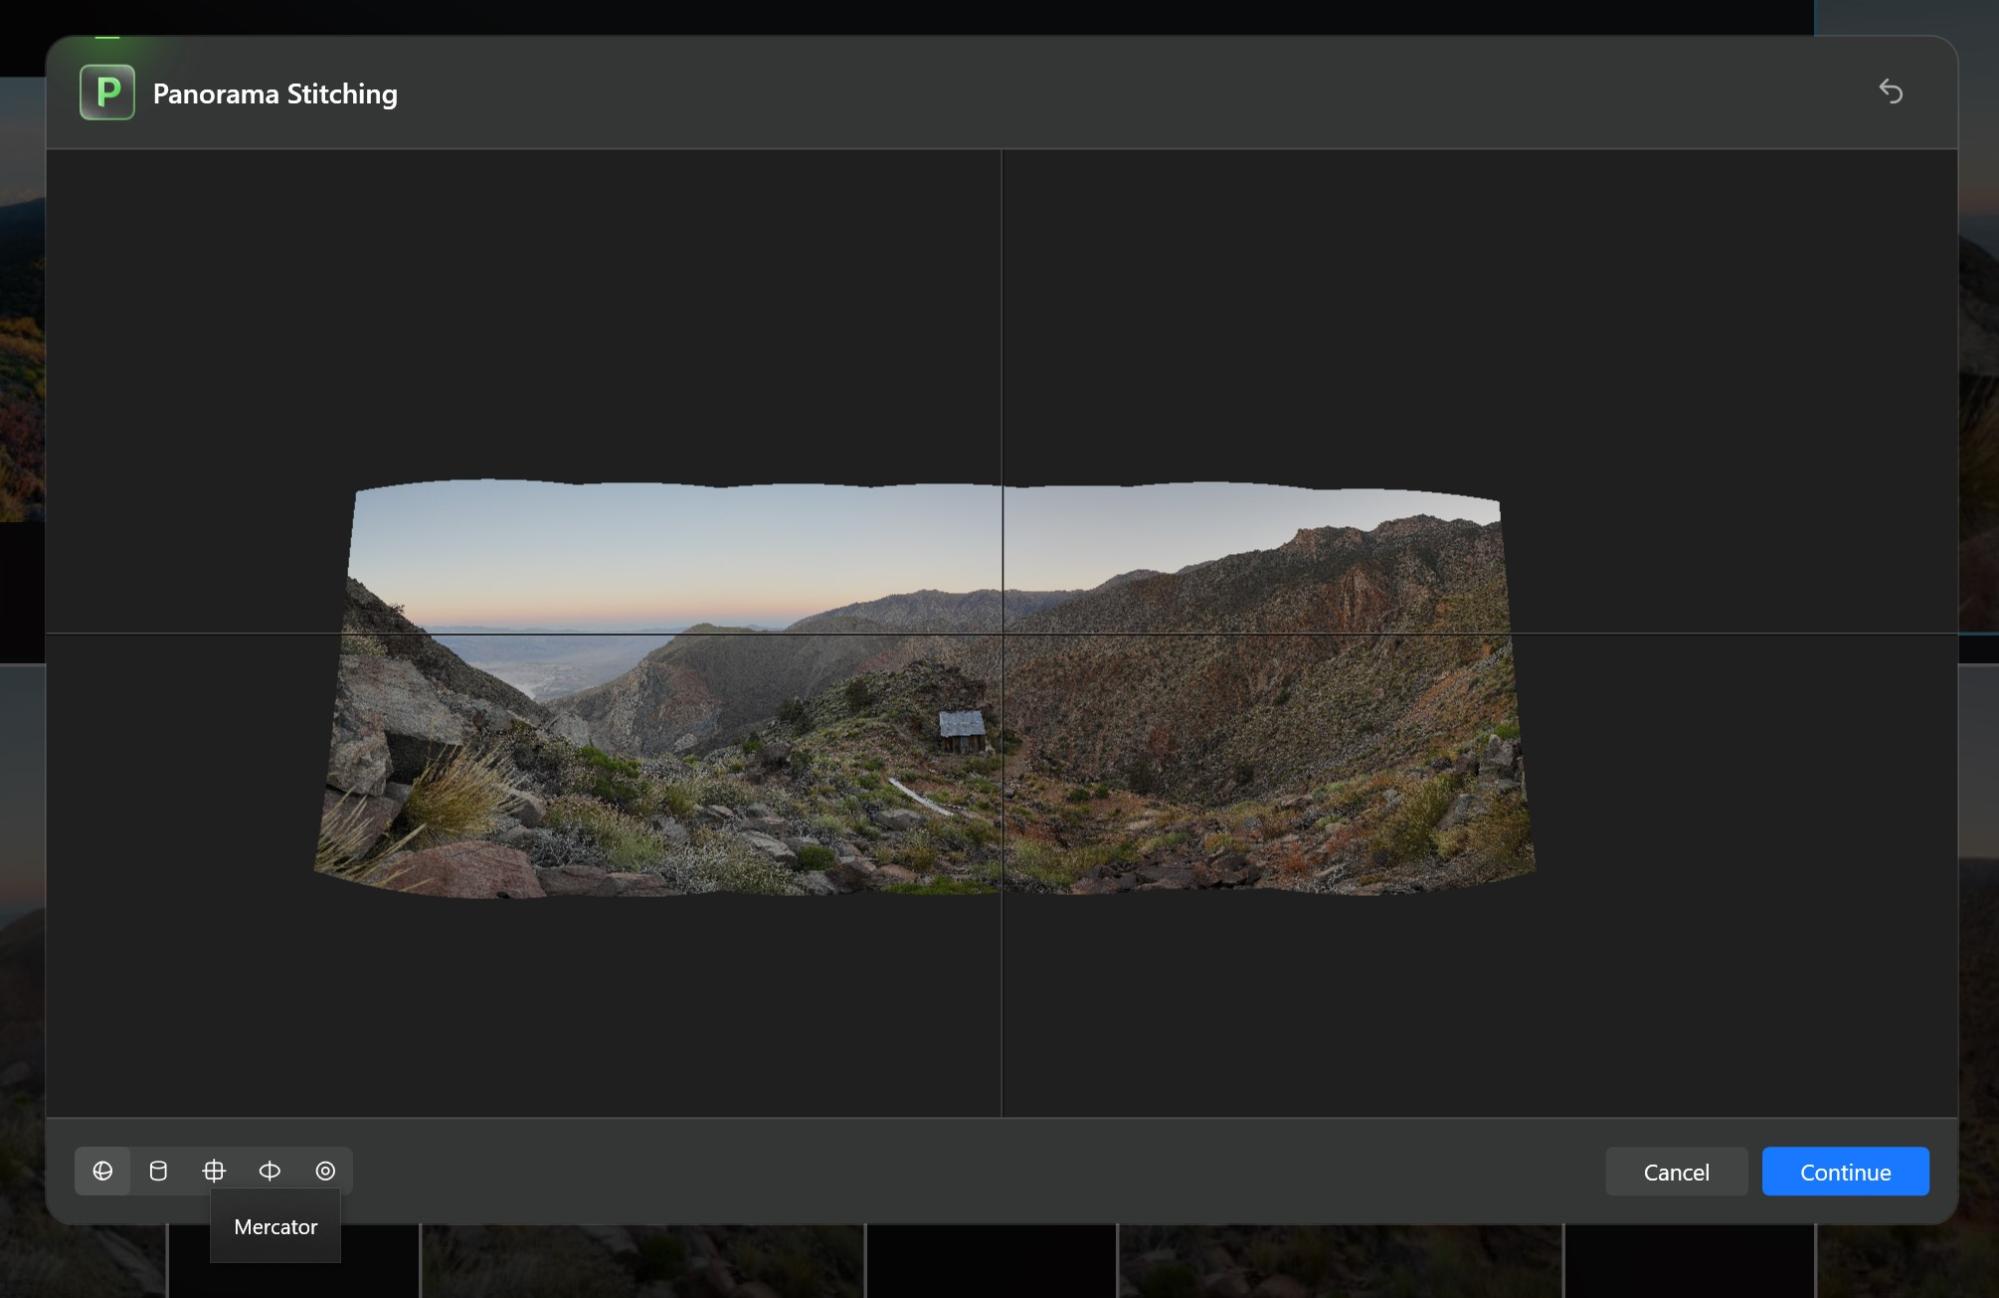
From here, you enter a very simple yet powerful interface, where you get some pretty interesting options to choose from. The first step is to choose a projection or a stitching mode. You have the common options, Spherical and Cylindrical, which are excellent defaults for most images. Additionally, however, there are more options that may be better suited to certain types of subjects. Specifically, there is Mercator, Plane, and Fisheye.

The best way to explain the “Plane” blending mode is that it attempts to create a similar view to what you might get if you simply had a lens wide enough to see the whole scene, such as a 10mm or 12mm full-frame lens. In other words, the edges will be quite stretched, but straight lines in the image ought to remain straight. This makes “Plane” a great option for architectural imagery.
“Mercator” attempts to use a similar projection algorithm as maritime mapping does; that is, it attempts to minimize vertical “stretching”, keeping horizontal lines as straight lines. “Fisheye”, on the other hand, works well with any wide-angle images, and does an excellent job of balancing all types of lines, including diagonal lines which often get curved using other methods. (See below)

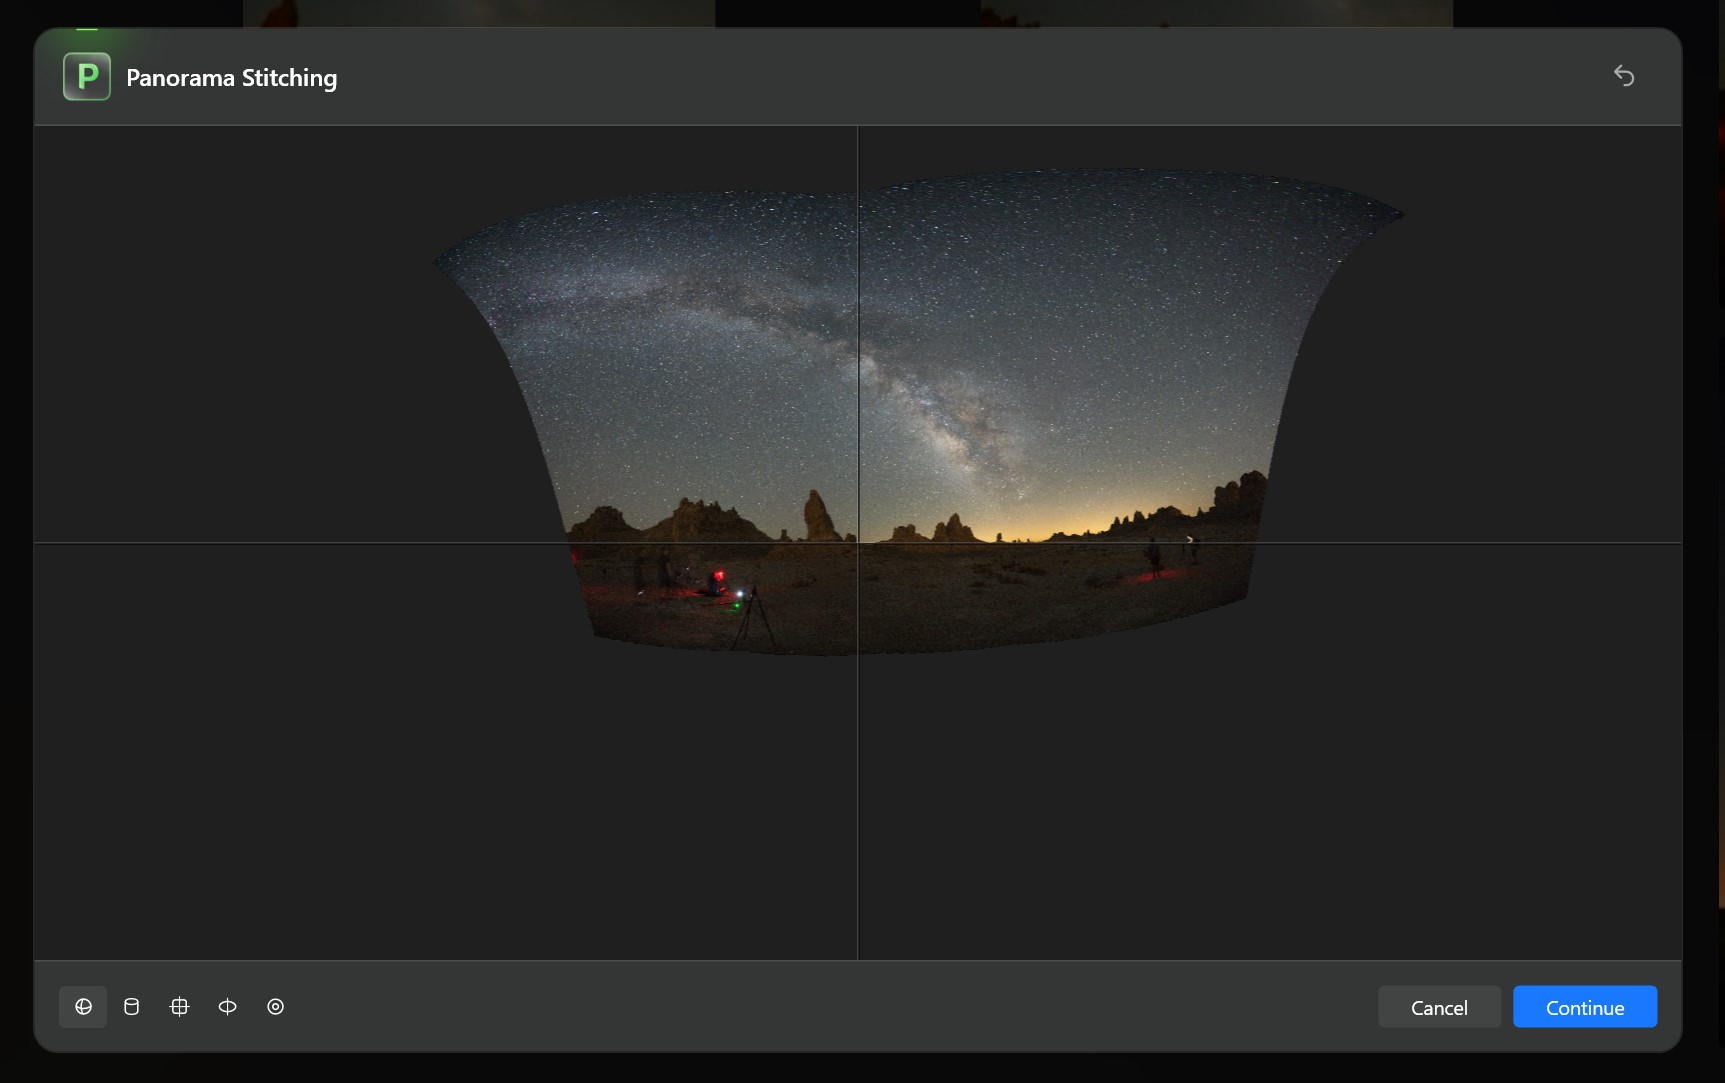
After you’ve chosen a projection method, but before you click “Continue”, you have a very important next step! That is, it’s time to “warp” your panorama, simply by clicking and dragging on the image, to make adjustments. This step is a powerful and unique step, and it requires a bit of practice to get things right. There is a crosshair overlay to help guide you, and it’s incredibly useful for flattening unwanted curves. What I learned in my experimenting is that you can warp the left and right sides of a panorama independently, allowing you to for example flatten a bit of a curve that is present on the edges by dragging the whole image left or right until the crosshair is at the edge, and then dragging up or down very carefully. If you hover your mouse far enough outside the image itself, you can also rotate the entire image too.
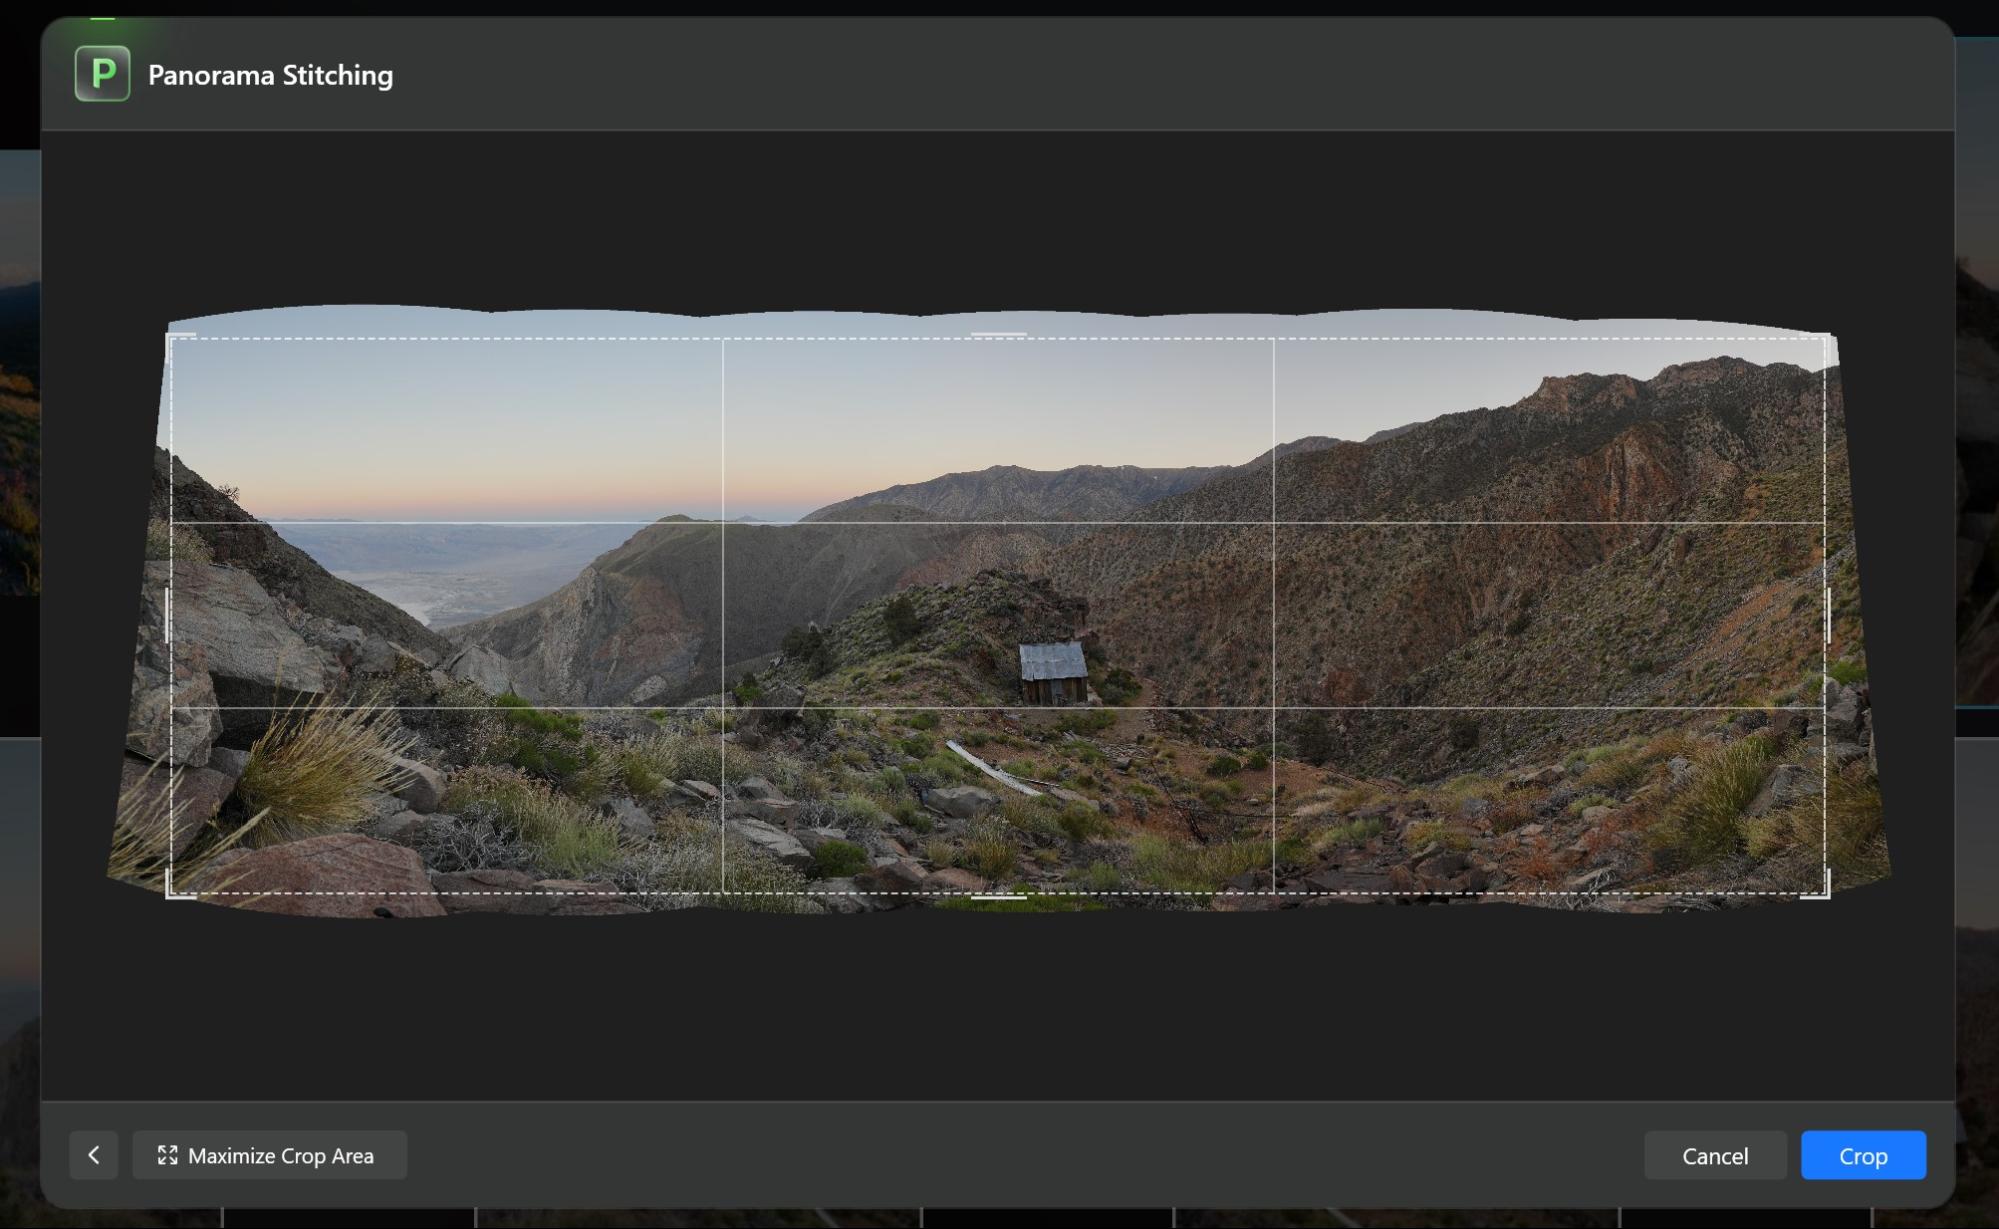
Once you’re satisfied with the projection and any necessary adjustments, hitting “Continue” will take you to the next window which is a cropping interface. I usually just hit the “Maximize Crop Area” option, eyeball a 1:3 or 1:2 crop, and then click “Crop” to continue. I do wish there was the ability to dictate a specific crop aspect ratio; surely that will appear in an update to the extension…
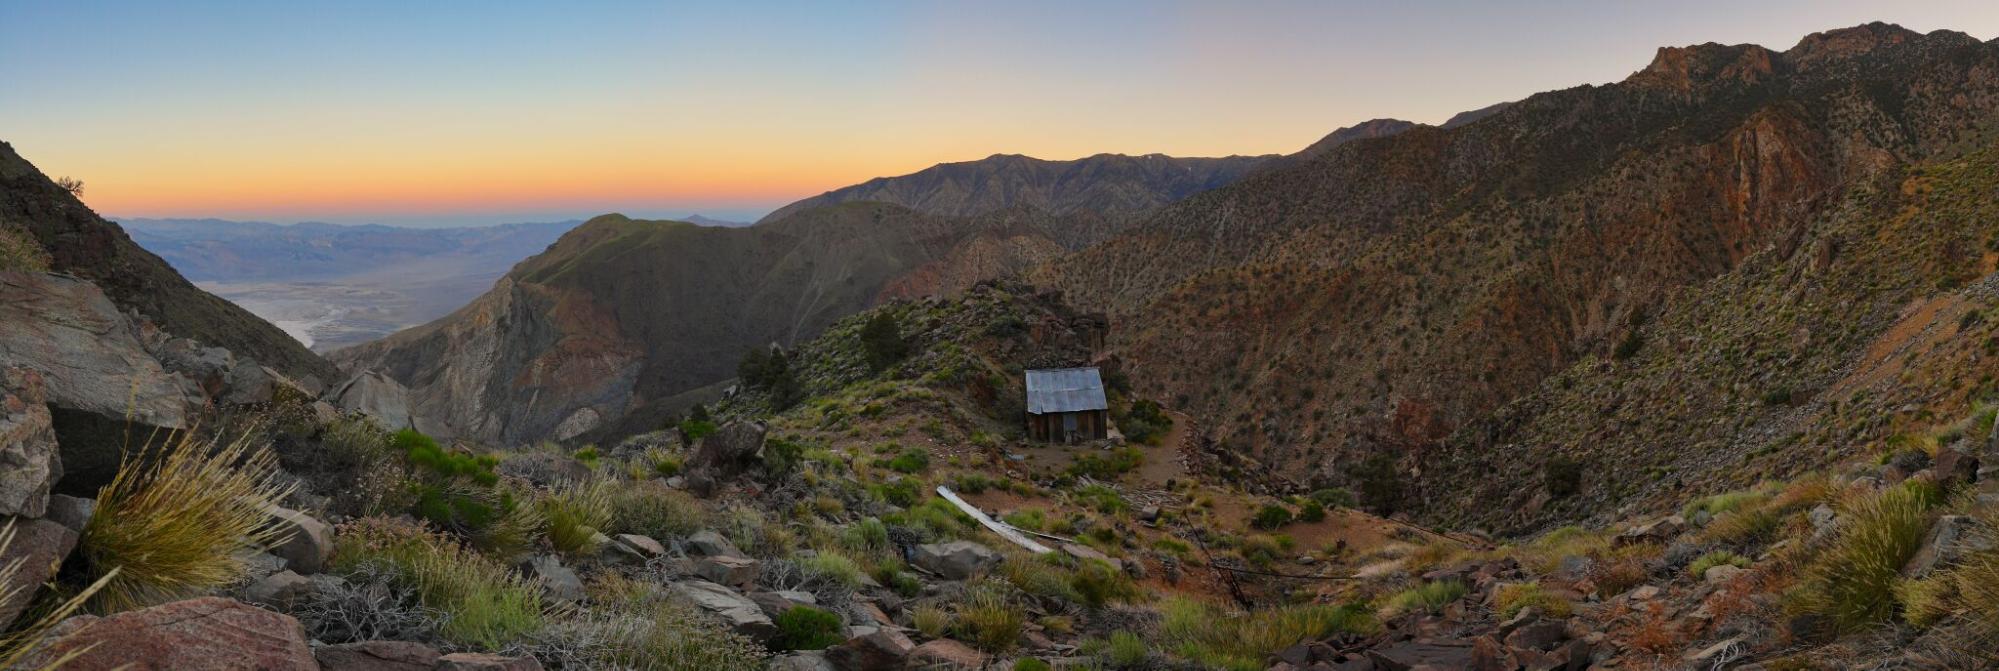
The final interface is simply where you hit “Save” and create the resulting panoramic image file. Select whichever output options work for you! When you’re done, Luminar will create that file and save it in a new “Panorama Stitching” folder. Personally, I prefer to drag and drop that panorama back into its original folder, so that it is stored with the original frames, but having all your panoramas in one folder is really nice too!
Luminar Neo Panorama Stitching Extension Review | Pros & Cons
There are a lot of things that I’m really liking about Luminar Neo’s Panorama Stitching extension, and a few quirks that I hope are improved or fixed with future updates. Let’s get into all of that now!
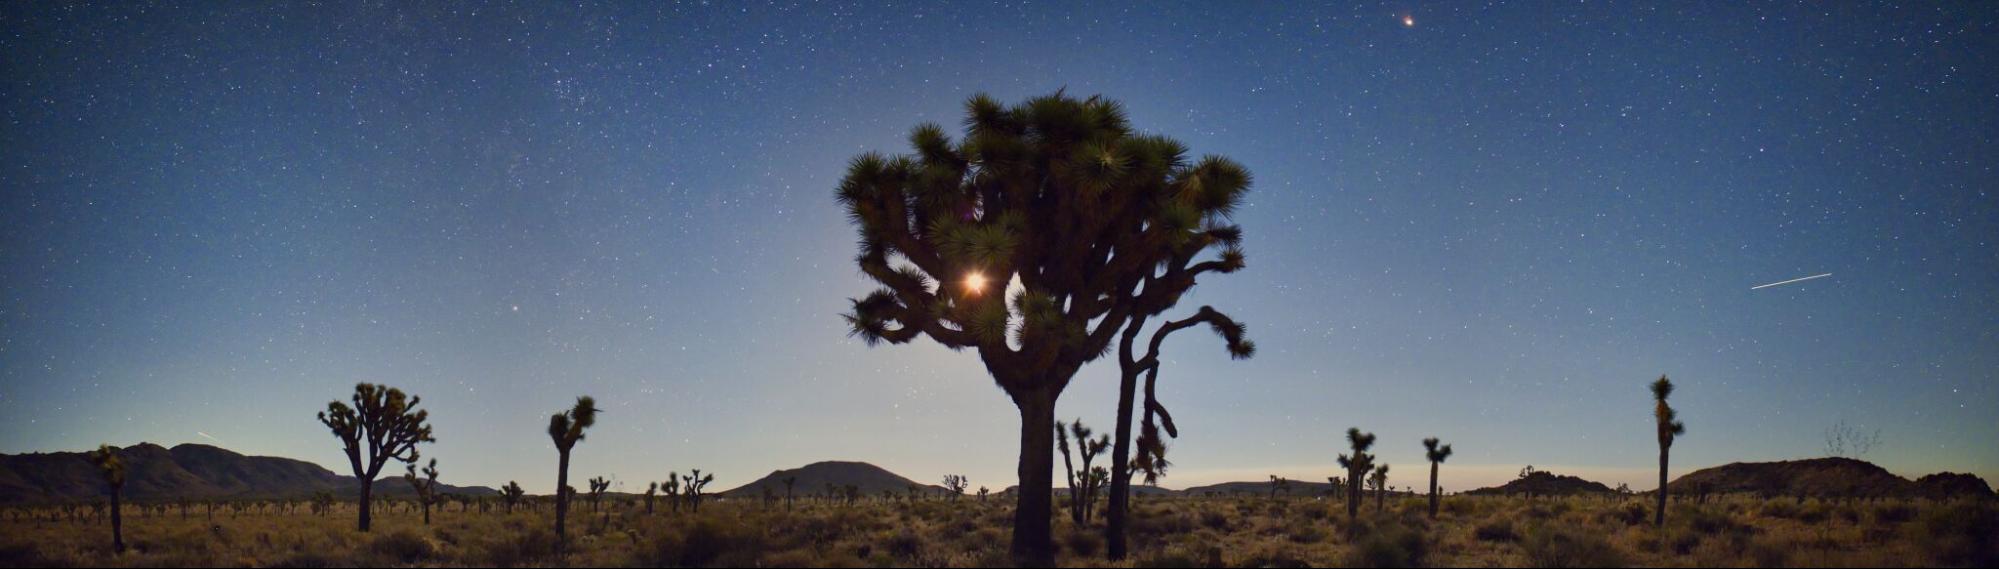
Make A Panoramic Image From Video Footage
One of the coolest things about creating panoramic imagery with Luminar Neo is the ability to create a panorama out of videos! We all have lots of video footage in which we pan left or right to show a whole scene, yet we don’t always bother to capture still frames of each scene, or sometimes it’s just not even practical. Especially when there are moving subjects in a scene; this always creates complications.
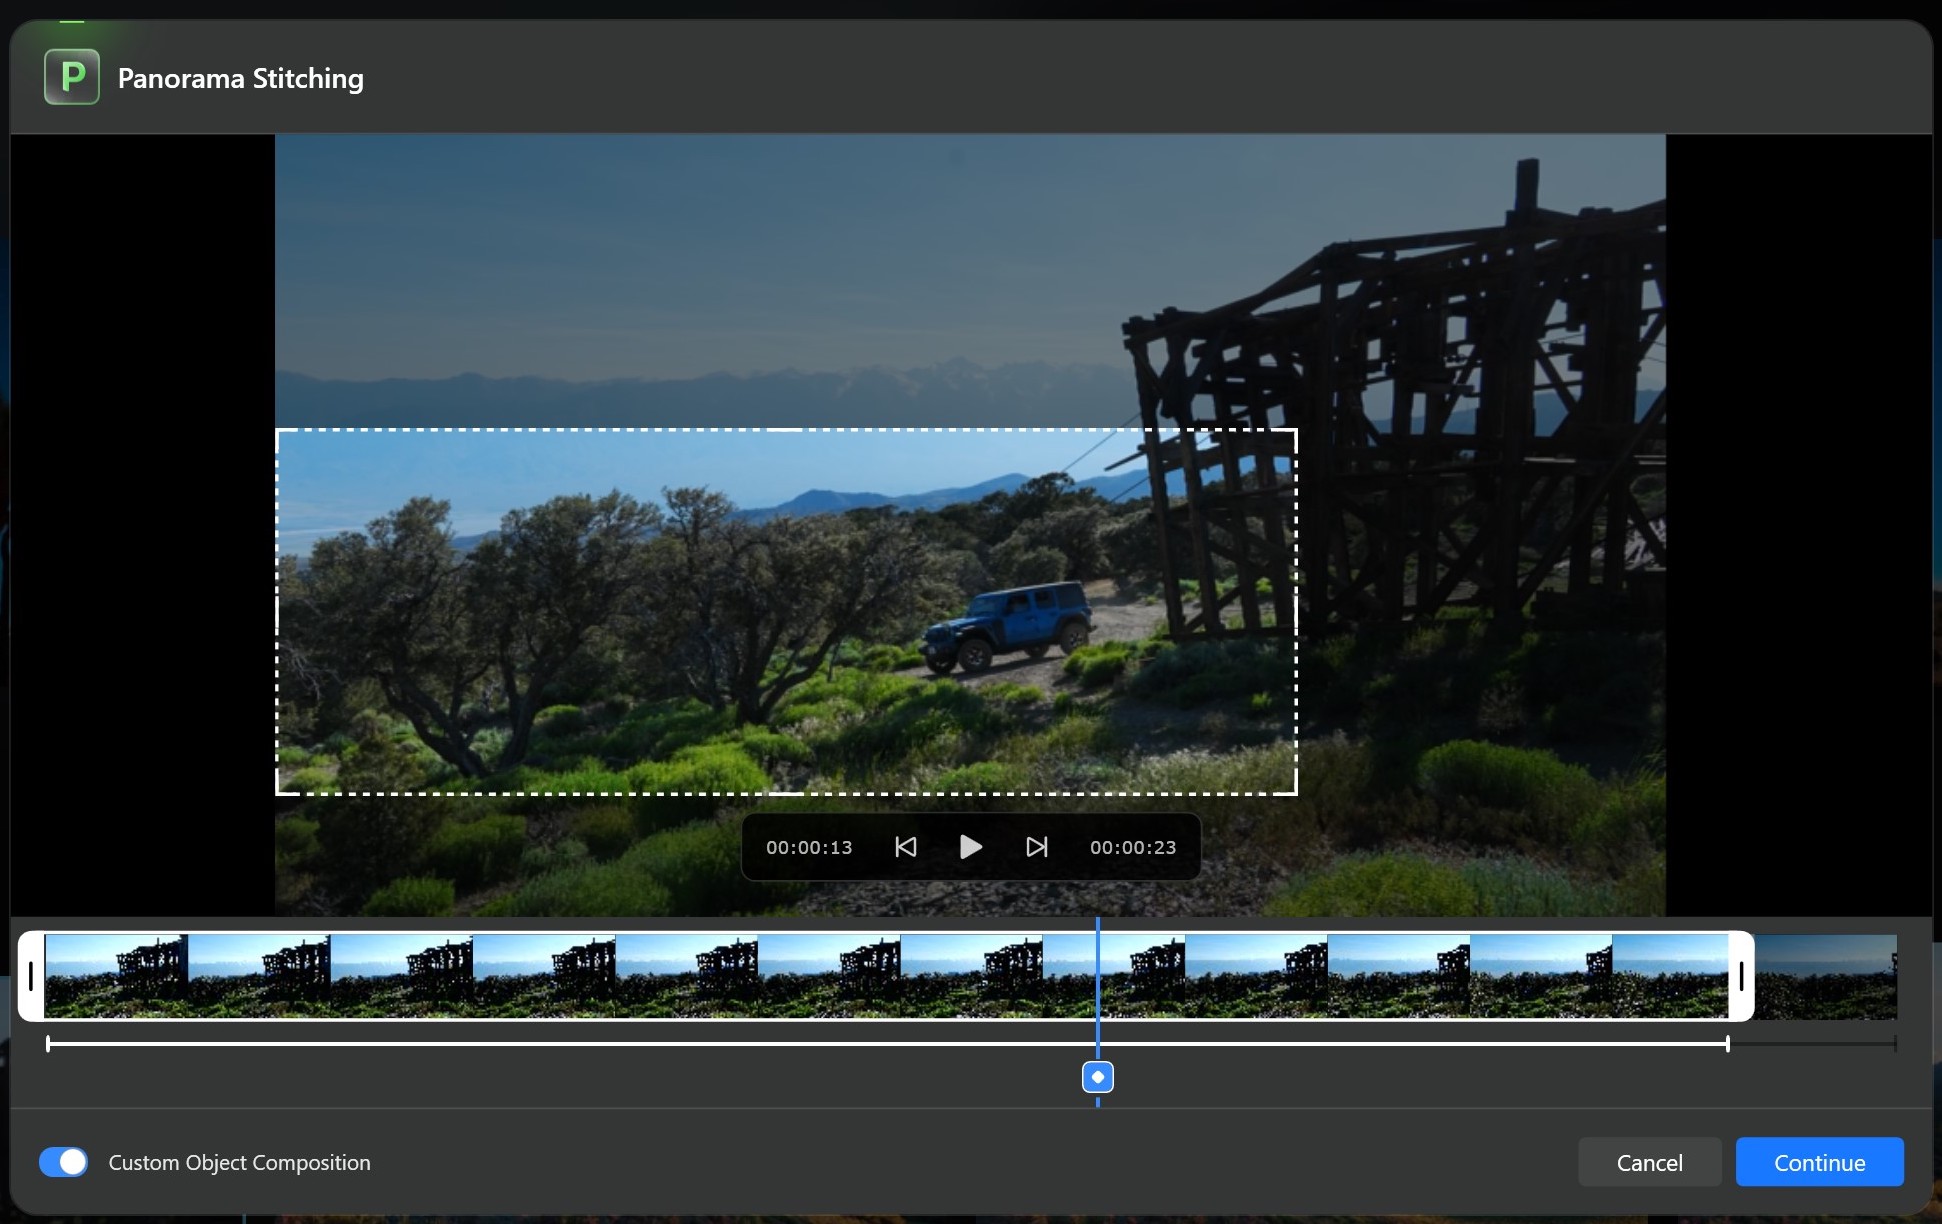
That is where one of the most unique features, once again, sets Luminar Neo apart from the competition: the “Custom Object Composition” tool. If you are creating a panorama from a video, you have the ability to pause the video anywhere and select your subject. Luminar will then identify where the subject is in that scene, and make sure it is placed in that exact spot in the final panorama.
This is an incredibly useful tool, and I wish it was also available for stitching raw/JPG original frames together, too! That might be a very complex interface to add, however.
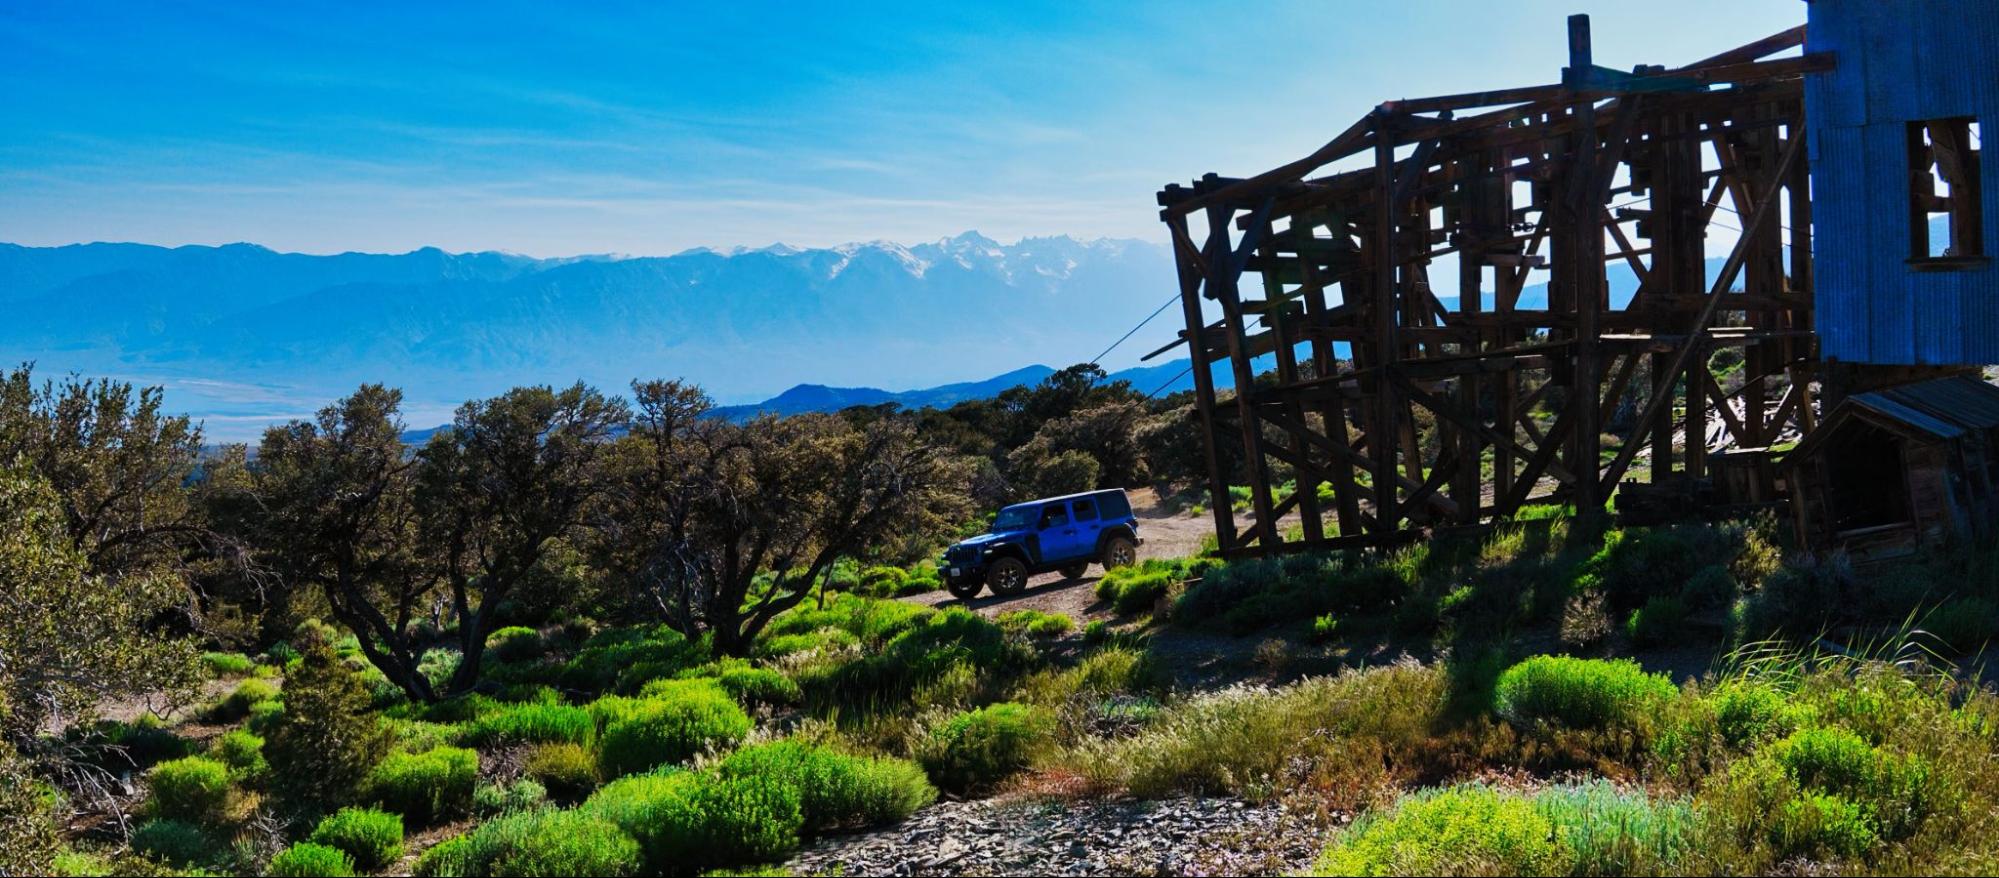
Create Action Composite Panoramas From Video Footage
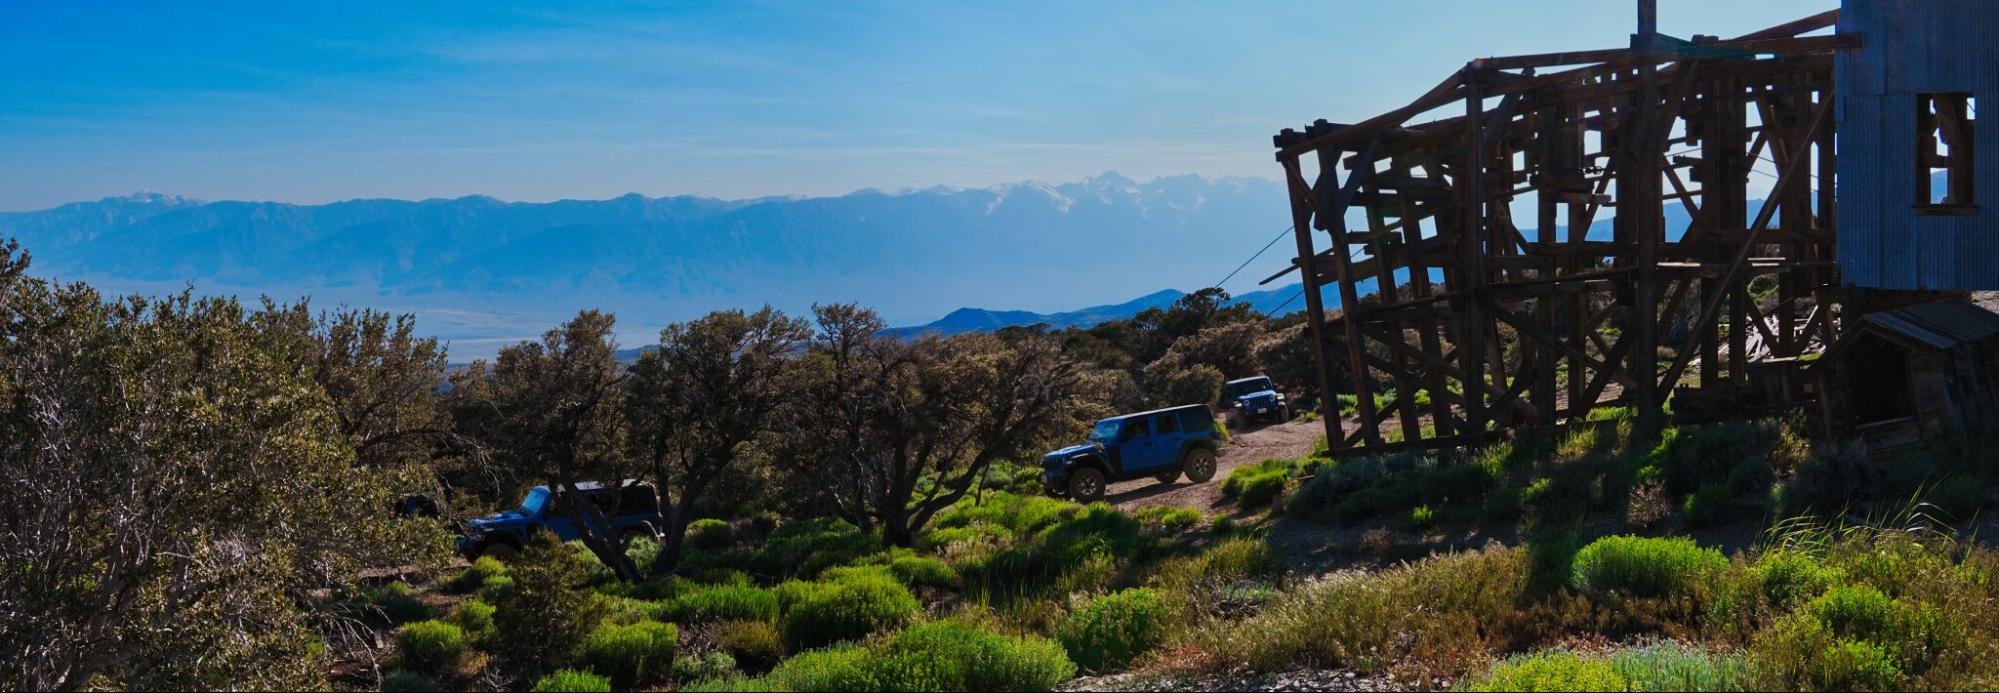
Alternatively, what if you want to create an action composite image using the same footage in which a subject passes through the frame? As you can see above, all you have to do is pause the video multiple times and select the subject or subjects in each position you want, and, presto! This works fantastic for creating content such as anything related to extreme sports, or just any fun activity!
More Stitching Method Options VS Other Panorama Software
The other huge benefit of Luminar Neo’s Panoramic Stitching extension is the versatility and power of its projections when merging still images together. I had really good luck with the Mercator and Fisheye projection modes, and I will definitely be preferring Luminar Neo for some of my more advanced panoramic imagery.
Built-In Manual Warping

The learning curve for this feature is only steep for a very brief period, but once you get the hang of it you really appreciate it! Being able to make subtle adjustments to the different parts of a panorama, especially a very wide one, is very useful.
Honestly, now that I’ve played with this capability just a bit, I’ll be once again keeping Luminar Neo in mind for all my images with a strong horizon, or any other lines that need to be straightened.
TIF vs DNG Files
An important thing to note is that, while the “Editing” section in Luminar Neo is a non-destructive environment, it is creating TIF files, not DNG raw files (something which Lightroom does offer). This is not a huge drawback, because editing a TIF file in the Luminar Neo Editing environment still produces beautiful final results, and you have access to all of the tools that make Luminar so awesome, such as Enhance AI, Sky AI, and Structure AI.
Missing “Boundary Warp” and “Fill Edges” (Content-Aware Fill)
One final thing I should mention is that, for now, you’ll have to manually clone stamp in any missing portions of your image, if you’re working with “sloppy” original frames. Personally, I always overlap my panoramic frames by at least 50%, so this is almost never a problem. However, once in a while the optimal projection, combined with the preferred crop, can leave a piece of a corner missing, or just not fitting your desired crop…
The best solution I can offer is to turn off the “Maximize Crop Area” option, and crop the image for your creative needs or for a specific aspect ratio. Then, use the clone stamping tool afterward to fill in a corner or two.
Another feature that I sometimes appreciate in Adobe Lightroom is the “Boundary Warp” tool. It automatically stretches your image to fit a rectangular frame, and although it usually ruins your image if you drag the slider all the way to its maximum, it can be useful at a very subtle, minimal level. Having said that, the Luminar Neo manual warping is far more versatile at warping your scene to look “correct”, whether that is straightening lines or just balancing a sense of scale.
Conclusion | Luminar Neo Panorama Stitching Extension Review
All in all, Panorama Stitching has been one of the most-requested features of Luminar Neo users, and the folks at Skylum did not disappoint. The Panorama Stitching extension is powerful, versatile, and simple.
I would like to see some refinements in future updates, and hopefully, as their blending algorithms improve, the app will become capable of even more impressive results. Either way, with its seamless integration into the existing Luminar Neo workflow, which offers a catalog organization system and some of the most advanced photo & image editing capabilities on the market, we definitely recommend giving it a try for yourself!
Where To Purchase Luminar Neo Panorama Stitching Extension
Luminar Neo Pro subscribers can look for the Panorama Stitching extension in the “Extras” menu; it is a free download as part of the yearly subscription. (Note: if you are a new user, Skylum may occasionally offer a discount of just $49 for your 1st year of a Pro subscription.) Prices Luminar Neo and various extensions fluctuate between the U.S. and outside of U.S. (see below). See their pricing page for up-to-date prices.
A free 7-day trial is available to new Luminar Neo users as well. During this trial period you can test out all of the extensions.