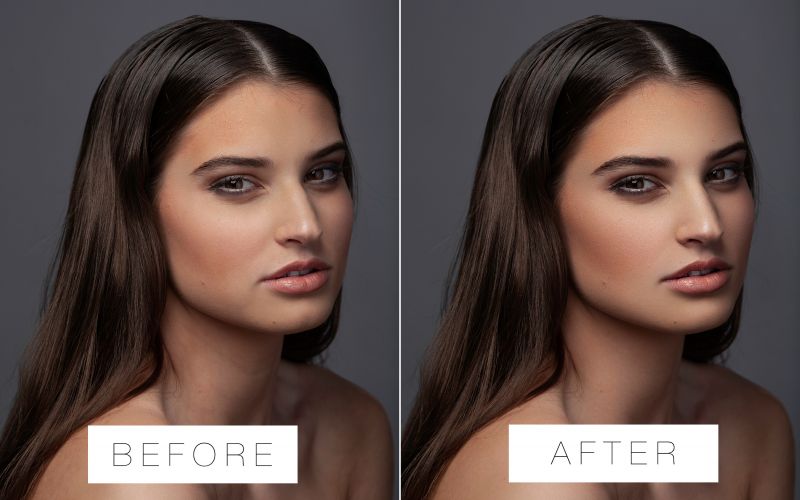
Retouching your images can be an overwhelming process sometimes, especially if you’re new to photoshop and beauty/portrait retouching. In this tutorial video from we’re going to make things a little easier to understand by walking through all the steps needed to completely retouch a portrait image in Photoshop using nothing but Dodge & Burn techniques, focusing on ‘Micro’ D&B to look for lines in the skin that look blotchy or uneven. Let’s dive into the video and if you’d like to skip ahead to a particular topic we’ve listed out what’s covered in each of the sections below.
00:48 – 01:58 – Dodge & Burn Curve Adjustment Layers
To begin create two curve adjustment layers. One for dodge and one for burn. For dodge drag up, and for burn drag down. Invert both layers, to create a mask. Once the masks have been made, place them into a folder, so you can later toggle both at the same time. Rename the folder to D&B.
01:58 – 02:28 – Black and White Visual Aid
Next, create the black and white visual aid. To do this we use two adjustment layers. The first adjustment layer will be Channel Mixer, make sure to check the monochrome box. The second adjustment layer will be Curves. Drag down on the curves to darken the image slightly. We are doing this to increase the visibility of the areas we will be focusing on. Select both layers and place them into a folder together. Rename that folder to Visual Aid.
02:58 – 03:28 – Brush Size, Opacity, & Flow
Make sure that you have a white brush selected, as we will be working with masks. Set Opacity to 100% and Flow to 1%. You will be changing your brush size depending on the area you are working on. I prefer to use a brush with softer edges for easier blending.
03:28 – 9:43 – Micro/Local Dodge & Burn
You are now ready to start. Begin by zooming out to see the overall image. You will be Dodging (lightening) the dark areas, and Burning (darkening) the light areas. Change your brush size according to the area you want to target, and start painting with gentle strokes. As you scan the image, you are looking for any areas of the skin that appear blotchy and uneven. I like to start out with dodging, because I feel like that takes care of about 70% of the image. Once I’m done with that, I move on to the burning.
If at any point during your gentle strokes, you feel that the effect is too strong, go up to Opacity and lower the percentage.
You can also switch to a black brush to essentially “erase” anything, since we are working on a mask.
09:43 – 10:21 – Duplicating D&B
Since this is a layering process you will duplicate the existing Dodge and Burn grouping. To clear the layers, press shift + delete and fill them in with black. If you toggle them on and off you should see no difference, which means you have done it correctly.
10:23 – 14:50 – Global D&B
During this process, you will be zooming in and out & will be switching between Dodge and Burn. For this process, we are doing the opposite. We are darkening the dark areas and lightening the light areas to sculpt the face.
14:50 – 17:51 – Skin Enhancement & Finishing Touches
The last step is to add depth to the skin. Create a Black & White adjustment layer. Set blending mode to Soft Light. Move the red & yellow sliders to play around with skin tone. Once you get it to a place you like, then you will Invert the Black & White adjustment layer. This enables us to paint the effect only on the desired place. (Skin) Using a white brush, paint the effect over the face.


Get Connected!