
Instagram Reels are short vertical videos similar to TikTok videos and Youtube Shorts. Reels offer a different, unique way to showcase your photos and videos. According to Instagram, “Reels are short, entertaining videos on Instagram where you can express your creativity and bring your brand to life.” In this article, we’ll review how to make reels on Instagram with photos in a slideshow format.
We’ll review the following:
- Example of Instagram Reels with Photos
- First Method: Make Reels on Instagram with Photos in the Native App (not recommended)
- Second Method: Make Instagram Reels on Canva (Recommended)
While the best, most effective reels are usually personalized clips that show the photographer’s face, some photographers are not as comfortable doing that. For the more introverted photographers, recording videos of themselves talking into the camera or showcasing a BTS clip can be a daunting task. With practice and a little extra courage, you can iron out your presentation skills and improve your process. But in the meantime, you can still get exposure within the Instagram Reels algorithm with a video slideshow of your work, along with adding music to the video.
Example of Instagram Reels with Photos
Let’s get started with an example of Instagram Reels with Photos from an actual recent wedding photoshoot. If it’s not showing up, you can click here to view it on Instagram. With the following process in this article, you should be able to create a similar video in 20-30 minutes from start to finish.
View this post on Instagram
Method 1: Make Reels on Instagram with Photos in the Native App (not recommended)
One way to make reels on Instagram with photos is to use the native app exclusively. However, we do not recommend this process since it takes longer and lacks features. If you prefer to keep things within Instagram, follow these steps:
- Tap the “Reels” tab/section in Instagram
- Next, tap the camera icon at the top-right to create a new Reel.

- Tap the Gallery icon at the bottom-left corner (or swipe up).

- Select the image (or select multiple images)

screenshot of adding multiple photos - Choose the time duration for the photo.

- Add the photo to your Reel.
- Repeat to add more photos
- Next, press the “Audio” button to add music to your Reel.

- Optionally, you can add text, effects, stickers
- When you’re done, press the blue “Share” Button
While the native Instagram app works for creating an image slideshow Reel, the process can be time consuming and the features are not as robust as using a 3rd party app. Instead, our preferred method is Canva, which we’ll detail below.
Method 2: Make Instagram Reels on Canva
Our preferred method is to use Canva for your Instagram Reel image slideshows. While there are other options out there, we find that Canva gives you intuitive, versatile features without overwhelming you with too many options. This is why we prefer Canva over software like Adobe Premier or iMovie for creating Instagram Reel slideshows.
Reasons to Use Canva
Here are a few reasons we prefer Canva:
- Free – All of the features in this article are available in the Free plan (as of the time of writing this article). The paid version will give you even more templates and features, but you don’t necessarily need them.
- Desktop and Mobile – Most photographers have their full resolution images on their desktop. Instead of having to transfer the images to your mobile app to use within the native Instagram app, Canva lets you upload your images and create your Reel on your desktop. You can then use the app to download the final video on your mobile device.
- Templates! – The ability to use their available templates or create your own makes the process quick and easy. After you create your first reel, you can simply copy the project and replace the images for your next one.
- Font and Transition Options – Canva gives you plenty of font options to match your branding. You’ll also be able to select from animations and transitions from image to image in your reel.
- More than Just Instagram! – Canva offers design templates for all types of uses, from presentations to other social media uses. So getting started with Canva and having image assets uploaded to the platform may come in handy again in the future for other uses.
How to Make Reels On Instagram With photos on Canva
Now, let’s walk through a complete workflow for creating IG reels on Canva. As mentioned, you should be able to get this process down to 20 minutes or so with some experience.
1) Select a base template
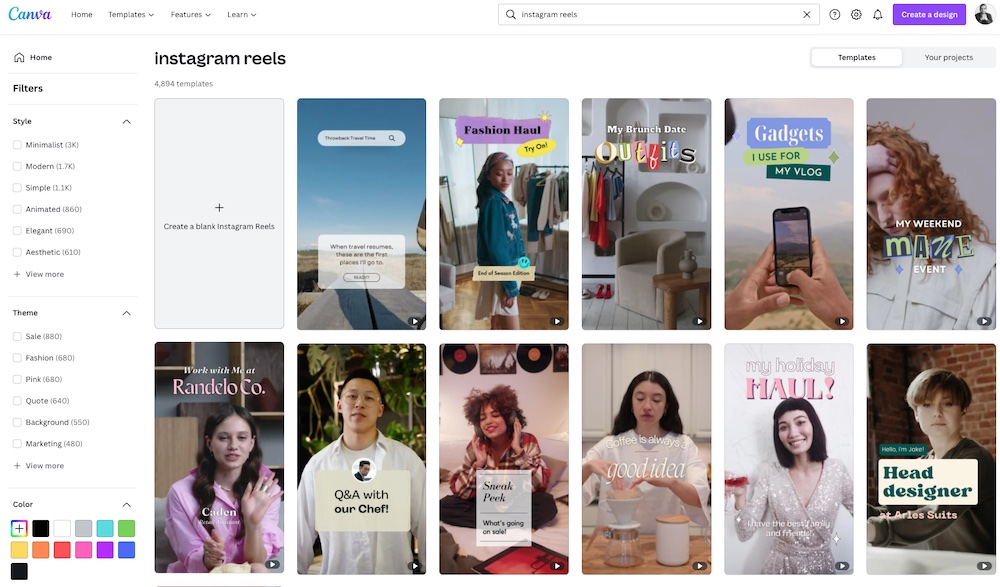
Create an account on Canva or Login to an existing account. Then, search for “instagram reels” and browse the existing templates.
Find the template that matches the overall feel of your brand. Don’t worry about the music, as we’ll be selecting the audio track within the Instagram app.
2) Select your images
Number of Images – Select around 20-30 images to use in the slideshow. Since the Reel is limited to 60 seconds, and you want to give each image at least 1.5 seconds, your absolute maximum should be 40 images.
Type of Images – To speed up your process, limit the images you select to certain types of images. The last thing you want to do is spend hours sifting through thousands of images. If you’re a wedding photographer, feel free to follow these general guidelines:
- Venue images (establishing shots): 1-4
- Bride prep images: 2-4
- Groom prep images: 2-4
- First look images: 2-4
- Couples session images: 5-10
- Ceremony images: 5-10
- Reception images: 5-10
- Ending photo – night session photo or couple on the dance floor
- Your Logo
3) Upload Your Images to Canva

Optionally, you can order and rename your images prior to uploading if that speeds up your process. We use Adobe Bridge for this, but if you don’t have it, then it’s not absolutely necessary. You can just upload all of your selected images in Canva and go from there.
4) Create your lead photo
Use the fonts and animations within Canva to create your lead photo. For weddings, we typically use the strongest couples session photo from the day and overlay the couples’ names.
5) Add your photos
Next, add the photos with the following tips in mind:
- To make your photo take up the entire frame, right click and use “replace background”

- For landscape orientation photos, consider using a black background or a semi-transparent background (using the same photo). See the example below.

Consider using a semi-transparent background for your landscape orientation photos
6) Standardize your transitions

7) Login to the App and Download the Video
From here, you can either export and download your video to your desktop or you can log into your Canva app on your smartphone and download the video from there. We use the latter so that we don’t have to transfer the video from our desktop to our smartphone (to upload to Instagram). So creating the slideshow in Canva on desktop and downloading with the app is the fastest way to make reels on Instagram with photos.

8) Upload to Instagram Reels
Use the same process as we outlined above in the first section get to the Instagram Reels section. Then add the video clip that you created in Canva.
9) Add an Audio track
Find the right audio track based on your branding and your style. We prefer chill instrumental music for our brand such as lofi or acoustic remixes of popular songs. In addition, we typically avoid pop songs and songs with too many lyrics because we want these picture slideshows to be timeless and not too “dated.”
Tip: As you browse for songs, be sure to swipe left and save the good ones for future use. This will save you a ton of time in the future as you make more reels on Instagram with photos.
10) Publish! (Share)
After that, select your share settings and press the “share” button. If your audience doesn’t respond the way you’d hoped, make a few tweaks and try again with the next one. There is a chance that your audience is not used to the new format, and it might take a few tries for your Reels to start getting the engagement you’re looking for. If you would like, you can also reuse the video you created for your Youtube Shorts or Tiktok.
More Information
For more information on web marketing, we invite you to check out the Photography Business Training System in SLR Lounge Premium.


