
Ever walk into a location and not be able to find two nice words to say about the lighting? You’ve got clients arriving soon and you know the challenge ahead of you to create and offer that stellar experience they hired you for because you are the professional. After 16 years in this industry, I can safely say that I have experienced my fair share of less than awesome locations, both indoors and out.
How to Work with (or Around) the Light You’re Given
What do I do before I ever take the gear out of the bag? I diagnose the ambient (existing) light where I am standing. How much light is falling on my subject? Is it harsh or soft? What direction is it coming from? What color is it? Knowing these four base points allows me to decide how to proceed. For example, let’s say your client could only book between 11am-2pm on a bright sunny day and they are begging you to shoot at a local park. Definitely not optimal and hopefully you had the conversation about booking closer to sunrise and sunset; sometimes, however, we are forced to deal with what we are given. There will be a ton of harsh, midday, white colored light coming from overhead and you’ll likely have to deal with specular highlights if you get anywhere near trees.
You have two choices here.
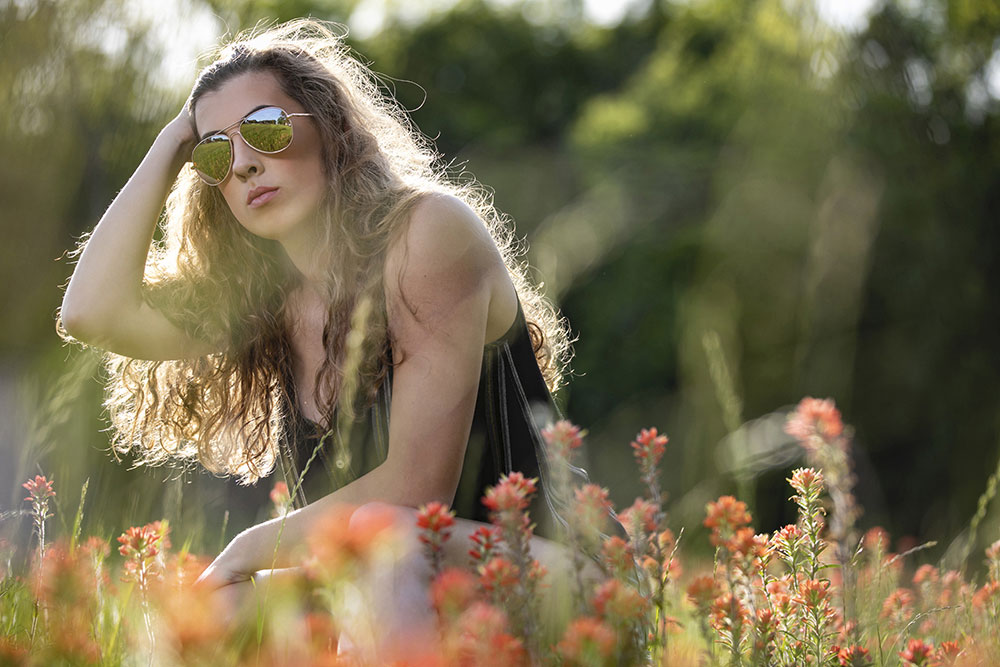
1. Use the Light as Is: You can choose to use that lighting as is (natural light only) and fashionably pose the person into the sun, giving them a pose they can handle that makes sense with the surroundings. If you decide to use the light as is, bring in sunglasses or fun hats and purposefully place their face directly into the sunlight. Start from the toe and pose your way up through the legs, hips, shoulders, and finally the chin. Bring their fingers up to the hat or glasses. Ask them to close their eyes and open on three as you count and grab the shot. You’ll see a lot of posing tips at both of my classes so if you are struggling there, I can help you refresh you on the basics and then move to the modern (see class info below).
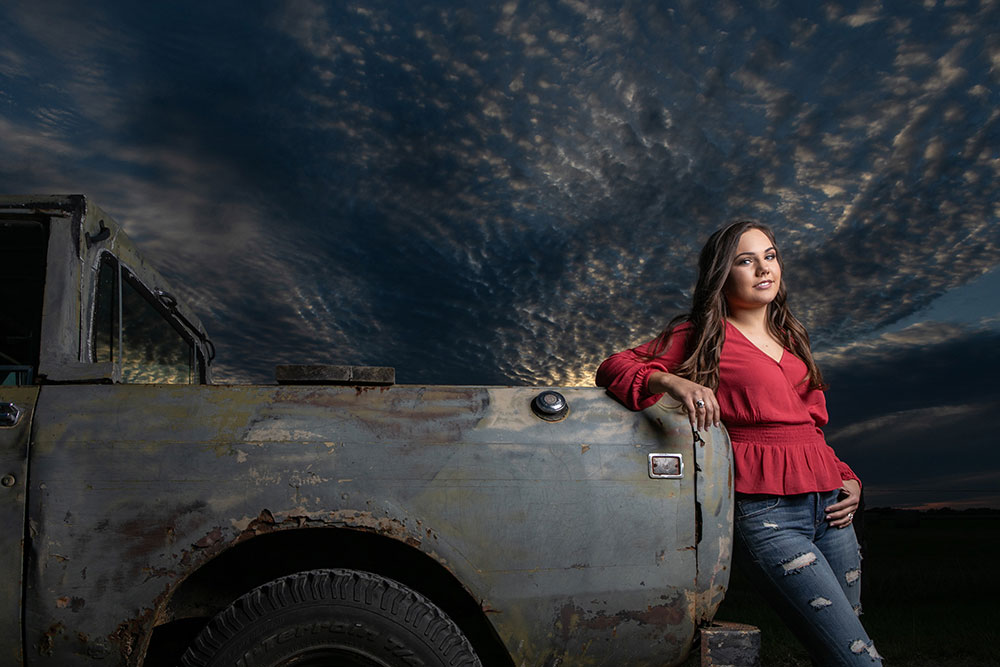
2. Add Light with the Modifier of Your Choice: Place the sun to their back and bring in a reflector, a scrim, or (my favorite) off-camera flash and softbox to fill the shadows.
Join Me at WPPI 2020
Platform Class (Tues, Feb 25th at 8:30am): My platform class at WPPI 2020 will provide step-by-step approaches to how I handle full sun, clouds, open shade, covered shade, interior spaces, multi colored mixed lighting, and nighttime scenarios. Posing people in modern ways that match the spaces they are in and expresses the mood of the lighting will be covered and we will have a brief, live demo (in the not so wonderfully lit classroom space) near the end.
My class will take you through that midday sun situation with behind the scenes photos of where the lighting was in relation to where the client and the photographer were standing. You’ll see us move to the side of the building next to demo an indirectly lit area, again starting with diagnosing how much light is there, the quality of it, the color of it, and the direction it’s coming from. In some situations, I will show you how to add flash to balance the ambient light while in other locations we go through the steps on how to “drown it out” and paint back in only what the viewer needs to see. I’ve turned closet spaces into something magical before and it all comes back to knowing exposure and lighting.

Our journey will then continue to an open shade location that’s perfect for portraits later in the day and then indoors to a local church with a rainbow of mixed colors that presented quite the lighting challenge. You’ll see how I worked with CTO gels and a custom Kelvin white balance temperature to correct the color. Want to keep that awesome stained glass in the shot and still light your subjects in the foreground? I’ll walk you through exposing for the highlights first and then adding the flash to fill the foreground, balancing out both extremes. Finally, we will finish with a nighttime shoot in two locations—one with twinkle lights in the background and one in a parking garage with super “awesome” lighting. The choice to drown out and darken that area was an easy one! The fun begins when you see how we added rim lights with gels, sprayed fog, and gave the girls a fashionable pose to really make something magical!
PhotoWalk (Wed, Feb 26th at 5:30pm): Plan to join me on my PhotoWalk as I demo posing and diagnose the light around us first. We will then decide how to attack it with speedlights, strobes, grids, & gels during this all demo/no lecture adventure around the grounds of Mandalay Bay.
Make 2020 the year you really learn how to light and pose in any situation!


Get Connected!