In the dynamic realm of photography, innovation is the heartbeat that propels enthusiasts and professionals alike to explore new horizons. Among the array of technological marvels that grace this landscape, the Sony A7II stands tall, embodying a fusion of cutting-edge features and intuitive design. In this comprehensive review, we delve into the depths of Sony’s flagship mirrorless camera, uncovering its prowess in reshaping the boundaries of creativity and functionality. From its groundbreaking image stabilization to its refined ergonomics, join us as we navigate through the realm of the Sony A7II, uncovering its potential to redefine the art of capturing moments frozen in time.


That this should be the first addressed makes sense, because by now, most people reading this are doing so just to self-educate generally, or looking to buy one of the A7 lineups and are unsure which one. Here are the basics, the standards that we have come to expect like a high-quality EVF (which is brilliant), a tilt screen and so on. Then the points really worth discussing:

Just a year after the release of the first A7, Sony dropped word that the A7 Mark II was heading to the assembly line that is significantly quicker an evolution than you would typically get with high-end camera models that enjoy at least two years of relevance. Also, in keeping with the mentality discussed above, it meant that had you just purchased an A7, you couldn’t possibly show your face in public with it again.
Nonetheless, Sony did it, and they gave it a cosmetic overhaul too with different build materials. It got some protein shakes, so it was beefier and more ergonomically sound, and then to add insult to injury, they packed it with one primary defining feature. The A7II is the world’s first full frame camera to come with in-body image stabilization and in a mirrorless camera.
IBIS (In Body Image Stabilization)
The IBIS system is, frankly, brilliant, and the advantage to having it should be rather obvious. It’s a 5-axis system that pretty much allows you to shake as if you had Parkinson’s and still take a steady image. That means that in low light situations you could, with some confidence, drop your shutter to 1/20 or even 1/10 and still come out with a sharp shot. This meant, of course, that you could use lower ISO, have less noise, higher dynamic range, and everything else that came along with it.

In addition, it must be said that part of the appeal of the A7 is that with a select and growing numbers of adapters, you can pretty much use it with the majority of lenses known to man, and in many of those instances, even with autofocus. So now all those lenses without OIS built in, from many other manufacturers could have a new life. This is especially great for natural light shooters, and those using long glass. I shot frequently on the Sony 70-200mm f/4 racked out, and results were brilliant even down to 1/20. I keep seeing marketing materials saying you can shoot steady at 1/10, but that was hit and miss with me.
This is one of the two new pieces to the A7II that would make me buy this beyond a shadow of a doubt over the original. Sure, it’s not necessarily as effective as OIS systems since you’re limited to the range of movement allowed of the sensor, but still, it’s damn good. The beefed up size of the A7II compared to the original I would assume is in part consequence to this feature, but more on that in the Design portion.
AutoFocus
The thorn in the side of the A7 was always autofocus, which never really felt like it belonged on the A7. It was like having an incredible hunting beagle with strong legs, flawlessly obedient, but was morally wrecked about hunting. It was a letdown. The A7R was even worse as it had NO phase detection.

The A7II was a bit better, but it wasn’t until relatively recently that it really came into its own, and all with a firmware update. It became the latest, and second next to the A7RII, to offer phase detection AF. It offers full phase detection AF with E-mount lenses, but it also allows for 117-point focal plane phase detection sensor to work with lenses attached via an adapter. So finally, that stable of Canon lenses you have, and many others, could benefit from this massive upgrade in AF ability. (Warrants saying here that the firmware upgrade also brought with it the ability to customize the record button).
While shooting a wedding reception with the A7II before the update, I still had no real focusing issues, but let’s get it out of the way here that it’s still not on par with offerings from Nikon or Canon, or for that matter with the A7RII, just a helluva lot closer. The A7RII says it’s a lot better with its AF on paper, and in practice it was nailing focus on the eyes of my subjects as if there was nothing else to focus on. I’ve found it to be noticeably better than on previous models, just maybe not good enough to advertise it on a billboard.

Speaking of billboards, in all honesty, you’re not going to be shooting to print on a billboard, or anything remotely close to that size, and if that’s the case, guess what? The 24MP available on the A7II are going to suit you just fine. And I’m not just saying it’s good enough but great. At this point, you can be sure that you’re probably going to be able to fully resolve most of your lenses (most of us aren’t burdened with what Zeiss Otus lens to shoot), and your resolution will still allow for decent cropping and wonderful printing on a large scale. You also won’t be dealing with file sizes larger than your IQ, that require powerful computer towers to process, and towers of storage to keep.
At no point was I shooting this and thought, “Damn, if only I had 40 megapixels I could take a much better picture.” Never.

It only takes a quick Google search of ‘A7’ to see just how much noise has erupted about this line since its inception. It was half a hundredweight before it was even released, and most of it positive. You don’t get that kind of reception and evaluation without good performance.
I think it goes without saying that the line on a whole was a success, but I think what the A7II has done, especially now with this firmware update, is show doubters that mirrorless are every bit as capable as the DSLR, or, at least, are about to be. Keep in mind the DSLR has been around now in some form for 15 years or so, and the SLR for another 50 years before that. Like a Porsche, they’ve not really changed all that much, but over time and numerous iterations, the wrinkles have been ironed out, and they just keep being refined. Mirrorless systems are embryonic in comparison, and yet in that time, the A7II stands as a testament to how quickly they’ve covered a great distance.


While there was quite a massive leap from the original A7 (and its variants) to the A7II, but the differences in parameters exist in fewer instances from the A7II to A7RII. The A7 is dependable in almost every respect. The only way I’ve found it not to be is the battery. The only thing I can depend on the battery to do is die quickly, so you really do have to have spares. But that’s not a big price to pay because otherwise you’d need bigger batteries and that means a bigger camera. Even still, you’ll get a couple hundred shots per charge, though I will say in low light prior to the update of the AF, it hunted and wore down the battery noticeably.
I’ve found some responsive improvements from the shutter release button. I remember shooting on the original and while the sound the A7 made was nice, and it felt substantial, there seemed to be some disconnect between the depression of the button and the image being captured. It’s hard to describe other than it made me feel a bit detached, like trying to read braille with rubber gloves on. That seems to have been sorted out with this version unless I’m imagining it. But this felt as if timing was no issue, and there was an immediacy to the feedback that’s good.
Image Quality

Sony has really hit the mark with image quality, because their sensors are brilliant, and much of their FE glass is too, especially when you consider the partnership with Zeiss. But the sensor does wonderful work; you will see it from the very first actuation and review. You can feel secure in the ability to underexpose and bring back details much as you are able to on the Nikon FF cameras like the D750 and D810 – they use Sony sensors, so it makes sense, and you can see why. Frankly, Sony sensors are the beacon for quality.
In that vein, it should be noted here that again with the firmware update, came uncompressed 14-bit RAW file capture, and that will have those of you in studio and wedding environments grinning. If you can’t take and process a good picture with this camera, maybe you should put it down. I was able to pull back a full 3 stops on the A7II, which strangely was reminiscent of the D750 experience.

The resolution I discussed above is great, and more than almost anyone I know needs. And in typical Sony sensor fashion, this thing handles low light with aplomb. Noise, when it does appear, is fine, and not distracting, but given the 5-axis stabilization, you’ll notice a lot less of it, hopefully.
Honestly, unless you’re looking to shoot sports or wildlife, I can’t think of why you would want the A7RII over this. I can hear some argue that you can crop your way to success, but if you need to do that, maybe you shouldn’t be out there to begin with. What’s one of the first things a pro will tell you? Try to get it right in camera, period. Never mind how much slower your workflow will be with those files. If you need more megapixels than 24, and you need them all the time, it means you’re likely shooting a genre that requires that. And for clients that do, in which case I’d imagine more of a studio environment, then you may want to look into medium format. Otherwise, if you need the extra resolution sometimes, just rent one, because otherwise I’d bet my pants that if I shot two images on either the A7II or A7RII you couldn’t tell the difference even when printed poster size.
And that’s a beautiful thing about the A7ii; It isn’t some preposterous poster child. It’s not a hunkered-down, beefed-up monster that announces itself upon entering a room. It’s built to be used every day, everywhere, by everyone, even though most people who buy them won’t have an idea of what it’s capable of as evidenced by those who argue about its resolution. It’s also a camera that’s not intimidating to be behind or in front of. It even had a friend’s dad wanting to give it a try, and he took this shot my friend Sara and I, and it’s in focus -and it wasn’t on auto…by some miracle.

JPEGS are a little on the punchy side, but I find this with most Sony cameras, just as I find Nikon cameras to be a bit on the slightly green side. But generally white balance was very good, tending to err on the warm side. This is less of a problem in RAW of course, but in JPEG it’s noticeable. But don’t write off the JPEGs this produces, because they’re good, and the creative picture modes are actually useful – especially the high contrast black & white, which produces some gorgeous stuff. (see below)


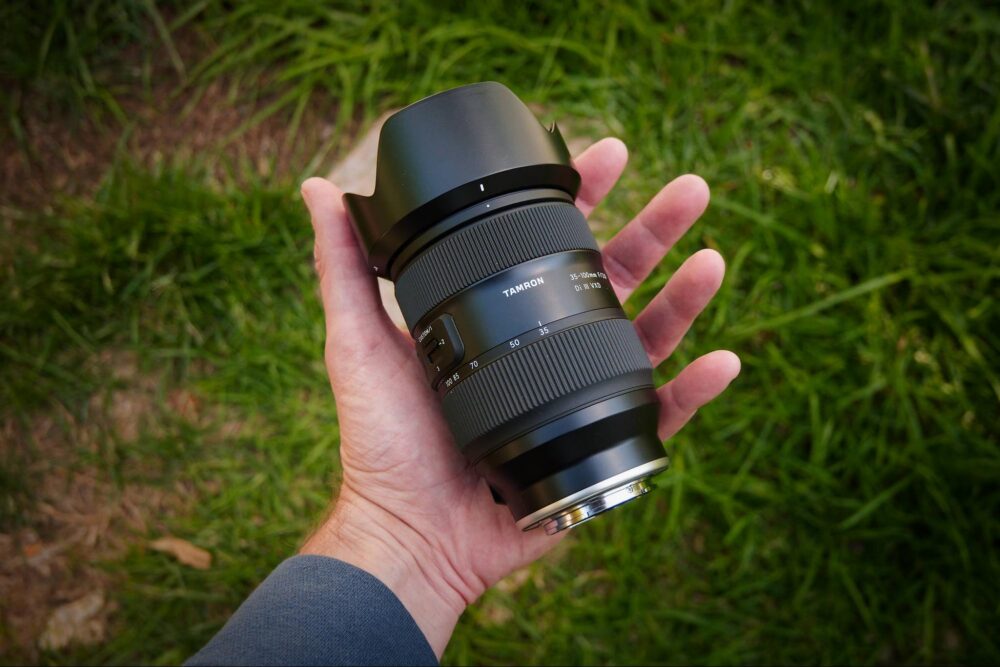
The only issue I had with performance, in general, is the limited availability of native lenses, and the fact that some of the native lenses, namely the 24-70mm F/4 showed MAJOR distortion to the point I began to not use it. But with the adapters available and the ability to phase-detect AF on adapted lenses, this is much less a problem. I’m sort of stumped here as for what else to say, other than the files are a joy to work with. The Sony interface is incredibly easy to adapt to and requires a short learning curve. Unlike Nikon, the Menu navigation just makes sense. The whole camera makes sense.

To someone shooting on a D810 who likes to pixel peep, looking closely at the images from the A7II will be disappointed from a resolving standpoint. But for everyone else, the sane people who know what they’re doing, the type you’d have ‘round your house for drinks, they’re about as disappointing as Adriana Lima’s left breast.
It’s a very easy camera to get along with, and a versatile one at that, especially now. But its size allows you to use it very casually, at your child’s sports game, or at an intimate dinner without drawing too much attention. And then the very next second pirouette to shoot a wedding or be very at home in a studio.
Sony A7RII ISO Sample Images
The following images are completely un-edited, RAW images opened in Adobe Lightroom CC. Scroll to the very end to see a dynamic range demonstration, and a comparison against the Nikon D750 at ISO 6400.


The small form factor of the original A7 was, in many ways, its meal ticket. The boffins at the Sony labs were able to fit in a full frame sensor into something small, light, adaptable, and aiming straight for the heart of Nikon and Canon’s bread and butter. It was ‘The Dark Side of The Moon’ aiming at Sticky Fingers, and it gained traction. Compared to the D810 and 5DRs, this was nimble and light where the others are anything but. Throw a battery grip on those and they weigh as much as the Moon.

So on theA7 We liked the small size, otherwise, why really would we switch to mirrorless? A massive selling point of mirrorless FF format is the small size and weight, and if you lose that, you’re left wondering why would you leave your D810 or 5DS with their lovely bounty of great glass?
But what I think many realize now is that small size doesn’t mean it’s the right size. For one, larger cameras can give a nice sense of occasion, and how Sony has beefed up the A7II and the A7RII, I think it’s all for the better. It’s attractive in a different more Brutish way, yet still civilized. In Bond terms it’s like going from Pierce Brosnan to Daniel Craig. The grip on the A7II is actually able to be gripped with security and sees the migration of the shutter release button move forward to a much more natural place. Even at 1.5x the A7 weight, it’s no fatted calf. And keep in mind it’s also strong, due to the fact it’s more magnesium than plastic, unlike its younger brother.

The other design features are much like that of the A7 and really most people will have to do a double take to notice it’s any different. It’s a good ergonomic design that builds more confidence in shooting and remains small enough that it’s much less intrusive than offerings from Nikon or Canon. You just can’t put a D810 on a restaurant table.
By biggest issue with the A7II design is again the single SD card slot. I know this is not an issue for everyone, and that storage units are more reliable than ever, but on paid assignments, it’s just a bit frightening. I typically shoot small and numerous SD cards anyway, going no larger than 16GB, and that’s rare. Typically, it’ll be two 8GB cards that are duplicates of each other, and when they’re full, they’re both swapped. On the odd occasion, I’ll keep one slot for overflow, but neither option is obviously yours on the A7II. This is a predominant issue with converting to this system for me, even though for the type of shoots I do, headshots, portraits, and tests, I’ll want to shoot tethered.

As just mentioned above, it’s pretty much an entirely magnesium alloy build now, and that makes it durable, along with feeling more of quality. I’m not sure what much there is to say about the quality of the A7 line because it never really leaves you wanting, or worried for that matter.
Sony didn’t come into this arena to offer up some second-rate alternative, and they know that full frame cameras are built to last. It feels as sturdy as a D750, and I don’t mollycoddle my gear. When you pick up an A7, it becomes completely apparent that Sony has applied much of what has made Sony electronics so lasting over the years. It’s good, plain and simple.


When we speak of value, a lot gets encompassed in that since different people draw value differently on different things, so lets work with the constant and that’s price. At a standard $1698 for the A7II, it’s near-as-makes-no-difference half the price of the A7RII which comes in about $3200 and it’s up to you to decide if the major differentiators of the A7RII are worth 2 A7II’s. Yes, it’s got a better EVF, a very quiet shutter, and many more Phase-detect AF points, but the latter two on that list will likely matter to few and specific people. The major difference is the megapixels, which brings me back to where I began.
[REWIND: THE D750 REVIEW | IT’S ACHILLES, LESS HIS HEEL]
So what we have here is a camera that is so good you just read an entire review that is not trying to show that it’s just good, but that it’s as good as and better suited to most than its newer brother that is getting all the attention. Therefore, the things it’s lacking are so minute they don’t really matter. In other words, worrying about any of them while looking at and using a camera this good is like sliding between the sheets with a supermodel who cooks and is allergic to underwear, is not a vegan, and then letting the fact they have tan lines bother you.