We’ve teamed up with Adorama to bring you a new series of photography tutorials called “Master Your Craft” to be featured on their YouTube Channel. Subscribe to see more of our videos on their channel throughout the next couple of months that will cover photography, lighting, posing, and editing education to help you hone your skills and master your craft. To watch the entire series, check out our playlist!
Video for 2 Ways to Light Details for Wedding Reception Photography
Wedding reception ballrooms offer photographers a chance to capture beautiful, professionally designed decor, but they also present a challenge when it comes to lighting the details. Of course, with the right lighting gear and techniques, you can quickly and confidently knock out your detail shots without issue. In this article, we’ll show you two easy ways to light details for wedding reception ballrooms.
[Related Reading: The Power of Grids | How to Create Dramatic Lighting]
Technique 1: Bounce an Off-Camera Flash to Light Details for Wedding Reception Photos

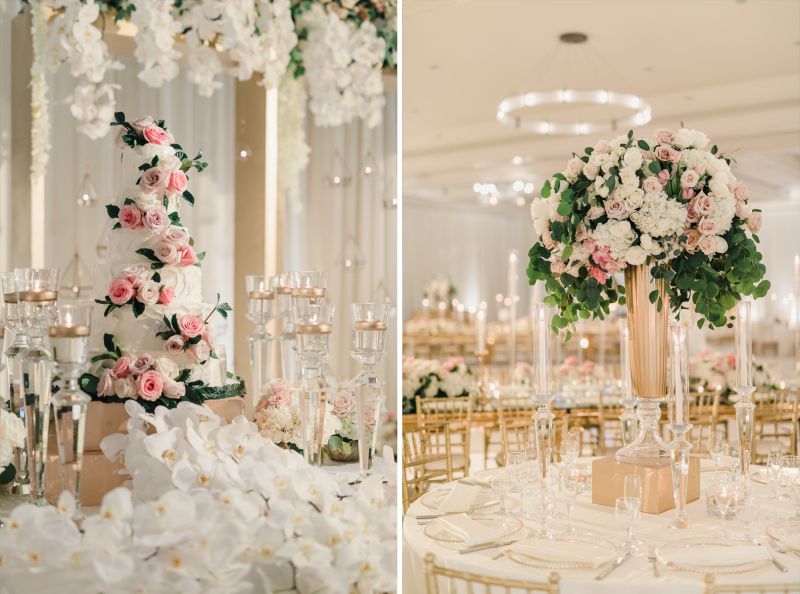
While it may be tempting to shoot with natural ambient light, the key to capturing great detail shots is making specific details stand out. In other words, if you’re trying to focus on a centerpiece, it could get lost among the other decor on the table or even in the room if the ambient lighting does not highlight the centerpiece (see the before image above). When this happens, we recommend bouncing light from an off-camera flash to highlight the detail you’re photographing.

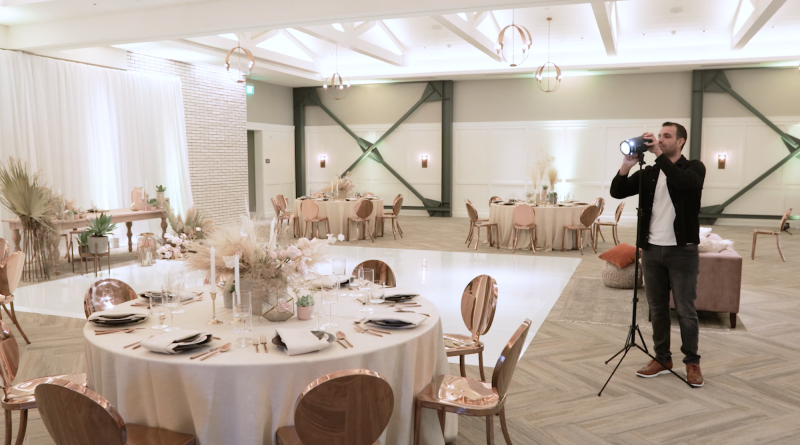
To start, set up the flash on the opposite side of the room from where you’re shooting. Place the flash on a stand and add a full CTO gel to match the color balance of the ballroom. Point the flash into the corner of the room to bounce the light and fill that corner of the room. This will result in a pleasant directional light coming from across the room and adding interest to the details. Once the flash is ready, you can walk back over to the details and take a couple shots to dial in your flash power settings.
This technique is best used in ballrooms that are generally bright to begin with as the flash will wash out the background, which is what allows the details to stand out. The overall look leans toward a natural light style, even though we’ve added flash to fill the room. If you don’t have a wall for bouncing light, you can use an umbrella or comparable surface to achieve a similar effect.
Note: If you only have on-camera flash, be sure to bounce it off the ceiling or a nearby wall. Bouncing light from an on-camera flash is not the ideal solution for lighting detail shots, but it will do in a pinch if it’s your only option.
Step 2: Use a Pin Light and Grid to Light Details for Wedding Reception Photos
For the ultimate lighting control, use a pin light and grid to light your detail photos. This is the ideal solution for making your details pop. Just like before, place your flash on a stand, but this time add a grid as well as a CTO gel, and point the flash directly at the details you’re trying to highlight. Try to choose an angle that compliments the direction that natural light is already falling onto the details. If the lighting is even, then go ahead and set the light up on either side.

Depending on the amount of ambient light in the room, you may be able to use a modeling light (if it’s available on your flash) as your primary light source for the scene. If the room is too bright, you likely won’t have this option. Dial in your power settings on the light until you get the results you’re after. You can see in the examples above that the modeling light didn’t quite produce the level of brightness we were after, so we adjusted our flash power and lowered our ISO to get a nice, moody look for our detail photos.

This technique produces a spotlit effect right on the details that complements more dramatically lit ballrooms.
[Related Reading: How To Master Wedding Ceremony & Reception Site Details]
We hope you enjoyed this video and lesson on two ways to light details for wedding reception photography – catch our next episode of Mastering Your Craft on Adorama’s YouTube channel next week! If you want to catch up on all the episodes, make sure you check out our playlist!


Get Connected!