


How to Create a Natural light Photography Studio

portrait studio

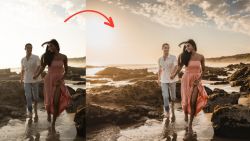
You don’t need studio strobes to get the portrait studio look.  In fact, you can get the studio portrait look with nothing but natural light. In this article, we’ll walk you through the essentials of setting up a natural light photography studio that maximizes the use of available light, giving you a budget friendly option …

Read more

Lightroom AI Retouching Toolkit Released by Visual Flow

Visual Flow has released their Lightroom AI Retouching Toolkit, a preset pack that uses Lightroom’s new AI capabilities to create advanced effects in one click.  Effects that used to require manual adjustments, like dodging and burning, enhancing skies, retouching skin, darkening backgrounds to make the subjects pop and more are now automated with 31 AI-powered …

Read more

Complete Guide to the Lightroom Tone Curve

You’re probably aware that Lightroom is a powerful editing tool, but you might be less familiar with one of its most powerful features: the Tone Curve. In this video/article, we’re going to teach you everything you need to know for mastering tone curves in Lightroom so that you can take more control over your edits. …

Read more

Impossible Things AI Photo Editor Launches Cropping and Major Algorithm Update

impossible things next generation

AI Photo Editor, Impossible Things, has launched their next gen update that includes cropping and straightening, better consistency, a better predictive AI algorithm, and other improvements. The Lightroom AI editor, created by preset maker DVLOP and SLR Lounge, first launched in February of this year with their “early access” version. Since the initial release, the …

Read more

How to Get $300-$600 Off Profoto B10X Single and Duo Kits

profoto b10

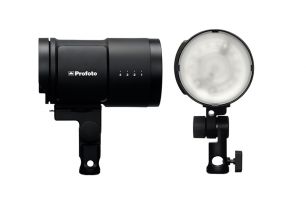
Profoto is currently offering enticing $300-$600 rebates and other offers on their B10X Single and Duo Kits. Boasting a compact size, exceptional power, and unwavering performance reliability, these flash units are a great addition to every photographer’s toolkit.  Take a closer look at the details below. Rebates for United States and Canada If you’re in …

Read more

Pye is at Kajabi Hero Live in Austin, Texas

kajabi hero live

SLR Lounge friends, this is Pye! I’m heading out to Kajabi Hero Live in Austin, Texas this Wednesday! If you’ve never heard of Kajabi, it’s actually the platform that we use to host SLR Lounge Education (among other projects). Kajabi Hero Live is their annual educational/inspirational conference designed for educators and coaches. From Kajabi themselves, …

Read more

Five Creative and Easy Lighting Setups for Any Wedding

wedding flash photography magmod PYE 5951

Looking for easy and effective off-camera flash and lighting setups for your wedding photography? In this video, Pye Jirsa shares five simple lighting recipes for photographers that will help you create stunning portraits of couples using just a few flashes and MagMod modifiers. So if you’re a photographer looking for new lighting ideas to take your wedding photography to the next level, take 10 minutes to watch this video and then go out and practice the lighting setups. We can’t wait to see what you create!

#1 Wrapping Backlight

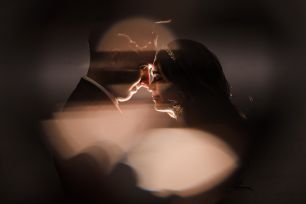
One of my favorite techniques, just backlight your subjects for a beautiful and moody glow. Here’s one of my favorite ways of doing it. 

Grab a MagGel 2, pop on a color of your choice. I like using orange to give the flash a nice and warm feel. Next, pop the MagSphere 2 on top.  For this technique, I love putting them into a closed pose where they’re looking at each other or touching foreheads.

You’re going to position the flash directly behind the groom’s shoulder facing up. The goal here is that the flash fires and wraps around our subjects as it bounces off their clothing and skin. 

Final Images

wedding flash photography magmod PYE 5981 Edit

wedding flash photography magmod PYE 5951

#2 Double Backlight

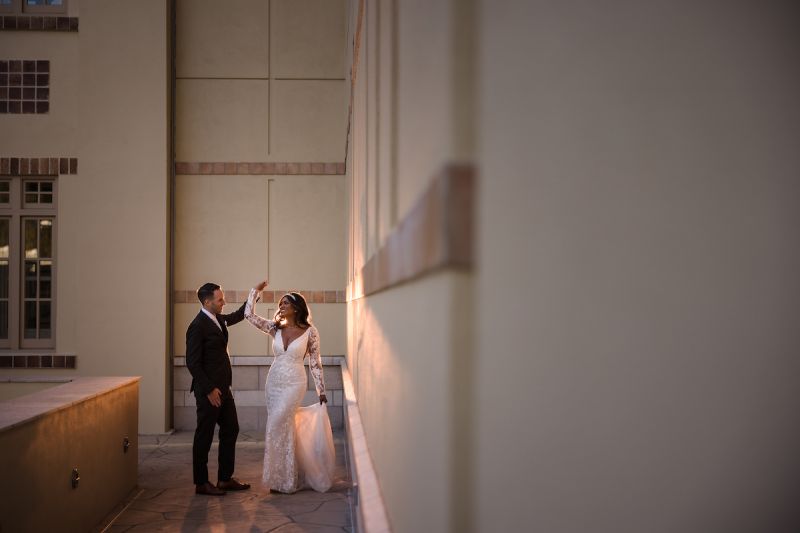
Let me show you one more backlighting technique, the double backlight.  This time, we’re going to use one flash for each person. One for him, one for her. Instead of it being right behind them, we’re going to place it 10-20 feet behind them. This is going to change the lighting pattern to more of a edging or rim light effect. 

Put each flash onto a stand and place them at the same height, I like it around the couples shoulder height. I’m going to add a CTO gel, because again my style is more of the warm natural tones. But pick whatever color MagGel you like, then go ahead and add a MagGrid 2 to each flash. 

For this shot, I’m going to have them do a dance floor twirl so we can see her dress open up. With the couple positioned, I’m going to place the flashes around 10-20 feet behind them and hidden behind where they’ll be. 

Final Image
wedding flash photography magmod PYE 6037 Edit

#3 Hollywood 2-Light

Since we have two flashes setup, let me show you a variation of a two-flash technique I call the Hollywood two-light. Because it’s a lighting pattern often used on production sets.  You’ll need two lights for this one. On each, place a MagGrid 2 to control light spill. If you like, you can also color each light to create a more dramatic look.  For fun, I’m going to use a blue gel for him, and a warm gel for her. 

You’re going to place your subjects back to back, and we’re going to position the lights behind them and angled forward. If you were looking top down on the scene, it would look like this. 

wedding flash photography magmod PYE 6021

#4 Softbox Short Light

Now, let me demonstrate a one-light short lighting variation that I’m constantly using.  I’m going to grab the MagBox and set it up quickly with one or two AD200s. Next, we’re going to find a wall or simple background like this one. From here, I’m going to position her behind him and we’re going to light into her side to create a silhouette of him that frames her face. 

Final Image

wedding flash photography magmod PYE 6087

#5 Boomed MagSphere (in-between couple)

Ok, let’s get a little crazy. I want to show you a technique that allows you to get your flashes into a unique position, which you can then remove easily in post. You will need an assistant for this one, but if you don’t have one, since you’re at a wedding you can ask pretty much any groomsman or bridesmaid to help out.

Let’s get an AD200 or any flash onto a stand that you can boom out. I’m going to place the MagSphere 2 on top to diffuse and send the light everywhere.   

Final Image

wedding flash photography magmod PYE 6110 Edit

10 Tips for Editing Wedding Photos in Less Than 1 Hour!

Wedding photographers are all too familiar with the grind of going through thousands of images after an event. With multiple cameras and full days of shooting, you can see how the number of photos can easily add up. The entire process can be incredibly time consuming, especially for photographers and editors without a ton of experience. Throughout my career, I’ve made it a point to streamline the editing workflow, and in this video, I’ll show you 10 tips for editing wedding photos in less than 1 hour.

Video: 10 Tips for Editing Wedding Photos in Less Than 1 Hour!

  1. Shoot Compressed RAW
  2. Shoot in Manual Mode
  3. In-Camera Color Temperature
  4. Use a High Speed Card/Reader
  5. How You Import Matters!
  6. Import to a Fast Internal Drive
  7. Simplify Your Culling
  8. Use AI-based Editors
  9. Sync Photos Per Scene
  10. Final Review & Signature Edit

Step #1: Shoot Compressed RAW

editing wedding photos compressed raw
Compressed RAW setting option on the Canon EOS R5

The first step to editing wedding photos begins before you shoot a single photograph. If your camera has the option, shoot medium or compressed RAW. Shooting in RAW is a given for its flexibility in post. However, today’s cameras often come with 50+ megapixels, but for portrait work, you don’t need more than 20-30.

By scaling down, you’ll not only save a ton of storage space, but your editing machine will run faster due to the smaller file sizes without a reduction in quality.

Step #2: Shoot in Manual Mode

editing wedding photos manual mode
Manual setting option on the Canon EOS R5

Having consistent exposures is critical for batch processing and shooting in manual mode is your best bet for achieving this. Aperture/Shutter priority still rely on some level of auto-exposure that varies depending on what your camera is pointing at. These exposure differences will bog down your editing workflow since you’ll need to individually correct each image that is off.

Adjusting your camera settings on the fly to changing scenes gets easier with time. Once adjusted, you’ll get consistent exposures every time regardless of where you are.

Step #3: Adjust Color Temperature/Tint In-Camera

Once you’re comfortable with manual exposure, start adjusting your color temperature/tint in-camera. Much like having consistent exposures, having your color temperature already set will save a ton of time in post.

On top of that, it’ll help your AI-based editor immediately understand your intentions with your image. More on that later.

Step #4: Use a High Speed Card & Reader

While we’re waiting for direct-to-cloud capture, we’re stuck with memory cards. It’s important to keep in mind that memory cards and card readers are not created equally. Make sure you’re using a high speed memory card as well as a high speed memory card reader. Having a high speed memory card reader can save you 10 minutes just from the import process. Even more so if you’re uploading multiple full cards.

Step #5: How You Import Matters!

editing wedding photos import

Use these settings when importing into Lightroom:

  1. Build Preview > Minimal
  2. Check “Build Smart Previews”
  3. Check “Don’t Import Suspected Duplicates”
  4. Leave other two options unchecked.
  5. Select your baseline look or preset if you’re planning on editing manually.
  6. Select “None” if you plan to edit using an AI-based editor.

Step #6: Import to Your Fastest Internal Drive

Don’t use external hard drives. Sorting through and editing high volumes of high-resolution images requires a ton of data bandwidth. An external hard drive will likely slow down that process (though if you must, make sure it’s an SSD connected to the fastest port available).

Ideally, you’ll want to import your images and keep your catalogs on a local SSD drive.

Step #7: Simplify Your Culling

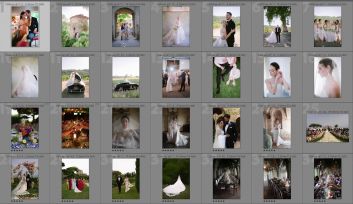
I’ve seen many photographers assign specific meanings to their star-rating system. I’d advise against this as doing so only complicates your culling process.

Flagging, rather than starring, reduces culling time significantly.

Instead of having to spend more time on these complex judgment calls, try out what we call “Culling-In.” This means that you’re going to assume that every image is going to be rejected unless you flag it as a keeper. As you move through each image, you’ll only be thinking one thing: Do I want to deliver this image?

For added efficiency, turn on “Auto Advance” which will automatically move you to the next image after flagging, saving keystrokes.

Step #8: Use AI-Based Editors

Here, I want to introduce Impossible Things, our new AI-based Lightroom native plugin. It’s the only AI editor (that I know of) that can be used with your own presets.

editing wedding photos ai editor impossible things

After installing, simply go to Plug-in Extras > Edit Photos. From there, select your preset, select your additional settings such as AI Portrait Retouching, and hit proceed. Impossible things will do the rest and after a brief moment, your work will essentially be done.

If you choose to use an AI-based editor, you can skip to Step #10.

Step #9: Sync Your Photos Per Scene

If you’re editing wedding photos manually, you should have your preset applied on import. From here, I suggest that you work by camera and by scene.

Make your adjustments to the first image of a given scene. Then, select the last image in that scene, and copy all of your adjustments over. Repeat for each new scene until all of your images are edited.

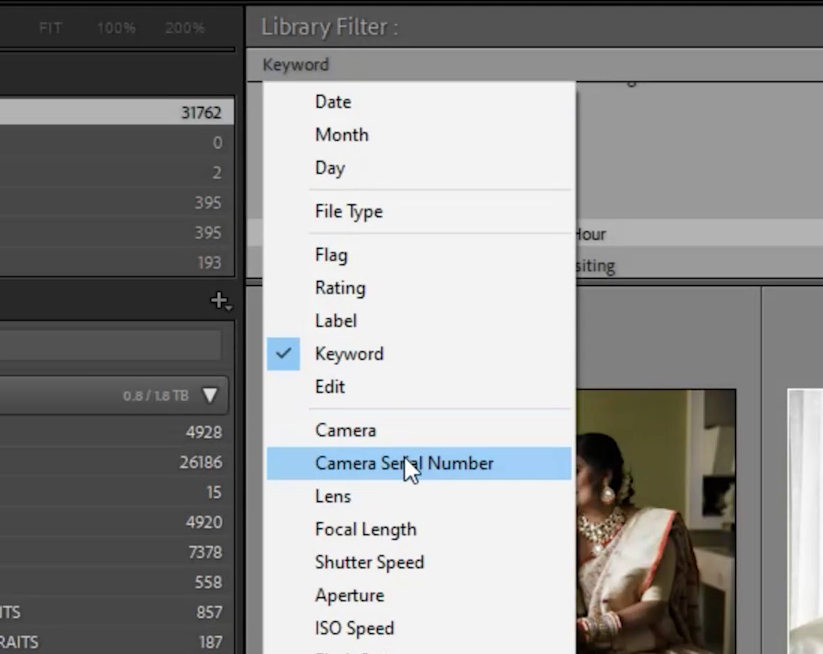
If you’re working with multiple cameras, filter through your cameras by selecting “Camera Serial Number” (In case there are more than one of the same camera). Follow the steps to edit the first scene, then move to the same scene on the next camera(s), ensuring that any differences in camera profiles are corrected. Follow the same steps for each scene.

Note that AI-based editing tools such as Impossible Things will actually sync all of your cameras for you!

Related Reading: 4 Steps for Cohesive Editing in Lightroom

Step #10: Final Review & Signature Edits

Whether you’re editing wedding photos manually or using AI, always review for consistency and make any necessary minor adjustments. As you review, mark your favorites to add in your signature look. These are the images you’ll want to have featured in albums and blog posts so be sure to give them some extra love at the end.

Conclusion

That’s it! From there, export and prepare your images for delivery.

If you enjoyed this tutorial, be sure to check out our complete Mastering Lightroom course on SLR Lounge Premium. You can also visit Visual Flow for our entire library of Lightroom presets and retouching tools. Lastly, check out Impossible Things and how you can integrate them into your own professional workflow.

Don’t miss our next episode of Mastering Your Craft on Adorama’s YouTube channel next week! If you want to catch up on all the episodes, make sure you check out our playlist!