Pye Jirsa is the co-founder of SLR Lounge and Lin & Jirsa Photography, one of Southern California's most recognized wedding photography studios. He is the creator of SLR Lounge's full educational library and has trained over 20,000 photographers since 2008 across lighting, posing, editing, and business strategy. He is also the co-creator of Visual Flow Presets and has spoken at WPPI, PPA, CreativeLive, Fstoppers, and Adorama.
Parks are fantastic places to take portraits. They have tons of interesting and vibrant scenery. Not only that, but you can catch some great lighting regardless of the time of day. In this video, I’ll show you 5 simple portrait ideas that you can try in any park.
Video: 5 Simple Portrait Ideas & Tips for Any Outdoor Park
For our 5 portrait ideas, we’ll be using a pair of lenses sent to us by Tamron. We’ll be trying out the 28-75mm f/2.8 Di III VXD G2 and the 70-180mm f/2.8 Di III VXD lenses for Sony. The wide range of focal lengths as well as Tamron’s incredible lens build will help us get the perfect portrait series with our model, my friend, Sabrina. You can check her out on Instagram here.
#1: Backlight Your Portrait
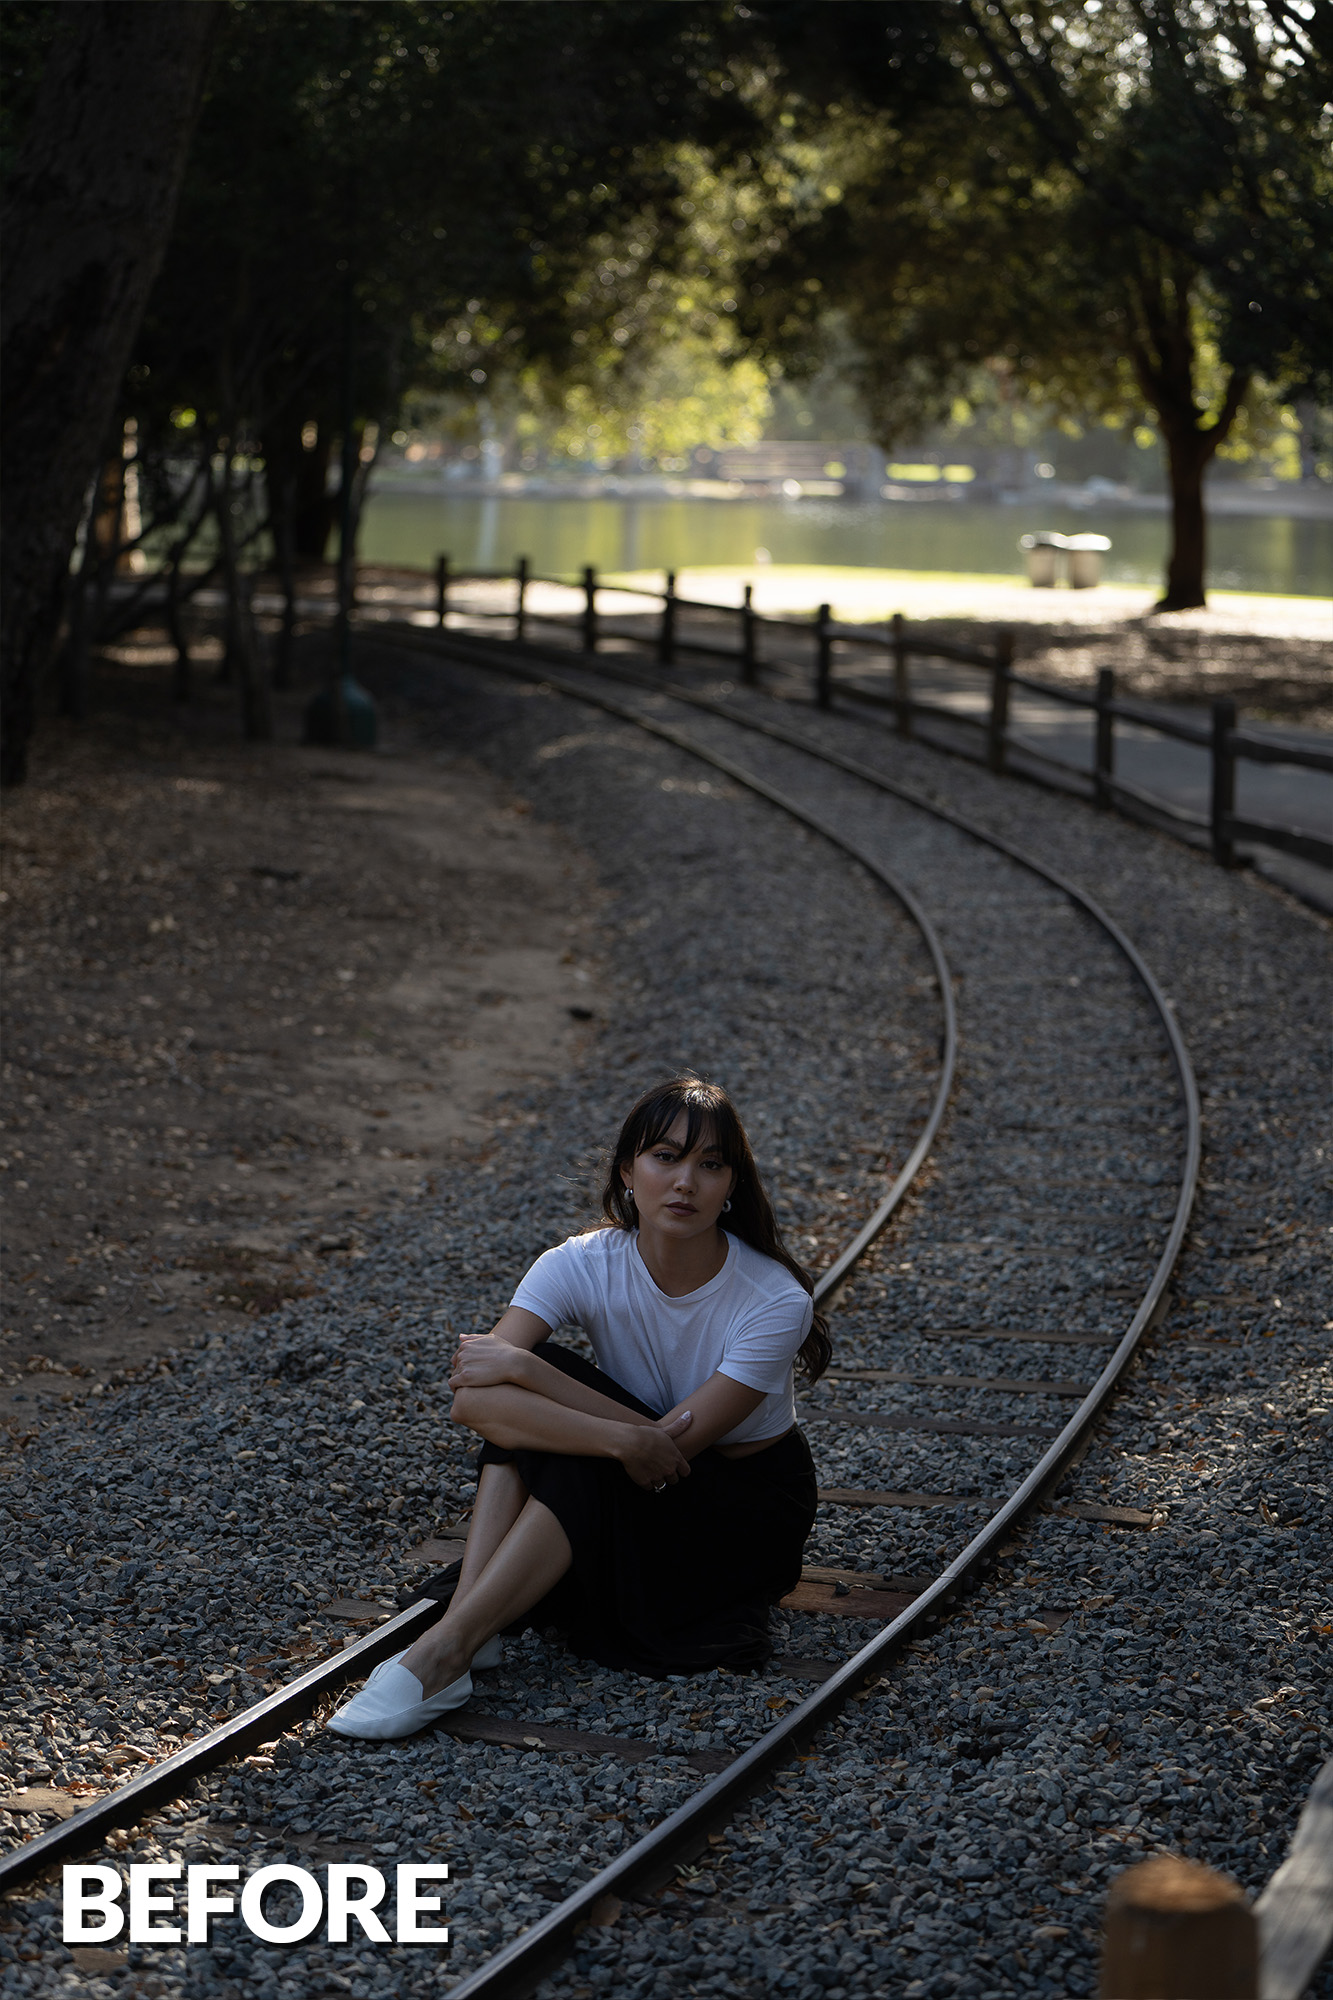
Starting with the 28-75mm f/2.8, my first tip is to backlight your subject. I placed Sabrina underneath the dabbled sunlight created by the trees above.
Compare this with an image in direct sunlight.
#2: Reflector Bump
I had Sabrina pose beside the shaded side of a tree. The only problem is that the sunlight was bouncing off of the ground and creating a slight “underlight.”
To even this out, I used a white reflector and held it up to bounce the light back on her face. This created a very pleasant and even light, perfect for portraits.
#3: Shoot in Open Shade
Let’s switch to the 70-180mm f/2.8. I call this concept the “Open Shade.” You’ll notice that one side is shaded, in this case, by the tree, and the other side is open to the sky.
This essentially creates a giant soft directional light source. You can add an accent piece or shoot plainly. Either way, the light makes for great portraits.
#4: Compress the Scene
Take advantage of the zoom lens to squash the foreground and background together to really focus in on your subject. I combined this concept with tip #1 to create a backlight on Sabrina.
I then framed her in front of a dark area in the trees beside other backlit trees and captured these great images showcasing her dance skills.
#5: Find the Brightest Spot
This is one of my favorite framing elements because it places your subject where the most attention is drawn to in the image.
In this instance, the brightest spot in the frame was the opening in the trees in the background. Check out the difference.
Conclusion
I hope you enjoyed this article/video. Give these portrait ideas a try during your next park portrait session! Be sure to visit SLR Lounge Premium for complete courses on photography related subjects including Mastering Lightroom and Creating a Successful Photography Business. You can also visit Visual Flow for all of our intuitive Lightroom presets and retouching tools. Lastly, be sure to check out Tamron’s incredible 28-75mm f/2.8 as well as the 70-180mm f/2.8 lenses to cover your full range of focal lengths for all types of photography at a great price.
Creating a seamless photoshoot experience isn’t just about knowing your camera settings or mastering lighting; it’s about effective communication and building a relaxed atmosphere that allows clients to feel comfortable and confident in front of the lens. This video is for all of you professional & aspiring professional photographers who want to communicate more effectively with your clients as well as feel like you’re having more effortless photo shoots.
Watch the Video
Tip #1: Know Your Gear
One of the things that you’re going to feel the most as a working professional, especially early in your career, is that you’re going to have a hard time separating what you’re thinking about the camera and the shoot from actually having a conversation with your clients. You’ll find that your mind will want to focus on exposure, composition, and lighting rather than communicating and building a relationship with your clients. So step number one in getting over that is to really master the gear itself, understand manual exposure so that you know how to dial those things in and it becomes muscle memory.
If you’re looking for a guide on how to do that check out our Photography 101 course designed to help you master manual mode on any camera. In addition to camera settings, I want you to master your ability to light, get confident with your ability to walk into any scene, and be able to find great photographs. When you get to that place then your mind will take it a little bit more easy you’ll back off on the technical side and allow more of your energy to focus on your clients and building that relationship with them.
Tip #2: Have a Plan
I’ve been doing this for over 10+ years and there are plenty of people that have been doing it longer but even with a decade’s worth of experience, I still scout my locations and plan before shoots. These things become even more critical as you learn more about photography because you want to set yourself up for the best shoot possible. Before the shoot, I am discussing wardrobe with my clients, helping them select an outfit that is cohesive and contextual for the locations we are shooting in because I’ve had the experience where a client shows up and they’re dressed in an outfit that doesn’t quite fit the scene which then reflects in the photos (whether the outfit isn’t flattering or the colors just didn’t compliment the scene). I typically arrive 30 – 60 minutes early depending on how intricate the shooting timeline is. If it’s a wedding, it’s gonna be a couple of hours early so I can scout the entire venue on the day of. Why? Even though I’ve shot at these venues 50 – 100 times by now, you never know what that location is going to look like on the day of. I would recommend downloading the Sunseeker App to determine where the sun is going to be throughout the day so you can better track its location and find shooting locations accordingly. This is once again another one of those things that alleviates the stress from you so that more of your emotional energy can go into your clients.
Rewind: [How to Book More Photography Clients – Free Training!]
Tip #3: Continue Building Rapport
For the first 15 minutes, I don’t want you to focus on taking pictures. This is a method I’ve explained in the past and what we teach in our first Wedding Workshop about client communication. I want the conversation to completely focus on them and what they’ve been up to recently. Talk about their work, home life, just get to know them better. In actuality, this is their first impression of you, and that matters, especially if this is an engaged couple and they are looking to book you on their wedding day. This is their first taste of how you communicate to make sure they feel comfortable but also who you are as a person beyond your art. What helps tremendously in this process is having gone through the W.A.V.E (Wall Art Vision Exercise from our Business Training). This is a visualization exercise that we do on the first time that we meet or talk to a client and it helps us to understand what the clients actually want and value what it is that they appreciate not only in their photography but actually in their own life and memories so gearing that conversation the first 15 minutes of building rapport should be geared around what the clients actually value if their values are centered around family talk about family if they are centered around aspirations and career then talk about what they’re doing next in their career focus that conversation on the things that they value most and then from there and before picking up the camera we step straight into the foundation posing exercise that I believe I’ve taught you all in previous Adorama videos so we walked them through that as a continued ice breaker and to help them feel comfortable posing in front of the camera before ever picking up the camera for the first photograph now in that process of going through the foundation posing framework.
Tip #4: Establish Authority
This comes from a book I read called Charisma Myth where it mentions having authority with warmth, otherwise, you come off to other people as arrogant. You want to be warm in the way that you’re conveying your message, but at the same time, we want to convey authority in the subject matter that we’re teaching. The Foundation Posing Framework is a crucial step in establishing authority with your clients because it allows them to trust you while you guide them through basic posing principles so they can feel more at ease. Every client is going to come to you and say the same thing “we want authentic photographs…but we don’t know how to pose we feel nervous in front of a camera” this is where you can put them at ease during the photoshoot by saying & establishing that kind of authority, this way when the camera is pointed at them they’re already at ease because you’ve done this series of steps
When I came into the industry, there were several people that I really looked up to, and I still look up to today. One of them is Jerry Ghionis, who I’ve always looked up to because of the way he communicates with his clients in this smooth Australian accent and it’s a beauty to watch. At the beginning of my career, I found myself trying to emulate this and then I realized… I’m not Jerry. I’m the kind of funny, awkward Dad and that’s the person that I need to lean into, so on every photo shoot, I am my goofy self because that is who I am. Don’t forget who you are in the process because in trying to be someone else, the best you can essentially be is a worse version of that person. Focus on being yourself and take each of the frameworks and all the things that you learn and pick up from other people and bring them into your own style of communication.
Doing these five things will help you walk away from your photoshoots feeling like you just hung out with friends for a couple of hours and managed to get tons of great photographs along the way. In fact, you’re going to find that many of your clients are not only going to become repeat clients, but they’re also going to become your friends. Be sure to catch our next episode of Mastering Your Craft on Adorama’s YouTube channel next week! If you want to catch up on all the episodes, make sure you check out our playlist!
Bird photography, with its unique blend of challenges and rewards, is a highly rewarding endeavor for photographers of all skill levels. In this comprehensive guide, we dive into the essential aspects of this captivating genre. Covering everything from selecting the right gear and camera settings to mastering composition and lighting, this article is designed to …
Improving your photography is not an easy thing to do. However, photography is a skill and just like any skill it can be learned. Follow this advice and you WILL improve.
One of the most frequently asked questions I receive from photographers in our Photography Mastermind Group, and even via DMs goes like this: “My clients want my RAW files. What should I do?” This topic has sparked a lot of debate in the photography community, and unfortunately, I’ve seen a lot of poor advice circulating. …
How do we get tack-sharp images, especially when it comes to groups, when we’re shooting with a wide-open aperture? This is without a doubt one of the more common questions I get. In another article, we reviewed how to take sharp photos, and in this one, we’re going to get more specific and provide you with some tips on getting sharp images when shooting groups at a wide open aperture. Let’s dive right in.
Video: 5 Tips on Shooting Sharp Images with a Wide-Open Aperture
Tip #1: Line Up Your Subjects on the Same Plane
Whenever you’re posing more than one person, you want to make sure to line everyone up on the same focal plane. The easiest way to do this is to actually walk around to the side of your subjects and look at their profiles to ensure they’re lined up correctly. It also helps to explain to the group what it is you’re doing so that they can assist in staying lined up. I usually tell them I’m shooting at a wide aperture and explain that they need to stay lined up so that everyone is in focus. Once everybody’s lined up, take a test shot and zoom in to make sure nobody looks blurry.
Tip #2: Use Pixel-Based Focusing Systems
If you’re on a mirrorless camera, like a Canon EOS-R or Sony A7R IV, for example, you will generally already be using a pixel-based focusing system. If you’re using an older DSLR, however, like a Canon 5D Mark IV, then turn on Live View and shoot using Live View. The reason for this is pixel-based focusing does a much better job tracking focus than using through-the-lens focus systems, especially when you’re shooting with a wide-open aperture.
If your camera features face & eye detection, then make sure it is turned on. Once the group is lined up, make sure your focus is point is placed directly over your subject’s face, and if you have an option to select the eyes, even better.
Tip #4: Understand Distance
It’s important to understand how distance affects depth of field, or the area in focus. The farther you are away from your subjects, the more leeway you have with the depth of field. If you’re shooting wide open on a 50mm prime, for example, you’ll have more wiggle room to capture tack-sharp images standing 15 feet away from your subjects than you would standing only six feet away (with proper social distancing in tact). The closer you stand to your subjects, the more you have to pay attention to the focal plane and other details. If you’re struggling to keep your subjects in focus at close distances, you can also step back and use another focal length (say a 105mm f/1.4 instead of a 50mm f/1.2). Either way, understand the lens you’re working with and how shooting distance affects the area in focus. See the graphic below for a visual representation of this concept.
Not all lenses are created equal. On the Canon RF 50mm f/1.2, for example, I know that I can still capture tack-sharp images when shooting wide open, but this isn’t the case with all prime lenses. Some prime lenses produce softer focus when shooting with a wide-open aperture. In such cases, the images will always be a little softer. You can stop down the aperture by two or three stops to increase your depth of field, which typically helps, depending on the lens.
If the lens blurs around the edges, avoid shooting wide open when using it for group shots. Stop down the aperture to f/2.8 or f/5.6 (see the image above) to take advantage of a wider depth of field and get edge-to-edge sharpness with a larger group.
This leads us to the first of three bonus tips.
Bonus Tip #1: Do Not Shoot Journalistically Wide Open
If you’re shooting journalistically, do not shoot with a wide-open aperture. When it comes to shooting portraits and your subject is holding still and posing while you work to capture the shot, you have a better chance of capturing an artistic, tack-sharp image with a shallow depth of field.
When you’re shooting journalistically, in the moment, you’re going to get a lot of blurry images with a wide-open aperture. If you’re photographing a bride and groom walking down the aisle during the recessional, don’t shoot it wide open. If you do, you better know your gear and know that the focus can keep up with the action. I typically stop down the aperture during moving shots to ensure more accurate focus. So, on a 24-70mm f/2.8, I know that I can get tack-sharp images at f/2.8 because that lens focuses very quickly and the depth of field is adequate for capturing the bride and groom as they exit the ceremony site. If I’m photographing sports or other types of action shots, then I’ll stop down the aperture a bit more.
Bonus Tip #2: Verify Sharpness
Even though I’m comfortable shooting wide open, I still make sure to look through my images before moving on so that I can make sure the expressions are good and also verify sharpness, especially with group portraits. If I notice the images are not sharp, I will stop down the aperture a little until I get the results I need. It’s better than getting back to the studio later only to realize that half of the shots are out of focus.
Bonus Tip #3: Don’t Solely Rely on Depth
Keep in mind that depth is a wonderful compositional tool, but it’s only one of many available to you! You also have lighting, leading lines, framing, symmetry, and many others at your disposal. When you rely on shooting every image with a wide-open aperture so that your background is blurred, then you’re limiting the diversity of your portfolio. The images in your collection are likely going to look very similar. So, use depth as a compositional tool, but don’t lean on it as a compositional crutch.
Conclusion
We hope you enjoyed this article/video with five tips (plus three bonus tips) on how to shoot sharp images with a wide-open aperture. When you put these tips into practice, you’ll find that your shots are not only sharp at a distance but also when you step in a bit closer, even if you’re still shooting wide open. It’s important to understand that shooting wide open takes practice. Don’t try this out with paying clients without first practicing and mastering the technique.
Be sure to catch our next episode of Mastering Your Craft on Adorama’s YouTube channel next week! If you want to catch up on all the episodes, make sure you check out our playlist!
In photography, some of the most compelling images are the ones that freeze motion, especially fast moving, dynamic motion. Whether it’s the graceful leap of a dancer, the splash of water mid-air, or the raw energy of a sporting event, freezing motion brings these fleeting moments to life with clarity. In this guide, we’ll explore two powerful techniques for freezing motion in your photography: using flash and using high shutter speeds.
How to Freeze Motion Using Off-Camera Flash
In this video, Pye demonstrates how to capture stunning dance portraits, using flash to freeze the model’s dynamic movements.
What You’ll Need to Freeze Motion
A high-resolution camera. A 30-45mp camera like the Canon EOS R5 will work great.
Off-camera flashes. I’ll be using two Westcott FJ400‘s with the beauty dish and umbrella.
Any regular colored fabric from your local fabric store.
Before we jump in, give our dancer, Sabrina, a follow on Instagram here!
Steps to Freezing Motion with Flash
Let’s walk through the steps to freezing motion with flash.
Step 1: Determine the Composition
My composition is very wide to make sure all the movement gets captured in the frame. You might get objects around the frame, however, this can be fixed in post. A high resolution camera is useful here as we have more flexibility when cropping to our desired composition later.
Step 2: Determine the Amount of Ambient Light
To freeze motion, I want to nix all the ambient light in the studio. The shutter speed is important here because a slower shutter speed may cause “ghosting.” This is when the ambient light mixes with flash and creates unwanted blur. I maxed out my flash shutter speed at 1/200 seconds, f/7.1, at ISO 800.
Step 3: Modify/Add Light
My key light is the FJ400 on camera left. I attached a shoot thru umbrella to create a large bounce from the umbrella but the white wall behind it as well. I placed the second FJ400 on the other side with a beauty dish. This light will add a little kick on Sabrina.
Higher power outputs increase recycle time, causing inconsistent lighting during bursts.
Here are a couple tips when using flash to freeze motion:
The higher the power of a flash, the longer the “Flash Duration” will be. Even though the flash is still incredibly fast, it can still cause some unwanted blur. A lower power has a much shorter flash duration, guaranteeing tack sharp action images.
One of the benefits of a high powered flash is the ability to power down. Powering down reduces the “recycle time.” At high power and high frame rate, the flash can’t keep up. When I reduce it, its able to give me consistent light with each frame.
How to Freeze Motion with a High Shutter Speed
Freezing motion with a high shutter speed is a straightforward technique. The faster your shutter speed, the sharper you can capture even the quickest actions. However, as explained in our Exposure Guide, increasing the shutter speed affects your exposure, requiring adjustments to either the aperture or ISO to maintain balance. In some situations, your aperture and ISO settings may limit how high your shutter speed can go.
To ensure you can effectively freeze motion, it’s important to understand the minimum shutter speed required for your subject. Below, we’ll explore the three key factors that influence your options for setting an effective minimum shutter speed:
Factor 1: Speed and direction of the moving subject
The most influential factor when it comes to freezing motion is the speed and direction of the moving subject. If the motion is slow, like someone waving his hand, you probably can freeze that motion with a 1/100th second shutter speed. But if the speed of the motion is fast, like someone swinging a baseball bat, you may need 1/1000th second to freeze the action.
When it comes to direction, a subject that is moving towards you or away from you can be frozen with a slower shutter speed than a subject that is moving in a side-to-side direction. So, if you want to freeze a dog running towards you, you can probably freeze it with 1/500th second shutter speed, whereas if the dog is running right to left, you may have to increase the shutter speed to 1/800th second. This is because the motion is more pronounced when the subject is moving across the frame as opposed to towards or away from you.
Factor 2: The distance between you and the subject
When the subject is close to you, the range of motion across the frame is much larger than when the subject is farther away from you. As a result, when you are shooting a moving subject up close, your shutter speed needs to be higher than when you are shooting the same subject moving the same speed a lot farther away.
Factor 3: Focal Length of Lens
The lens focal length that you are shooting with and how much of the frame your subject is occupying also affects how fast of a shutter speed that you will need. A wide angle lens requires less of a shutter speed to freeze motion as opposed to a telephoto lens. Just like shooting a subject that is up close, when you zoom in with your lens or use a telephoto lens, the subject’s size and motion in the frame becomes more pronounced.
Photo by Matthew Saville for the Sony a1 Review
If you are shooting a soccer match with a wide angle lens, each player is moving through a small space of the frame. If you zoom in or use a telephoto lens, you will need a faster shutter speed in comparison to when you are using a wide angle lens.
There are countless ways to get creative with studio portrait lighting. In this video, we’ll be putting the spotlight on our model with an incredibly simple creative lighting setup using only two off-camera flashes.
Video: Creative Lighting Setup For “Spotlight” Style Portraits
Before we jump in, be sure to give my friend and model, Kiara, a follow on Instagram. Let’s start with what we’ll need for our creative lighting setup.
Camera & Portrait Lens. I’ll be using the Canon EOS R5 with the RF 70-200mm f/2.8L to get that separation from the background.
2 Off-Camera Flashes. I’ll be using two Westcott FJ400‘s.
As you can see, our composition is pretty simple. The important piece to keep in mind is to give your model some distance from the background for better lighting control.
Adding in the Lights
The first step in our creative lighting setup is to drop the exposure. This will get rid of all the ambient light and make room for the flash. A setting of 1/200 sec, f/5.6, and ISO 100 will do the trick.
Next, let’s add in our first light. This will be our backlight and I placed it right behind Kiara at a downward angle.
It’s important to consider your model’s distance from the light. You’ll notice that the closer Kiara is to the light, the more concentrated the light is on the top of her hair. The further she is from the light, the more evenly spread out it is, creating a better outline.
Finally, let’s add in our key light. The Westcott Optical Spot lets us create this spotlight effect on Kiara. If you don’t have an optical spot, a tight grid on a basic reflector should achieve a similar effect, albeit with slightly less control.
The Westcott Optical Spot also comes with “drops in filters” that cast specific patterns and shapes for even more creative lighting looks. I used a simple circular shaped drop-in filter to tighten up the spotlight effect. Then, I slightly defocused the spotlight to create softer edges.
Don’t miss our next episode of Mastering Your Craft on Adorama’s YouTube channel next week! If you want to catch up on all the episodes, make sure you check out our playlist!
Family photography is an art form that captures precious memories of the people we hold dear. With the advent of digital cameras and smartphones, taking photos of our loved ones has never been easier. However, when it comes to professional family photography, two styles have emerged: lifestyle family photography and traditional family photography. While both styles capture important moments in a family’s life, they differ in their approach, aesthetic, and final result. In this article, we will explore the differences between these two styles of family photography, their advantages, and which one might be best for your family.
Video: Family Lifestyle Photography vs Traditional Photography
This week, I’m going to show you a sneak peek into the SLR Lounge Premium Library. This is a chapter from our new course, Family Photography 101. This course is a complete guide to capturing unique and memorable family portraits. In this video/article, Shivani and I will be comparing family lifestyle photography with traditional family portraits.
When we think of family portraits, we automatically picture traditional family poses: Everybody lined up, happy and smiling. Family lifestyle photography shines a different light on family portraiture. Rather than having everybody perfectly posed, lifestyle captures the personality of the family. The spontaneity can be a great addition to a complete family portrait album. Although they call for different family poses, both styles can (and should) be used in a single session. First, let’s discuss how the two styles differ.
Traditional Family Photography
This is the most requested type of family portrait. Everybody is looking at the camera, smiling, and the outfits all look good, etc. Pretty pictures in a pretty location. The first thing you’ll notice in these examples is how they all look quite similar. Everybody is on the same focal plane and lined up starting from the center of the photo. We follow a posing guideline much like Foundation Posing that we’ll discuss in later chapters of Family Photography 101. This is the staple photograph that every family wants and is usually where we begin when we photograph the families.
We placed the grandparents in the center and placed the rest of the family in an “Open Pose.” This is perfect for large families like this. I want to point out the “feel” or “vibe” of the image. The family dressed in matching colors to blend with the beach scene harmoniously. Keep an eye out for this in the next examples.
Traditional Example #2
The previous posing principle applies to portraits with three people. Pick a center person and build around them. Once your family is in position, you can then direct them into more natural and candid expressions. Note the color contrast this time. The red outfits pop out against the green background.
Traditional Example #3
You can then add in actions to draw out different reactions such as walking, or even tickling. To capture this photo, Shivani had the family walk through this clearing. This family was also dressed in colors that matched the location. We’ve included a full chapter on wardrobe and color in Family Photography 101. From here, we begin to blend into lifestyle family photography.
Lifestyle Family Photography
As photographers, we want to capture realism and authenticity. That’s the core of lifestyle portraits. Shivani points out that lifestyle allows more “imperfections.” We want to capture the specific mannerisms and nuances of the family. In a sense, “perfection” throws off the idea of lifestyle. We want to leave room for imperfections because that’s what’s real and authentic.
Lifestyle Example #1:
This photo is a great example of realism in lifestyle. The family loves to play “London Bridge” and jumped into it in order to calm the child. All Shivani had to do was capture the scene as it unfolded in front of her. The beauty in the scene comes from how happy the child was in that moment. As Shivani states, “This is their family story.”
The family was placed in front of the bright background. In addition, the leading lines guide the viewer to the family. Lifestyle photography is a great because you can still incorporate the artistic components of photography while capturing authentic moments.
Lifestyle Example #2:
This photo is another great example of embracing the imperfections. Even though the expressions may not be perfect smiles, the moment itself is what makes the photo perfect. Allow the family to be spontaneous. Then, all the photographer has to do is capture what’s happening in front of them.
Lifestyle Example #3:
Check out these images in this incredible home of a real moment between the kids. A tip Shivani provides is to create the scene around what the kids like to do. Find their favorite activities and things that will generally make them happy. Doing so will create authentic reactions and moments.
What Defines Lifestyle Family Photography?
I define a lifestyle shoot as what the family does on an everyday basis. Photos captured with a bit of added production value. That being said, everybody has their own take on what “lifestyle” is.
Take the above examples by Vinson Images. Jason has a unique approach to family photography. Simply put, he follows the family around for 12 hours, documenting their daily lives. What happens in that day is completely up to the family. His approach is pure documentary and realism. Jason even goes so far as to asking the parents not to clean the home.
From fully traditional to documentary, family lifestyle photography can fall anywhere in that spectrum. The style depends on what best suits your tastes, and importantly, your personality.
Conclusion
I hope you enjoyed this sneak peek into Family Photography 101. Family lifestyle photography is a fun way to capture authentic and real moments. It also provides great memories for the family to cherish. For the complete course, be sure to visit the SLR Lounge Premium Library, and we’ll see you next time!
Free Newsletter
Tutorials, gear reviews & pro tips — straight to your inbox.