
Flash gels are thin, heat-resistant sheets of colored material that fit over a flash or strobe to shift the color of the light it produces. That single sentence makes them sound simple — and they are — but the results they unlock are not. With one CTO gel and a tungsten white balance, you can take a mismatched reception hall shot and make it look like everything belongs in the same scene. With a red gel, two flashes, and five minutes of setup, you can turn a plain wall into a dramatic colored backdrop that looks like it cost a day rate to rent. This guide covers both approaches: corrective gels that fix problems, and creative gels that manufacture mood.
Flash gel video tutorial: corrective and creative techniques
In this video we walk through both uses of flash gels — corrective color matching for mixed-light environments, and creative color effects for dramatic in-camera results. Watch it through once before diving into the step-by-step breakdowns below.
Flash gels for corrective effect
Corrective gelling is about matching your flash to the ambient light so both sources look like they belong in the same scene. The problem it solves is one almost every wedding and event photographer runs into: you walk indoors from daylight into a reception hall lit with tungsten or LED fixtures, and suddenly your flash-lit subjects look cool and blue while the background glows orange. Try to fix it in post and you’ll get muddy, over-saturated backgrounds. Fix it in-camera with a gel and it’s a non-issue.
Here’s why the mismatch happens. Your flash fires at roughly 5500K — close to daylight. Tungsten room lights run at around 3600K. When both are in the same frame, the camera’s white balance can only optimize for one of them. Set it for the flash and the background goes orange. Set it for the room and your subject goes blue.
The fix:
- Place a CTO (Color Temperature Orange) gel over your flash. This shifts the flash output from 5500K down to approximately 3600K — matching the room.
- Set your in-camera white balance to 3600K (Tungsten). Now both your flash and the ambient light are the same color temperature, and your white balance setting renders both correctly.
- Expose for ambient first, then dial in flash power to match.
Example 1: reception hall portrait with CTO gel
For this shot, we used the Profoto OCF Beauty Dish (reviewed in this article) mounted on a Profoto B2 with a CTO gel in the flash gel holder. The strobe was positioned at a 45-degree angle on camera left at 20–30% power. Both images below are SOOC — the only difference is the presence of the gel.
Camera settings: 1/200, f/1.4, ISO 800, 3600K
Gear used:

Example 2: correcting green ambient light with a tungsten gel
Here we placed a tungsten gel on the flash to compensate for a green tint coming from a nearby building. A silver reflector simulated the direction of the existing ambient light — giving us a cleaner, brighter source than what the location provided while maintaining the natural lighting feel of the scene.
Flash gels for creative color effects
Creative gelling works differently. Here the goal is not to match — it’s to manufacture a color relationship between subject and background that doesn’t exist in the natural scene. You’re using the gel to push the background toward a specific hue while keeping the subject’s skin tones controlled through white balance and gel color compensation.
The following video walks through this technique in detail, including how to use the color wheel to predict what your scene will look like before you fire a single test frame:
Gear for creative color effects
- Off-camera flash — Profoto B10+ or equivalent (250 watt seconds or more)
- MagBox Pro 24
- MagBox Pro Speedring for Profoto
- MagGrip 2
- MagGels — we used 1/2 CTO, 1/2 CTB (blue), and 1/2 Plusgreen
- MagGrid (optional, for controlling light spill)
Step-by-step: creative color effects with flash gels
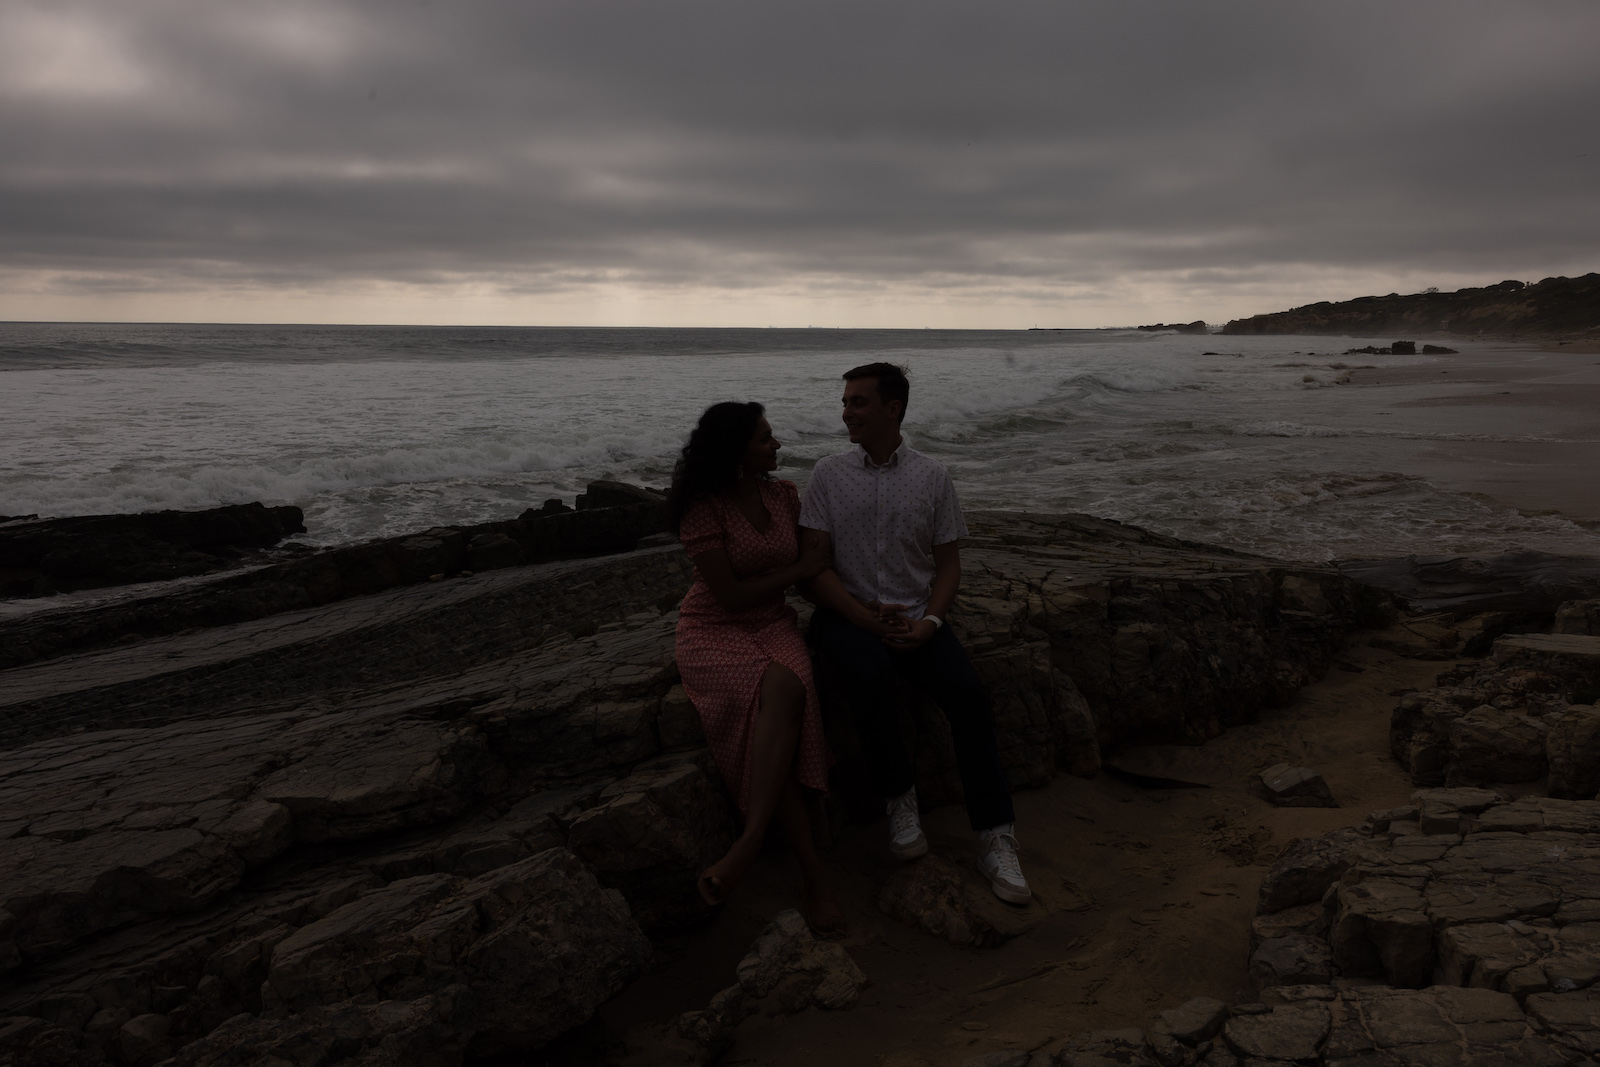
Step 1: establish your ambient exposure
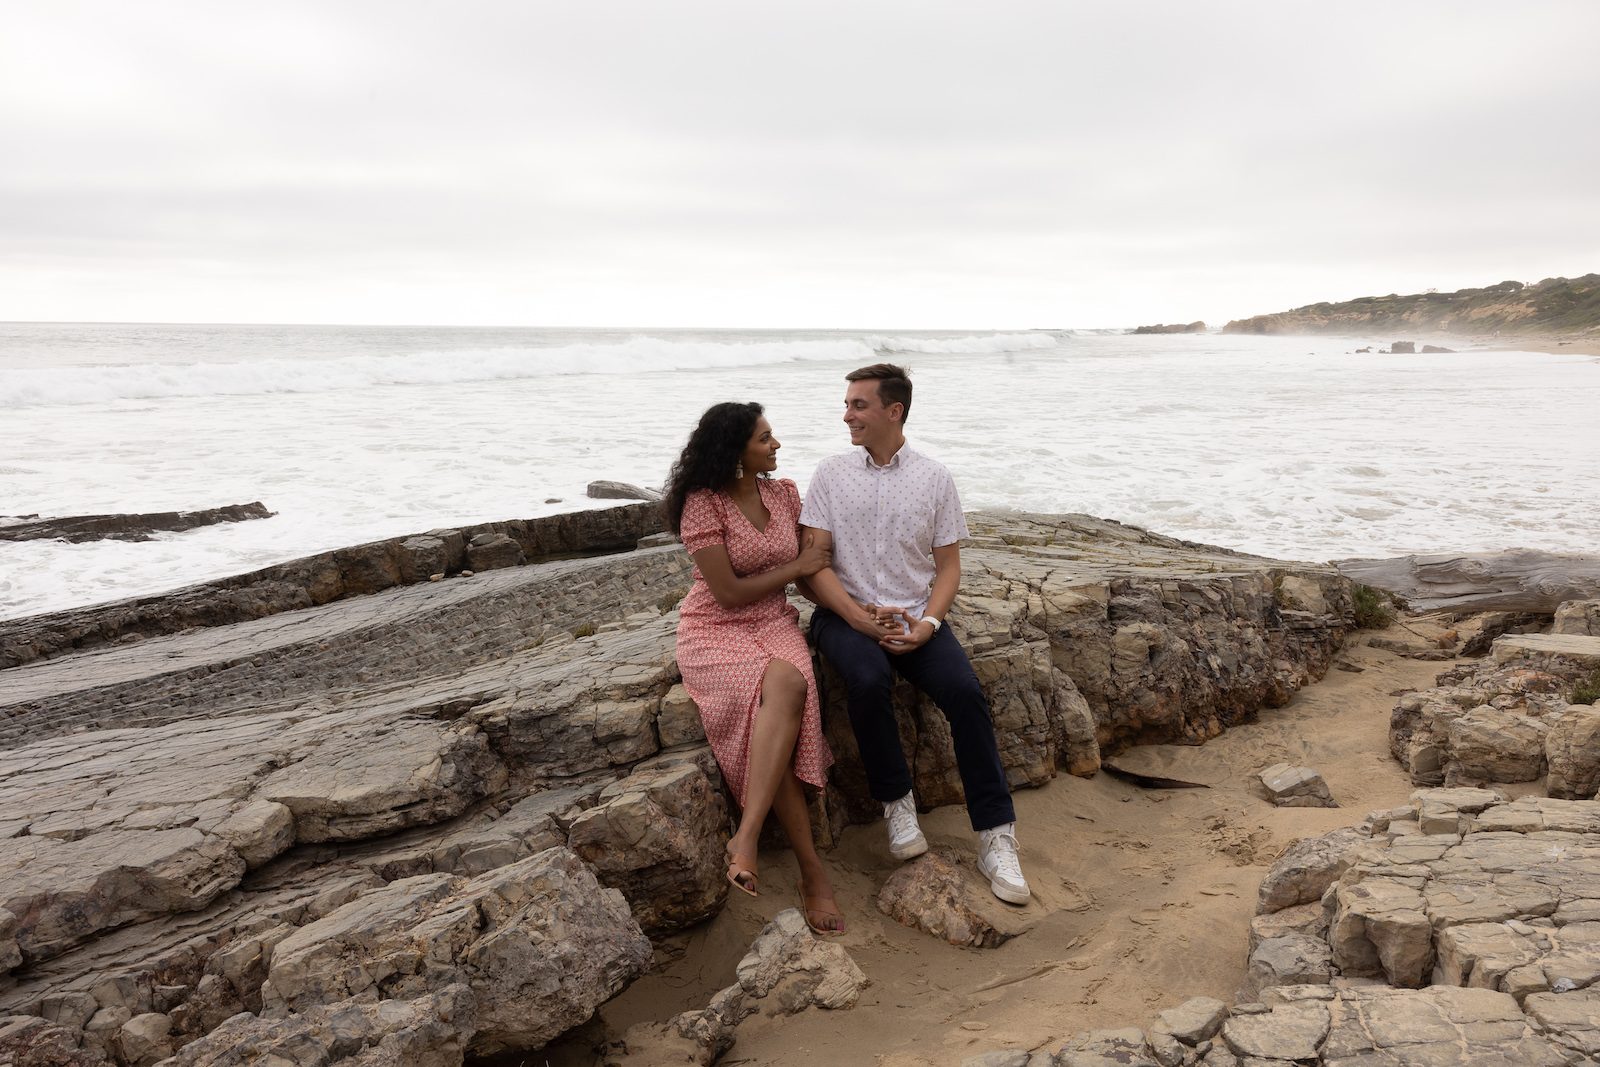
Dial in a darker-than-natural ambient exposure to create a dramatic base. You want the scene to look intentionally underexposed without flash — this gives you a controlled starting point before color enters the frame.
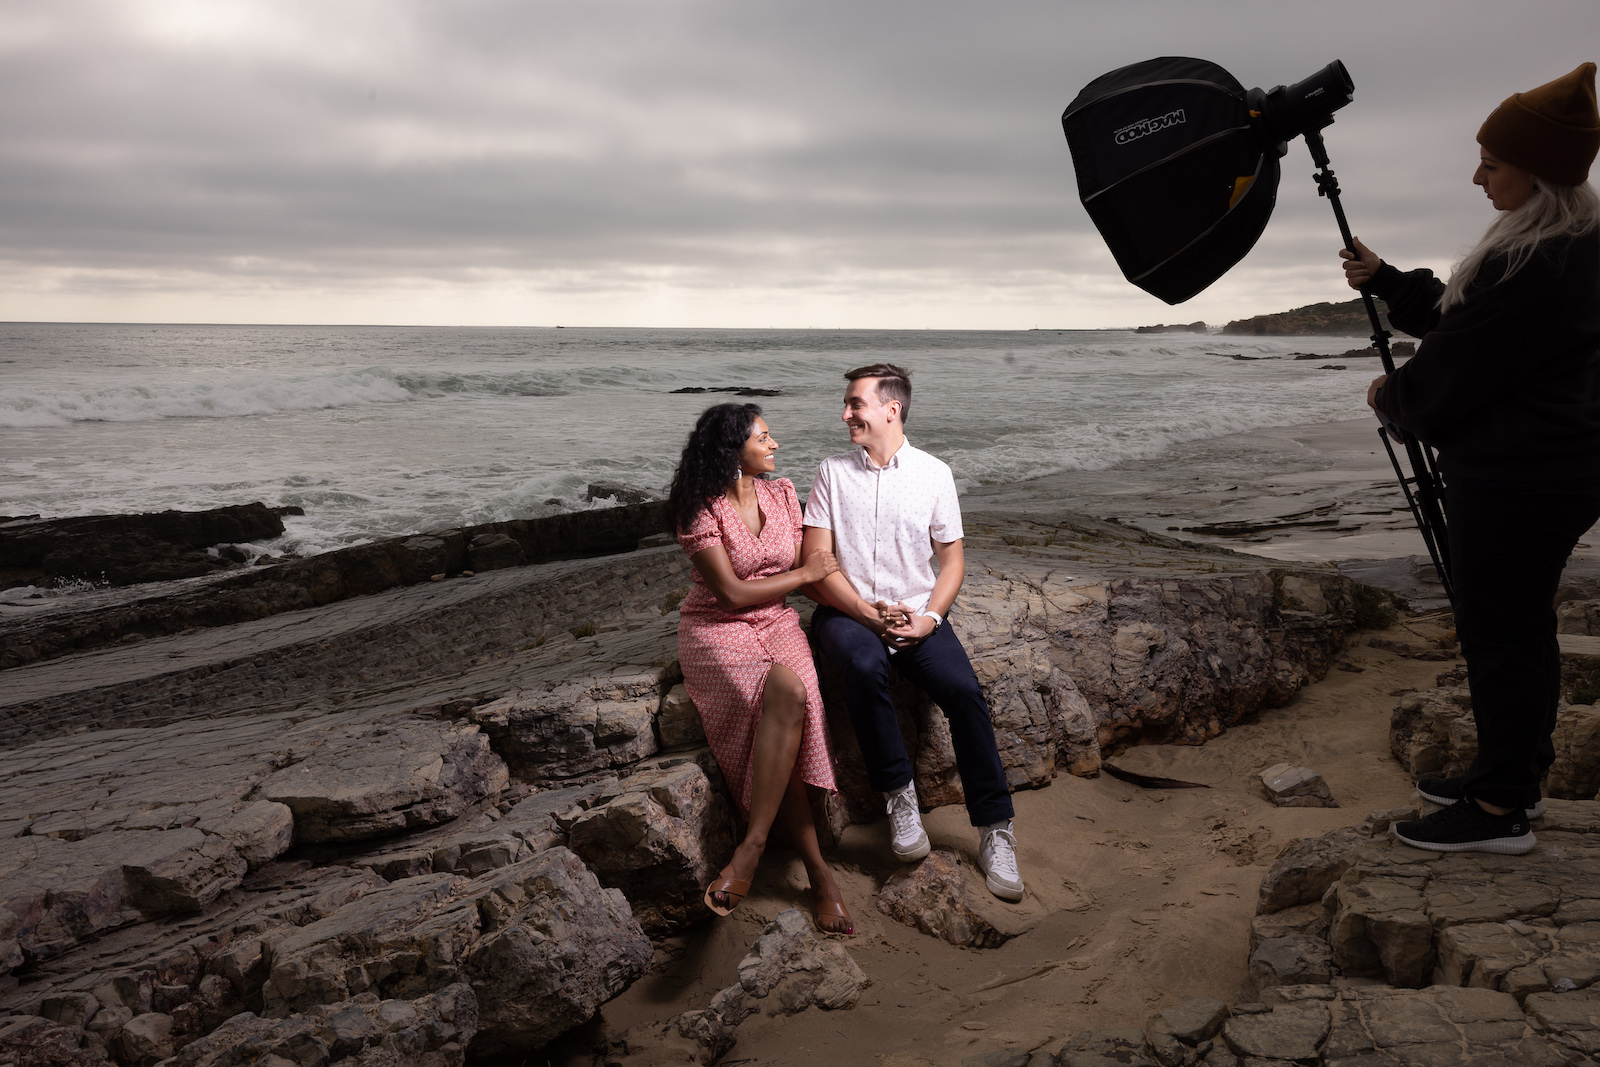
Capture a plate shot without your lighting assistant in frame — you’ll use it to quickly composite out any unwanted elements in post.
Step 2: add your color gel
Add the gel and fire a test frame. At this point the subject will likely look too warm or too saturated — that’s expected. The gel is doing its job on the background; now you need to compensate for what it’s doing to skin tones.
Step 3: adjust white balance to correct skin tones
For the CTO gel, we shifted white balance from 6000K down to 4300K and adjusted tint to +11 magenta. That combination brought skin tones back to neutral while the background retained the orange warmth from the gel. The principle scales to any gel color — use the color wheel to predict your compensation:
- Orange subject (CTO gel): add blue in white balance. The scene shifts blue while skin normalizes.
- Green subject (Plusgreen gel): add magenta. Neutralizes skin while pushing the scene pink-purple.
- Blue subject (CTB gel): add warmth/orange. Scene goes warmer while skin corrects.
Step 4: finalize in post
Most of the work is done in-camera. Post processing at this point is refinement — a slight curves adjustment, your preset base, and any tint fine-tuning. Here are the final results across three gel colors:
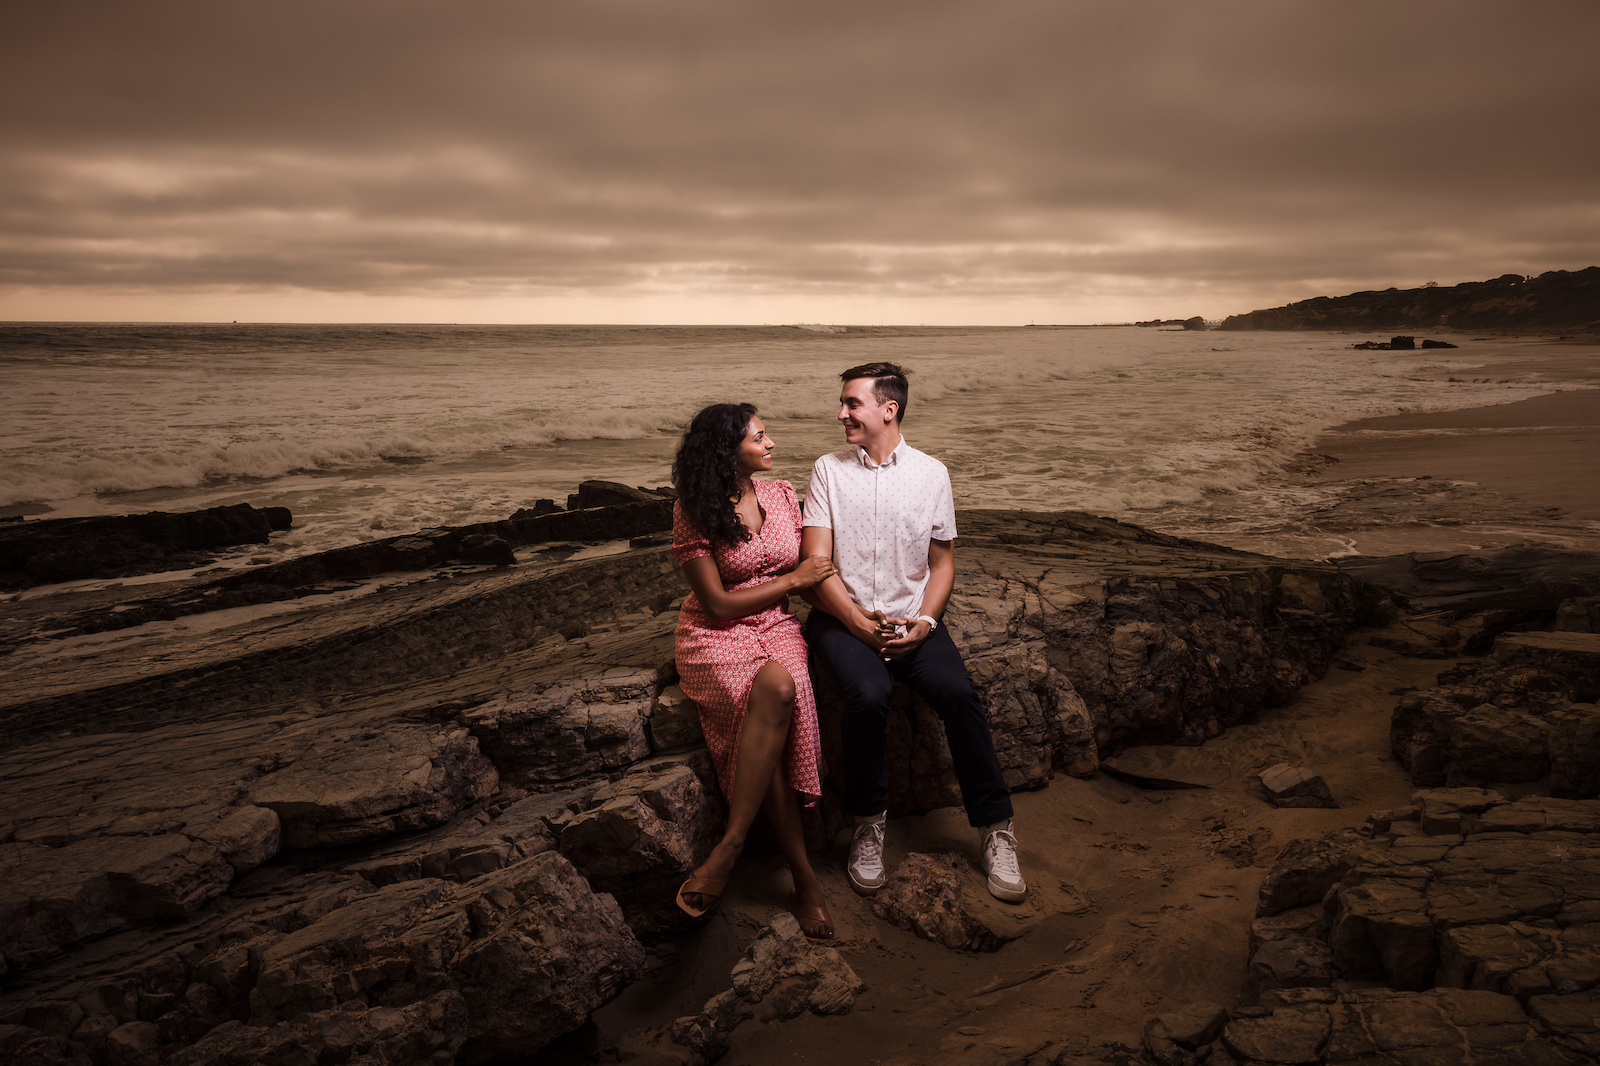
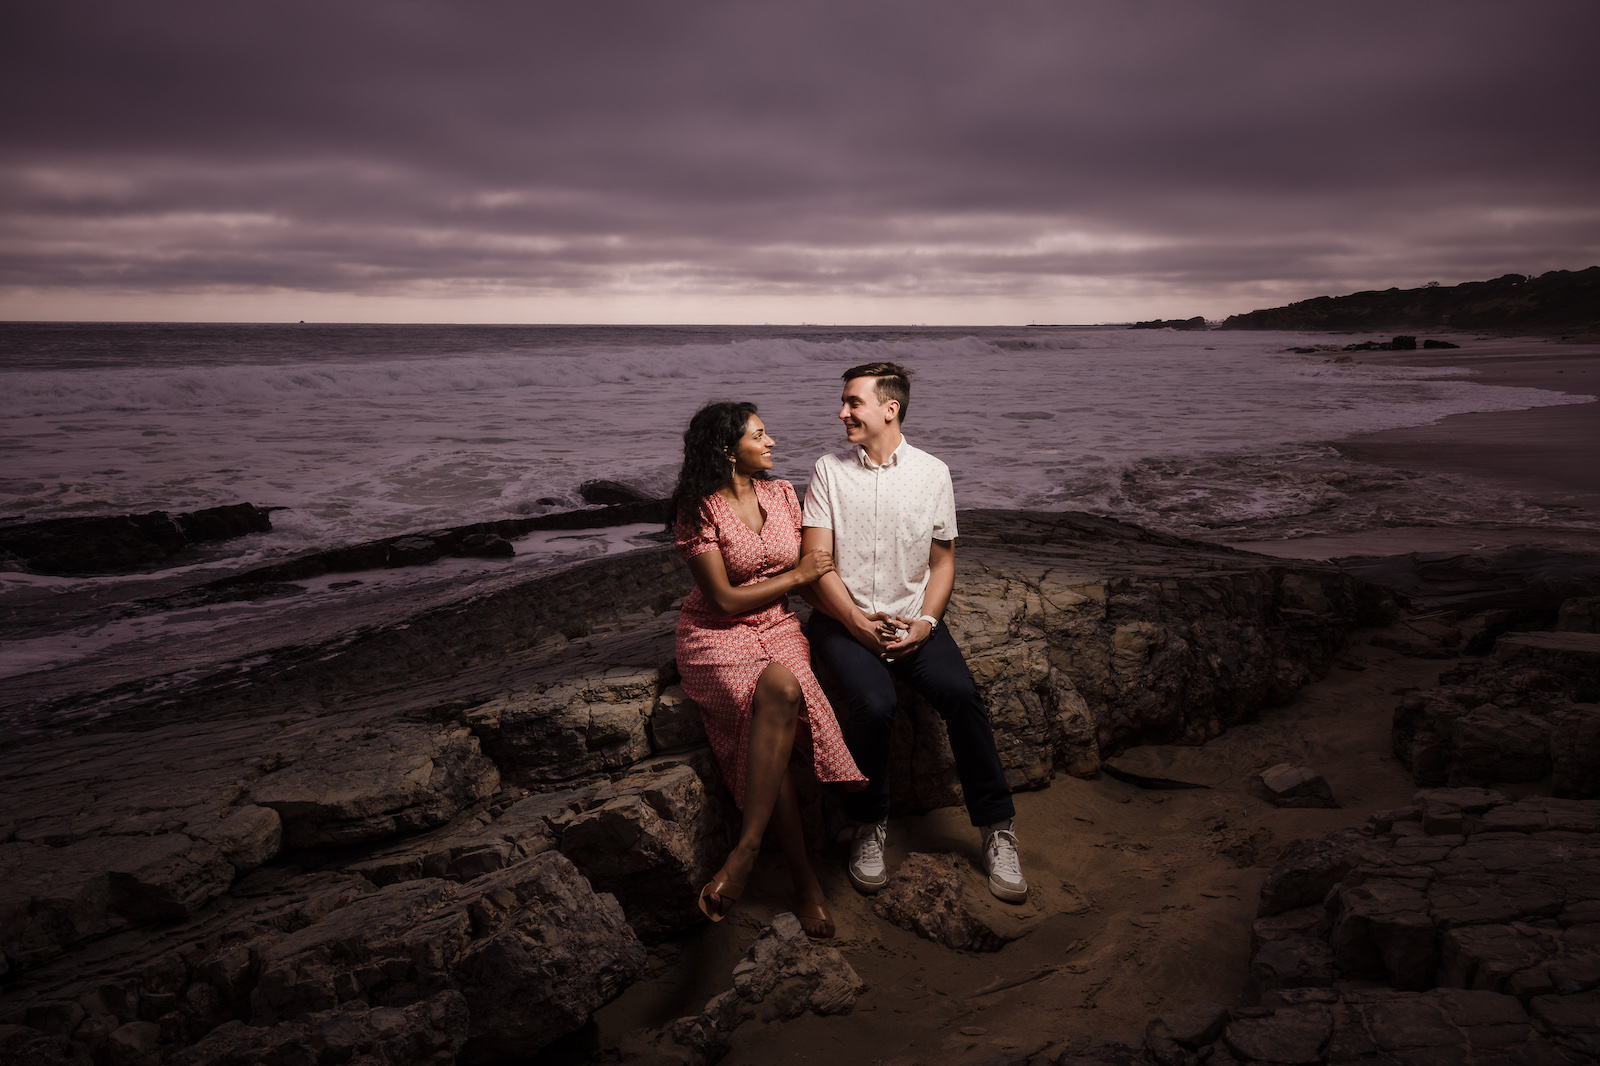
Creative example: one CTO gel and a reflector for a two-light look
For the first creative scene in Article 1, we set the Profoto B2 with a CTO gel inside a grid to control light spill. Using a modeling light, we glanced the flash off the models’ hair and into a reflector held on the opposite side — which pushed the light back into the subjects’ faces. One strobe, one reflector, and the result reads as a two-light setup.
Camera settings: 1/50, f/1.4, ISO 1600, 3600K
Gear used:


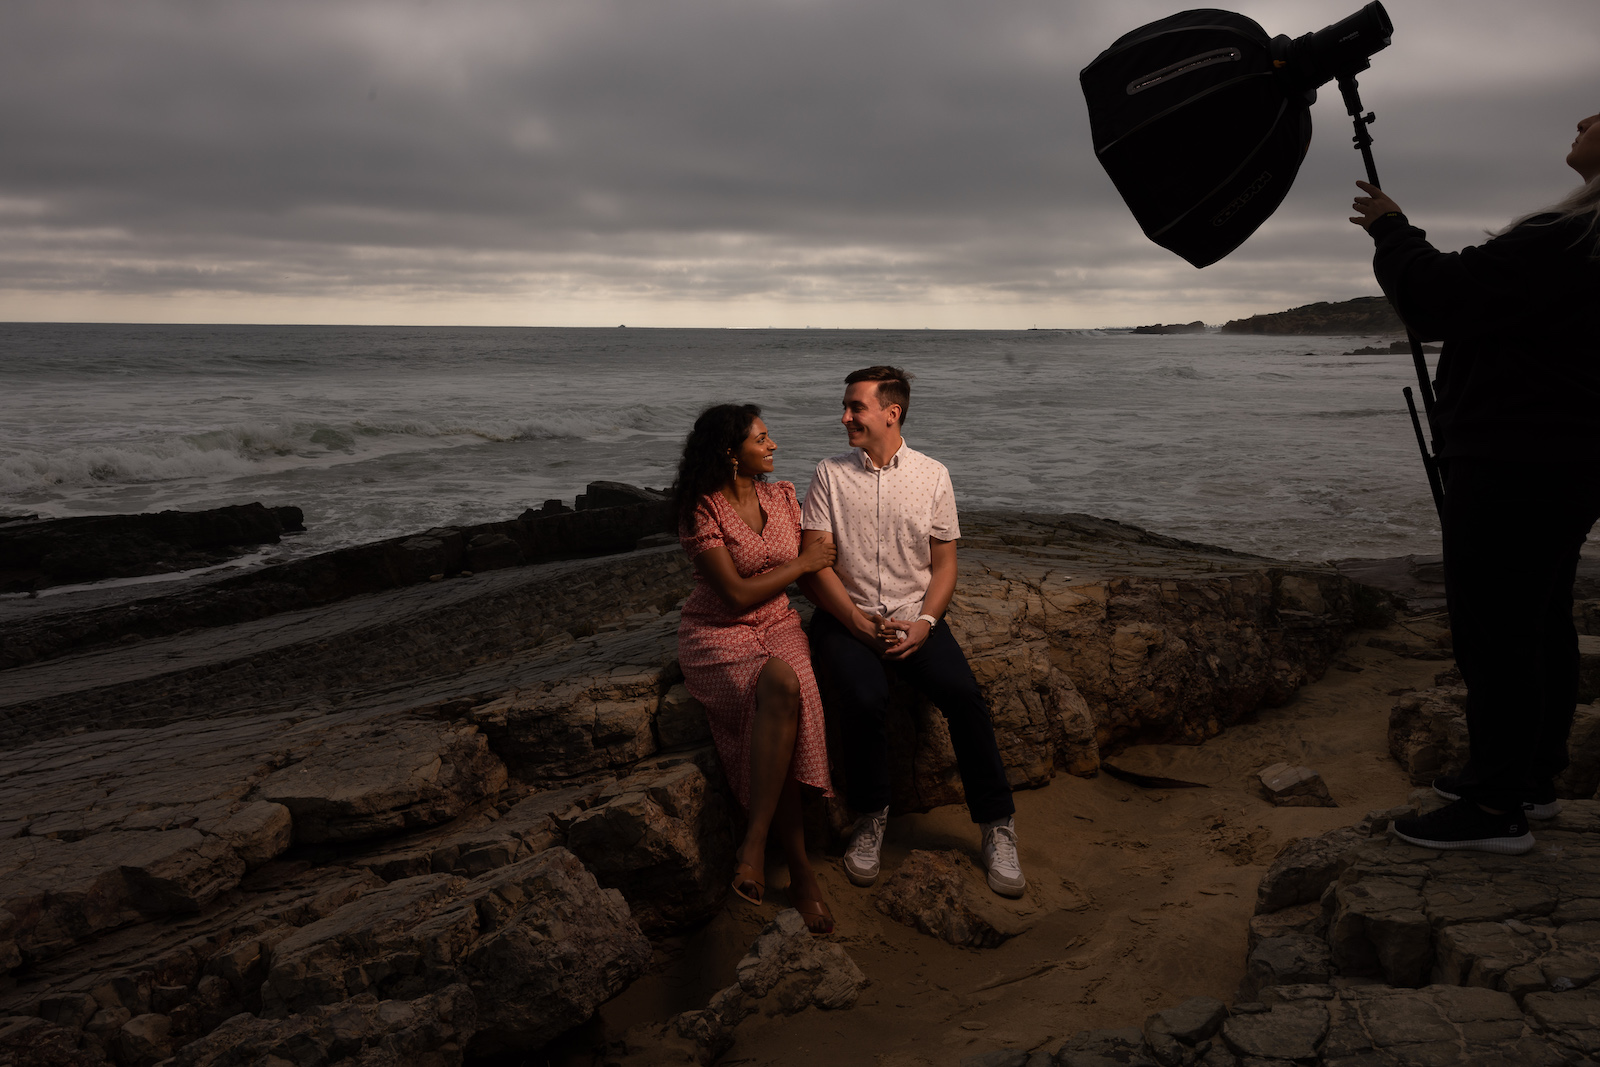
Turn any background into a creative portrait: two flashes and one gel
This is the technique that travels. A plain hotel corridor, a blank studio wall, a parking structure — none of it matters once you add a colored gel to a background light. The setup takes under five minutes and the result is done entirely in-camera. Here’s the full video followed by the step-by-step breakdown:
Gear used:
- Profoto B10 Plus (background light)
- Profoto B1 (key light)
- Manfrotto 1051BAC light stand
- Profoto OCF Color Gel Starter Kit
- Profoto Snoot (on key light)
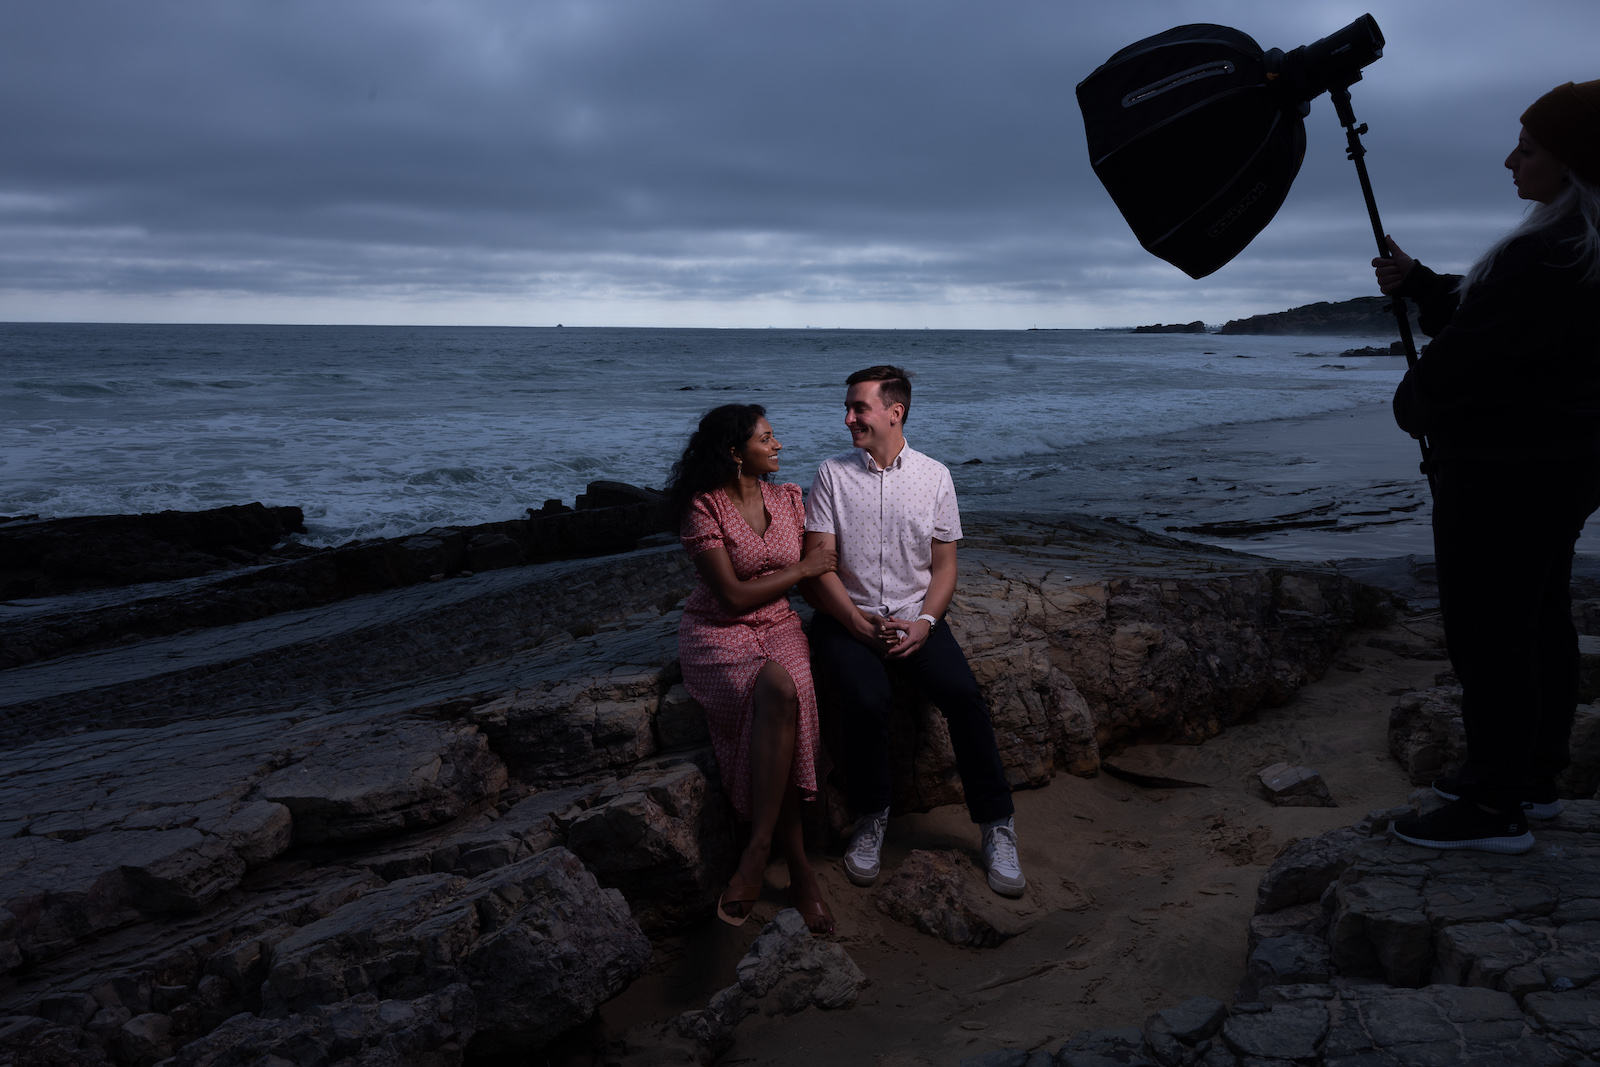
Step 1: cut out ambient light

Set your exposure to black out the scene entirely before introducing any flash. At 1/200, f/7.1, ISO 100 in this location, the frame was completely dark — giving us a clean slate for the color to work against.
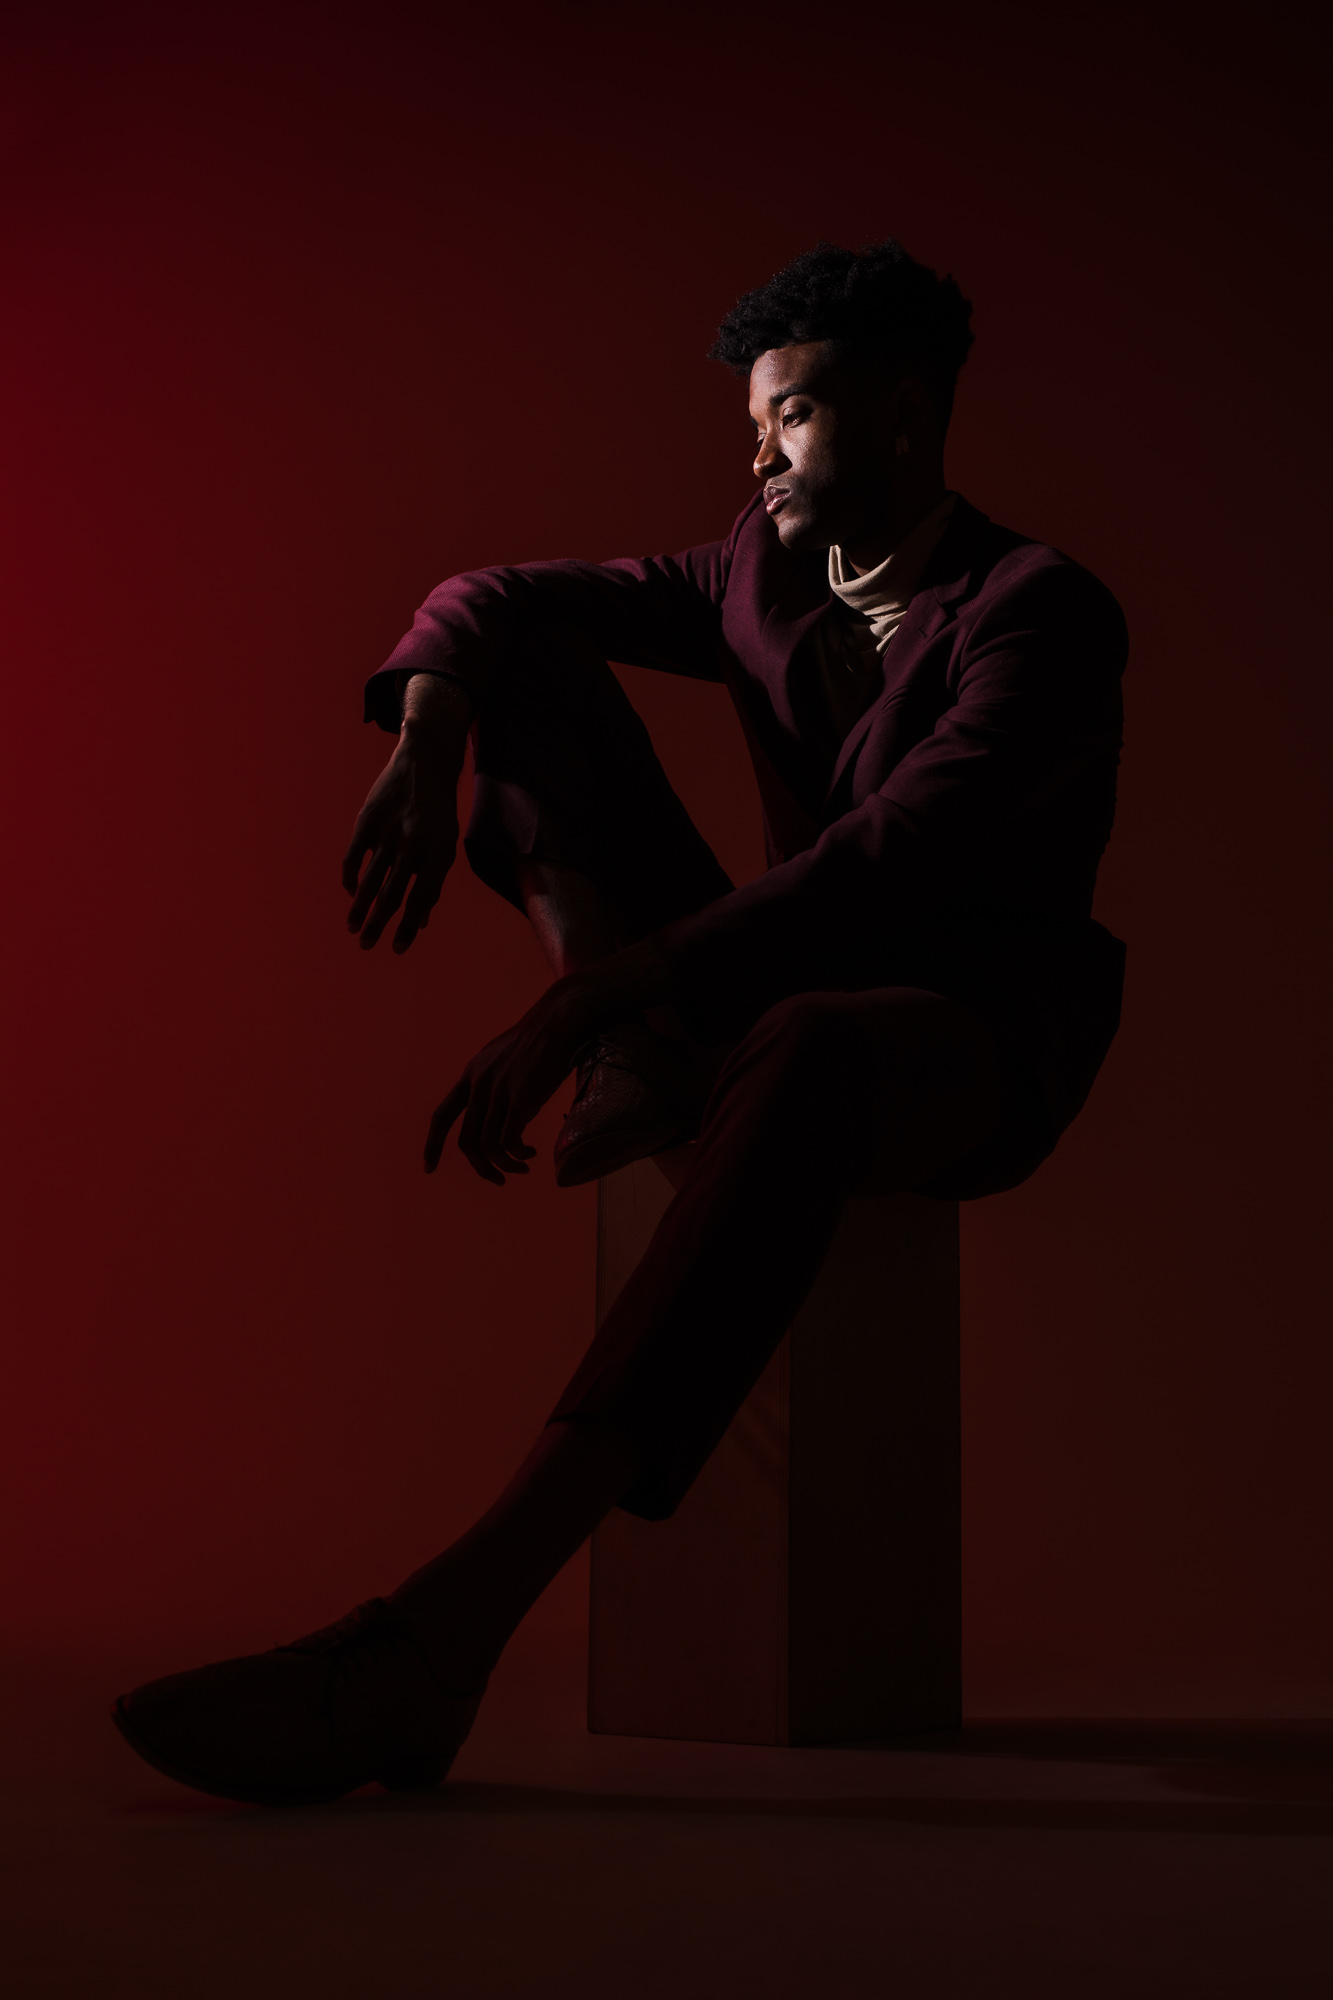
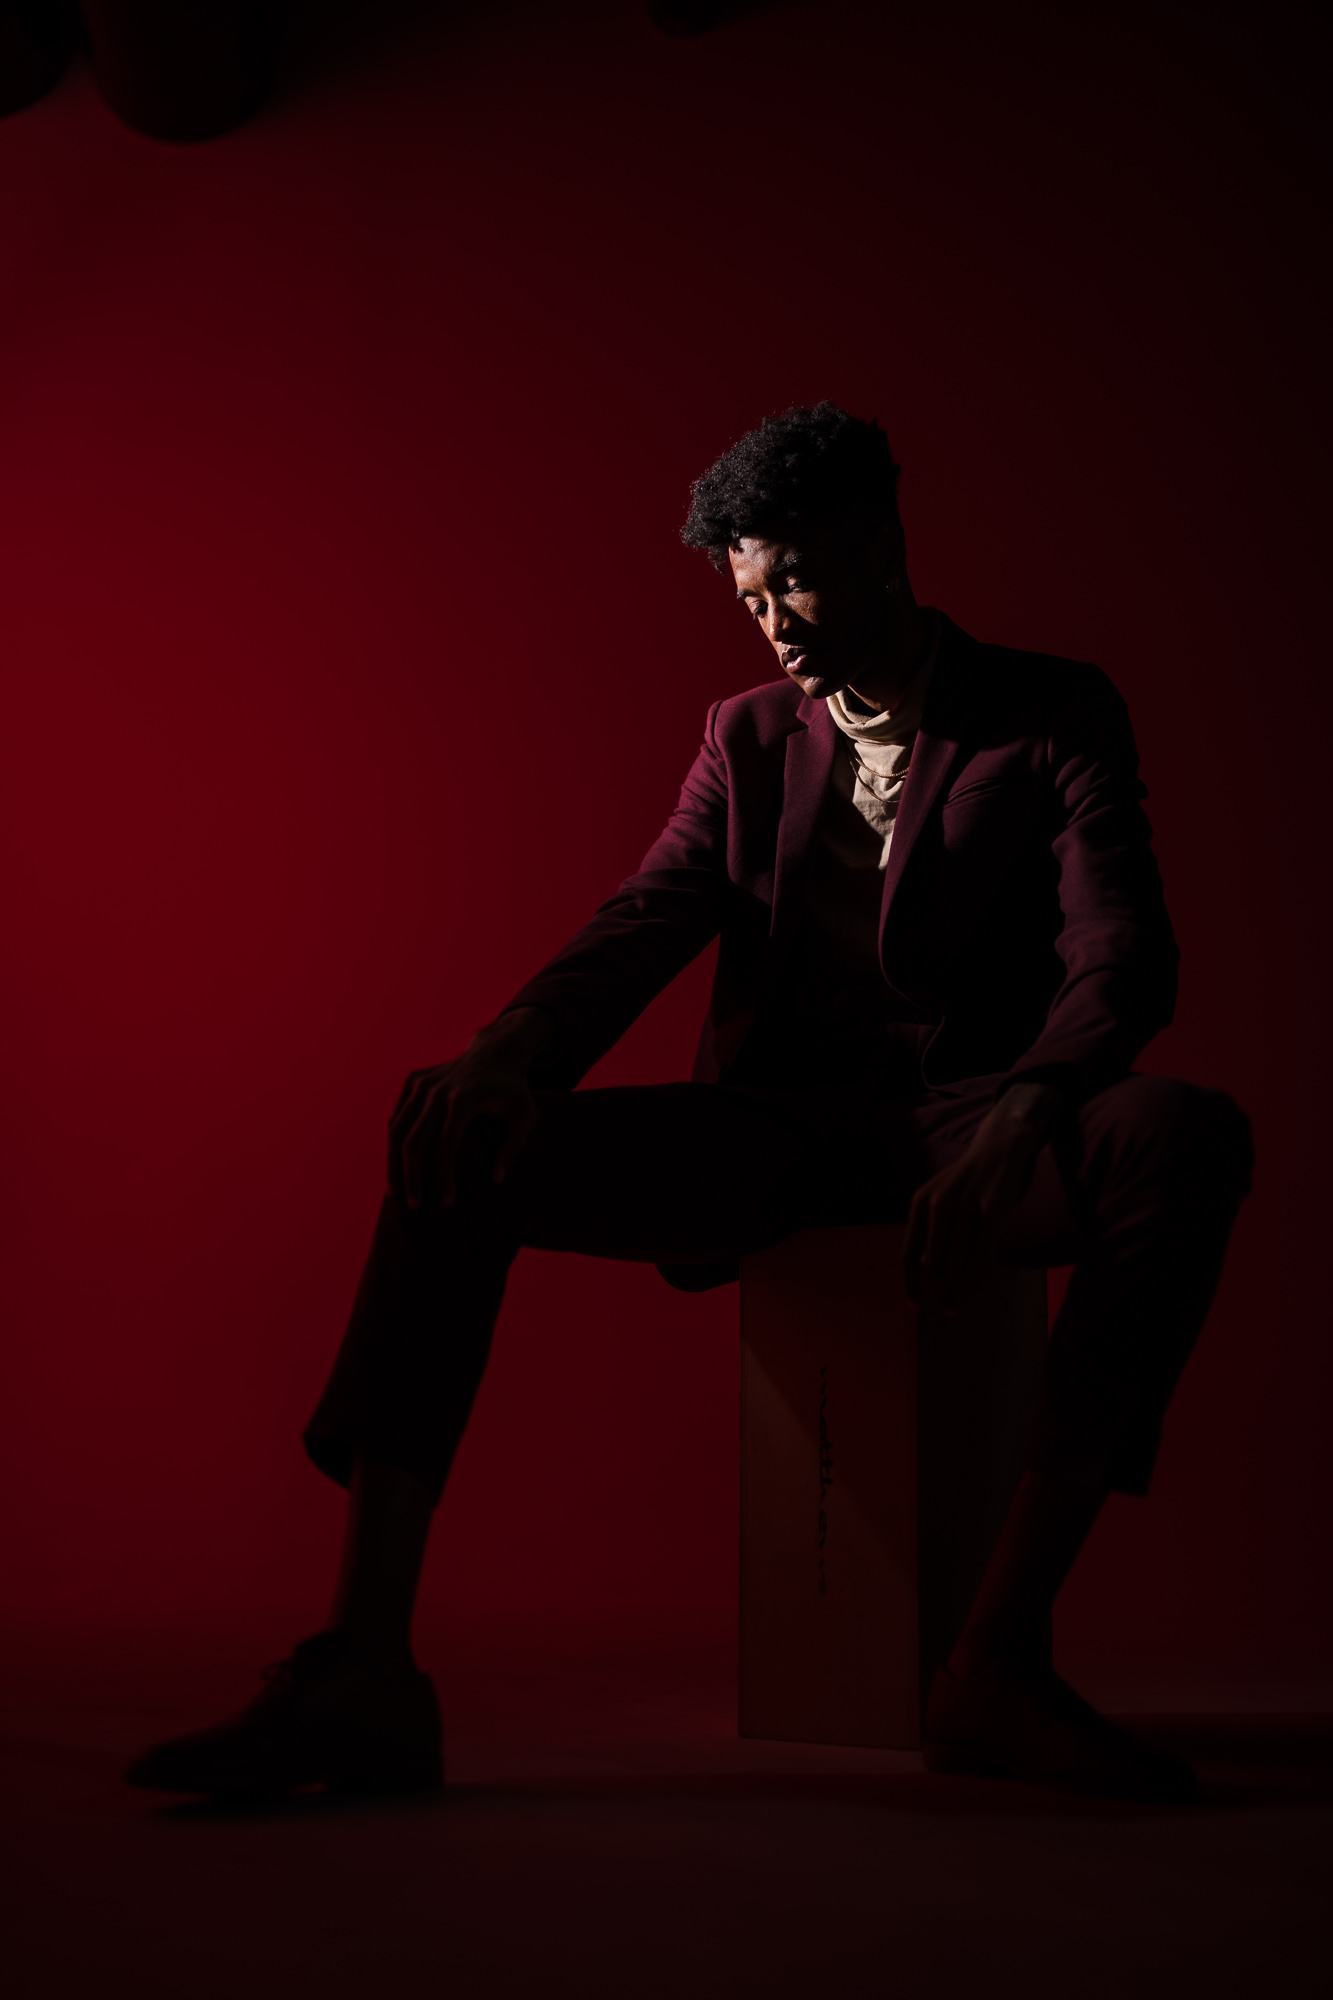
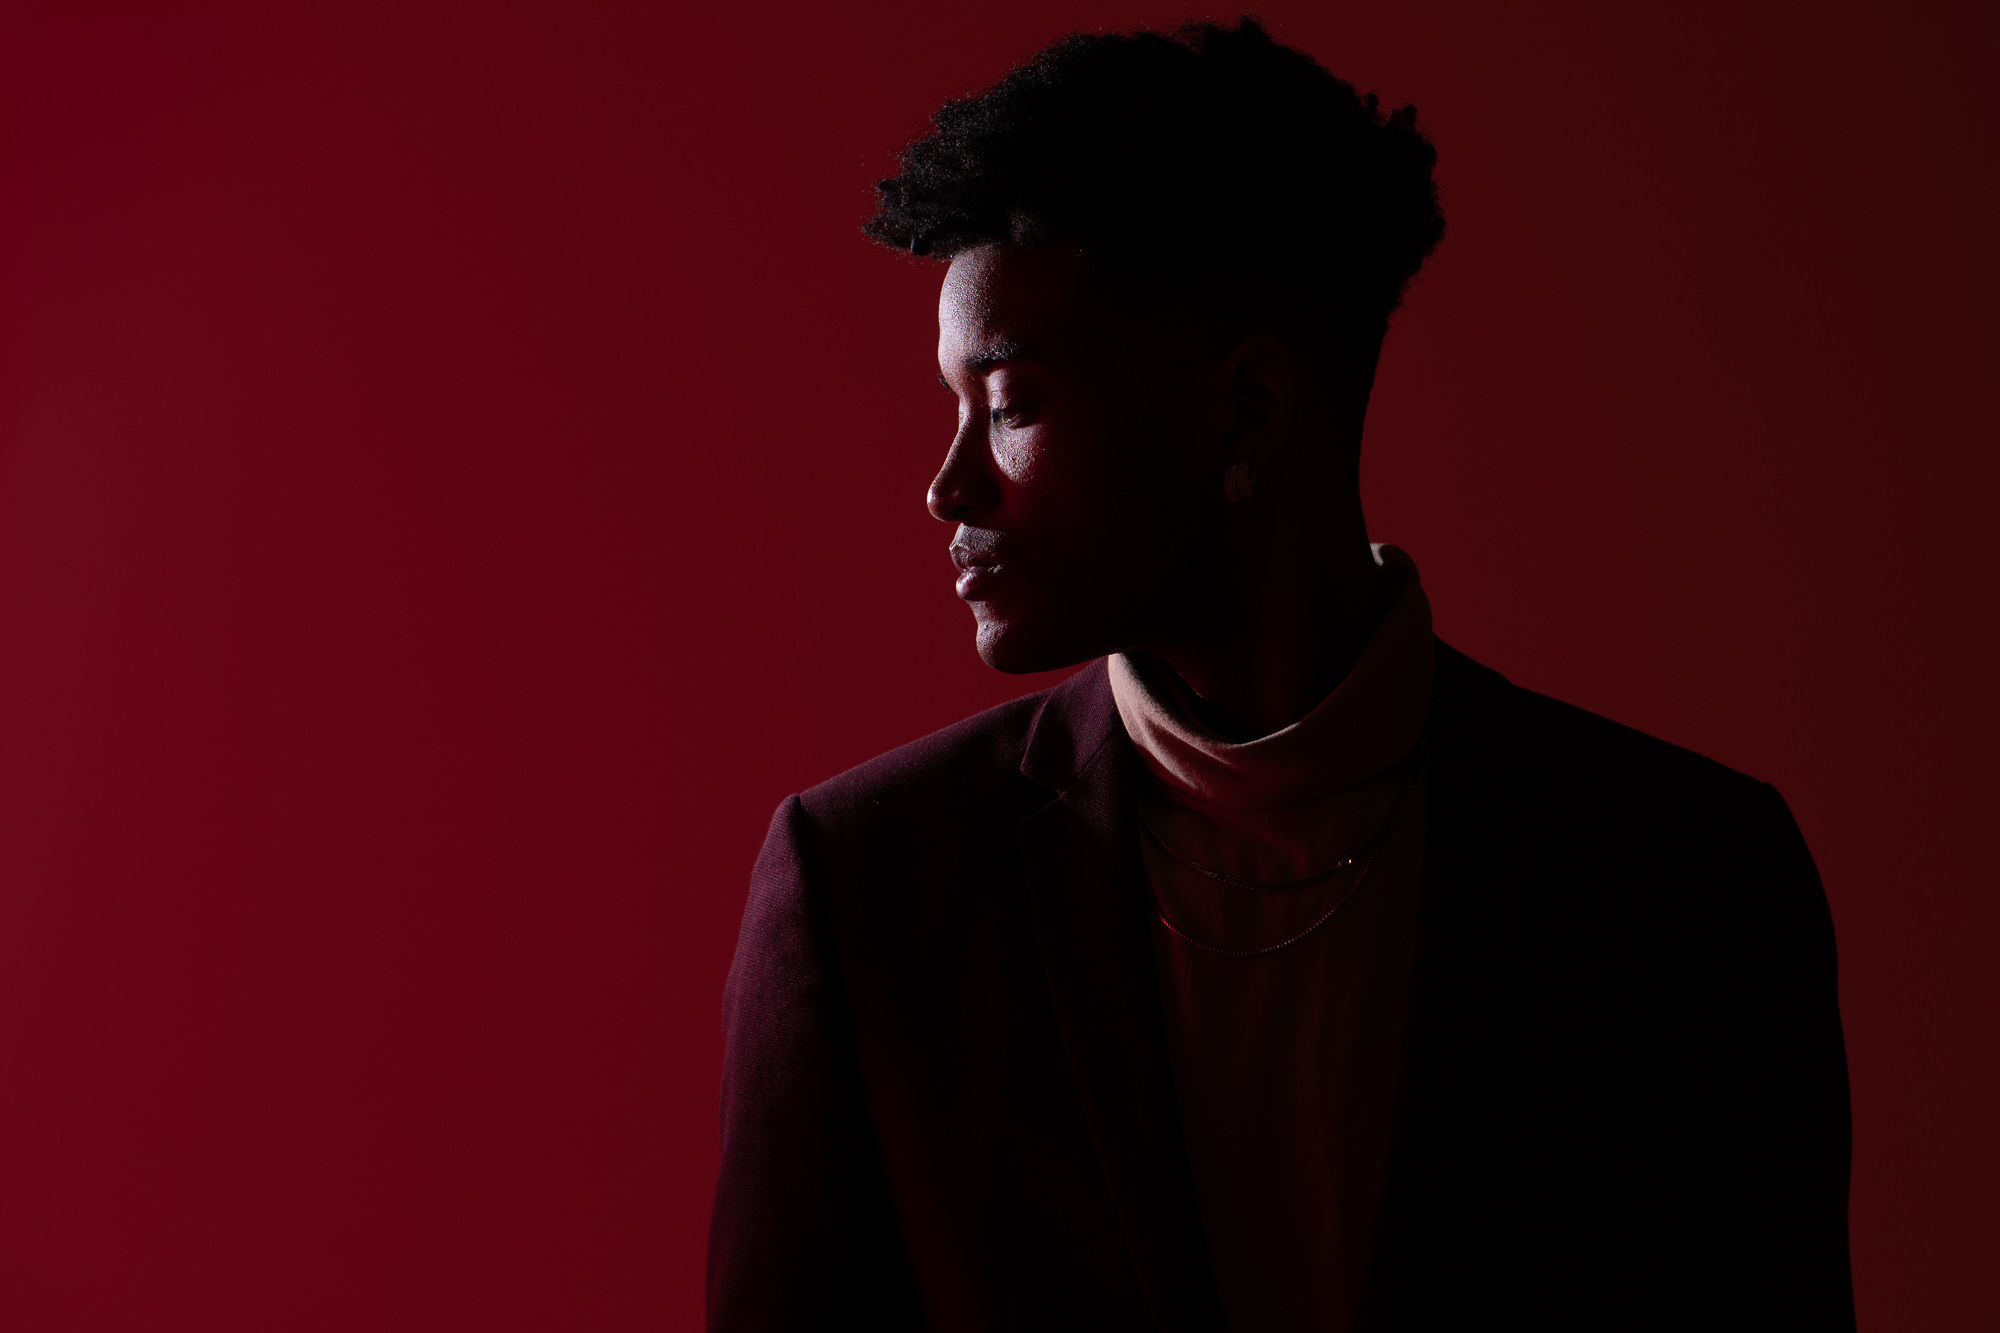
Step 2: add colored gel as background light (first flash)

Place a colored gel over the background flash — we used red. Fire it directly at the backdrop for a saturated, hard-edged look, or bounce it off a nearby wall to soften and spread it. Bouncing produces a more gradual color falloff that reads as more natural. Adjust power until the color saturation looks right — gels cut light output, so you’ll need more power than you might expect. At our settings, the B10 ran at roughly 1/4 power.
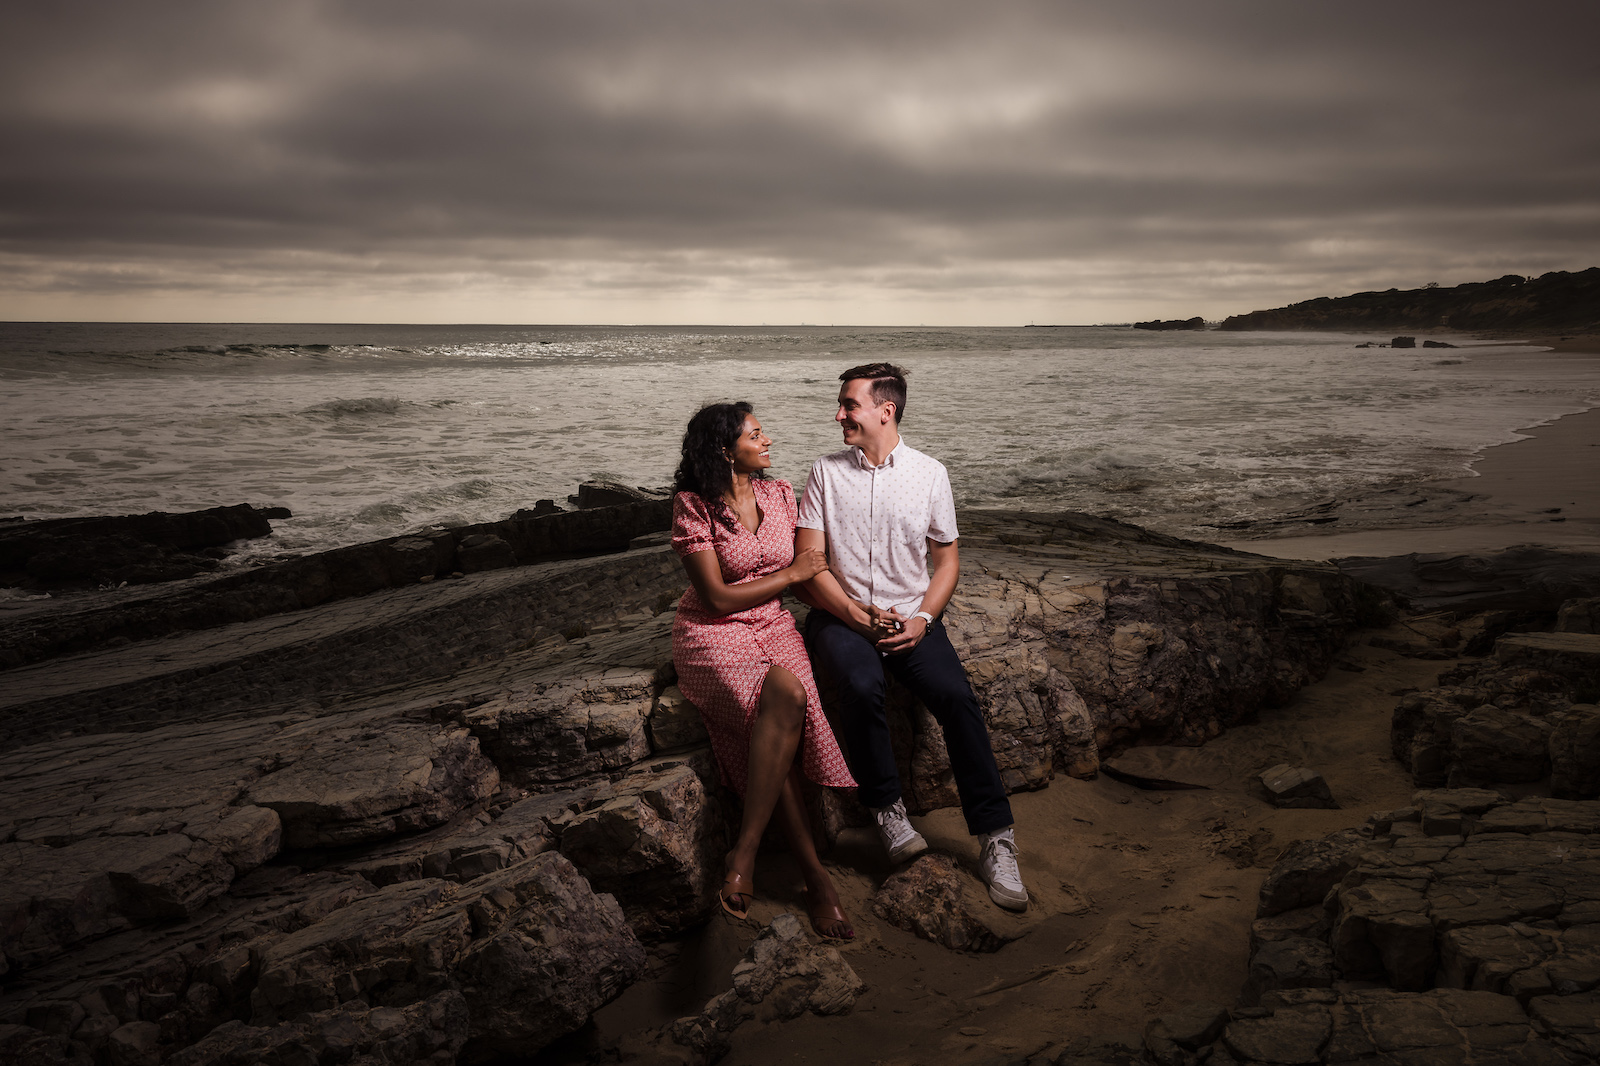
Step 3: add key light (second flash)

Add the key light — no gel on this one. We used the B1 at around 4–5 on its power scale (equivalent to 1/8 to 1/16 on a standard flash, roughly 5–10 watt seconds). Position it slightly behind and to the side of the subject, angled top-down. The modeling light on strobes like the B1 lets you see exactly where the light will fall before you fire, which makes positioning this shot significantly faster than working blind.

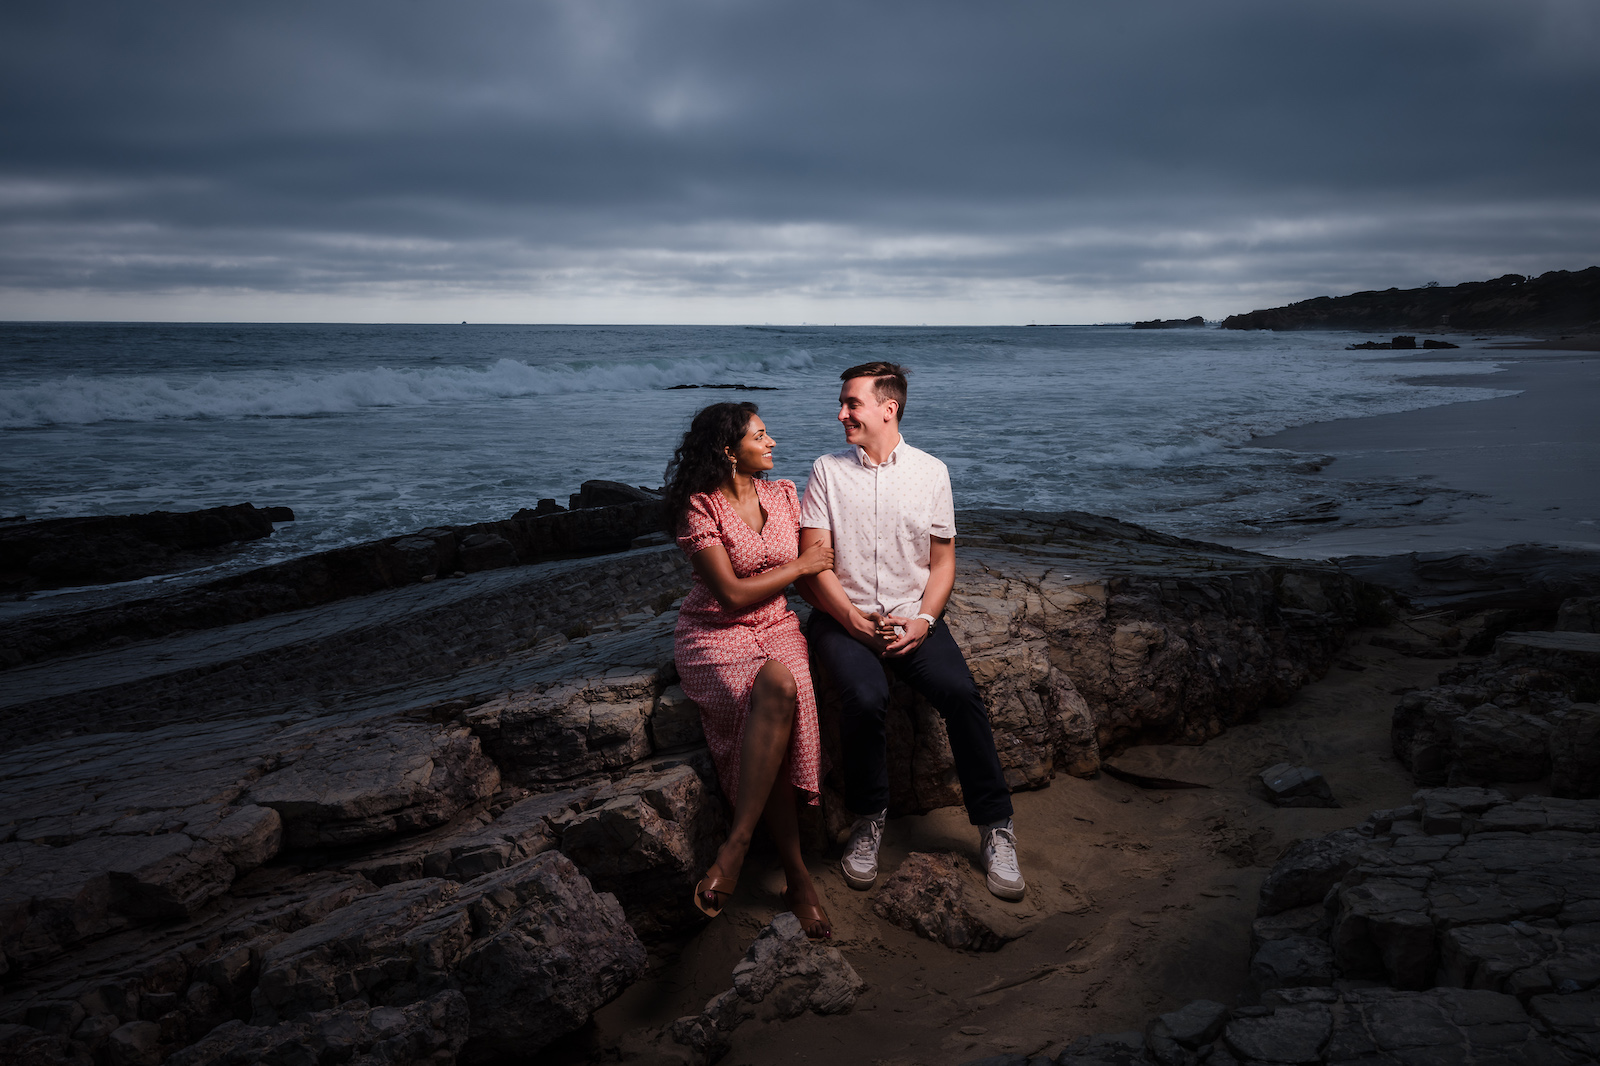
From here, direct your subject and shoot. The final images below were edited in Lightroom with the Soft Light Preset from the Visual Flow Modern Pack:

This technique works anywhere. A plain wall in a venue, a hotel hallway, a parking structure — the colored background light transforms all of it. Keep a single colored gel in your bag and you have a creative option available on every shoot.
To go deeper on flash gel technique, white balance workflows, and the complete off-camera flash system we use on real wedding and portrait jobs, see our Flash & Lighting Photography Guide. The Flash Photography Training System covers corrective and creative gel techniques in full, including the exact power settings and white balance combinations we use across different venue lighting conditions.
Frequently asked questions about flash gels
What is a flash gel used for in photography?
Flash gels serve two distinct purposes. Corrective gels — most commonly CTO (orange) and CTB (blue) — match the color temperature of your flash to the ambient light in a scene, so both light sources render correctly at a single white balance setting. Creative gels shift the color of your flash intentionally, allowing you to push the background or subject toward a specific hue for dramatic in-camera color effects.
What is a CTO gel and when should I use it?
CTO stands for Color Temperature Orange. It shifts flash output from its native daylight color temperature (around 5500K) down toward tungsten (around 3200–3600K). Use it when shooting in tungsten-lit environments — reception halls, ballrooms, hotel interiors — where your ungelled flash will make subjects look noticeably cooler than the warm ambient light. Pair it with a matching in-camera white balance of around 3600K for a clean result straight out of camera.
How do I fix skin tones when using a creative color gel?
Use the color wheel. Whatever color your gel is pushing the subject toward, shift your white balance in the opposite direction to compensate. An orange gel requires a cooler white balance; a blue gel requires a warmer one; a green gel requires added magenta. The background retains the gel’s color because it’s further from the camera’s white balance correction range, while the subject’s skin tones normalize. Fine-tune with the tint slider in Lightroom after the fact.
Do I need expensive gear to use flash gels?
No. The technique in the two-flash creative portrait section above uses a Profoto B10 and B1, but the same result is achievable with two speedlights and a $15 gel pack. The principles — black out ambient, add a gelled background light, add a clean key light — are identical regardless of flash brand or price point. Gel packs from Rosco or Lee cost under $20 and cover every color you’ll realistically use.


