Golden hour has just come to an end and the sky is slowly fading from a rich cyan to black, but that doesn’t mean it’s time to pack up your things and leave. Although natural light has its ethereal qualities, nighttime photography forces you to showcase your technical mastery with artificial light sources. Possible locations for night photography include downtown city locations, open fields with star visibility, or even moonlit beaches. Once the sky loses its color, it is time to whip out your off-camera flashes and constant LED’s to create some magic. To help on your next nighttime session, check out these 6 night photography ideas.
Night Portrait Photography Tips Video
Let’s start out our nighttime photography learning with this video tutorial on “Night Portrait Photography Tips.” Most of the tips in this article are based on those presented in this video.
6 Night Photography Ideas
- Simple, Soft, Diffused Flash
- Constant Light
- Whip Pan
- Streaks of Light (Shutter Drag)
- Back Flash (Silhouette)
- Back Flash (Inner Warmth)
Night Photography Idea 1: Simple, Soft, Diffused Flash
While a single speedlight with a softbox would not be able to compete with the sun during a daytime shoot, that setup provides plenty of power for lighting subjects during the evening.

To figure out an adequate power setting on your flash, start with the inverse of your ISO when shooting wide open (e.g. f/2 or f/2.8). In other words, if you’re shooting with an ISO of 1600, set your flash power to 1/16th. Other factors such as distance of the flash from your subjects and aperture will affect your settings and outcome, but this general rule provides a great place to start.

To capture the image above, we placed the light 45-degrees to camera left. We dialed in our settings in camera to leave the ambient light in the background a little darker so that the subjects would pop out from the scene.
Let’s review one more example of this technique from the same engagement session.

For this photo, we use the same lighting technique as the first image, with a speedlight and a softbox, but we also supplement the lighting with an off camera flash behind the subjects to illuminate the water. Night photography ideas like this give you a beautiful diffused light source which avoids any harsh highlights on the skin.

Night Photography Tip 2: Constant Light


Using a constant LED light, like the Westcott Ice Light for example, is another alternative for illuminating your subjects when photographing in the night. While an OCF with an umbrella or softbox produces more of a diffused light, a constant light is a bit more portable and still gives you a smooth transition from light to shadow. The main issue with using an LED light is that it might not illuminate enough of the body, making it harder to get full body images. You also might face the issue of not having a strong enough source of light compared to an OCF where you can adjust the power.
Idea 3: The Whip Pan

The best part about shooting night photography in the city is having plenty of ambient light available, especially in the dark. Using city lights as your backdrop, there are a plethora of possibilities to be created in-camera that are sure to wow your clients.
The “whip pan” is one of our favorite night photography ideas on the list. The effect creates interest by panning the camera left and right while the shutter is open to add motion into an image.

Whip Pan Directions:
- Look for an area where city lights are visible, preferably closer to your subjects than further to increase the emphasis of the effect.
- Set your camera on a tripod and slow your shutter to around 1/2 second.
- Set your flashes to Rear Curtain Sync to ensure that the subjects are flashed as the shutter closes.
- Place your subjects in the darkest area of the frame.
- Instruct your subjects to hold still.
- Position a backlight (a single speedlight on a light stand) directly behind the subjects to create a “rim light” (or outline) around them.
- Loosen your tripod head and press the shutter, then quickly pan in one direction to capture streaks of light.
- Adjust your shutter speed until the light trails are the length you’re looking for.
You may need to create a composite using a plate shot during post-production to get the exact look you want.
Tip 4: Streaks of Light (Shutter Drag)
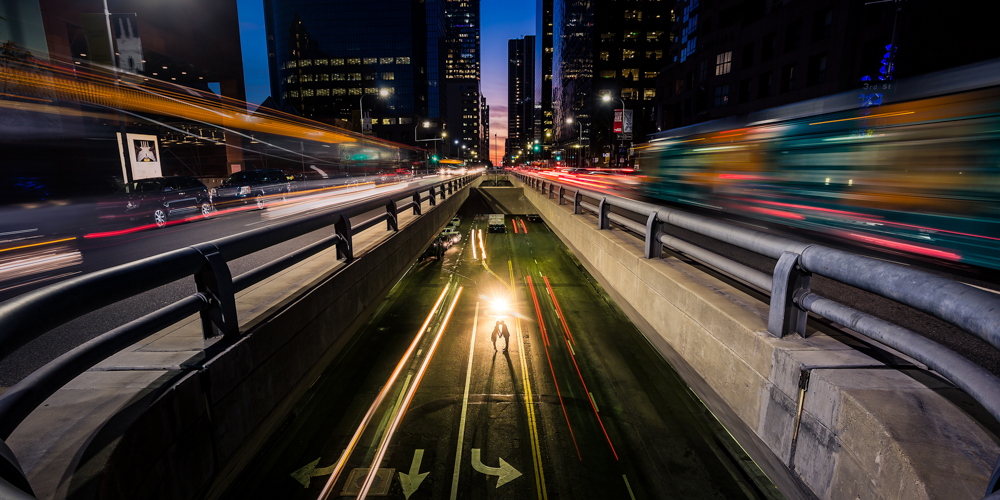
Long exposures are another easy trick to try for city photography. Capture the motion and movement of downtown cities by simply slowing down your shutter speed and freezing your couples with flash.
Similar to the whip pan, this shot requires a slower shutter speed. The biggest difference here, however, is that the motion will come from the lights on passing cars rather than the movement of the camera. Here’s a quick breakdown of how to capture the above image:
Directions:
- Set your camera on a tripod and slow your shutter to around 1-5 seconds.
- Instruct your subjects to hold still or freeze them with flash.
- Place your camera on tripod.
- Position the camera so that the frame can capture passing cars (you do not need to stand—nor should you stand—in a dangerous place to achieve this).
- Place your subjects into the frame so that you can see the busy movement of the city around them.
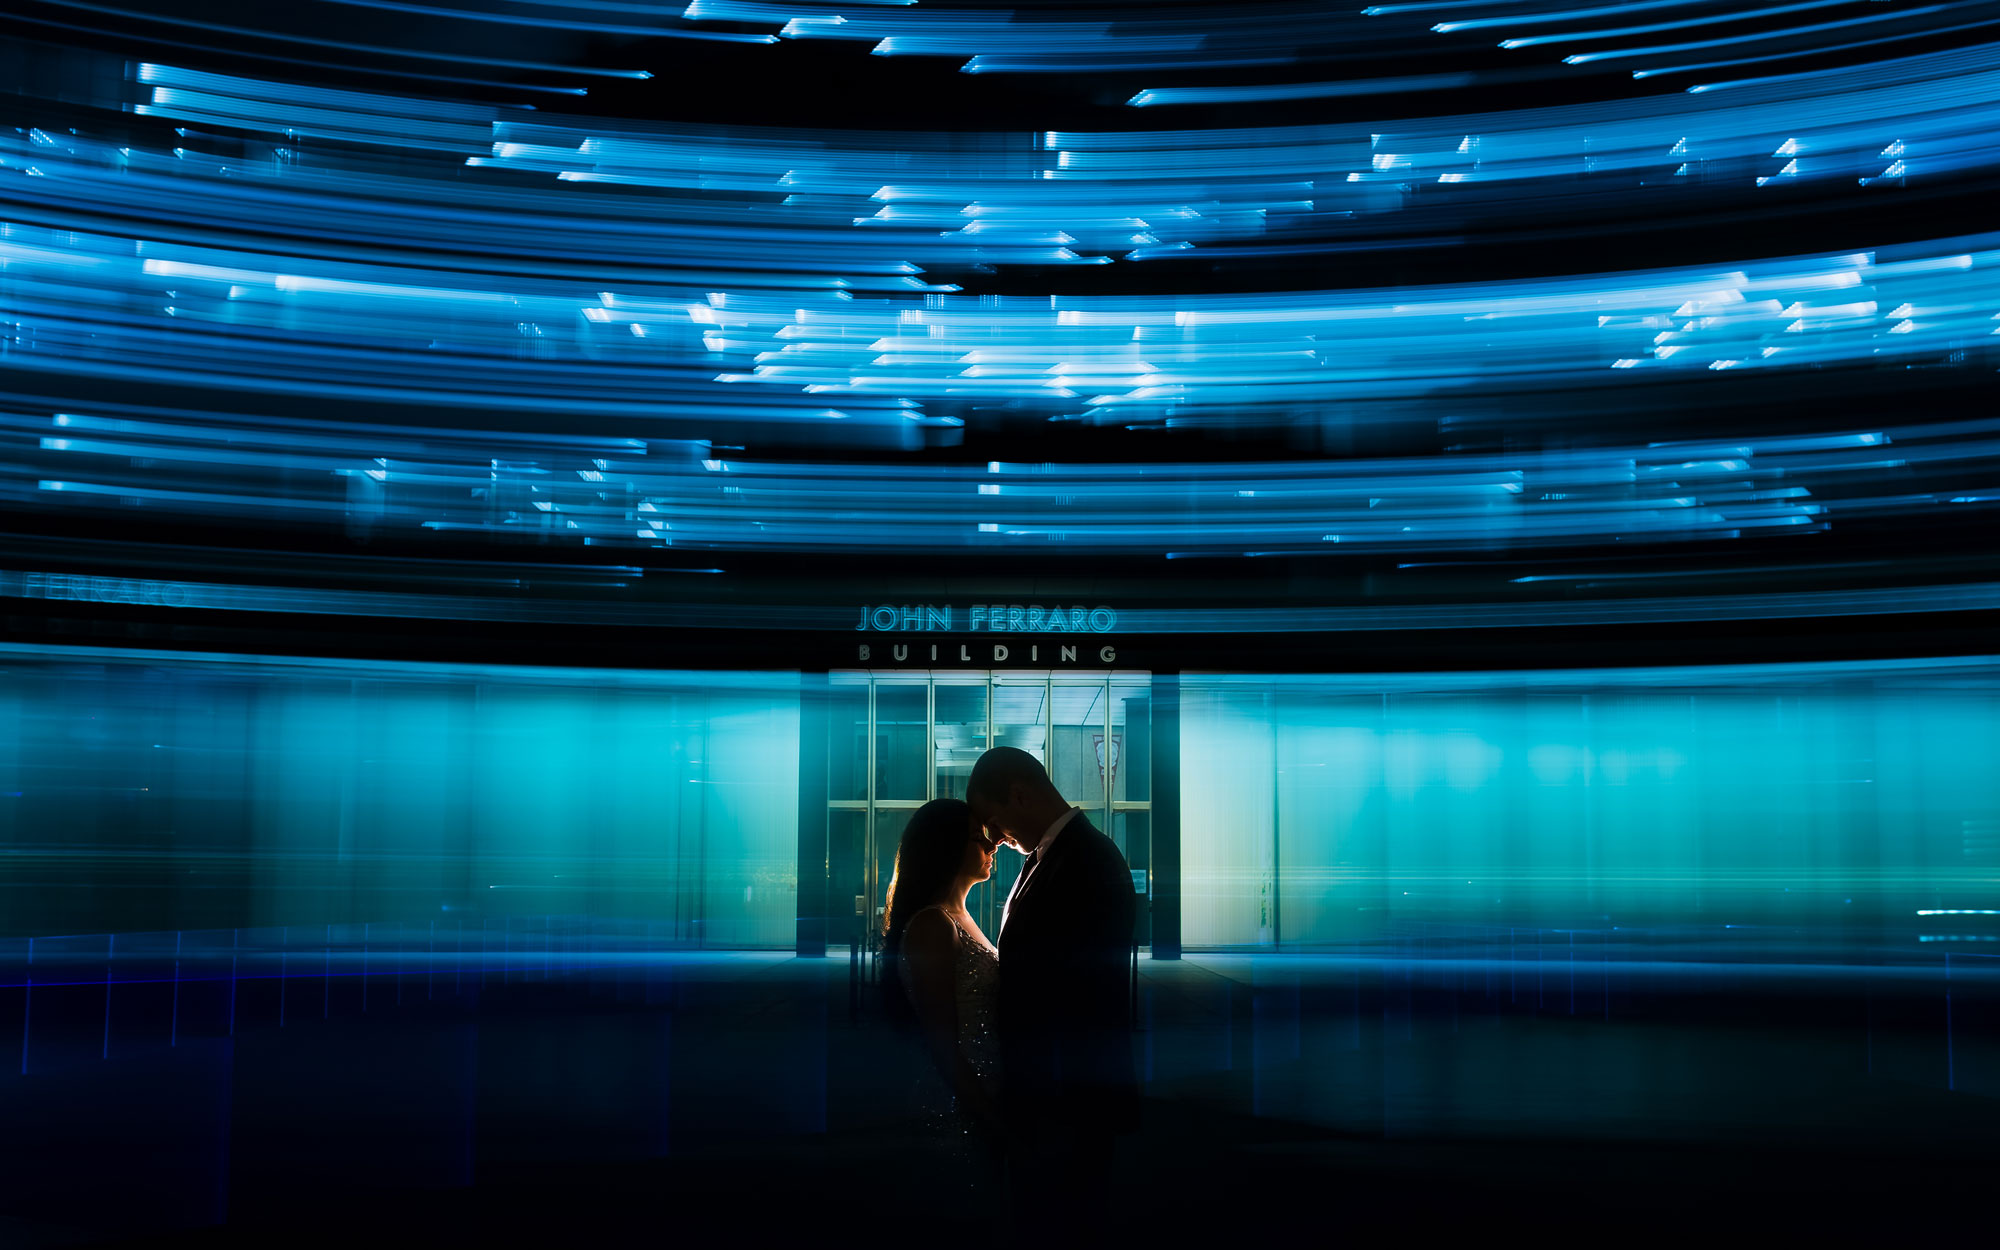
Night Photography Idea 5: Backflash (Silhouette)

Silhouettes are creative night photography ideas that you can execute to achieve incredible results. Simply place an off-camera flash behind your subjects and face it either toward a textured wall behind them or towards them. Make sure your camera settings allow for just enough ambient light to be seen surrounding your subjects.

To capture the image above, we also used a technique known as shooting “day for night.” In other words, we made the ambient light look darker and cooler (more blue) than it was in reality. We used CTO gels over the flash units to warm the light color coming from the speedlight. We also dialed down the in-camera white balance to cool the overall image without over cooling the light behind the couple.
Night Photography Tip 6: Backflash (Inner Warmth)


There really isn’t a technical term to describe this particular shot but the end result gives meaning to the phrase ‘inner glow’. This shot works best if one of your subjects is wearing white or a light color so that the flash can bounce off their shirt and be diffused. The tight composition and flash to ambient light balance really work together to create a unique and unforgettable image.
Varying the distance between your subjects and the flash can dramatically change the shape and look of the light in the image. To create the “blooming backlight” featured in the image above, we placed a speedlight directly behind our subjects. The speedlight should be aimed toward the chest of one of the subjects, preferably the one wearing the brightest shirt. This will help bounce the light so that it wraps around the subjects.
In order to avoid overexposing the subjects and capturing too bright of highlights under their chins, do the following:
- Pose the subjects so that they’re facing one another (closed pose) with their heads leaning in and their eyes closed.
- Add a grid to the flash to minimize light spill.
Conclusion
I hope you enjoyed these 6 night photography ideas and put them to good use during your next nighttime photo session. Don’t let the setting sun set limits on what you can do with your photography. Dive deeper into your flash photography education with our complete Flash Photography Training System, which provides everything you’ll need (except the flash gear) to master flash no matter whether you’re shooting day or night.


Get Connected!