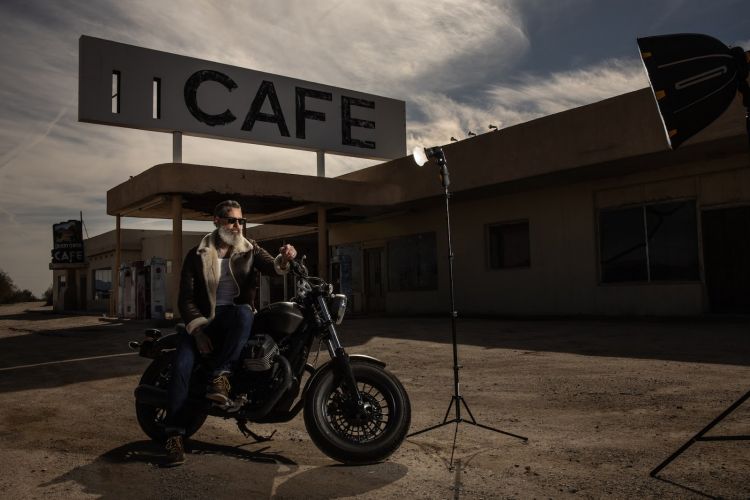
We wanted to see just how versatile of a look we could achieve with the MagBox so we put it through its paces to create these dramatic portraits. These images were created for our Lighting 3 course which is all about multi-point location lighting and advanced lighting refinement. Every piece of gear, every modifier, made simple so you can choose what best fits your budget and vision.
Limited Time Pre-Order Discount!
From now until July 11, we are offering a special launch discount for this workshop. Click on the link below to save $20 off the regular price ($149)!
Purchase Here1. Stacking the MagSpere with the MagBox
In order to create this painterly portrait, we needed one light to illuminate our subject and a second light for added fill. What characterizes a photo as ‘painterly’ as the additional depth created from multiple light sources filling into the face. We started out with 2 Godox AD200s placed in the MagRing firing through a MagBox with the FocusDiffuser. This light is being used to add light onto the subject, firing both strobes at full power.
Our secondary light source is a simple pocket flash, the Godox V860IIC, firing at full power directly at the subjects face. Adding a grid and a sphere to this light gives us a pin-pointed diffused light source that will match the same light quality of the light being produced from the MagBox. Both lights are angled to create a Rembrandt light setup, giving us that perfect triangle of light under the eye on the far side of the face. We then take a plate shot with the light stands and remove them and take a second shot to composite the two later in post to arrive at our final image.
Final Image:
Camera Settings:
1/200th of a second, f/18, ISO 50
Lighting:
2 Godox AD200s placed in MagRing on MagShoes firing through MagBox with FocusDiffuser
1 Godox V860IIC with MagGrid + MagSphere
2. Double Diffusion – 2 Magboxes are Better than 1
Placing our first light (2 Godox AD200s placed in the MagRing firing through a MagBox with the FocusDiffuser) high and angled down at our subject, we create a pretty basic image that illuminates our subject, parts of the background, and his bike. While this is a great first shot, we are aiming to elevate the scene by adding a level of light refinement.
Adding a reflector just in front of our key light, we are able to ‘double diffuse’ our light source, softening the highlights and wrapping the subject with light – a concept we discuss heavily in Lighting 201. Taking another Magbox with the FocusDiffuser, we want to bring back some of the detail on the right side and add a kicker to highlight the left side of the subject without completely ruining the drama we create with our camera settings. This technique can be replicated with 2 lights modified with a MagGrid and MagSphere, just like we showed you in the first technique above.
Final Image:
Camera Settings:
1/200th of a second, f/11, ISO 50
Lighting:
4 Godox AD200s placed in MagRing on MagShoes firing through 2 MagBoxes with FocusDiffusers
[REWIND: MagBox Review For Wedding Photographers]
3. Top-Down Triple Lighting
Don’t my fancy title for this fool you into thinking that this is complicated, it’s really not. The trick to getting a studio-like top-down lighting setup on-location is to getting higher than the subject and making sure you are creating that shadow underneath the nose, otherwise known as butterfly lighting – you can learn more about this in Lighting 101.
I wanted to create something dramatic since the sun was just overhead, so I stopped down to f/14 to create a starburst effect just at the top part of the frame. To match that effect we placed one Godox on either side of the camera just out of frame to create starbursts on the left and right side of the frame.
Final Image:
Camera Settings:
1/200th of a second, f/14, ISO 50
Lighting:
2 Godox AD200s placed in MagRing on MagShoes firing through MagBox with Focus Diffuser
1 Godox AD200s Camera Right
1 Godox AD200s Camera Left
There you have it. With a little bit of compositing help from Photoshop, we were able to create dramatic portraiture with the assistance of some powerful MagMod lighting tools. You can see exactly how we created these images in the Lighting 3 course and so many more advanced off-camera flash techniques available on pre-sale for a limited time!


Get Connected!