Virtual copies are needed for many different reasons when post-producing images in Lightroom. We use them on almost every project to give our clients a different version of the same image, each adding something new to the overall finished selection of images. As long as they work and look great, we often keep all Virtual Copies and deliver them with the originally produced image. In this article, I will discuss a few of my favorite ways to use Virtual Copies and how they can be useful during post-production to improve your workflow.
Watch the Video Tutorial
The following video demonstrates how to create virtual copies in Lightroom 4. While the software version is outdated, the concepts remain unchanged.
How to Create a Virtual Copy in Lightroom
In the Grid View within the Library module, choose the image (or images) you wish to replicate:
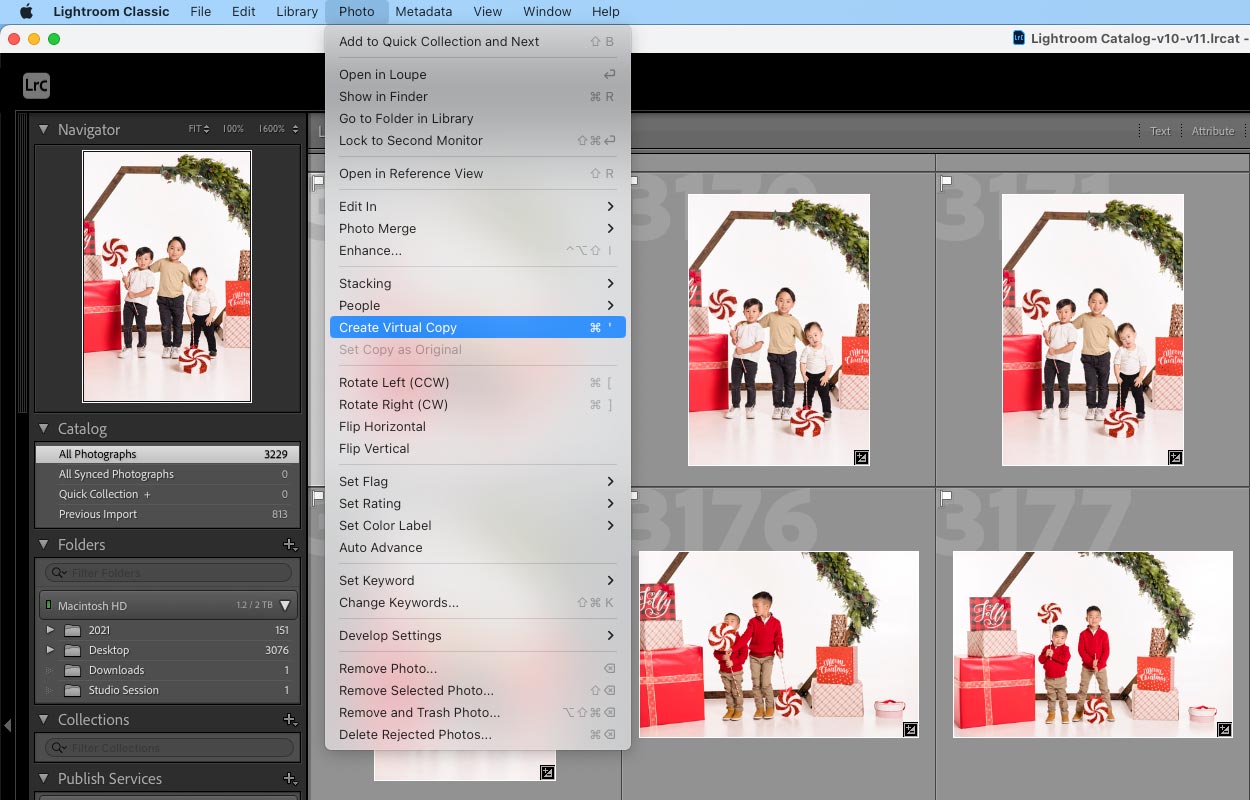
Method 1 – Menu
With the images selected, navigate to “photo” in the menu click “Create Virtual Copy.” Lightroom will then produce the Virtual Copies and position them within the same Collection as the original images.
Method 2 – Shortcut
Utilize the keyboard shortcut. For Windows users, press Ctrl along with the apostrophe (Ctrl + ‘), and for Mac users, press Command along with the apostrophe (Cmd + ‘).
Method 3 – Right Click
Right-click on a selected photo and opt for Create Virtual Copy.

When you generate a Virtual Copy, it will display alongside the original in Grid View, being identical in every aspect. Feel free to make any alterations to the Virtual Copy without affecting the original.
Method 4 – New Collection

Go to the menu item “Library” and select “New Collection.” This action will prompt the Create Collection window to appear. Within the Options section, check both the Include Selected Photos and Make New Virtual Copies boxes. Lightroom will then create a new Collection with Virtual Copies of the selected images.
Three Ways to Use Virtual Copies
Here are reasons to use virtual copies in your Lightroom photo editing workflow.
1. Save Storage Space
One great thing about Virtual Copies is the fact that they don’t take up much hard drive space at all. This is because each Virtual Copy is not actually a copy of the original raw file; it is simply a copy of the develop settings applied to the image. Virtual Copies don’t effect the original image or any other copy you create.
To create a Virtual Copy, use the shortcut [ Ctrl + ‘ ] or right click on the image and click “Create a Virtual Copy”.

At this point a Virtual copy is created and you will be able to view both the image and the Virtual Copy in the Library Module.

The reason why Virtual Copies don’t take up much space is because they are simply a record of the develop settings for a particular image that is stored within the Lightroom Catalog. Each copy only contains the develop information from the develop settings on the new image. Only when Virtual Copies are exported do they become their own image. At that point, they will take up more space on the hard drive.
2. Experiment with a New Look
Get creative and give your images a new spin. It is amazing how different a photo can feel with different production techniques or different Lightroom presets applied. Many of our color images are also developed and delivered as black and white images when we want to enhance the timeless emotion of a scene. Pop a high-contrast “crushed” look onto a dancing scene for a little extra excitement. Use deep blacks and warm tones to create a “moody” look for more romantic scenes. Virtual Copies allow to create these additional looks, without doubling up on image space or altering the original color image.

3. Filter by Virtual Copies
You can also filter by Virtual Copies. To bring up the Filter Menu, hit [ \ ], selecting “Attribute” and then choosing the Virtual Copies icon as shown below.
![]()
On the right side, you can see the “Virtual Copies” icon.

One reason why you might want to only view your Virtual Copies is to check for processing consistency. If you did a certain look on multiple images, you can easily compare them or even synchronize the same look across multiple Virtual Copies. Also, if you need to delete Virtual Copies, use the filter to quickly pull them up together.
To delete, select the Virtual Copies you would like to delete then Right-Click, select Delete Photos and then click “Remove” to confirm. Remember that deleting Virtual Copies will not affect the original image.

If you are interested in owning the Lightroom workshop it can be viewed in SLR Lounge Premium. Stay tuned for the next article.


