If I had a penny for all the blemishes I had removed over the years, I’d have a shed-load of pennies, and what an annoyance that would be! It’s a sad fact of our lives that all the sex, drugs and rock ‘n’ roll has an impact on our visage (that’s French for face). The impact for you and I as photographers is a significant time spent removing the pesky red marks. That, and the myriad of other things we find offensive to our eyes which blight our otherwise gorgeous images. But the big question is, which program is better suited to removing blemishes, Lightroom or Photoshop?
Lightroom vs Photoshop Blemish Removal Speed
This article will only be dealing with relatively simple blemish removal; spots, scratches and so on. I think we can all agree that for anything significant Photoshop is our one and only.
The first blow, and it’s almost a knockout (one of many), goes to Photoshop. Speed is of the utmost importance to me. I do not want to waste my time waiting for a program when I have other, far more exciting, things to be doing. But surely speed is down to the user, not the program? You’d think so, but you’d be wrong. Lightroom is not able to utilize your computer’s full power. Thus, no matter how much money you have thrown at your pride and joy, Adobe, in their infinite wisdom, decided Lightroom didn’t need the extra power. The result of this, at least when editing at my pace (fast), is that Lightroom cannot keep up.
[REWIND: BEST COMPUTER SPECS FOR PHOTOSHOP | IS YOUR COMPUTER UP TO PAR?]

I haven’t tried Lightroom for this type of thing in a little while. So, in the interest of fairness, I thought I’d give it a quick go. As has always been the case, I found my editing speed throttled by performance; Either waiting for areas to render or having to backtrack when Lightroom did a poor job.
In all fairness, the “poor job” would somewhat be my error, but that error was only caused by the juddering one experiences in Lightroom when attempting to edit at speed. When Lightroom is 3-5 strokes behind me, errors are going to occur. That said, if one was editing at a more leisurely pace Lightroom does a fine job, though I have never felt throttled by Photoshop when it comes to speed.

Lightroom vs Photoshop Accuracy
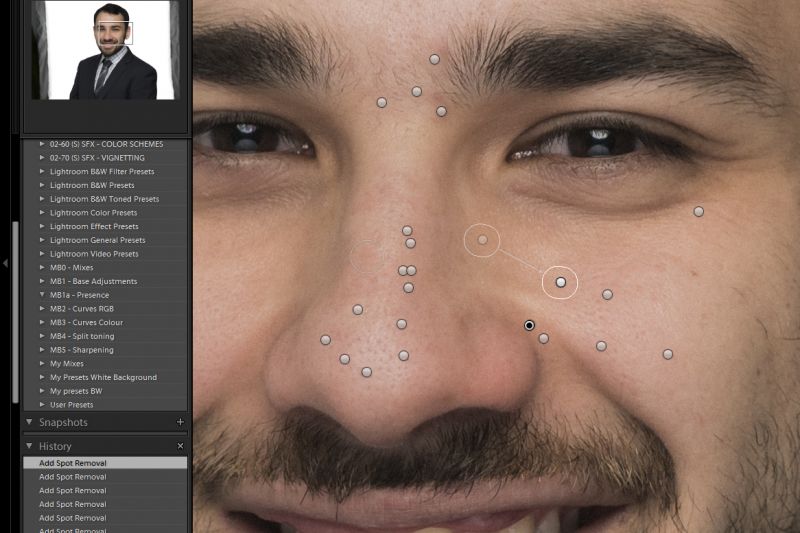
This is a big one. There’s no point doing a job like this if it’s not done accurately. Both programs are accurate but one does outshine the other in a few respects. Can you guess which one that is? Yeah, it’s Photoshop. Firstly, as I’ve mentioned, when the speed of the program is causing errors that must be taken into account, however, I can look past this considering, for many, it may not be an issue. Secondly, I find the white splodges while editing created in Lightroom to be quite distracting and can also potentially lead to errors.
[REWIND: THE MANY FACES OF FREQUENCY SEPARATION. ARE YOU DOING IT WRONG?]
Thinking about it, this point also comes down to speed. Lightroom can do a good job, even with edges. The trouble is, especially with edges, that it takes far longer. You will often need to make your edits visible so you can move the sample points, adjusting the size and hardness of your brush can takes ages depending on your tools, and the rendering time also leads to issues.

LIFE-CHANGING TIP – It always amazes me how few people know this: Go to Photoshop hit B for the Brush tool and hold down cmd/ctrl + alt + right click, then drag your mouse around. You’ll see that the brush size and hardness are changing as you move the mouse; up and down for hardness, and left and right for size. I also have this programmed to my Wacom tablet, push one button and drag to change size and hardness.
SECOND LIFE-CHANGING TIP – Get a Wacom Tablet. It takes some time to get used to but once you do, you can edit faster, more accurately, and it’s more enjoyable. It’s also great for Lightroom. Check out our previous post on why you need a tablet for Lightroom.
Lightroom vs Photoshop Final Result
Speed and accuracy are what it comes down to when removing blemishes. Or are they? Clearly Photoshop is the outright winner in these categories; It’s fast, accurate and has the power behind it to keep up with you but there is another element to this if you’re a professional.
Depending on the job, I will not, and I also recommend you do not, fully edit images before showing them to a client. It’s a massive waste of time. As such, if I’m working on portraits, I’ll usually use the SLR Lounge Preset system to get me going, refine the images a little and then stop. The rest, blemish removal and other final touches, I do in Photoshop IF, and only IF, the client buys the photos. Otherwise, it’s a gigantic waste of my time. In fact, I only do that level of edit if the client is buying printed products, not digital files. There’s not much point in editing blemishes away in a photo which will only be seen on social media.
However, if I feel there is a significant blemish, which will detract from the client’s experience when viewing the images. I will, in that instance, use Lightroom to remove the offender. Therefore, there is most definitely reason to use the tools Lightroom provides.

Summary
In this instance, Photoshop is the obvious winner, and that probably surprises very few of you. I do, however, hope that the pro’s amongst you have picked up a little tip in terms of prepping images for clients and not wasting your time. I also hope that the Photoshop brush size tip changes some of your lives as it did mine.
For more info on object removal in Photoshop be sure to read these two articles I wrote a little while ago on the subject. Between them, they cover (almost) every technique you could every need to know. Beyond these tips, you can check out our post on Adorama for a more general overview of the differences between Lightroom and Photoshop. Taking a closer look at the strengths and weaknesses of each will allow you to refine your workflow and choose the right tool for the job. Again, all of this in a grand effort to work more efficiently.
[REWIND: THE ULTIMATE GUIDE TO OBJECT REMOVAL IN PHOTOSHOP [PART 1] | THE CLONE STAMP TOOL & SO MUCH MORE!]
[REWIND: THE ULTIMATE GUIDE TO OBJECT REMOVAL IN PHOTOSHOP [PART 2] | THE CLONE STAMP TOOL & SO MUCH MORE!]
In addition, when I originally released this article, I touted the benefits of using the SLR Lounge Preset system. I truly used the system regularly and was happy to recommend it. Over the course of several editing sessions, it proved itself an indispensable tool for me. I’ve more recently switched over to the latest batch of preset packs from Visual Flow, the result of a collaboration between the teams at SLR Lounge and DVLOP. Whereas normal presets are designed to apply particular looks to scenes that were shot in a very specific way under particular lighting conditions and so on, the Visual Flow packs offer a certain look (such as a pastel-toned edit) and then give you 10 variations of that look based on different lighting conditions, like soft light, hard light, backlighting, etc. Because of this, you’ll be able to achieve the look you want regardless of the available lighting conditions when you captured the photo. I highly recommend that you check them out.


Get Connected!