The following is an excerpt from our HDR Tutorial by SLR Lounge. This workshop dubbed “the gold standard of HDR education” by FStoppers contains over 13 hours of tutorials, RAW files for you to follow along, and dozens of full prep to post examples. We cover bracketed HDR, in-camera HDR, single-shot faux HDR, single-shot bracketed HDR, panoramic HDR and more! Click here for more info.
Introduction
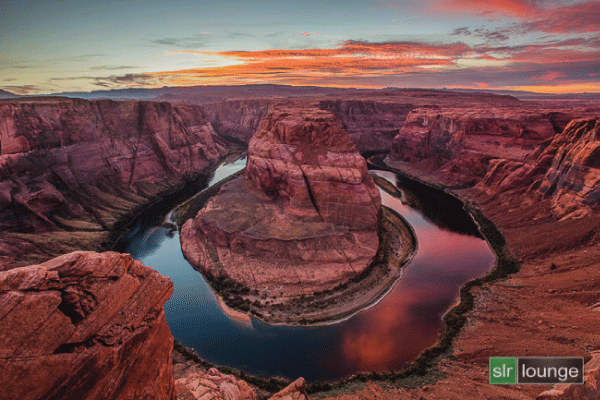
In our article “Horseshoe Bend: How It Was Shot,” we explained how we got this shot of Horseshoe Bend in Page, Arizona. In this article, we will discuss how to prepare the 3 RAW exposures that create this final HDR image. In addition, we will go over how to export these 3 RAW exposures into Photomatix for HDR processing.
[Tip: Click here for a 15% Photomatix Discount Code]

Watch the Video
How to Prepare RAW Files
To prepare photos for HDR processing, we need to first prepare the 3 RAW files. You should start with them at Adobe’s original default values, and be sure to double check that all three images are totally reset, not just one of the images, otherwise your HDR will turn out weird.

White Balance
One of the main things that you want to get as perfect as possible BEFORE creating an HDR is your white balance, because slight errors in tint or temperature are much more difficult to correct in JPG, TIF, and PSD images compared to a RAW image. So, bring up the brightest (or median) exposure and check the overall colors. Use Tint and Temperature in tandem (say that ten times fast!) to get all three exposures in the right place.
The Auto White Balance in Lightroom 4 can often do a really good job, especially for outdoor shots in the daytime, but be sure to sync your WB across all three images if you try to use this option.
Noise Reduction
Next, double check for noise by zooming into the image. Zoom into the darker areas of the photo to see if you need a little bit of noise reduction. (Remember that when you shoot in full RAW format, you are bound to get more noise than when you shoot in medium RAW or JPG.)
In Lightroom 4, the Noise Reduction settings are under the Detail Panel, which you can expand and collapse by pressing “Ctrl + 5.” For this image, we are going to set the Noise Reduction to 20.
Keep in mind that this step is still necessary even if you’re shooting at your base ISO and are used to getting very “clean” images. Why? Because HDR photography is all about manipulating highlights and shadows, and even your lowest ISO images will have some noise deep in their shadows. Of course this is the whole reason we bracket exposures, but even then your shadows could probably use 10-30 in Luminance Noise Reduction.

Sync Noise Reduction Settings
After we adjusted the Noise Reduction settings for the shadows of the brightest exposure, we need to sync these settings over to the other 2 exposures. Select the other 2 exposures and press “Ctrl + S.” This will bring up the Synchronize Settings Dialogue Box. Since we only changed the Noise Reduction settings of the brightest exposure, click on “Check None” and then check the box next to “Noise Reduction.” Then, click “Synchronize.”

As a side note, we use Lightroom 4 to reduce the overall noise of the images before bringing the photos into Photomatix because Lightroom 4 is a much better RAW processor than Photomatix.
How to Export to Photomatix
Now that we have prepared these 3 RAW files for export, it is time to export them to Photomatix. Right-click on your images and select “Export” from the dropdown menu. Then, select “Photomatix Pro.”

Once you select “Photomatix Pro,” the Settings for Processing Exported Files Dialogue Box will appear. Do not check the box next to “Align images” since we shot this image on a tripod. Check the box next to “Remove ghosts” because there could potentially be some movement in the water and we want Photomatix to find that and automatically blend it smoothly. Everything else will stay defaulted, so click on “Export” at the bottom of the dialogue box. Once you click on “Export,” your images will be brought up into Photomatix, ready for our next step!

Conclusion & Learn More!
We hope you have enjoyed this tutorial on how to prepare RAW files and export them for HDR processing! Stay tuned for our next tutorial on how to create the HDR “blend” image of Horseshoe Bend using these images in Photomatix.
For more HDR education, be sure to check out our HDR Tutorial by SLR Lounge. This comprehensive “gold standard” guide will give you a mastery of HDR photography, from the scene considerations to the actual shooting to the post production. Click here for more info.
[FAQ: What is HDR Photography?]


Get Connected!