We wanted to give you a sneak peek into one of the newest courses in our SLR Lounge Premium Library: Creative Photography 101. This course is all about training your eye to see the world creatively. All images in the course were taken on my iPhone to emphasize that it truly isn’t about the gear, it’s the technique and art behind it. In this video, you’ll learn how to create interesting light patterns with your phone to get epic portraits.
Gear Used in This Tutorial:
- iPhone 11 Pro Max (any phone or camera will work just fine)
- Peak Design Tripod
- Glass chandelier sphere: the one I purchased from Michael’s is no longer available but you can find something similar at any local craft store!
Now that you have all your gear ready, let’s dive into the tutorial. All you’ll need for this lesson is a plain white wall so that we can reflect our pattern onto it. This concept is similar to how a projector works for casting patterns onto backdrops, but this is just a DIY and budget-friendly version of that. We’re going to follow the C.A.M.P framework while setting up this shot:
- Composition: What do we want our scene to look like? Where do we want the camera to be? What’s the angle? What do we want our subjects to be doing?
- Ambient Light Exposure: Choose the intention of the scene. Do we want a dramatic image (darkening the ambient light and using more flash) or do we want a softer image (brightening the ambient light and using a more natural power of flash)?
- Modify/Add Light: Are your subjects visible in the frame or do they need to be chiseled out? Do you need to add an additional light source?
- Pose & Photograph: Take your shot!
1. Decide on Composition
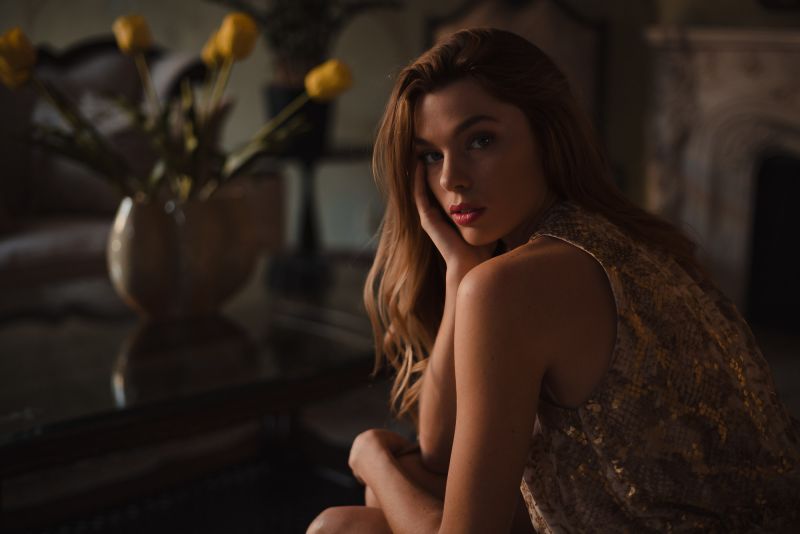
 Since the object we are using has a perfectly circular center, I decided to place Shiv in the center of the scene to frame her head exactly in that circle. This is the simple concept of framing your subject within a frame, a popular compositional tool to yield creative outcomes.
2. Dial In Ambient Light
From there, we are going to blackout our room so there is no available light cast on the wall. This is going to help the pattern show up as clearly as possible. In order to have more control over our camera settings, I am using the Moment App to help dial in the appropriate exposure settings for our phone. Another option is to use the Night Mode (available on certain iPhones and Androids) to create longer exposures.
3. Modify or Add Light
 This next part requires having another iPhone or tiny flashlight to shine through the glass object. You’ll want to turn that flashlight to the highest intensity and shine it directly through the object to cast the pattern onto the wall. If you are using a camera, you’re likely going to have to put it on a timer (if you’re taking this shot yourself) or have someone help you out so you can get the pattern perfectly placed. By bringing the prism closer or away from the light you’ll notice the difference in how the pattern is displayed on the wall. Play around with it and see what you like! This intro course on creativity is all about learning to see like your camera right so so far we have focused on lighting based principles whether it was utilizing natural light and modifying it over to finding hard light sources and finding shapes and different objects the difference now is we’re actually creating it on our own but it’s the same principles we’re still creating or finding a unique light pattern only the difference is in a dark room we have the ability to create it ourselves so this ties into the exact same lighting principles we’ve been discussing in our comprehensive lighting tutorials using off-camera flash and strobes as well.
4. Pose & Photograph
Adjust your subject’s pose so that the pattern being reflected isn’t creating any unwanted shadows and you’re good to go! This is such a fun trick you can try at home or out on location and is sure to create some unique lighting patterns once you start playing around with the prism of your choice.
 Here is a before and after of the edit using our Visual Flow Lightroom Presets. Post-production really does transform the image and puts the finishing touches on creating something from nothing. You saw how we took a plain white wall and made something of it and that it truly what this course and creativity is all about. To see more tutorials like this make sure you check out our Creative Photography 101 course and pick up tricks and tips to take your photos from ordinary to extraordinary!