Being able to adjust color is an important skill which every photographer should know. This article will cover three methods to adjust and sometimes completely alter the existing colors in your photos.

Using Curves To Edit Color In Lightroom
The RGB section of the Curves panel is something which you are probably familiar with. It allows us to alter the luminosity of the various tones in our image by dragging the curve either up or down. The bottom of the curve represents the blacks, and the top represents the whites. However, if you click RGB a drop down will appear which allows you to select the Red, Green or Blue channels. From here, we can adjust the colors in our image by moving the curve.

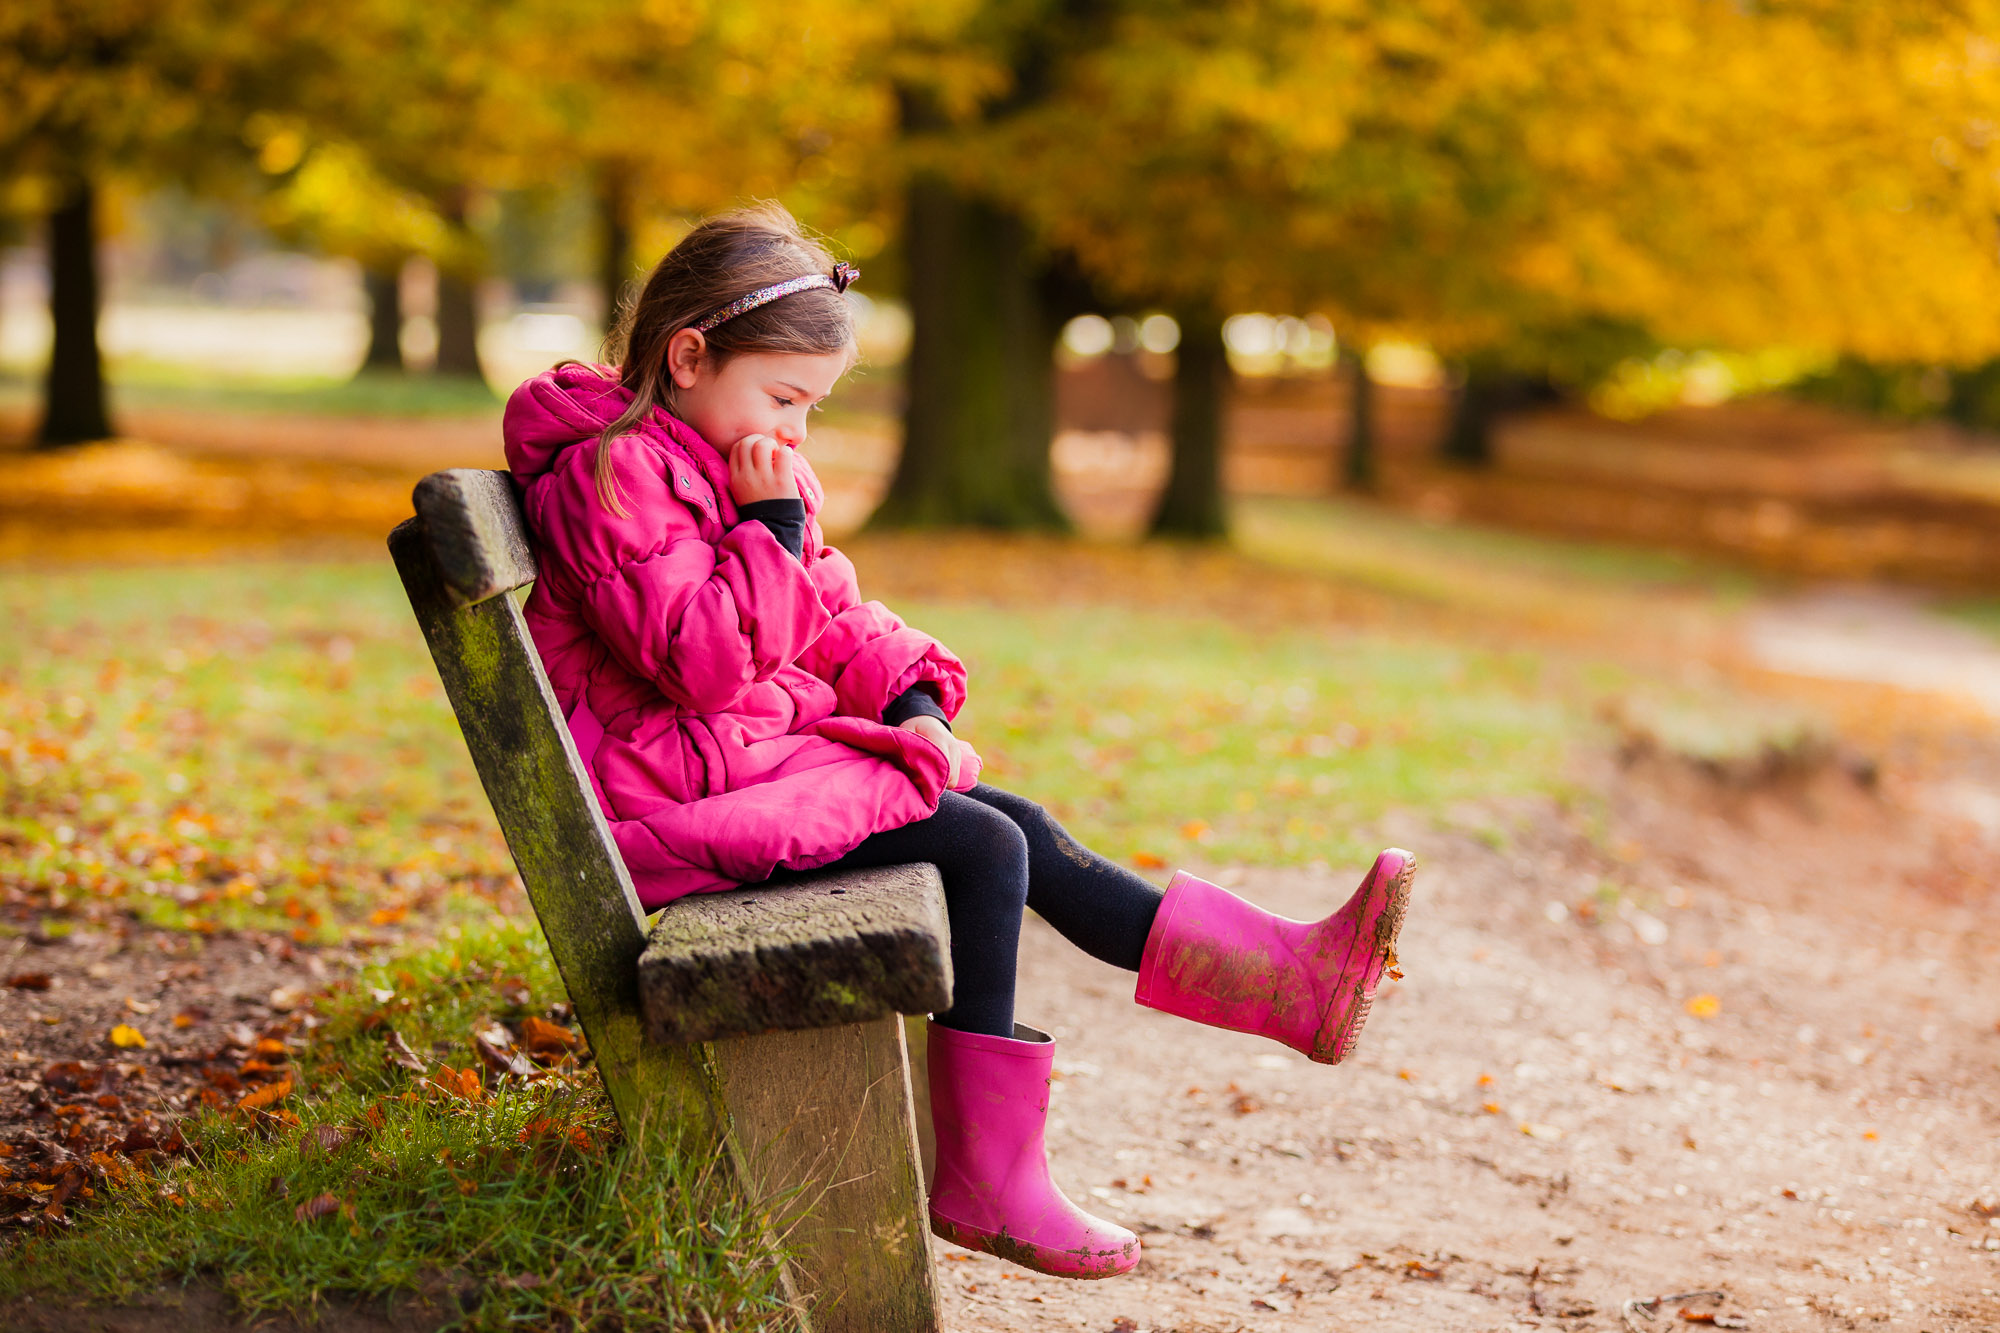
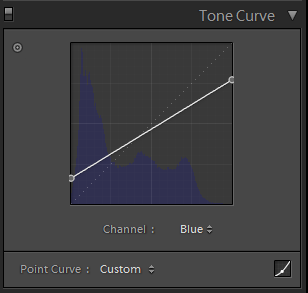
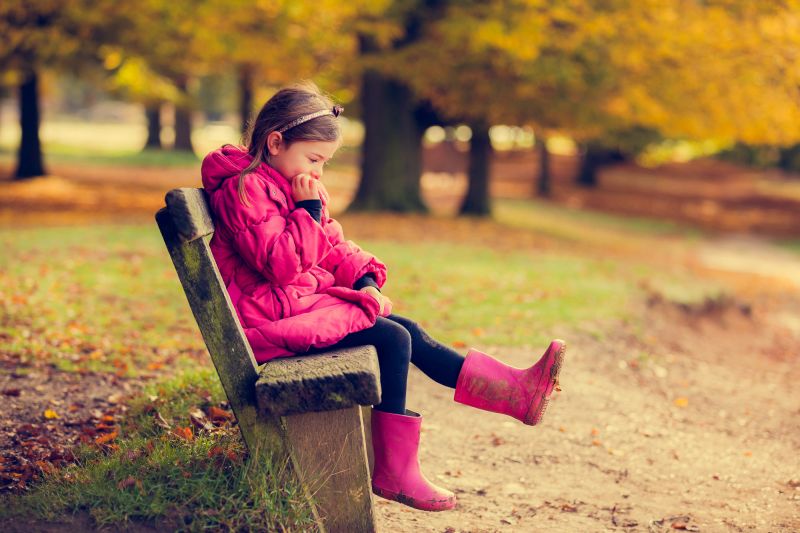
For this demo, I have created an exaggerated cross-processed look by adding yellow to the highlights and blue to the shadows (see photo below). To do so, I went to the Blue channel and moved the top of the curve down and the bottom up (see photo above). To fully understand this, you need to understand a little bit about color theory and complementary colors; this article will help. Essentially, all you need to know for our purposes is that by moving the Blue channel curve down we get yellow. Whereas moving it up gives us blue. Each one of the three channels will have a different effect, experiment and you’ll quickly see what I mean.
[REWIND: THE ADOBE COLOR PICKER TOOL | WE ALL SEE IT, BUT DO YOU REALLY UNDERSTAND IT?]

It’s important to note that adjusting colors here will affect the luminance of our image. The effect is not as pronounced as using the RGB section of Curves but it is still there. While in the Develop module press J to turn on your Clipping warnings and make sure nothing is getting unintentionally clipped.
Editing Color Using HSL Panel
The HSL Panel or Hue, Saturation and Luminance is one of my favorite places to edit color in Lightroom. I’m a control freak and I love the precision it provides. I also like that it doesn’t affect luminance unless I want it to.

As you can see the panel is pretty simple. We have the three sections at the top, as well as an option to show “all”, which is a bit of a slider overload. We also have the Targeted Adjustment Tool which I have pointed out above. This tool, which is also present in Curves, allows us to click and drag directly on our image, thereby adjusting the corresponding color, or tone in the case of Curves. The sliders all represent the various colors in our image and we can adjust each one individually in respects of it’s Hue, Saturation or Luminance.
[REWIND: CREATING A VINTAGE FADE WITH A YELLOW VIOLET COLOR SCHEME – WEEKLY ORDINARY TO EXTRAORDINARY LIGHTROOM EDIT – E11]

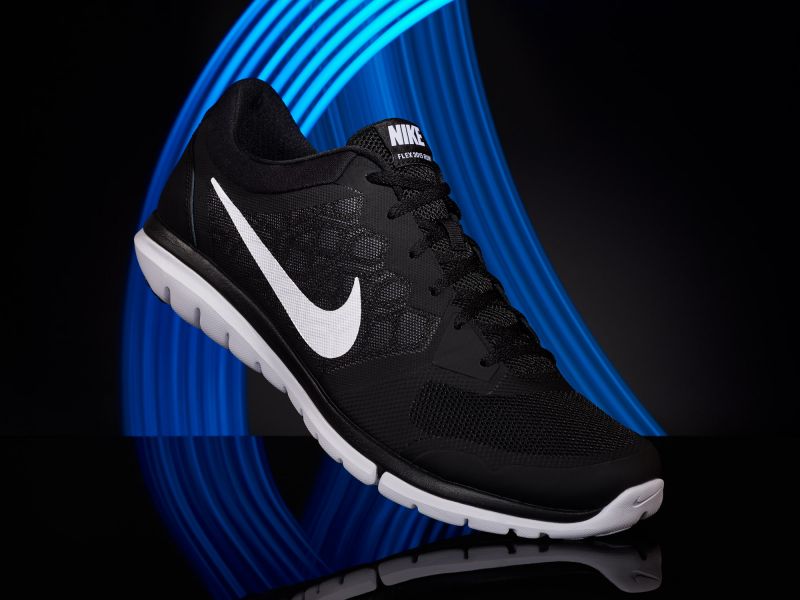
Using the various sliders in the HSL Panel I decided to alter the color of the blue, light painted, swipes in the photo you see above. To do so, I simply moved the blue slider within the Hue section of the panel.

The HSL panel allows us to quite heavily alter our colors but it does have its limitations. For instance, if I wanted to change that blue to red I would have some trouble. This is because the panel only allows us to alter the colors within a certain degree of that color on the color wheel.
More Adjustments To Color Using Split Toning
As you know, our images can be split into sections of tonality. In Lightroom you can move your cursor across the Histogram and see what these are; Blacks, Shadows, Exposure (or Midtones), Highlights and Whites. Split Toning allows us to apply color to the Highlights, Shadows and, to a lesser extent, the Midtones.

The Split Toning Panel is probably the easiest of these three methods to get your head around. The less obvious aspects are that we can easily select and adjust our color by using the rectangular boxes next to the words Highlights and Shadows. When you click on those a pop up will appear and you’ll be able to drag your cursor around and find a color and saturation which you find appealing.
The other less obvious aspect is what balance does. The panel implies (if a panel can imply) that it only effects the highlights and shadows. This is not the case. Lightroom allows the effect to bleed into the midtones to provide a smooth transition. As such, balance adjusts that effect and emphasizes the highlight or shadow color.
Continuing my example with Curves I quickly applied a similar cross-processed look to the same photo.

Moving Beyond Adjusting Colors
This would be a whole separate article but, briefly, if you wanted to move beyond simply altering your colors, to outright changing them, you would most likely require masks to do so. As such, if I am ever to do this sort of thing (I very rarely do) I would head over to Photoshop. Having already masked out this shoe I applied that mask to a Hue and Saturation layer. Using the colorize function, and by adjusting the Hue, I was able to change the blue swipes to red.
[REWIND: COLOR GRADING IN PHOTOSHOP | 5 WAYS TO MANIPULATE COLOR]

Summary
I have no qualms adjusting the colors in my image. The cameras we use have their own algorithms which decide on the Hue and Saturation of our scene, and IfiI feel that it’s not accurate, or if I want to adjust it for artistic reasons, then I will use one of these tools. Or, I’ll head over to Photoshop and do something else. I might want to slightly exaggerate the colors of an autumnal scene or adjust the colors to an aesthetic which is more suited to my style.
Some of the concepts here are a little complicated but with a good understanding of color theory and editing you should be fine. If you feel a little lost, then I would suggest you head over to the SLR Lounge Store and check out some of our comprehensive tutorials, click here. Make sure you also look at the SLR Lounge Preset System. It’s an excellent tool to give your photos a unique look within just a few clicks.


Get Connected!