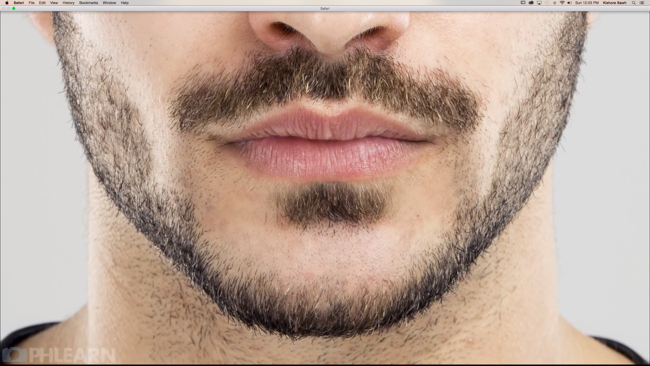
Men, on a whole, have a love hate relationship with facial hair. Either it grows too quickly, too sparsely, too slowly, or some measure in between. Those who don’t have a God given ability to grow a full on face carpet marvel (read: glare with envy) at those who do. Then there are the types like me whose facial hair grows at the rate of continental drift, and end up looking like some manner of rabid animal for months before something human appears, and listen bemused to the complaints from friends who have to shave at 7am and noon to avoid a 5 o’clock shadow at 2. So, getting facial hair to look just right in photos can, for many, be a challenge, and in order to combat this, Aaron Nace at Phlearn has put together a brilliant tutorial on how to create and manage facial hair in Photoshop.
What this tutorial is, more than anything else, is an exercise in creating custom brushes, and understanding how to see and manage uniformity for realism. The process as described by Aaron begins with creating a single hair with the brush tool, that needs to be as close to perfect as possible, as it will be the base for the custom brush. [To those of you who don’t yet have a Wacom tablet, it is possible to do this with a mouse or trackpad, but undeniably easier with a touch pen. See reviews on two options at opposite ends of the pricing scale here and here]

You will be creating a white background, surrounding the hair using the marquee tool, then going to Edit>Define Brush Preset, at which point you’ll be able to open the brush in the brushes panel.
[REWIND: How To Use The Amazing Patch Tool In Photoshop | Aaron Nace]
Within the brush menu, your options are as varied and customizable as you could want, and probably more so. I suggest taking heed of Aaron’s advice and playing around within this section to get a grasp of what is possible. It is in this section, when alterations are made to the angle jitter, scattering, opacity etc, that the realism starts to take shape, and when you’ve finished here, it’s a simple matter of painting on the face with some variance in color and size. This variance is an absolute necessity for rendering a realistic look.

As always, if you are a fan of Aaron’s teachings (and who isn’t?), be sure to check back here for updates, and follow along with Aaron on YouTube and Phlearn. You should also consider becoming quickly adept at Photoshop with the Phlearn Photoshop 101 & 201 sets as they are extremely comprehensive, and will have you quickly doing things with Photoshop you may have otherwise thought too complex, or didn’t even know you could do.
Source: Phlearn YouTube, Images are screen captures from featured video


Get Connected!