
On December 1, 1913, the Ford Model T began rolling down the assembly line and completely changed how automobiles were built. In turn, it also had an immense influence on the world, how we created things and the expansion of industry during the 20th century. What does all this have to do with workflow tips in Lightroom and relate to us as wedding photographers?
If you’re ready to use a more productive workflow in Lightroom, you need to think like the assembly line. Here are some ways to do it. In this tutorial, we’re going through our pre and post-production workflow and giving you the best tips on how to make your own workflow as efficient as possible. When mastered, these tips are guaranteed to save you time in your workflow so you can spend more time doing things that matter, like taking more pictures!
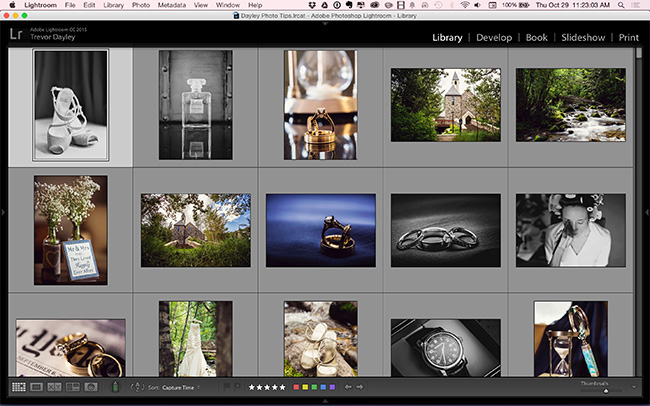
Import Through Lightroom
There are two options to import your images from your card to your computer. The first option is to copy your memory card onto your desktop and then manually import into Lightroom. The second option is to import directly into Lightroom, and we recommend sticking to this option. We recommend this option because the desktop operating system is not designed for image management. This can be a problem when you have images with identical file names because the desktop will treat them as the same image and you will only be able to keep one.

In our studio many of our photographers shoot with the same camera make and model that don’t have custom file naming options. We frequently run into this problem where we have unique images coming from different cameras with the same file name. When we import directly into Lightroom, it automatically takes care of the identical image file names, insuring that all images that should be uploaded are uploaded.

Cull in The Library Module
When you begin your culling process, we advise that you do all this in the Library module. You can choose to cull in the grid view or the loop view in the Library module, just as long as you’re not culling in the Develop module. The reason why is because the Develop module uses a different type of image preview than the Library module, and these previews take more time to load, and that will slow down your workflow significantly.
Culling is the act of looking through the images quickly and choosing the ones you want to edit. While culling don’t start editing any photos. Even if you saw one that you like but was exposed improperly, therefore, you are unsure if you want to keep it, just keep it for now and try to fix it later during the next process. If you find out later it’s unrepairable, then you toss it out. But, don’t, I repeat, don’t stop to bring a photo into the develop module and start editing it. While culling you can use numbers to rate images, color labels, or “P” to flag the images you like, then filter for those later. There are lots of ways to do it. The key is only to cull the images as our first workflow step.
Keep Culling System Simple
Lightroom gives us many culling options such as rating, flagging, and coloring our photos, and you may feel the need to cull accordingly. Our tip is to keep your initial culling process simple. When you’re looking through your photos, simply ask yourself if you want to keep or discard the photos. That way you’re only focused on one thing, and your culling process will become much faster.
Master Every Method of Batch Processing
Once you’ve culled the photos, you need to filter for those images you picked, and you can now start the editing process. Switch over to the Develop module and begin editing the images. Most of your edits will happen in the Basic menu of the module, (white balance, exposure, contrast, vibrance, clarity, etc.). During this process, you can also apply any Lightroom presets. Be sure to take advantage of Sync and Previous buttons. Where many photographers get held up here is when they come across an image that needs some extra editing they right-click on the image and choose to open it in Photoshop. Don’t do this. It will slow you down. We will do that part later.
We went through on how Lightroom’s strength vs Photoshop is it’s ability to batch process. From using the using the previous button, synchronizing, auto-sync, and other batch processing functions, nothing will speed up your workflow faster than mastering these batch processing techniques.

Batch processing is your best friend when processing large amounts of images in an efficient manner, and this is also why we recommend shooting in manual mode on your camera. Batch processing works best when images are similar in terms of exposure and color, and if your camera settings are consistent from scene to scene then the batch processing workflow becomes much quicker and smoother.
Avoid Advanced Production & Photoshop Until Batch Processing is Finished
 We want to avoid re-work and loss in efficiency, so we save the heavier post processing until we are finished batch processing our images. If you’re constantly stopping to do advanced post production on your images then you’re not taking full advantage of your batch processing workflow. Also you may decide later that you find a better image to do advance post processing to and not want to use the image you’ve already edited, and all that time spent editing the initial image is now wasted.
Once you have all the JPEGs exported into one folder, open up Photoshop. Now is the time you can drag the JPEGs that need additional editing into Photoshop, make the edits and resave the photo. Edits in Photoshop might be advanced cloning, healing, and skin retouching. I also like to do some color toning in Photoshop using an action I haven’t been able to replicate yet in Lightroom. The key here is that you are using Photoshop on JPEG files that have already been exported out of Lightroom. No going back and forth between the programs like before. Remember, think like an assembly line. Only focus on one particular job at a time.
Your “assembly line” might look different. The key though is to keep yourself from bouncing between one thing and another. If you are culling and decide to open one image in Develop, then go back to culling, you are doing it slower than you could be. If you are opening images from Lightroom into Photoshop, then saving the edits before jumping back into Lightroom, you are also doing it slower than you could be.
Post Produce High ISO Photos Separately
Once you’ve finished editing all your images, use the Metadata filter in the Library module to sort your images by ISO. Choose the high ISO images. Fix the noise in one photo and then sync just the noise reduction of that one image to all your other photos shot at the same ISO. Do this for each level of high ISO images you would like to fix.
Export Images to any Format That You Plan To Use in the Future
You’ve finished editing all the images; your next step is to select them all and rename them before moving onto the export process. The easiest way to do this is going to the Library module, select all, then on the PC just hit F2, or on the Mac hit Cmd+F2 to bring up the Rename dialog box.
During the export process we recommending exporting the images to any format you might need in the future. So if you need full sized JPEG’s and web sized photos, export for both.

The reason is because if you need a particular image sometime in the future, you’ll always have it available to you in the size you need, and it’s available quickly. If you have to re-import your catalog, find the image you need and export, that can be very time consuming, especially if you have to do it over and over again. Although this process will take up a bit more space on your hard drive, the time you save will be worth it.
Don’t Save Every Single Raw File
As photographers we tend to save every single photo we take. This is where we encourage you not to be a photography hoarder. If you have rejected images that are duplicates or are simply not as good, don’t feel shy when it comes to deleting from your hard drive.
Although when it comes to professional shoots, or when we’re shooting for clients, we reset our rejected images and export them as JPEG files just so we have them available to us if we need them in the future. Sometimes a client might ask “Do you have any more shots of…” and even though the photos may not be the best, the client will appreciate them. So as JPEGs we still have the images if needed, while not taking up the enormous amount of space that RAW files do.
Quick Tip: Make sure your caps lock key is activated so that while culling, your photos auto-advance from one image to the next after you pick, rate or label your images.
Conclusion
Just as the assembly line was able to make Ford workers much more productive, you will become a much more productive editor in your workflow. Develop your steps, write it down and paste it above your computer or on your desk. Don’t break the flow. Form workflow habits. In a short time, you will find your workflow process will be much faster than before.
If you are ready to take your Lightroom skills to the next level be sure to check out the Lightroom Image Processing Mastery tutorials here on SLR Lounge. They are extremely helpful, comprehensive and taught very well. Did I mention it’s over 10 hours of instruction? I learned lots just by having them play in the background as I was doing my editing and every so often I would replay a section of the instruction because it was so beneficial. Time is money and these videos have saved me a lot of time.


Get Connected!