
I’ve been a rather happy Lightroom user since version 2. However, last year, I made the switch to Capture One 9, and here’s a short breakdown of why I did and why maybe you should too.
Image Quality
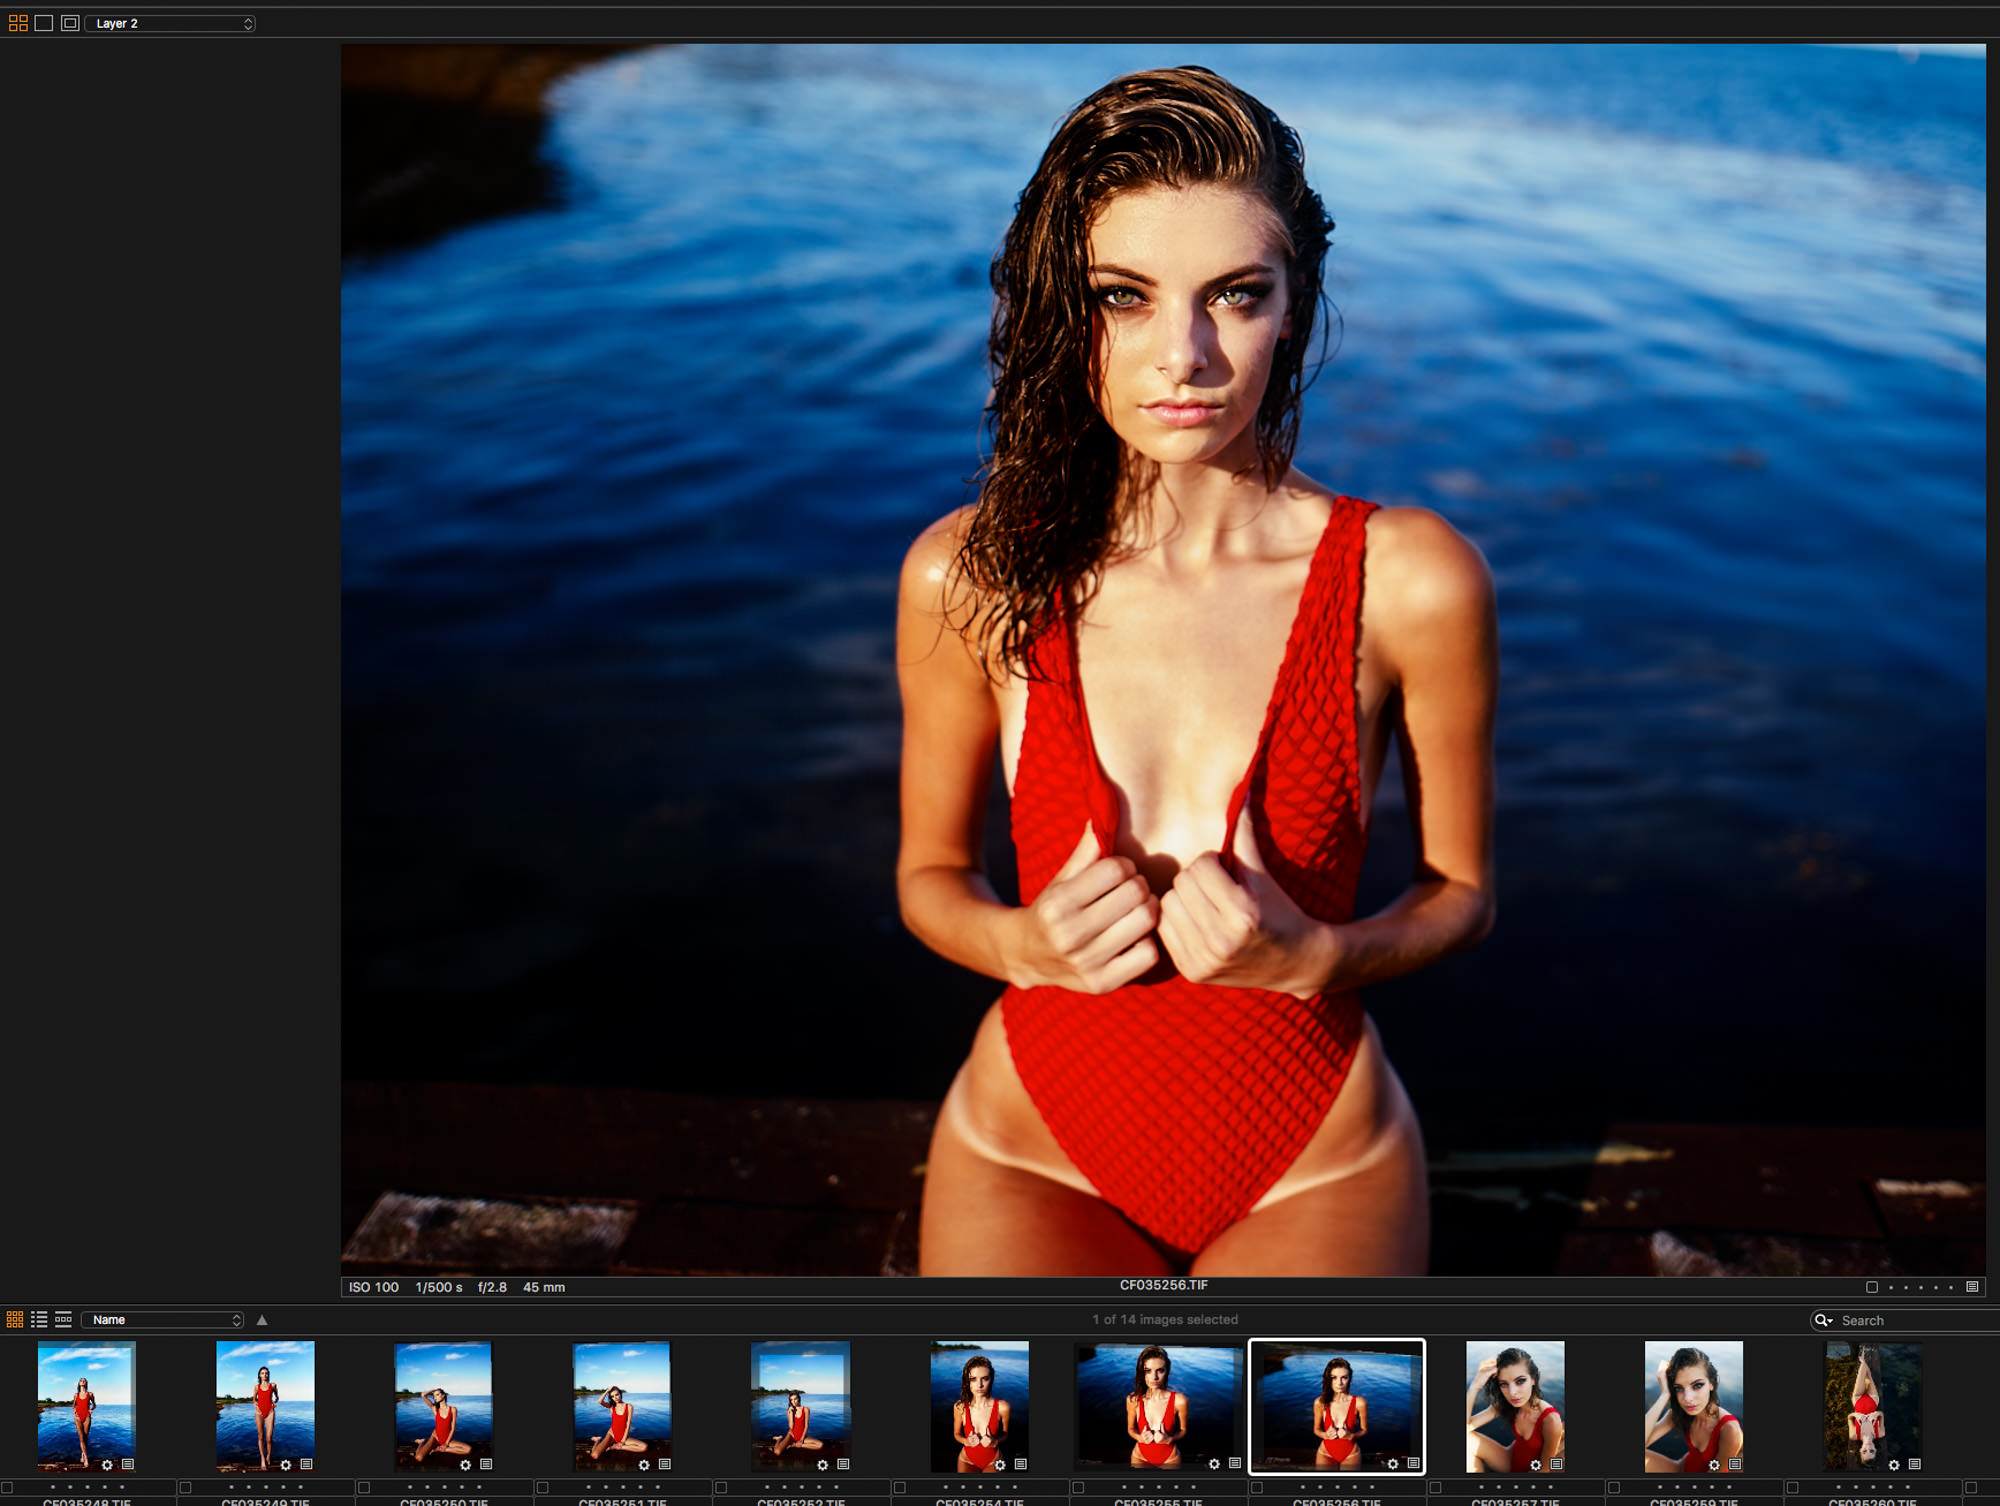
Before you start to even process an image in Capture one you’ll notice that your raw images simply look better in Capture One than they do in Lightroom. Raw images opened in Capture One 9 show excellent color, contrast, and fine detail with nearly any combination of camera or lens. Even decade-old images from long discontinued cameras absolutely sing in Capture One.
[LEARN: Free Engagement Photography Guide]
For those who may be curious why a there’s a difference at all, understand that raw formats are interpreted differently by various converters, somewhat akin to how different cooks following a recipe may have slightly different resulting dishes. Capture One, it is largely agreed (though subjective), gives truer skin tones and overall balance.
Local Adjustment Layers

Besides having the ability to create as many as 10 layers of local adjustments in Capture One 9 we now have the ability to make local adjustment masks from Color Editor selections. This allows users to very easily create more complicated masks for compensating for lighting in interiors, skin-tone editing, skin softening, portrait retouching, and landscape color separation.
By contrast, Lightroom’s adjustment layer is limited to just a single layer with far less precision. While Capture One’s layers aren’t as robust as that of Photoshop, it covers what most photographers will desire to have and cut down on multiple application switching.
Luma Curves Channels

This, is a big one. The Luma Curves Channel is a new channel in the curves tool for Luminance. The luma curve adjusts contrast in a different way than with only the RGB channel which will often change overall saturation with contrast is increased.
Additionally, users can perform all available curve adjustments on local adjustment layers for even more precise fine tuning. Having this option on local layers is a huge precision plus.
Focus Mask
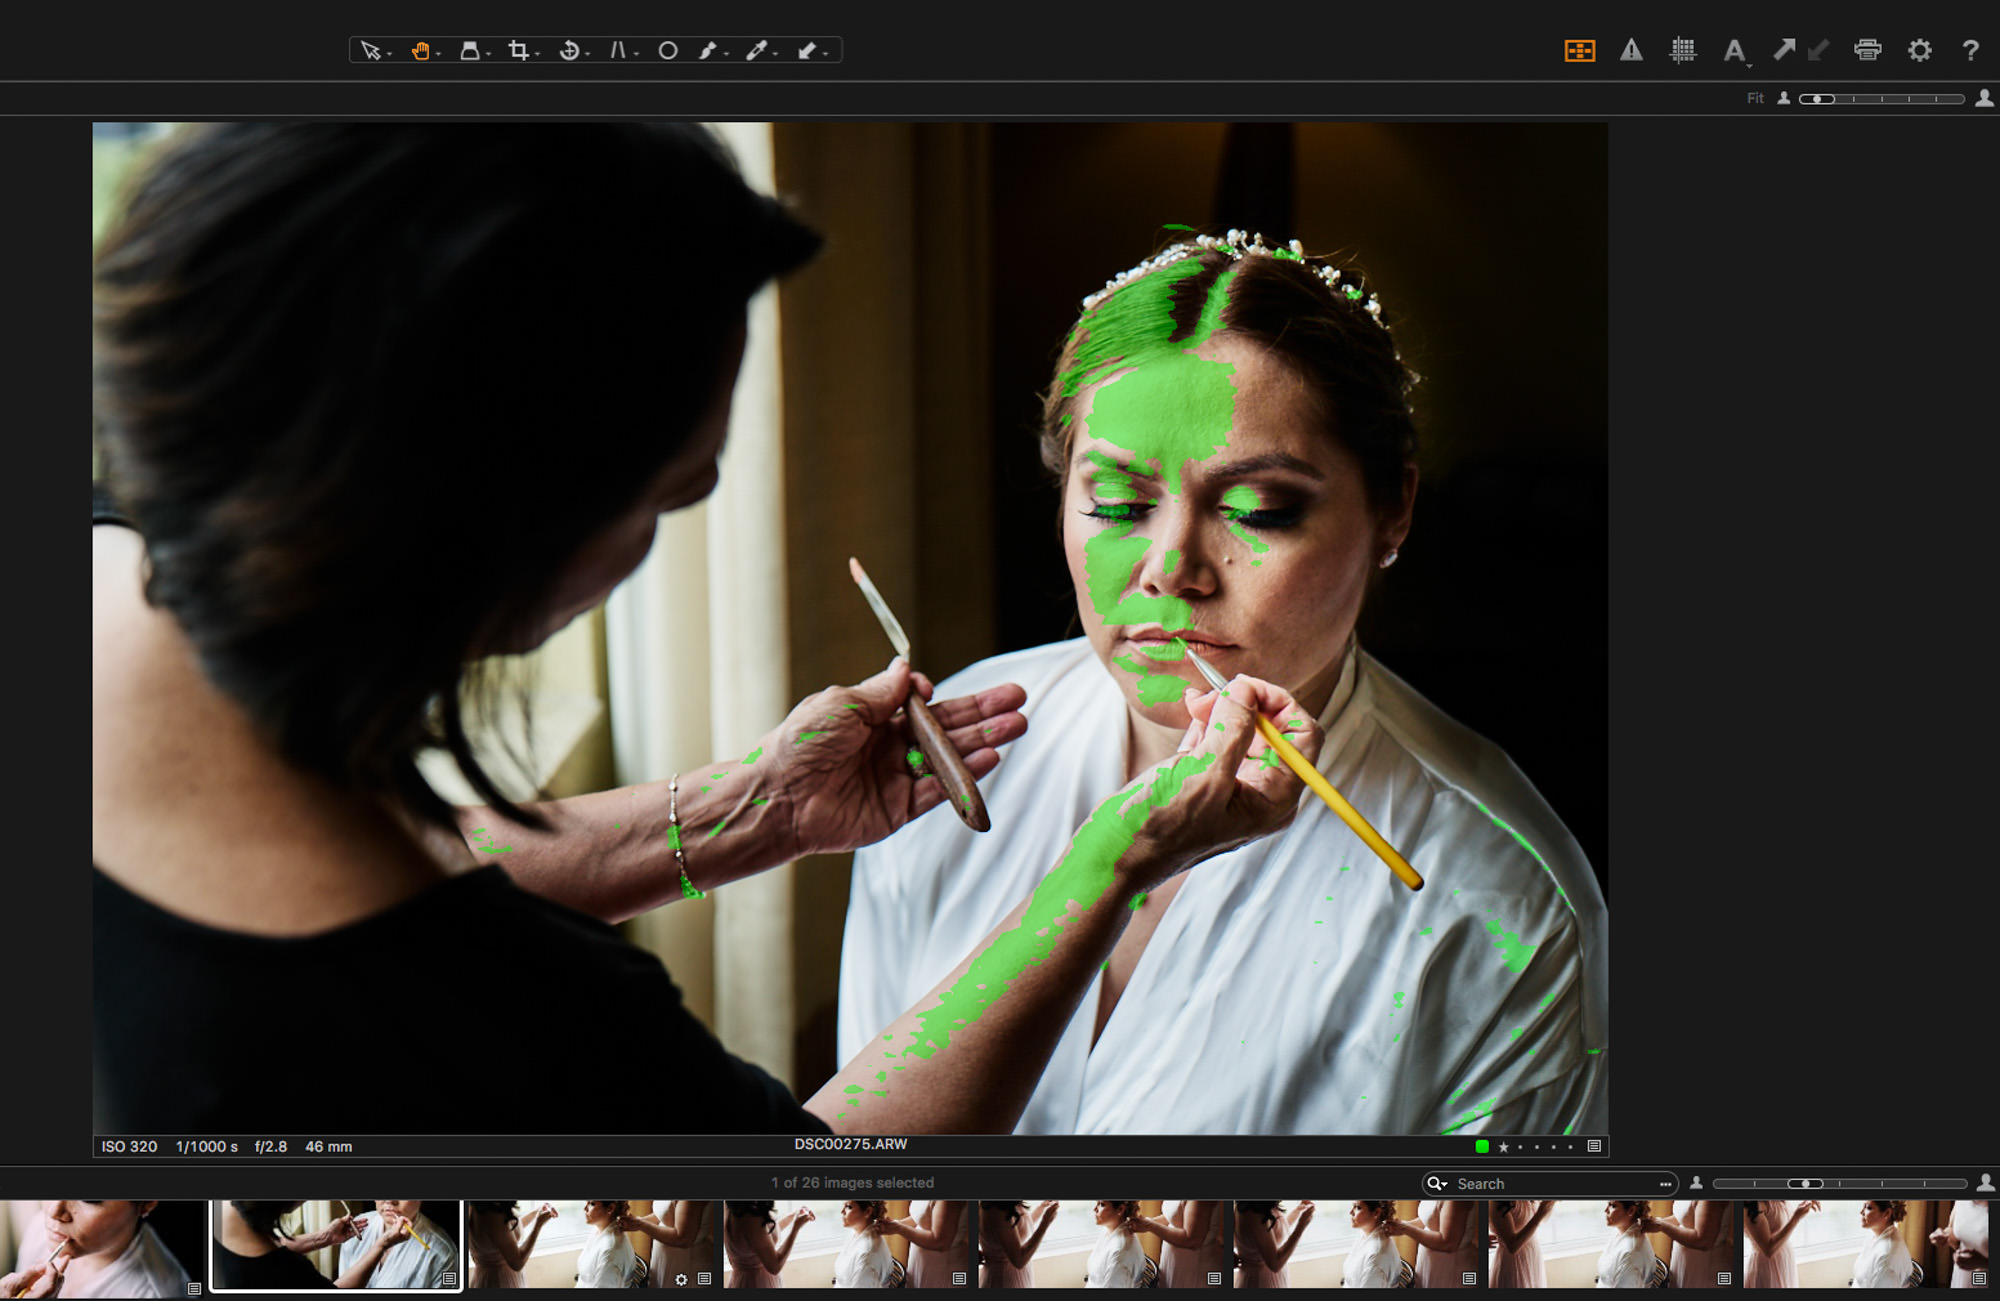
Capture One 9 employs a suite of two simple tools that help users easily determine if their photos are in focus. The one you’ll use the most is likely to be the Focus Mask. The Focus Mask works by analyzing each individual image in a session or catalog and determines the sharpest areas. In use it’s sort of like a “peaking” feature but for still images instead of video capture.
[Free Tutorial: Lighting Tips and Tricks You Should Know]
Once analyzed, the sharpest areas of the image are overlaid with a color mask. If nothing is in focus, no overlay will be present. Even cooler, this feature works in catalog view, allowing users to cull for correct focus in entire shoots very quickly.
Powerful Color Editor
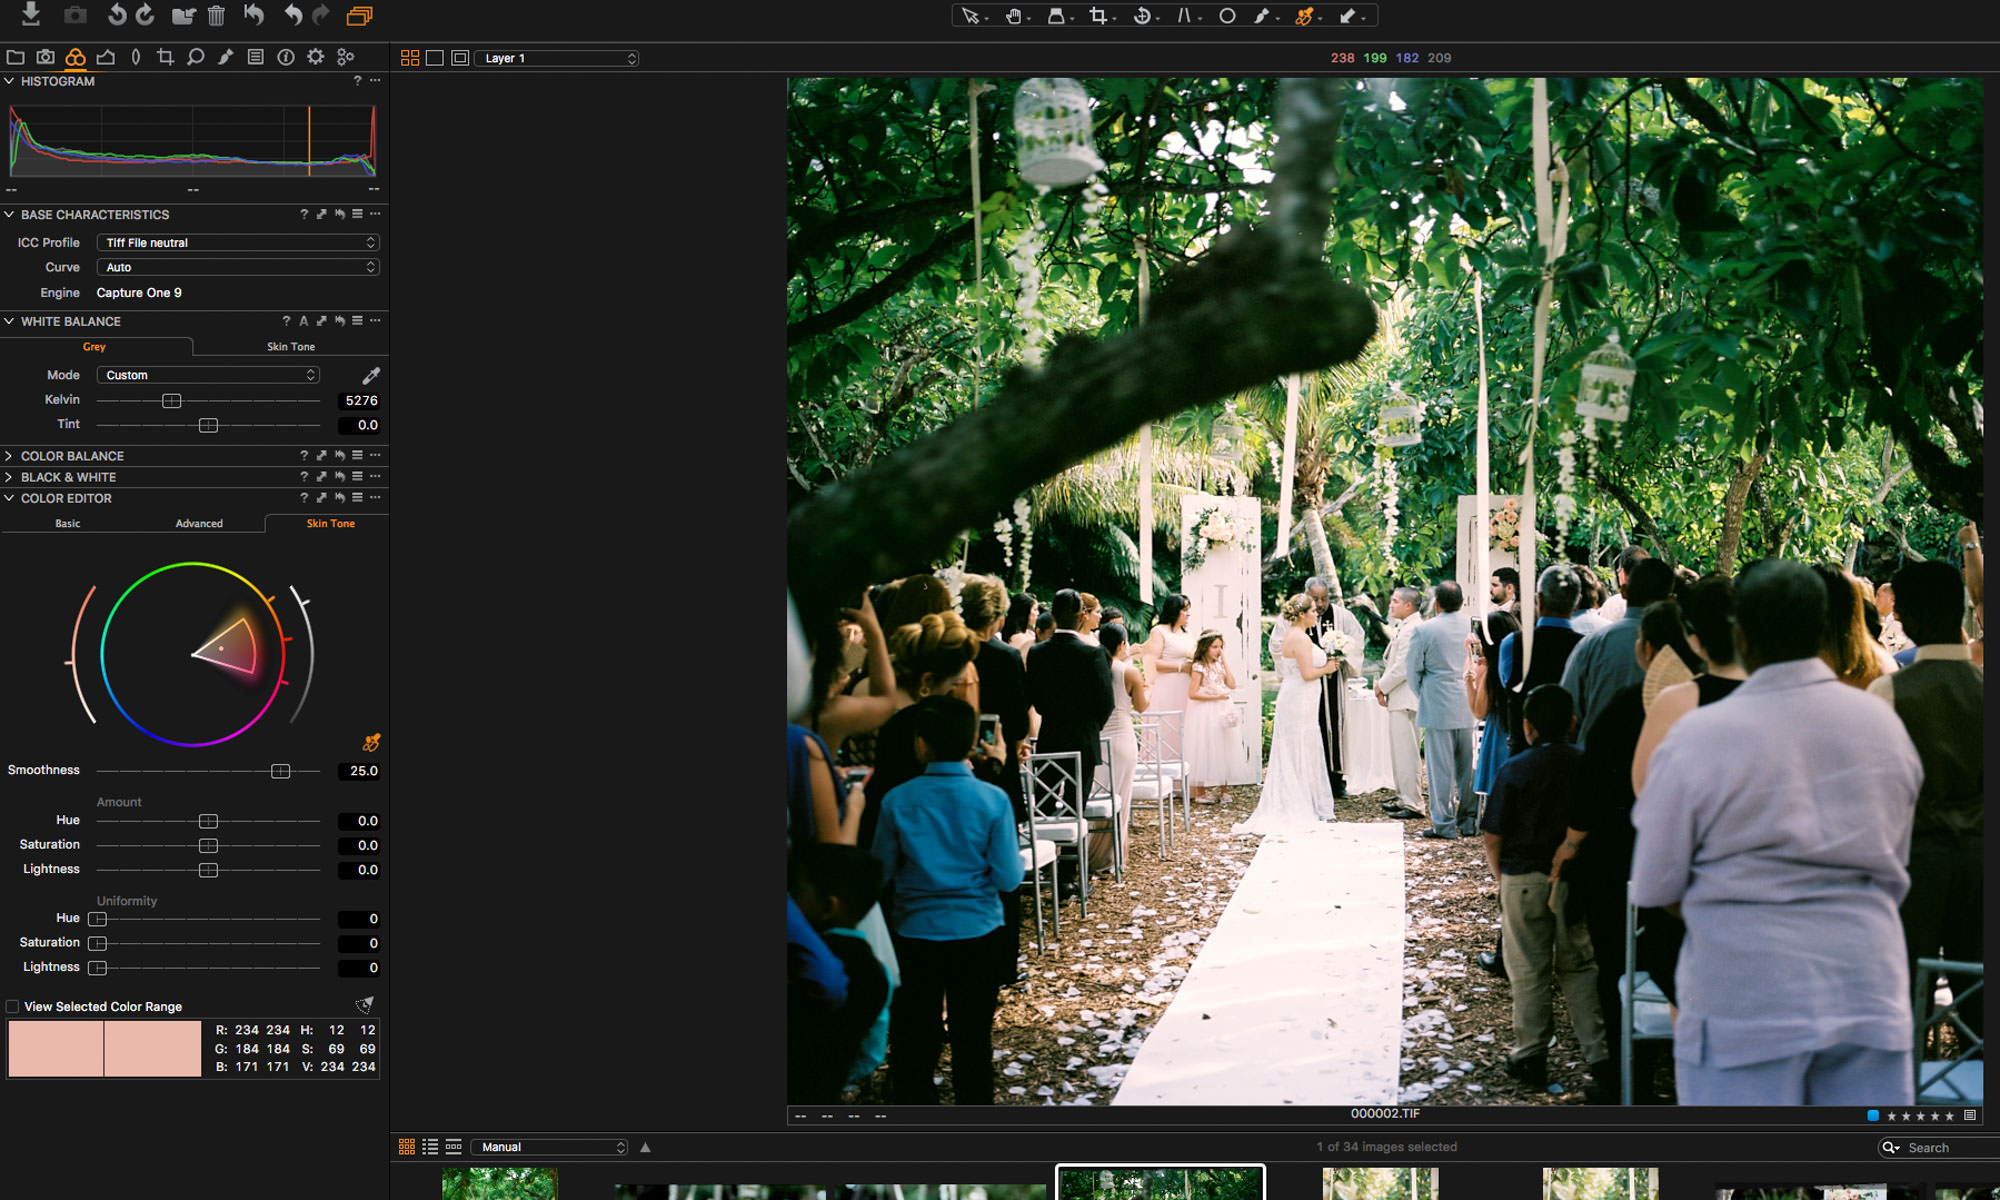
The color editor in Capture One 9 defines the exact color tones you select and then allows you to adjust these colors in an optimal way. The Color Editor in Capture One is the tool you wished Lightroom had.
Although the controls might seem similar, the degree of control you have in Capture One puts it in a class of its own. To put it simply, you can precisely modify any specific color in a raw image that you see. Even better, the Color Editor plays well with the Skin Editor for portraits, and Color Editor selections can be turned into local adjustment masks. Boom!
Offline Mode

When importing images to a Catalog, a preview is made and stored in the Catalog. This preview is what’s displayed when you edit in Capture One, and without directly being connected to the RAW images, Capture One 9 will still allow you to make any adjustments you like. You’ll only need to relocate your referenced images when processing for export.
Basically, it’s like a Lightroom Smart Preview but you don’t need to specifically enable it. Less fuss, and saves you a step.
Live View

The tethering experience with Lightroom is abysmal with almost any camera combo. It’s choppy, laggy, and can be generally unreliable. Capture One 9 is a different animal altogether, and it’s easy to see why on professional shoots it’s CO you’ll see tethered. Users can connect their compatible Canon, Nikon, Sony, Leaf or Phase One camera for instant tethered capture. Live View, shows directly in Capture One simplifying composition and aiding in accurate focusing.
For the first time in years may find yourself planning tethered shooting into your workflow because of how easy and useful Live View in Capture One 9 is.
Media Pro SE
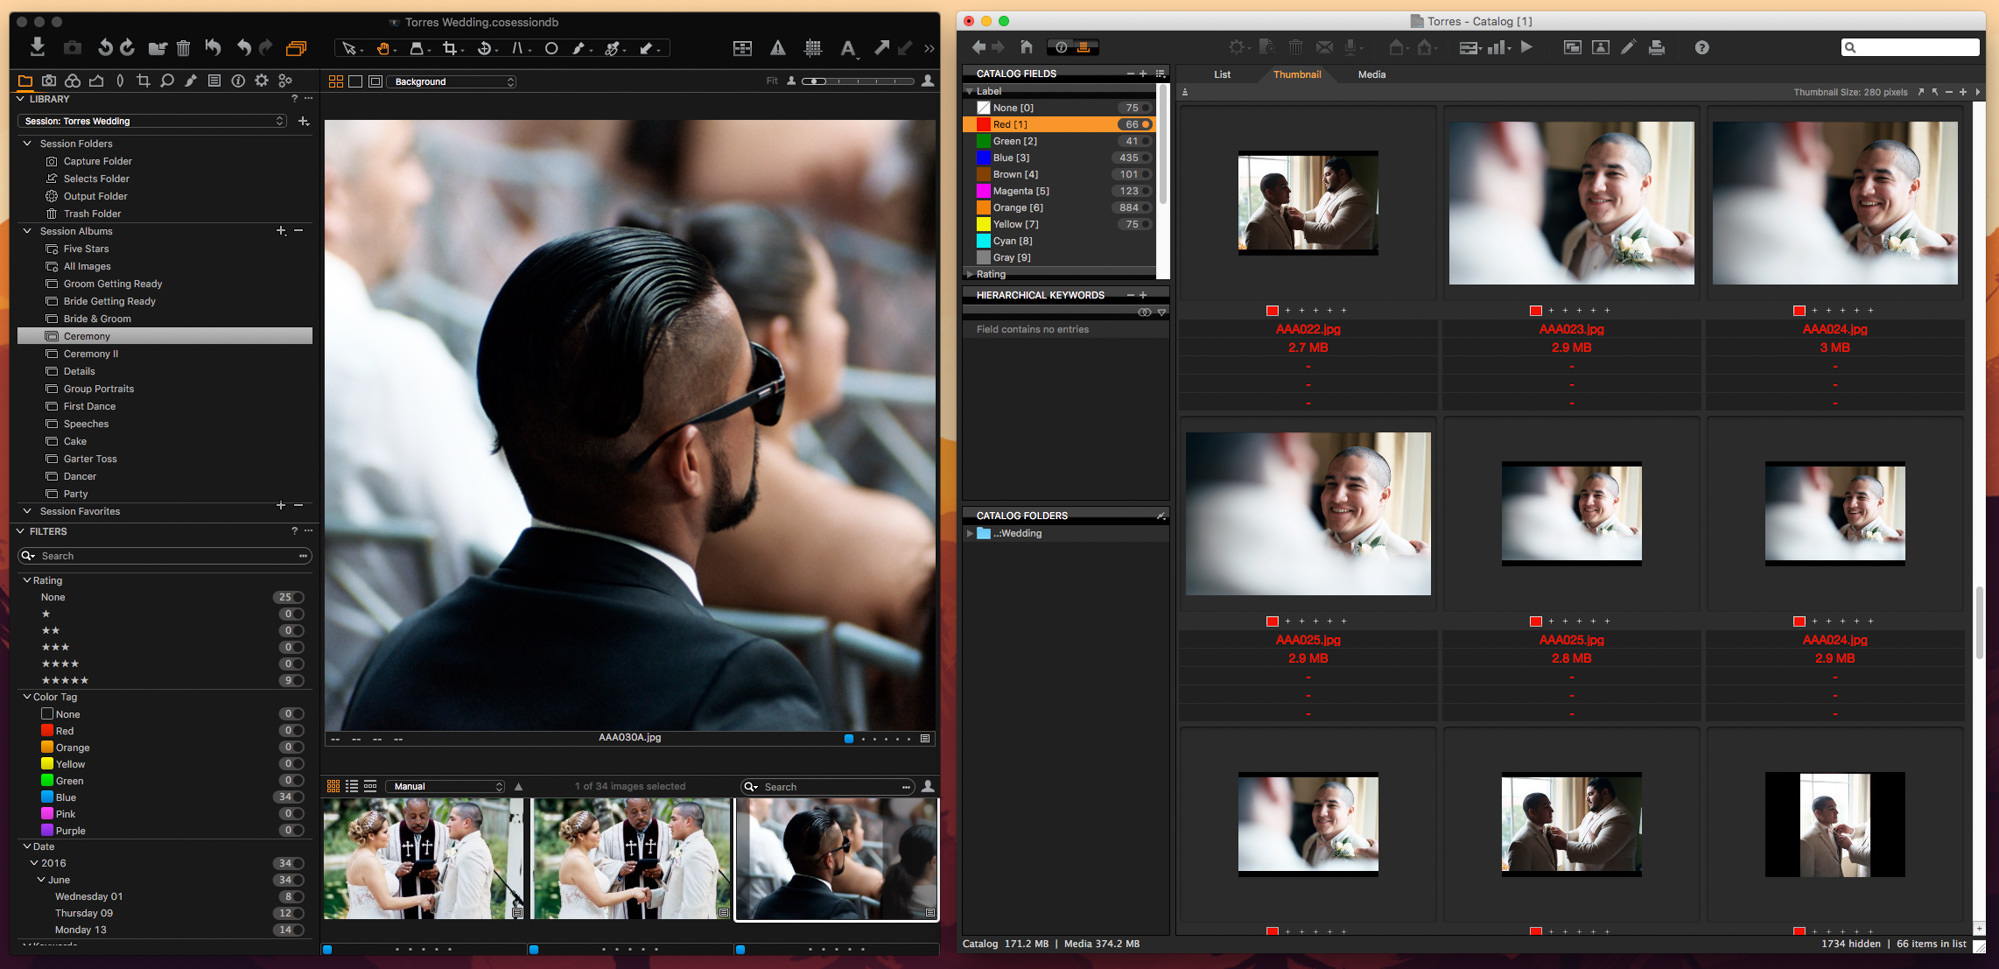
This recently revamped asset-management program can work seamlessly with Capture One 9. What portrait, event, and wedding photographers will love is that you can import thousands of images into Media Pro SE in minutes, with previews that are so responsive culling and organizing large libraries becomes easy and doesn’t require a maxed out system! After you cull you can drag and drop only the files you want to edit into a Capture One session.
Capture One 9 Is Worth A Try, — It’s Also Free!

With every new release, Capture One pushes itself to be an even more versatile and indispensable tool in the digital photographers kit. The last several updates to Capture One have added new features, improved existing features, improved speed, and improved output capabilities. By contrast, Lightroom’s most recent updates have been more like maintenance releases to fix stuff broken on previous versions.
For advanced Lightroom users, you’ll find the learning curve for Capture One 9 to be pretty small. Many of the tools look similar, and you can even setup the editing tools in a similar layout to Lightroom if that helps. I promise you if you give Capture One 9 a legitimate try for a couple weeks, most of you won’t want to go back.
[REWIND: CULLING IS CRITICAL & LIGHTROOM IS THE TOOL TO DO IT WITH (IF YOU KNOW HOW)]
That said, Lightroom has a vibrant community of educators and numerous tutorials and workshops available. LR also has robust 3rd party support and quality presets such as the SLR Lounge Preset system, with nothing quite to match it within Capture One. The value of that cannot go overstated.
Although Capture One predates Lightroom the user base is still very small by comparison made of mostly fashion, food, and studio photographers who were early adopters of medium format digital.
Capture One Pro 9 is available for $269 through the Phase One website. If you already have version 7 or 8 of the software, you can upgrade for $99. There’s also a subscription plan that gives you access to the program for $15 per month, opening the doors to many more users. You can get it here.


Get Connected!