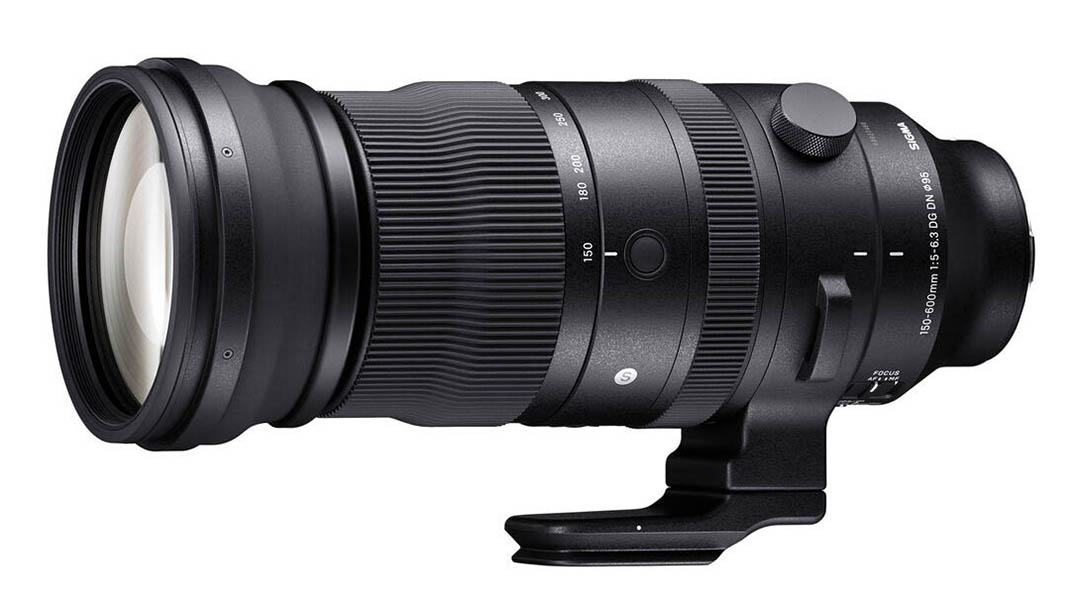
Sigma has announced a new full-frame mirrorless lens for the Sony E-mount: the Sigma 150-600mm f/5-6.3 DG DN OS Sport. This lens is yet another milestone for Sony’s E-mount; it’s the first third-party super-telephoto zoom to hit the coveted 600mm focal length.
This is, believe it or not, the fourth milestone lens for Sony’s E-mount in the past year or so. (2020 is going to forever be counted as a bit of a mess, isn’t it?) If you weren’t paying attention, here’s all the excitement you missed…
We will review this lens as soon as possible, so be sure to check back soon! The following is just our initial reaction to the lens’ announcement.
Sony E-mount Telephoto Zoom Lineup | Sigma & Tamron
Most recently, Tamron literally just announced a similar lens, the Tamron 150-500mm f/5-6.7 Di III VC VXD. This was the first third-party E-mount telephoto zoom to reach 500mm! (I am currently reviewing this lens, and it is looking awesome so far!)
Just a few months before that, we got the Tamron 70-300mm f/4.5-6.3 Di RXD III, which was/is a truly incredible, ultra-portable E-mount lens; check out our review here. This was the first third-party E-mount lens to offer the extremely popular, affordable, portable 70-300mm option.

Completing the Sony E-mount telephoto zoom third-party party, we had the Sigma 100-400mm f/5-6.3 DG DN OS C which, you guessed it, turned out to be an amazing, well-made lens that we were thrilled to review as well.

[Related: Tamron Is One Of The Biggest Reasons To Choose Sony Full-Frame Mirrorless Right Now!]
All in all, this is quite unprecedented for any full-frame mirrorless system: third-party options that offer basically every super-telephoto zoom range–300mm, 400mm, 500mm, and 600mm.
Of course, we have still not seen a flagship-grade 70-200mm f/2.8 from either Tamron or Sigma. I can only assume that they are saving the best for last! Tamron made their 70-180mm f/2.8 Di III VXD which is an excellent option, however, considering the very minimal ergonomics and the slight compromise on focal range, it feels like Tamron has left room for a high-end (SP?) mirrorless 70-200mm f/2.8.
Oddly enough, Tamron’s latest “tease” is an even more unique fast-aperture telephoto zoom, the Tamron 35-150mm f/2-2.8 Di III VXD. Suffice it to say, right now is an exciting time to be a Sony-shooting telephoto action sports/wildlife photographer!
Sigma 150-600mm f/5-6.3 DG DN OS Sport | Specifications

- FOCAL LENGTH & ANGLE OF VIEW: 150-600mm (16.4° to 4.1°) full-frame
- LENS MOUNT(S): Sony E, Leica L
- APERTURE & RANGE: f/5-6.3 to f/22-29, rounded 9-blade
- STABILIZATION: Yes, Sigma OS, 4 stops (does not combine w/ in-body stabilization)
- AUTOFOCUS: Yes, near-silent stepper motor & magnetic sensor
- MANUAL FOCUS: Yes, electronic, no focus/hyperfocal markings (distance on camera displays)
- OPTICAL CONSTRUCTION: 25 elements in 15 groups, 4 “FLD”, 2 “ELD” Low Dispersion elements, Super-Multi-Layer coating, water/oil-repellent coating on the front element
- MECHANICAL CONSTRUCTION: Metal, TSC, (Thermally Stable Composite) weather sealed
- MAGNIFICATION & MINIMUM FOCUS DISTANCE: 110.24 in, (2.80 m) 0.34x magnification
- FILTER THREADS & HOOD: 95mm filter threads, reversible bayonet hood
- Tripod Collar: Included; Arca-Swiss foot, 90° click-stops
- SIZE: 4.3 x 10.5 in (10.9 x 26.7 cm)
- WEIGHT: 74.1 oz (2.1 kg)
- PRICE: $1,499 (B&H)

The following is my quick assessment of the press release which was sent out a few days ago. I have NOT tested the lens myself yet, I’ve only seen some sample images and sharpness tests, but, based on the spec sheet and the price tag alone I think it is safe to make the following general statements:
The Sigma 150-600mm f/5-6.3 is meant to be their professional, flagship super-telephoto mirrorless zoom. Don’t be fooled by the seemingly slow variable aperture; for a focal length of 600mm, f/6.3 is actually quite a fast aperture! Even the Sony FE 200-600mm “G” (not GMaster, that is) has an aperture of f/5.6-6.3, and costs $1,998.
Build Quality & Image Quality
If the physical build quality of this lens is anything like its existing “Sport” class siblings, then it will be a solid workhorse of a lens that the most demanding pros will be able to rely on, even compared to the high standards of Sony GM, Canon L, or Nikon S-line pro lenses.
If the overall image quality is anything like its DSLR-made “Sport” telephoto lenses and possibly slightly better than its mirrorless-made “Contemporary” 100-400mm, (based on the name and price tag alone) …then we can expect this new mirrorless 150-600mm Sport lens to offer truly impressive image quality, too.
So, make no mistake: this is the biggest, heaviest, and most pricey third-party telephoto zoom lens of the bunch. If you are coming from a lens like its DSLR sibling, you’re going to be impressed by how much lighter and more compact it is, however, if you bought a full-frame mirrorless camera primarily because you were hoping to buy nothing but lightweight, compact lenses, then you’ll probably want to choose something a bit more modest like a 70-300mm or 100-400mm.
I will be getting my hands on this Sigma 150-600mm as soon as I can for a full review! Stay tuned.
Sigma 150-600mm f/5-6.3 DG DN OS Sport | Versus Tamron 150-500mm f/5-6.7 Di III VC VXD

Before I wrap up, let’s compare this new Sigma against its new closest competition, the Tamron 150-500mm. Both lenses start at 150mm and f/5, however, the Tamron ends at 500mm and f/6.7 while the Sigma ends at 600mm and “just” f/6.3. That means the Sigma offers not just a bit more reach, but also a 1/3-stop faster aperture.
That is probably why the Sigma is about ~0.8 lbs (~400g) heavier. I am going to assume that both lenses are very solidly built, and both lenses have one feature I love which Sony (and Canon and Nikon etc.) don’t: an Arca-Swiss dovetail tripod foot. Speaking of the tripod foot, though, the Sigma offers one thing that I really love and no other maker has: click-stops at 90-degree increments.
Telephoto Zoom “Creep” | Not Anymore!
Also, both lenses provide multiple options in terms of zoom ring locking. The Sigma has loose/stiff/locked options which allow you to either lock the lens at 150mm or zoom with two varying degrees of effort, and the Tamron has a lose/locked clutch mechanism that allows you to either zoom smoothly or lock the zoom at ANY focal length!

Both lenses provide an array of physical switches for AF/MF control and stabilization, but the Sigma 150-600mm is the only one that has (re-programmable) AF-L buttons.
In addition, both lenses have the now-common design aspect of putting the focusing ring closer to the camera than the zoom ring, which I personally dislike, but honestly, I’m not going to be doing much on-the-fly manual focusing with this lens.
Which lens is right for you? Surprisingly, the two zooms are only $100 apart in price, so if size and weight are truly not a problem, this Sigma 150-600mm seems pretty attractive. However, I absolutely cannot make a recommendation for either lens until I’ve reviewed them both, so again, stay tuned! It could very well come down to the autofocus reliability and/or the image quality, which are two things I absolutely refuse to judge or even speculate on a “winner” between two lenses without extensive testing.
Sigma 150-600mm f/5-6.3 DG DN OS Sport | Versus Sigma 150-600mm f/5-6.3 DG OS HSM Contemporary/Sport

What if you already own one of the DSLR lenses, and use it on an E-mount adapter? That presents a very interesting question. If you’re happy with the image quality, autofocus performance, and size/heft of your Sigma 150-600mm f/5-6.3 DG OS HSM Sport/Contemporary for Canon EF (or Nikon F) on your Sony mirrorless camera, that’s great! Both lenses are impressive.
This new made-for-mirrorless Sigma 150-600mm lens is, in fact, totally different from the two DSLR-made Sigma 150-600mm lenses. They all have a lot of exotic glass in them, but this newest version stands above the rest with a whopping 4 FLD and 2 ELD elements. Translation: This new lens is probably sharper.
Impressively, the new mirrorless Sigma 150-600mm Sport is actually quite a bit lighter than its Sport-class predecessor, and is even $500 cheaper! (The Canon EF-mount 150-600mm is usually ~$2K) The Contemporary version was originally just ~$1,100, though, and is currently on sale for ~$900. If you’re on that kind of a budget, then don’t hesitate to save the money and get the Contemporary version. Unless you’re doing a lot of high-speed action sports/wildlife photography, in which case there is absolutely going to be an advantage with the native E-mount lens and its cutting-edge AF system.
Sigma 150-600mm f/5-6.3 DG DN OS Sport Review | Coming Soon!
Again, for the last time, I will have to reserve judgment until I get my hands on the lens. Every indication is that this will be a fantastic lens, for those who can afford it. Also, you have to be willing to lug around something that weighs over 4.5 lbs. (2.1 kg!)
Sigma has been on a roll lately with some impressive lenses, especially for full-frame mirrorless Sony (and Sigma, Leica, & Panasonic!) cameras, so, if you do any sort of telephoto action sports or wildlife photography, then you should definitely keep an eye out for our official review of this lens.


Get Connected!