
Capturing the essence of autumn through the lens of children’s portrait photography offers a unique and heartwarming perspective on this enchanting season. In this tutorial, we’ll walk you through an entire autumn children’s portrait, featuring our adorable model Kaylin. You’ll learn what gear we used, how we conceptualized and lit the shot, and finally, how we finished it off with some editing finesse in Lightroom.
Fall Portraits Video Tutorial
Short Fall Portraits Tutorial
View this post on Instagram
Gear Used in the Fall Portraits Tutorial
- Canon EOS 5D Mark IV
- Canon 50mm f/1.2L USM Lens
- Profoto B10 Plus
- Peak Design Travel Tripod
- Air Remote TTL
- Umbrella Deep White XL
- Manfrotto Nano Stand
Before you pick up your camera or reach for your flashes, check out our C.A.M.P. framework and simplify your lighting process.
- Composition: What do we want our scene to look like? Where do we want the camera to be? What’s the angle? What do we want our subjects to be doing?
- Ambient Light Exposure: Choose the intention of the scene. Do we want a dramatic image (darkening the ambient light and using more flash) or do we want a softer image (brightening the ambient light and using a more natural power of flash)?
- Modify/Add Light: Are your subjects visible in the frame or do they need to be chiseled out? Do you need to add an additional light source?
- Pose & Photograph: Take your shot!
1. Compose the Shot
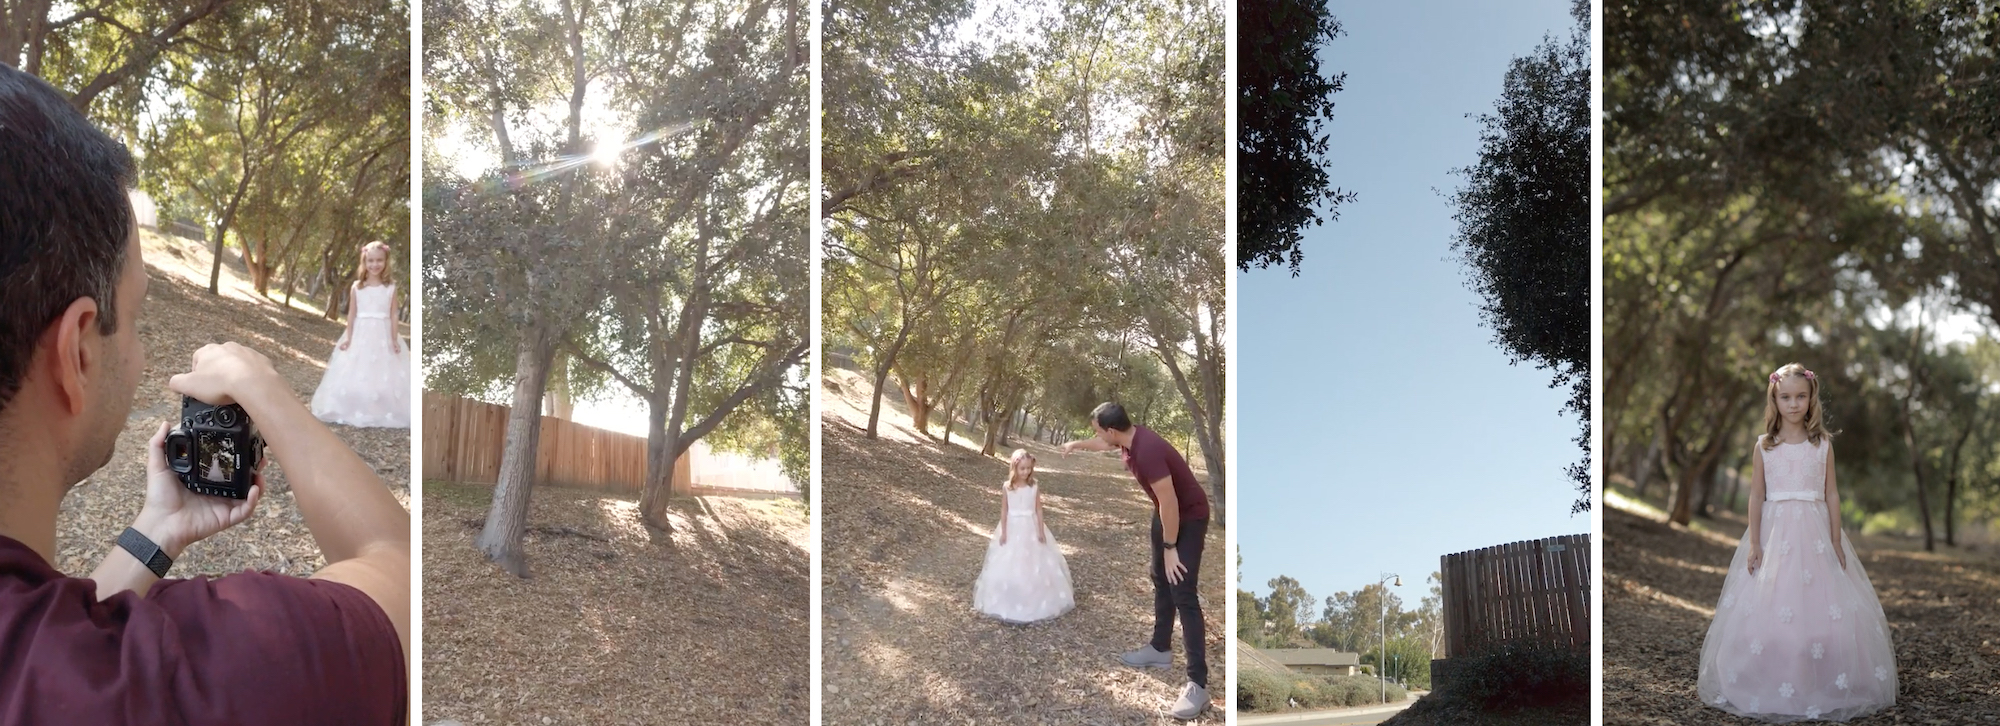
I decided early on that I wanted to set the aperture somewhere between f/1.4 and f/2 to leave the shot kind of very blurred in the background, and I knew I wanted to add quite a bit of light to her. The reason for this is so that I can use depth of field and lighting as compositional tools. What you’ll notice in this scene is that the sun is positioned up and to the left, causing light to fall across the scene.
Where you place your subject can make a big difference. For example, the hair light falling on my subject will change depending on where she’s standing. It’s important to think of these things because as we’re shooting, we essentially already have two to three light sources set up for us. We have the sun, which in this case offers a nice hair light and creates kind of a rim light. We also have the sky, which serves as the main light and illuminating her face. We also have other fill light that we’re getting from the scene. Basically, try to start in a spot that already offers good lighting options, and then simply add light to it (if necessary) to get to your final image.
You don’t need a tripod for this shot, but I’ve decided to use one to keep the composition steady throughout the entire session.
2. Dial In Your Ambient Exposure
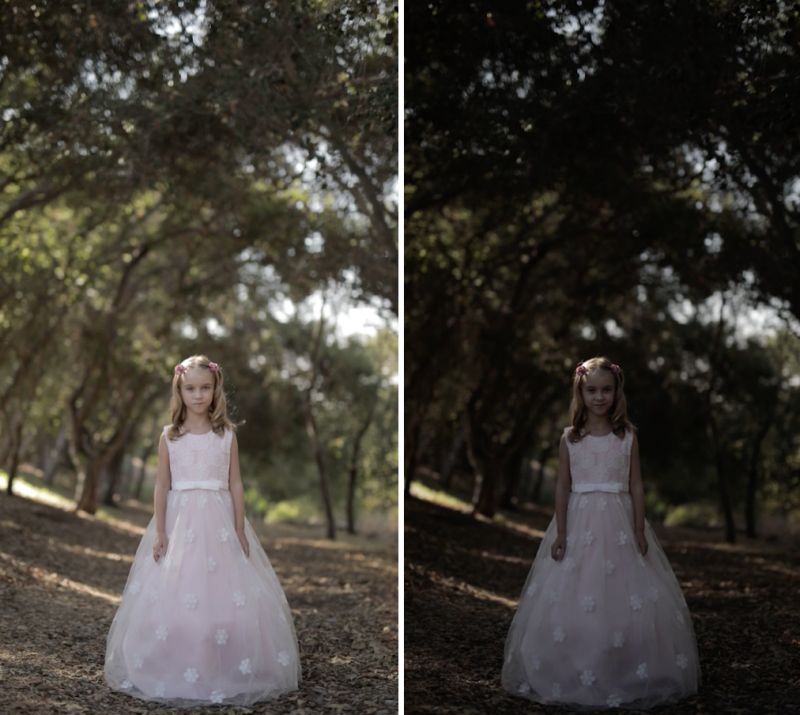
As a natural light image, this setup works well and you can shoot this as is (see the image above, to the left). What I wanted to do, however, was set the intention for my photograph by going to the “A” in the CAMP framework and exposing the ambient light. As I mentioned before, I wanted to create a kind of a dark, rich autumn tone to the image, so I adjusted my ambient light and brought my shutter speed up to 1/2000. Of course, this meant that I’d have to use high speed sync on my flash, but that was fine.
Using a fast shutter speed (e.g. 1/2000) does a couple different things. First, it allows me to get the background exactly where I want it, which gives agency to my intentions as an artist. It also allows me to notice where the light is landing, specifically on my subject’s face. In this scene, I noticed that the light was coming in from the top left side. I decided to place my light kind of on the top left as well to simply add to the existing light direction.
3. Modify (or Add) Light
At this point, we need to either modify or add light (or possibly both). In this scene, modification wouldn’t have worked, really, as I didn’t have any way to effectively reflect light. So, I added a Profoto B10 Plus and used a large modifier.
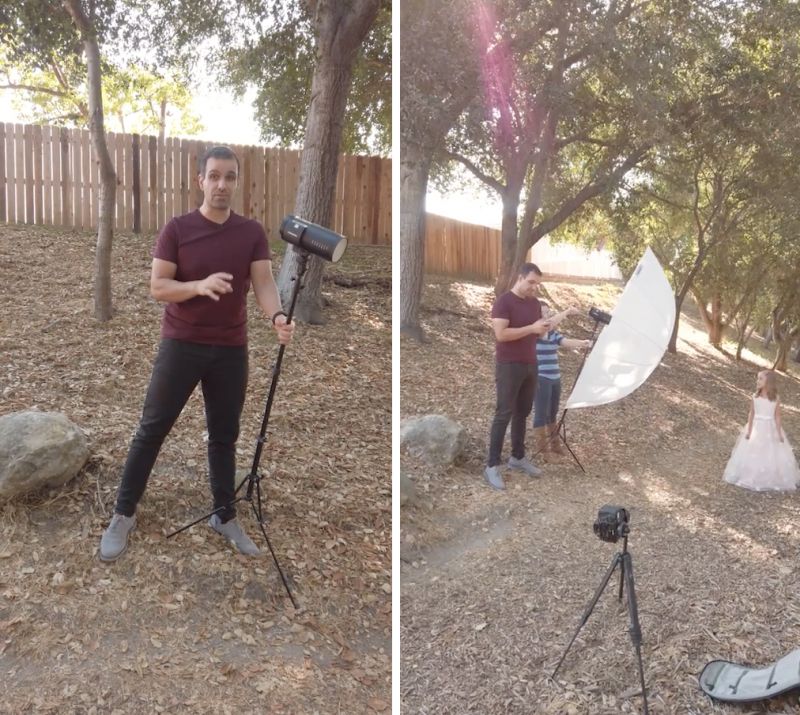
I used a deep umbrella in order to keep the light that I added to the scene very soft and natural looking. I wanted it to match the light coming in from the sky. When I took a test shot, I noticed that everything went bright. This happened because I had the shutter speed set to 1/2000, but I forgot to press sync on the remote and go to high speed. It was a quick and easy fix, but it’s something to look out for if you run into a similar situation.
All that’s left in this step is to choose our power. The benefit of using the CAMP framework is that it allows us to cover all of the important aspects of setting up a shot while working through one variable at a time. I recommend using the histogram and highlight alert to make sure that you’re good in terms of light and exposure. You should know immediately if any details are blown out or otherwise lost.

Please note: Although I used a Manfrotto Nano Stand with an umbrella for this shot, this is not the stand that I would say that you should work with if you’re shooting solo in a scene like this. Instead, you’re going to want to use something heavy duty, like a C-stand. You’ll also want to place the stand(s) in flat areas with sandbags to keep them secure and stable. Luckily, the subject’s mom is also a photographer who knew exactly what we were doing and she was able to help.
4. Pose and Capture the Portrait
All that’s left is to direct your subject into a pose, give cues to draw expressions, and capture the shot. I like to use live view to shoot these because the Canon 5D IV uses a pixel-based focus system. When I’m shooting with a wide-open aperture, live view on a 5D IV basically guarantees really sharp results each time. I finished off the image using our Mood Lightroom Preset Pack from Visual Flow Presets.
Before & Afters

5. Post Production
 Make sure you download the exercise files so you can edit along with me! Autumn photos typically work well with a warmer color palette in order to blend the colors of the foliage with the tones in the photo. To edit, we’re using the Visual Flow Presets Modern Pack. Since the presets are designed with lighting conditions in mind, I chose Soft Light for this photo to match the ambient light. I then applied that same preset to the other images that I wanted to composite into the frame. In order to create a more full effect, I added images that had a higher density of leaves in the frame to create more interest. This is another crucial reason why using a tripod for composite imagery is highly beneficial. Once I’ve selected all the images to composite, I open them in Photoshop with the applied presets and Auto-Align the layers. I create a Layer Mask for each image that I want to add leaves from and here is the final result:

Conclusion
Hopefully, you found our tips on how to create rich & moody autumn portraits helpful. We started with a nice, natural light look and ended with our dramatic, autumn-tone image. The noticeable difference between these two shots really comes down to the intention of the photographer. I shot both images at the same time of day, but one simply features natural light while the other demonstrates how added light can transform an entire scene.
For more Profoto lighting tutorials, be sure to check out our Slice of Pye Series on their IGTV!


Get Connected!