-
Term: Brenizer Method
Description:The Brenizer Method is a type of panoramic composite photography that captures images at a fast or wide-open aperture, instead of stopped-down, in order to create a resulting image with extremely shallow depth of field. (DOF, or bokeh) Wedding and portrait photographer Ryan Brenizer first popularized the method by capturing unique, dramatic environmental portraits using a fast lens and multi-row panoramic images. The resulting images can have "impossible" DOF, often equivalent to f/0.X apertures and/or relatively wide angles.
Brenizer Method
How to Create Brenizer Method Photos

Any photographer who is into what is considered “ultra-shallow” depth of field (DOF) or “creamy” bokeh, (background blur) should have a basic understanding of how the Brenizer Method works. Simply put, it is a panoramic image, often composed of multiple rows of images, all captured at a very fast aperture with shallow depth, which when combined create an “ultra-shallow depth” image that would literally not be possible with any existing lens.
Using a depth of field calculation tool, you can calculate the approximate aperture and DOF that would be achieved if the image had been captured as one image. For example, if you use an 85mm f/1.4 prime, and capture a panoramic image with an angle of view equal to a 24mm lens, the depth of field of the resulting image would be equal to if you had a 24mm f/0.39 lens!
The Brenizer Method DOF calculator tool created by Brett Maxwell is one of the best available.
Brenizer Method Tips: Hold Still, Overlap Generously
The two most important factors in executing the Brenizer Method correctly (and without too much frustration) are to take your time, and 1.) hold as still as possible, both the photographer and the subjects, and 2.) overlap each frame you take rather generously, even by 40-50%. If captured carefully, the resulting images should be able to be stitched easily in an auto-panoramic stitching software such as Adobe Lightroom CC, or Adobe Photoshop.

6 Of The Most Common Brenizer Method Mistakes
The Brenizer Method is characterized by creating an image with a wide-angle of view in tandem with an extremely shallow depth of field. If executed improperly, the image can be distorted, poorly exposed, and unevenly stitched. Here are a couple of mistakes to avoid:
1. Using a Wide Angle Lens
Using wide angle lenses will not yield the desired effect because they are more likely to distort the edges of the image which will be problematic in post.

Longer focal lengths such as 85mm or even anywhere in the 70-200mm range will give you immense compression and prominent bokeh.
2. Using Auto-focus
Since we are panning across an image with our subject in a very shallow plane of focus, we want to always remember to keep our lenses in manual focus. This is why shooting on a tripod will yield the best results, because there is no room for error when it comes to focus adjustment once you’ve taken care of the stability of your camera body.
3. Using Closed Down Apertures
A closed down aperture is not going to yield the background blur needed to create the effect. Using prime lenses such as a 50mm that can exaggerate the effect even more by shooting wide open at f/1.2, 1.4, 1.8, are ideal. Lenses with a narrower depth of field such as f/2.8 or f/4.0 don’t give enough separation from the background unless they’re on the longer focal length range.

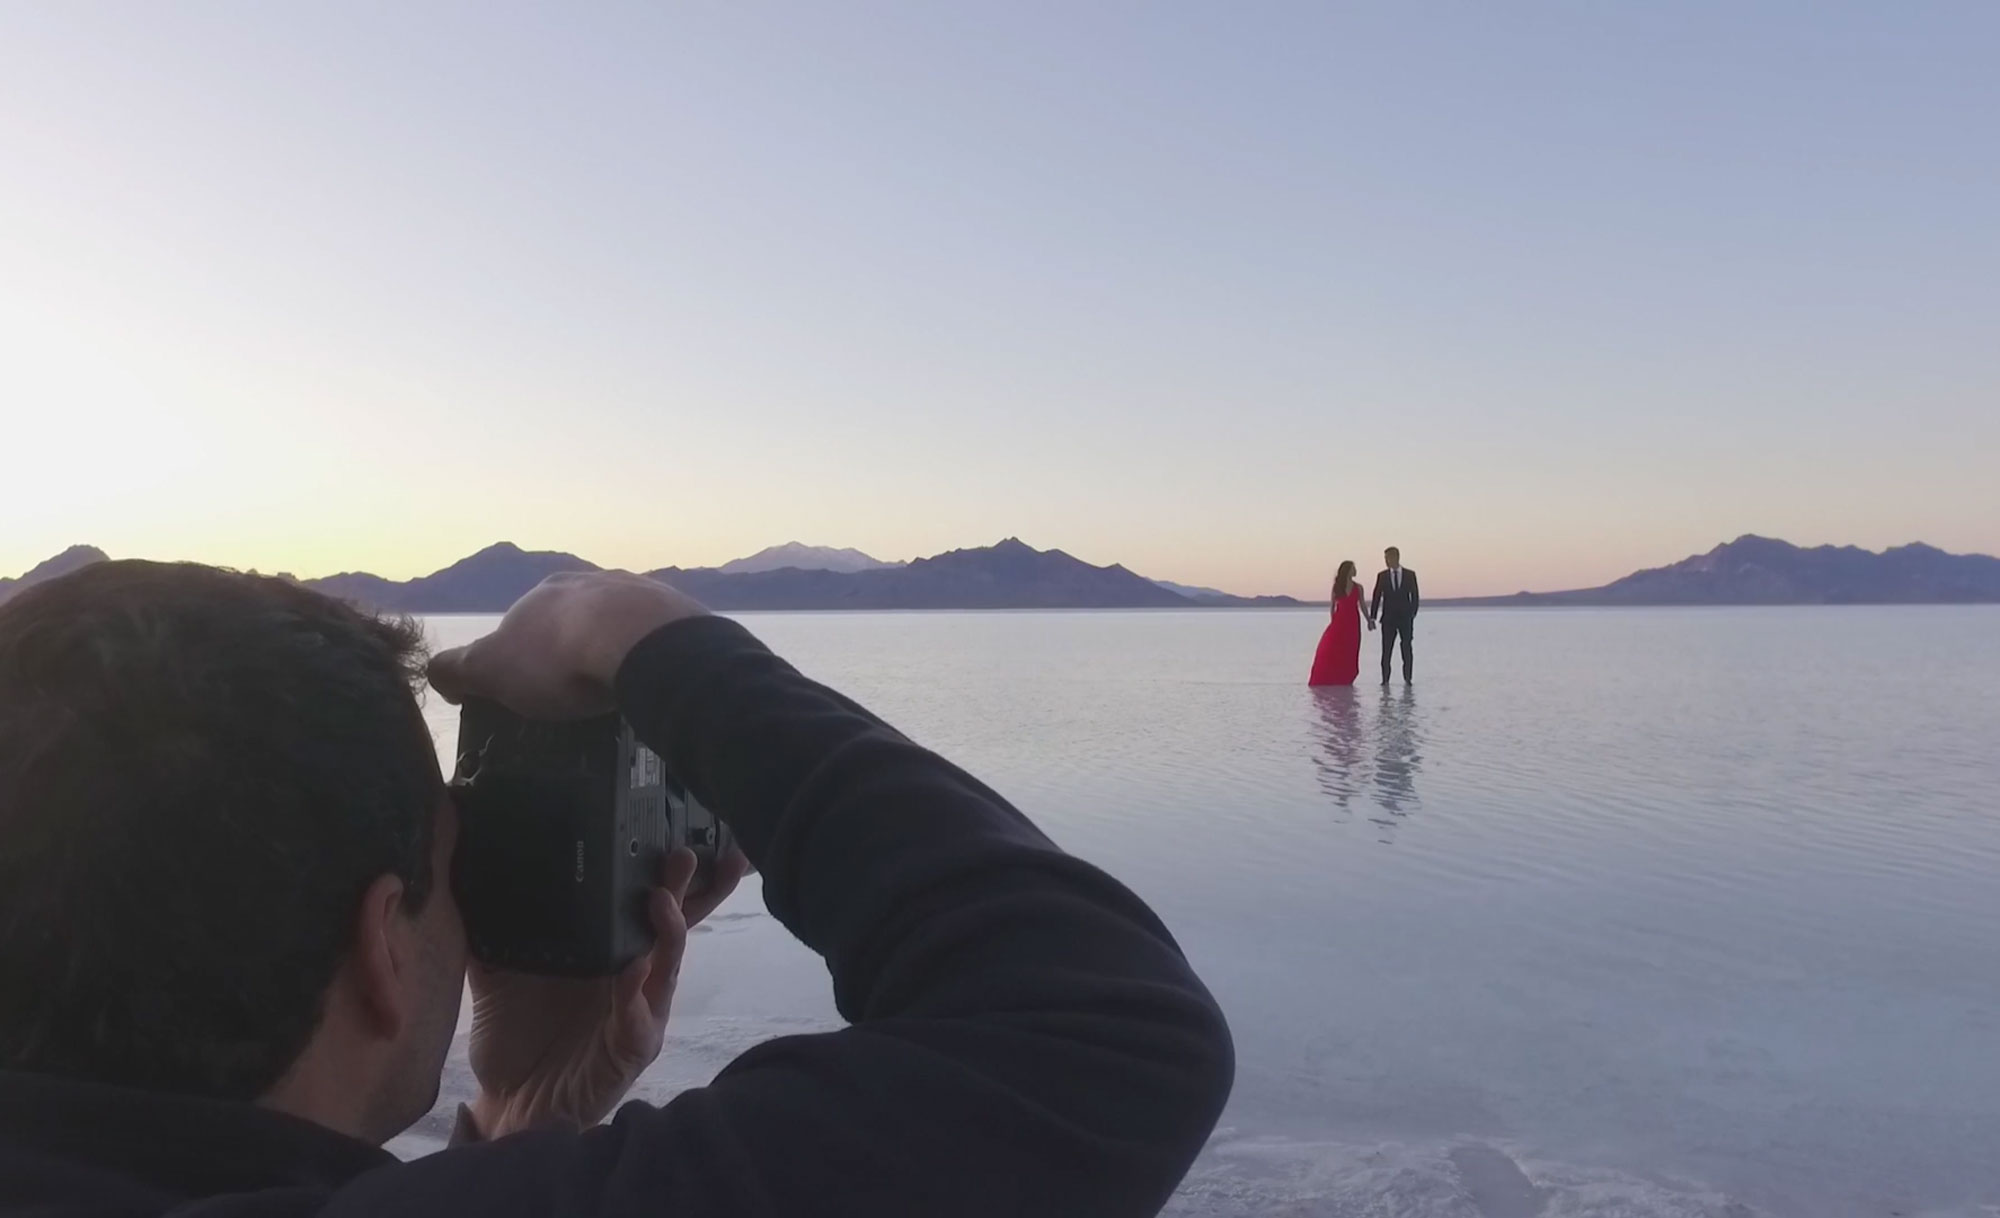
The above image was shot with an Sigma 85mm f/1.4 lens and is a nine frame panoramic stitch. See how we accomplished it here!
4. Not enough Overlap between images
Unfortunately, creating a panoramic stitch on a DSLR isn’t as easy as manually panning your mobile device across a scene and having it automatically stitched together. You can see that when you use a phone to photograph a panorama, any change in movement results in a bit of a lighting difference because it was unable to stitch properly. Not overlapping enough between images using a DSLR will not give Lightroom/Photoshop enough detail to work with. About 1/3 of your image should overlap as you move from one shot to the next in order to provide just enough image to sample when stitching.

As mentioned above, using a tripod is imperative for this specific reason, so that you can seamlessly pan and make sure you’ve got overlapping images. We recommend checking out the MeFoto Globetrotter.
*SLRL Premium members receive a discount on Mefoto gear – upgrade now!
5. Not Having a Systematic Approach to Capturing
Use a systematic approach to capturing the full set of images. For example, start from the center, then move 3 to the left, then 3 to the right. Then center up again, move the camera up, capture the center shot, then 3 to the left, and 3 to the right. Then do the same thing for the bottom portion of the image. Approach the shot with a system so that you can ensure you have enough images to cover the entire scene.
To a certain extent, some issues can be corrected in post-production after the images have been stitched, but getting it right in camera will prevent you hours of labor after the fact.
6. Areas that Lack Detail Won’t Stitch Automatically
If your sky lacks detail, it won’t stitch properly. Make sure that the image has details that Lightroom/CaptureOne/Photoshop can reference easily. This starts by shooting at your lowest native ISO to preserve all dynamic range within the image. For example, if it’s a plain white cloudy day shoot more of the ground in the composition and make sure that any image with a lot of sky also has some ground in the shot so that Lightroom/Photoshop can reference it’s placement in the frame.

When you are using flash in conjunction with the Brenizer method a whole slew of issues can occur that will likely alter the result of your stitch. To dive into the nitty gritty details of panoramic stitching using special lenses and lighting effects, stream our three courses in Premium here!
Related Articles to Brenizer Method Definition
Photography Styles Defined: Popular Techniques and Approaches
Finding a photography style is an important aspect of being a good photographer. Without a defined style or approach, a…
Try Panoramic Stitching for Incredible Wide-Angle Images
What happens when you are shooting a scene with natural beauty for miles, and your widest angle lens doesn’t come…
A Wedding Photographer’s Guide to Navigating the Covid-19 World
Times have changed and we need to change with them. We need to be nimble in our processes and flexible in the way we deal with the next months and years, so that we can survive the now and thrive when things get better.


Get Connected!