How to Create a Home Portrait Studio

Photography home studio cheap

Creating a home portrait studio doesn’t require an elaborate setup or a massive budget. Whether you’re converting a spare room, clearing space in your garage, or finding a nook in your living room, there are affordable ways to transform any area into a versatile photography studio. In this guide, we’ll explore tips for building a budget-friendly home studio, from selecting simple lighting setups to creative backgrounds, and we’ll cover how to make the most of smaller spaces. With some creativity and a few affordable tools, you can capture stunning portraits right from your home. In this article, we’ll explore simple lighting setups:

Video 1 – How to Create a Home Portrait Studio for Under $20

Step 1. Find a Door

find a door photography home studio cheap

People often come up with excuses about things they don’t have that they need to get the shot, but it should be pretty easy to “knock” out this first step. Simply put: find a door. Any door in your home portrait studio should work, especially if it leads outside. We’re going to open the door and use the incoming light to create a nice, flat light pattern on our subjects.

Step 2. Get a Background

get a background photography home studio cheap

Inside of every 5-in-1 reflector,  you’ll find a scrim. Grab that scrim and take it out. If you don’t already have a $20 reflector, now’s the time to buy one. It’s a useful tool and you should have one. If you’d rather not spend any money, then you can always use a bed sheet (white, black, etc.).

Either way, you’ll need to hang your scrim (or sheet or whatever) near the doorway. For this exercise, I used a chair to hold up the scrim. You can use an A-Clamp (or something similar) from Home Depot to adjust the height and hold it in place. Viola! You have a background.

Step 3. Face Your Subject Toward the Open Door

face the light clamp the backdrop cheap home studio
The subject is positioned to face the light (see the clamp used to hold the scrim to the back of the chair)

Facing your subject toward the open door will allow a nice, flat light to fall on your subject.

Step 4. Dial In Your Exposure Settings

Once your subject is in place, dial in your exposure settings. For this shot, I’m using the Canon EOS-R with a 50mm f/1.2 RF lens. However, any 50mm prime lens on pretty much any camera should yield similar results. If you don’t have a dedicated camera, we’ll go over how to do this with your phone as well.

Assuming you do have a camera and a prime lens, I would recommend shooting this with a wide-open aperture, ideally somewhere between f/1.2 to f/2.8.

Step 5. Shoot on Your Phone if Necessary

Most phones should work, and if your phone camera features portrait mode, even better – turn it on. All that’s left, really, is to zoom in and snap away.

Screen Shot 2020 10 28 at 5.34.48 AM

If you look at the images above, it’s probably hard to tell which one was shot with a phone and which was shot using a dedicated camera. Most people will not recognize the difference between the images. In other words, use whatever camera you have to get the shot.

Step 5. Edit the Photo

Before After home studio cheap 01

Video 2 – Create a Home Photography Studio With Window Lighting

In this video, we’re here to show you how to create a $20 photography studio that you can use anywhere, and the best part is, you won’t need to go out an purchase new camera gear. In fact, you can even use your smartphone camera to produce quality portraits with an affordable, portable setup.

Step 1: Turn Off the Ambient Light in the Room

Create photography studio take anywhere 20 dollars too much ambient

We began by placing our subject in front of the window with the curtains open and the room lights were on (see the diagram and image above). The lighting from inside and outside the room combined to create mixed lighting, which we want to avoid. To correct this, simply turn off the lights in the room.

Step 2: Close Down the Curtains

After we turn of the room lights, we need to minimize the light coming in through the window(s). To be clear, we still want to place our subject in front of the window and use window light, but we don’t want too much light pouring in. By adjusting the curtains, we can create a strip box of sorts, leaving only as much light as we need to get the shot.

Step 3: Use Sheer Curtains (If Possible)

If you have sheer curtains, now’s the time to use them to further soften the light coming through the window. If you don’t have them, you can always use a white bed sheet to create a similar effect.

Create photography studio you can use anywhere 20 dollars lower exposure richer tones
Before and after reducing ambient exposure.

By closing down the curtains, using sheer curtains when possible, and lowering your ambient exposure, you’ll allow less (and softer) light to fill the room. As a result, the walls in the background will get darker, regardless of what color they are. The darker backdrop will then render a rich tone that we wouldn’t get with a brighter exposure or highlights (see the image above).

Step 4: Choose Your Background

create studio you can use anywhere choose your backdrop

I found an affordable, hand-painted backdrop online from @backdropsbyethanalex and placed it directly behind my subject. Really, you can use anything as your backdrop: a black cloth, a piece of fabric, or even a studio backdrop.

Step 5: Add a Fill Light

create studio you can use anywhere add a bounce light

I noticed that half of my subject’s face was getting lost in the shadows, so I brought in a reflector (a white poster board) to bounce light back onto my subject and fill in the shadows a bit. You might not have a C-stand at home to hold up your backdrops and reflectors, so grab a chair or employ a family member or friend to hold up the backdrop or reflector while you capture your shot.

Where you place the reflector will control the type of light you have. If you want to use the reflector to create more of an edge light, place it slightly behind your subject and angle it towards him/her. If you want to fill in more of the shadows on the face, position the reflector towards the front of the subject and angle it slightly back towards him/her.

create studio you can use anywhere before edit

If you compare the starting image to our properly lit portrait, you can already see much improvement. However, we can take it even further with our edit.

Step 6: Edit The Photo

create studio you can use anywhere radial burn technique
Adjustments for the “Selective” Radial Filter
create photography studio you can use anywhere Journey to final image
Walk-up shot (left), final image un-edited (center), final image edited (right)

Video 3 – Turn Your Garage Into a Professional Home Portrait Studio

Learn how to capture great portraits without the hassle of lighting equipment. In this video, I’ll be walking through how to turn your garage into a professional home portrait studio!

In a previous video, I demonstrated how to capture dramatic portraits in a garage by controlling the existing light. This time around, we’ll be capturing traditional style portraits by opening up the garage and creating a large soft light source for our home portrait studio. On top of that, you can create this look with any camera. I’ll be using a Canon EOS R5 with an RF 70-200mm f/2.8L as well as my iPhone.

Before we dive into the steps, head over to Instagram and give Kiara, our model today, a follow!

Step #1: Find the Right Time of Day

Our home portrait studio needs a large and soft light source. To do this, we’ll have to avoid harsh sunlight. Pay attention to where the sun is at what time of day. Schedule the shoot for when the sun isn’t directly shining into the garage or when the sky is overcast.

Step #2: Place Your Background

Place any background of your choosing about 10-15 feet deep into the garage. For this tutorial, I’m using handmade backdrops by Ethan Alex.

In just a little bit, I’ll show you how to change background exposure using subject placement.

Step #3: Choose Your Subject’s Outfit

Since we’re working with an earth-tone background for our home portrait studio, I had Kiara dress in a dark outfit with similar hues.

Step #4: Place Your Subject

This is where your subject’s distance from the light source will make a big difference. When Kiara is further from the light source, the light will fall more evenly on her and the background. However, when we bring Kiara closer to the garage opening, she’ll be more brightly lit. Then, once adjusting the exposure, the background darkens significantly.

The further the subject is from the light, the more even the light.
Placing the subject closer to the light allows us to darken the background.

By simply moving our subject closer and further from the light source, we can adjust how bright or dark the background is.

Step #5: Modify the Light

home portrait studio v flats

A bonus tip for adding drama to the scene in your home portrait studio is to add negative fill on both sides of your subject. I’m using V-Flats from V-Flat World to block out any light on either side of Kiara.

home portrait studio final looks
Edited with VF Presets > Modern

Conclusion

I hope you enjoyed this article/video. Great natural light is everywhere and with just a few basic tools, you can quickly be on your way to taking great photos your home portrait studio! For full courses on photography topics such as Lighting with Flash and Lightroom editing, check out SLR Lounge’s Premium Library. For powerful and intuitive presets for any lighting condition, visit VF Presets.

Wedding Photography Pricing | Misconceptions and Facts

Wedding photography pricing and package design can be confusing and overwhelming due to the competitive nature of the industry, the constant evolution of technology and trends, and the need to balance the needs and preferences of clients with the costs of doing business.  In this guide, we’ll cover the factors that affect wedding photography pricing, …

Read more

Jewish Wedding Photography Tips and Guide

chuppah jewish wedding

Jewish wedding days are built on a number of unique traditions, and even these traditions vary within different branches of Judaism. Furthermore, some Jewish weddings only incorporate one or two traditions out of respect to the families, while others observe several. With such an array of nuances and elements, it is important that photographers know …

Read more

Natural Light Portrait Tips | Use Hard Light to Shape the Body

Feature for natural light portrait tips hard light to shape the body

Did you know that we can use the sun as a harsh, directional light, the same way we would use a flash, to create a dramatic image? While many photographers tend to shy away from using hard light in natural light portraits, you can use it to dramatic effect to shape your subject’s body. Here’s the best part: It doesn’t matter what gear you’re using to capture the shot, whether it be a professional rig or an iPhone. The key to pulling this off has more to do with how you position and pose your subjects.

Follow these natural light portrait tips to use hard light to shape the body with an example from our new Engagement Photography 101 course, which we designed to guide you from communication to capture to create stunning engagement photography using the gear you already have.

Video: Natural Light Portrait Tips | Use Hard Light to Shape the Body

Natural Light Portrait Tip #1: Compose the Image

composition for natural light portrait tips hard light to shape the body

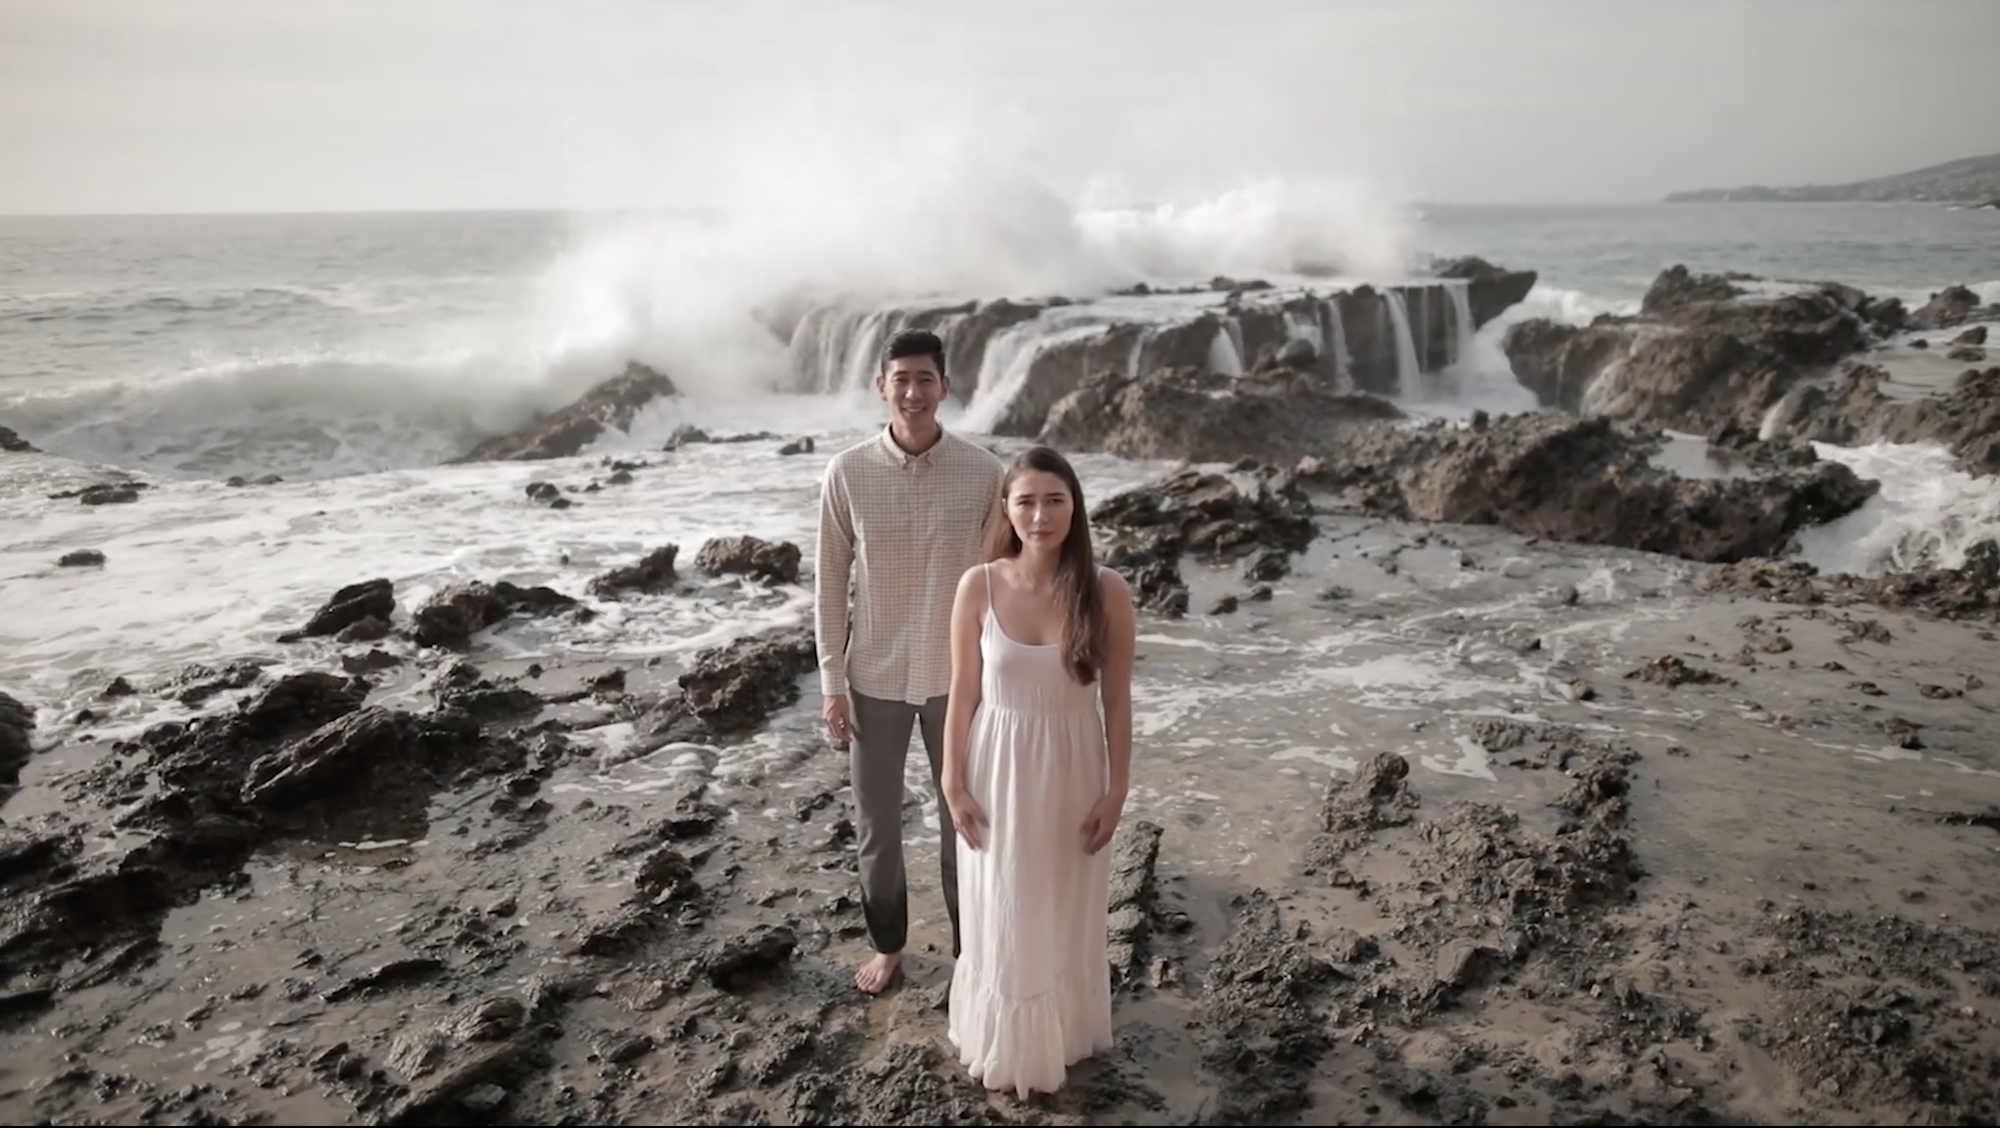
Because we’re using the sun as a directional light in our natural light portrait, your composition will depend in part on the sun’s location in the sky and how it affects the light falling on your subjects. In this scene, the sun was still a couple hours from setting, so its position allowed me to use the ocean as a backdrop for the light direction I wanted.

I chose a wide angle 24mm lens to include more of the ocean and rocks in the frame, but you can really use whichever focal length that best suits your needs. To minimize the effects of lens distortion associated with capturing portraits on a wide angle lens, it helps to place the subjects toward the center of the frame. The distortion becomes more obvious the closer the distance between the camera and the subjects.

[Related Reading: 5 Things to Look for When Shooting Natural Light Portraits in Urban Locations]

Natural Light Portrait Tip #2: Dial in Ambient Exposure

As I mentioned before, you can use whatever gear you have to capture natural light portraits, but you’ll still need to use your tools you have available to dial in ambient exposure. For this shot, we opted for a wide aperture (f/1.4) and shallow depth of field to create a bit of separation between our subjects and the background, and this required a faster shutter speed (1/8000) and low ISO (100). The goal is to create a dramatic natural light portrait using hard light, so the ambient exposure leans toward the left side of the histogram while still trying to maximize dynamic range.

Natural Light Portrait Tip #3: Position Your Subjects

position subjects for natural light portrait tips hard light to shape the body
Subjects are positioned so that the natural light falling creates a Rembrandt pattern on the subject in front

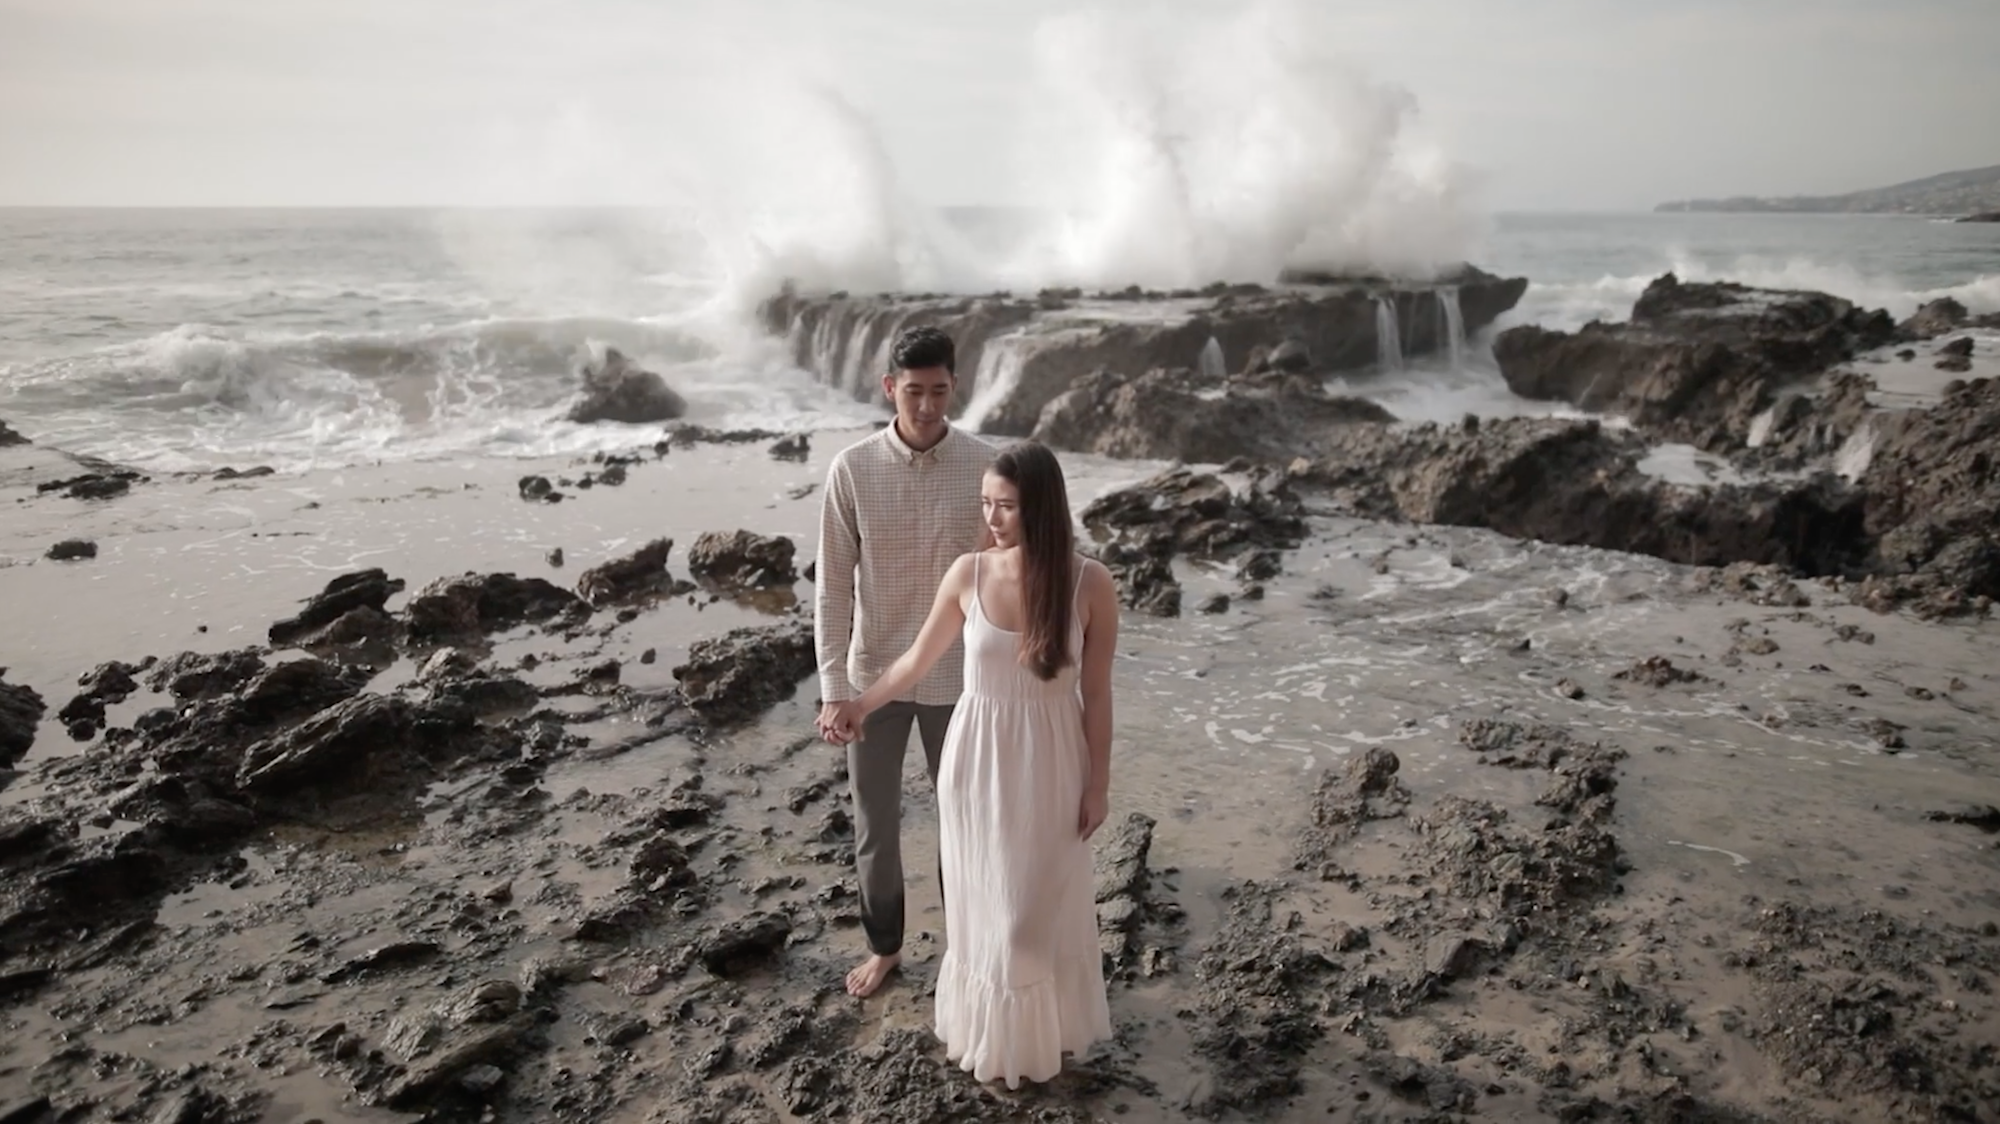
Positioning your subjects ties into both your composition (step 1) as well as how you’re going to pose your subjects (step 4), and it holds the key for making this shot work. You want to position your subjects in a way that allows you to make the available natural light work for you while also capturing the scene, or at least as much of the backdrop as you want to reveal. In this particular scene, I positioned the female subject in front of the male subject to prevent her from falling into the male’s shadow, which would’ve happened if he stood at her side, between her position and the sun.

Natural Light Portrait Tip #4: Direct Your Subjects into a Pose

composition for natural light portrait tips hard light to shape the bodyPose for natural light portrait tips hard light to shape the body

How you pose your subjects will determine your level of success for using hard light to shape the body in your portraits. All of your knowledge of foundational posing will come into play here, as well as light patterns. After moving the subjects into position (in a combination open and stacked pose), I asked the female subject to turn her face slightly toward the sun, which created nice Rembrandt lighting on her face. As hand position is also important, I asked her to hold her dress with her left hand and reach back with the other hand to hold the male subject’s hand. I then asked the male subject to step slightly to his right to reduce the overlap between the subjects. Finally, I directed his gaze to create an “x” pattern between the eye direction of the two subjects, and we were ready to capture the image.

[Related Reading: 5 Primary Light Patters and Their Purposes]

Natural Light Portrait Tip #5: Capture the Shot

Final for natural light portrait tips hard light to shape the body
Final Image: 1/8000, f/1.4, ISO 100

To make the image more dynamic, I just needed to wait for the right moment with the crashing waves in the background so that I could capture the shot. You can continue to refine the pose and direct for multiple expressions once you’ve gotten the shot you’re after.

Conclusion

I hope you found these natural light portrait tips on using hard light to shape the body helpful. This technique proves that you don’t have to use flash to capture dramatically lit images. If you’re interested in learning more about how to photograph couples, don’t miss our Engagement Photography 101 workshop, which is available for purchase now.

How to Start a Photography Business

Sometimes, statistics can be scary. If you were to search for success rates for new photography businesses, you would find that the vast majority of them fail within the first two years. I’m not sharing this information to dissuade you from starting your own photography business, but rather to emphasize the importance of putting together …

Read more

Photography Challenge: Portraits in a Car

car photoshoot ideas

Scrolling through Instagram you’ll come across some creative and unique shoot concepts and locations, but if there is anything 2020 taught us… we’ve got to work with what we’ve got. Instead of heading out to a fancy location to film our YouTube video this week, we opted for something more convenient. This week, we’re going to do a complete portrait session in a car and give you some fun and fancy car photoshoot ideas to try out.

Car Photoshoot Ideas: Video

I’ve been wanting to do a portrait shoot with just a car because of how available of a prop it is to most people (you can even rent vintage or brand new cars for shoots if you choose). We’re not going to move the car,  we’re not going to introduce flashes…we’re just using natural light and some basic lenses (and our lovely model Alyssa) to give you some car photography ideas.

To start, we’re shooting just before sunset and have placed the car so it is completely backlit. I am shooting on the EOS R with a Rokinon 85mm and Rokinon 35mm f/1.4 shooting anywhere between 1.4-2.0. This allows me to maintain a wide aperture and shoot without increasing my ISO and avoiding grain. For most of these shots I am shooting at a shallow depth of field so that I don’t make it too commercialized (which is great for automotive photography) and showcase the branding, but you can definitely make the artistic choice to do the opposite and bump up your aperture accordingly. Let’s dive into some of my favorite car photoshoot ideas!

Car Photoshoot Idea #1: Open the Door

Alyssa opened the door to start modeling inside the car and that’s when the first idea came into play. When you think of using such a big prop like a car you want to split the parts into separate props, that way it seems like you’re making the most out of one prop. Similar to how if you shot in a house, you would move around to make it seem like you’re in multiple locations. There are a couple of ways to use a door for car photoshoots:

  1. Place the model in front of the door and lean up against the car.
  2. Place the model inside the driver’s seat and shoot through the door window.
  3. Place the model inside and open the driver’s side window and use it as a frame.
  4. Open the door halfway and have the model step out of the car.
  5. Open the door fully and have the model sit inside.
  6. Open the door halfway and shoot through the crack of the door and the car.
1 car photoshoot ideas

As you watch the video you’ll notice I move Alyssa from position to position with ease because it’s all revolving around the door and moving the subject around it. Play around and see what poses work with door. You’ll find that action based poses tend to look more natural than catching the gaze of your model so test out a few where you direct your subject to open the door, step in, step out, etc.

Car Photoshoot Idea #2: Find Reflections

car photoshoot ideas photography

The beautiful thing about cars is the opportunity to see and find unique compositions that we know exist because we happen upon them while driving. For example, we use our rear view and side view mirrors daily while driving (I hope you do). Direct your model to look at the mirror and shoot from the backseat or outside the car to get more of a voyeristic portrait of your subject.

Car Photoshoot Idea #3: Car Exterior

2 car photoshoot ideas

One of the easiest ways to showcase the entire car and the subject is to use a wide lens and get down low. This gives the car more presence in the frame and let’s you see it in its entirety. This is also a great change to highlight some specific features that are unique to the car like rims, any additions to the back, or the logo in the front. This is also a great opportunity to grab portraits of your model where the car is just a backdrop or background prop and not a secondary subject.

If you enjoy our content and you’re serious about photography be sure to check out our Premium education! It will literally teach you from the ground up how to master your camera, how to shoot professional images, and how to even open and begin the business of your dreams if that’s your goal.

Professional Lighting for YouTube or Podcast Sets in 4 Easy Steps

video lighting for youtube or podcast sets feature main 01

If you’re thinking about starting up a video podcast or YouTube channel, you’re going to want to learn how to make your set (shooting space) look its best.  A big part of that will have to do with lighting.  The best part about this is that it doesn’t have the break the bank and you can get creative and find lots of DIY alternatives.  In this video, we’ll show you how to master video lighting for YouTube or podcast sets in four simple steps.

Video: Master Video Lighting for YouTube or Podcast Sets in 4 Steps

I recently launched a new podcast called 12-Week Relationships, a place where better relationships are made stupid-simple.  In this passion project, I’ve partnered with a Doctor of Psychology and University professor, Dr. Glen Hong, to discuss happiness, fulfillment, and connection.  You can listen and connect in the following places:

The podcast has little to do with photography or cinematography beyond gaining a better understanding of people and psychology. But it does offer the chance to create and study how to light a set for video and film-making. I mean, what better way to explore the topic of lighting a set than with a real-world case study?

C.A.M.P. Framework

If you’ve watched any of our previous videos, you may already be familiar with our C.A.M.P. Framework.

  • Composition
  • Ambient Light
  • Modify/Add Light
  • Photograph/Press Record

We will put this same 4-step framework that we use to light photography sets to work to light our video set. This process works equally well for lighting a set for cinema (whether it’s for YouTube, documentary films, or a home-podcast set). Follow these steps to get a great look, right in your camera.

Let’s get into it.

Gear Used in Video Lighting for YouTube or Podcast Sets

You can find the gear used for this video/article in the links below or neatly gathered in one place in our SLR Lounge Studio Build Store on B&H.

Lights

Light Modifiers

Light Cases

Light Stands

Light Stand Accessories

Budget Options

Step 0: Building the Set

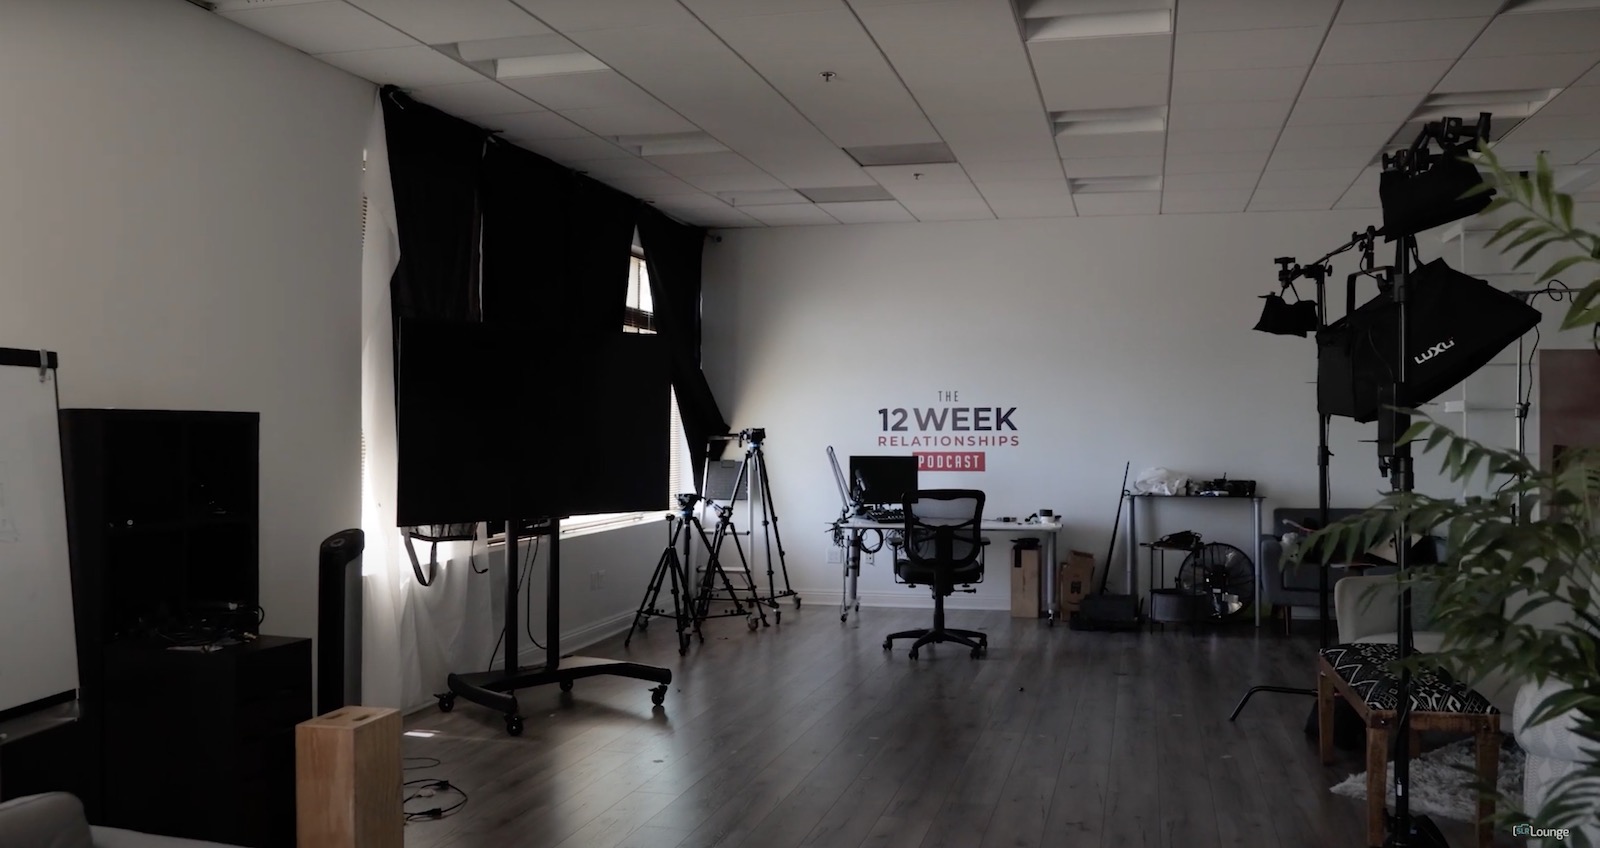
Before we can light our set, we’ll need to build and/or design it. And before we do that, we need to consider the theme of our production. The new podcast, 12-Week Relationships, focuses on relationships (obviously) and the psychology behind them. As such, we wanted the look of the set to reflect a comfortable environment in which to discuss these matters, like a household living room.

plain office space

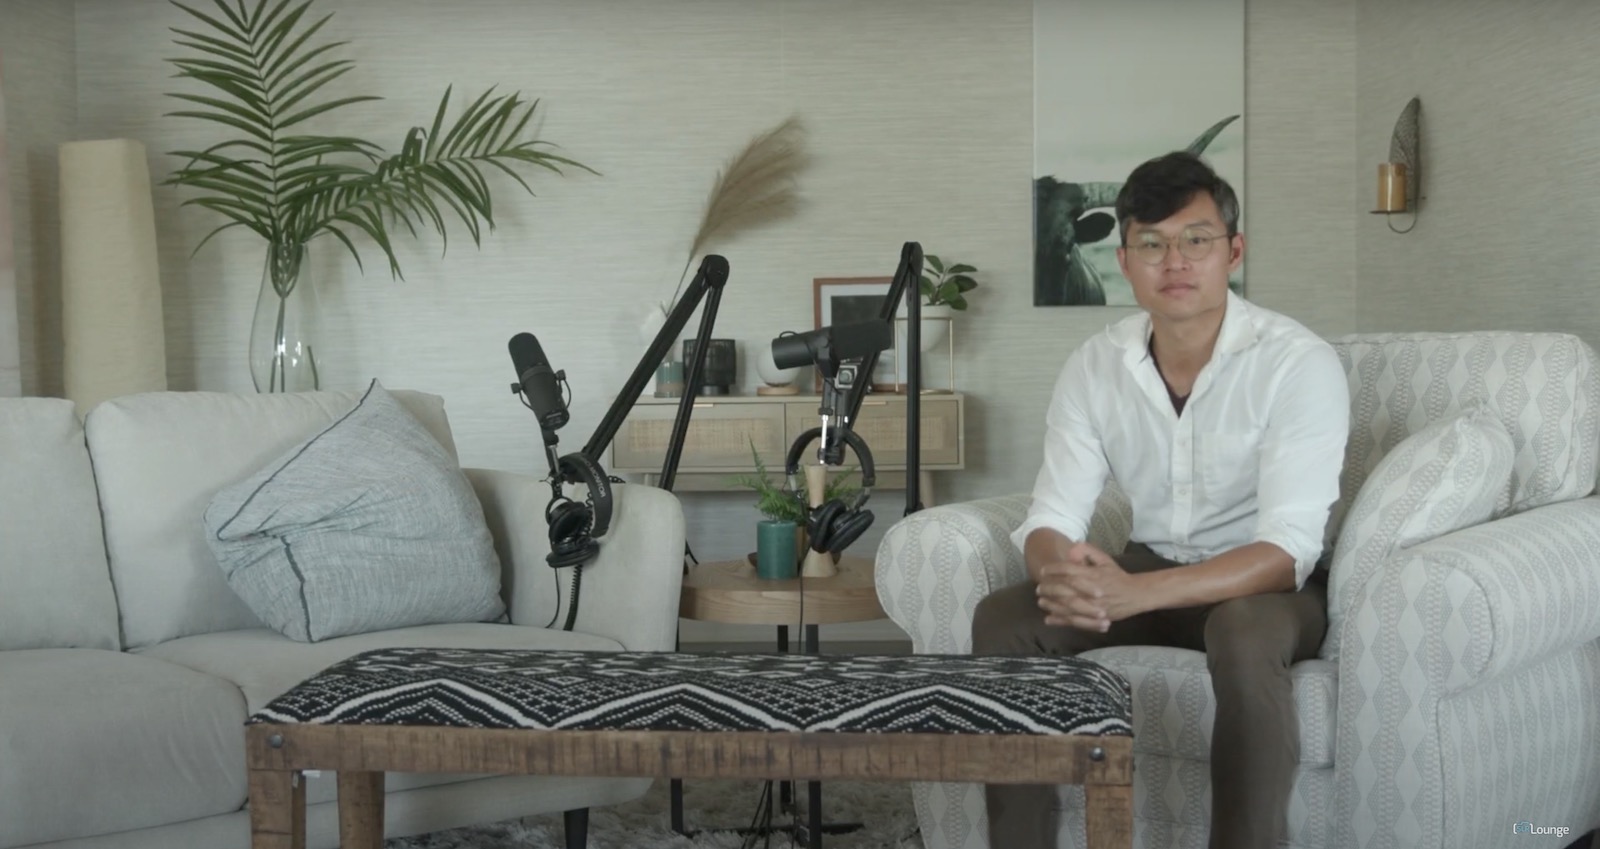
As you can see in the image above, the set location is a typical office space that doesn’t really lend itself to the vibe we wanted to create. To remedy this, we put up some simple wallpaper, added a couple of pieces of furniture, some sofas, and that’s pretty much it.

basic furniture on set

This gave the space the look of a home setting, but the overhead office lighting still didn’t create the right ambiance. So with the set design in place, let’s get into the process of lighting it.

Step 1: Composition

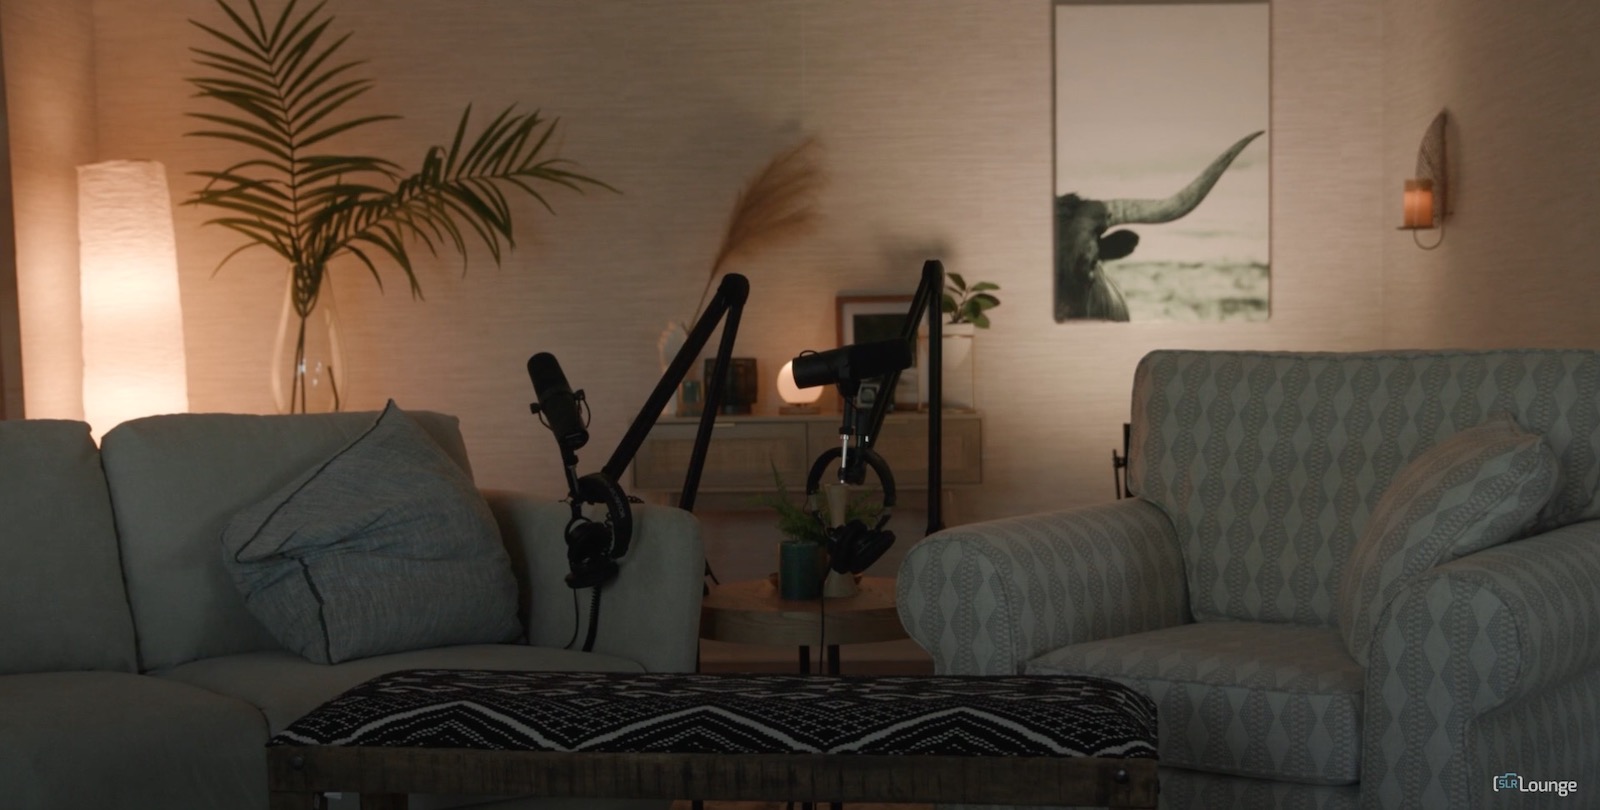
I always like to start with a rough idea of my composition. We placed a Canon C200 with a 24-70mm lens up on a tripod and started with a basic wide shot that framed the sofas and microphones. Keep in mind that you don’t have to perfect your composition right away, we just want a place to start so we can start placing lights in the right places.  Exposing for ambient light, this is what the scene looks like without any added lighting.

ambient light on set

Step 2: Ambient Light

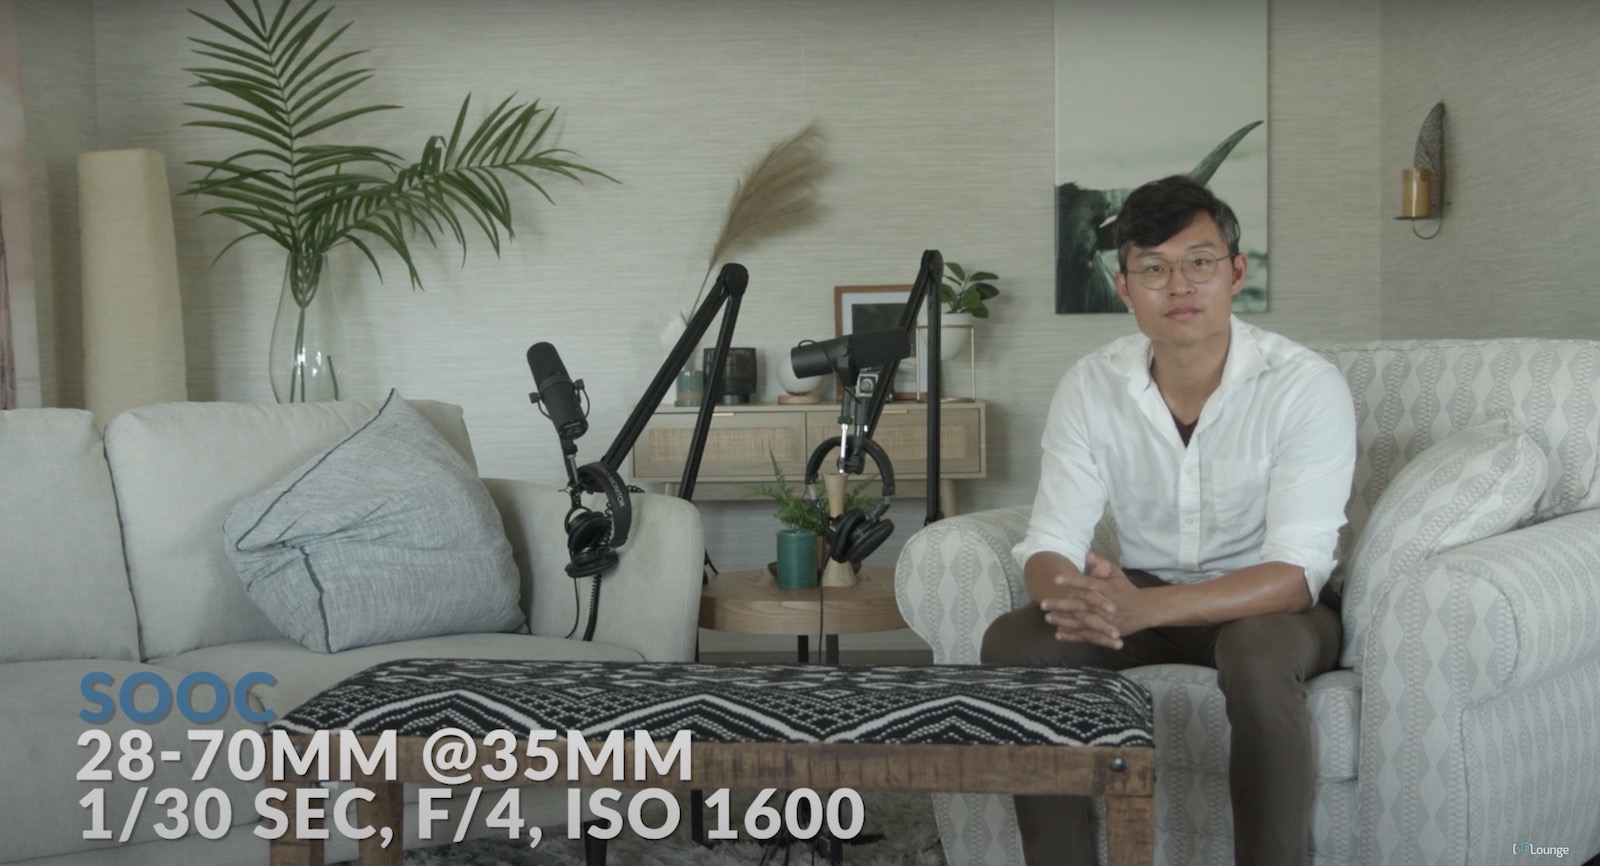
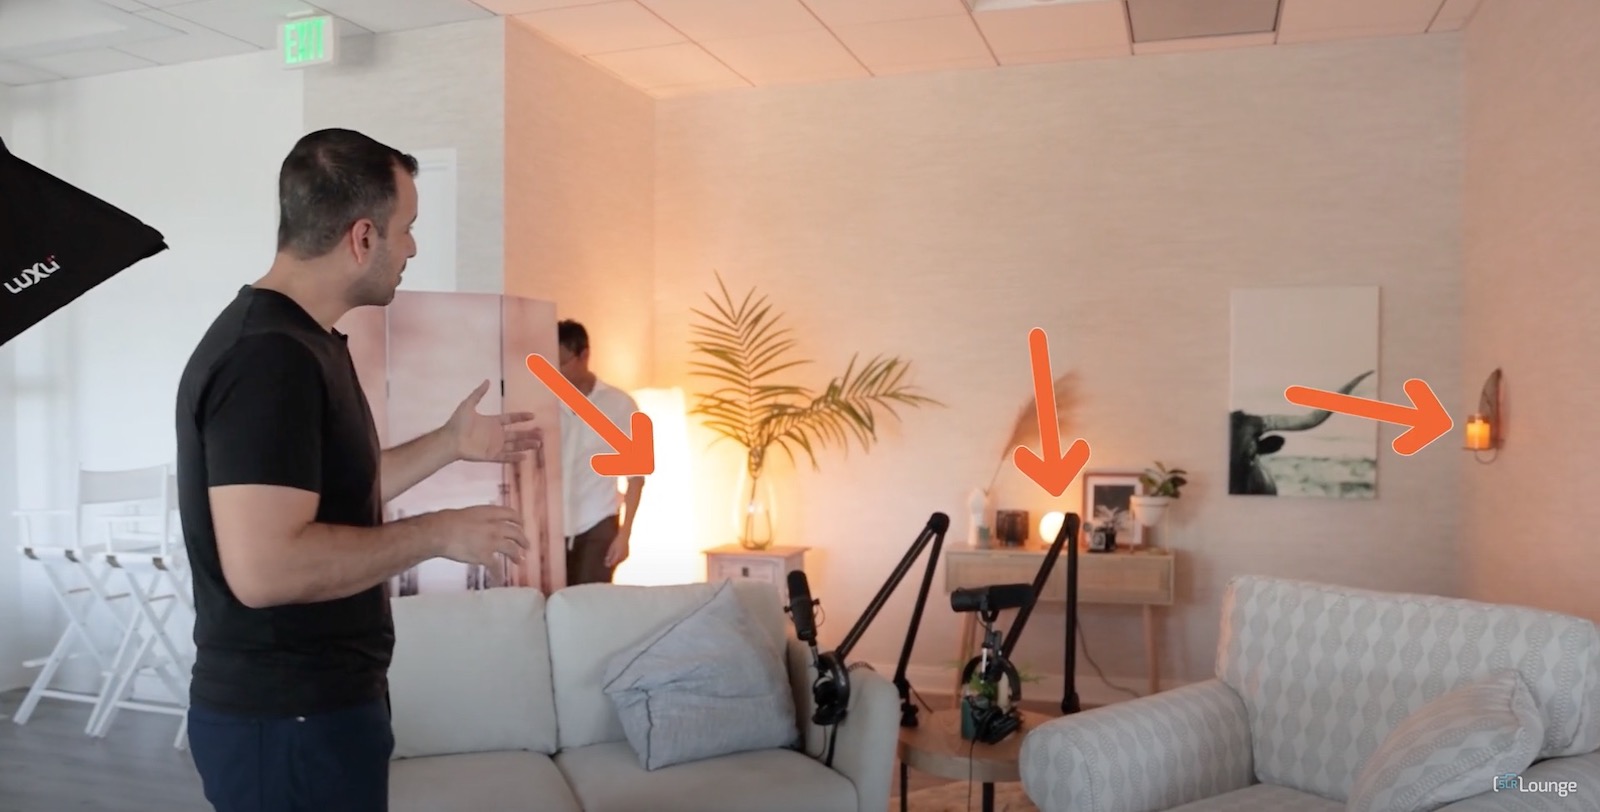
Step two is ambient light, but we haven’t yet placed any lights to create an ambiance. So this is where I like to place “practical lights” for environmental effect. Practicals are lights used on set that are both in the shot, but also add light to the scene.  You can see the three lights in the picture below.

video lighting for youtube or podcast sets design details practical lighting 01

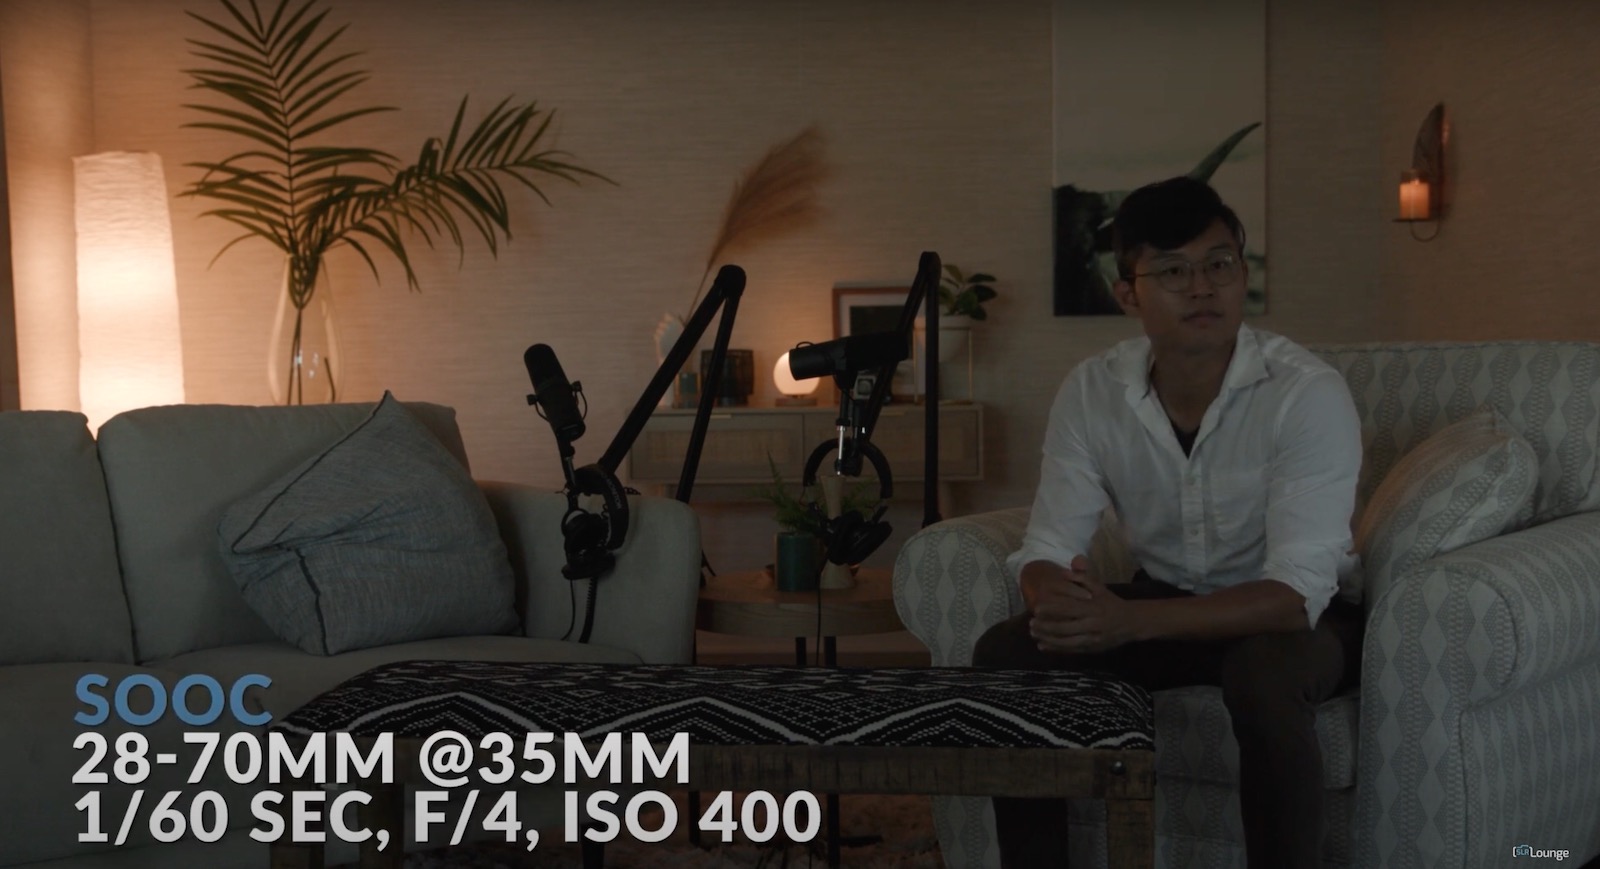
With these lights on, we can now dial in the camera’s ambient light exposure. This is where you’re setting the “intention” of the scene. If you want a more dramatic look and feel, go with a darker ambient exposure. On the flip side, a brighter ambient exposure will have a more light and natural vibe.

I wanted to aim for a darker evening sort of feel with a bit of warmth to the scene. So for this set, we started with ISO 1600, a shutter speed of 1/30, and an aperture of f/4. This felt like an appropriate starting place, although we knew we were going to make adjustments to better capture the vibe we were trying to create.

video lighting for youtube or podcast sets design details practicals 02
Notice the change in shutter speed and ISO to dial down the ambient exposure and better establish the mood

With the ambient exposure mostly dialed in, I like to check if we need any additional light sources to balance out the scene. In the picture above, I noticed the painting behind Anthony was a bit dark, so we added a 1×1 on the ground to light it up a bit as you see below.

video lighting for youtube or podcast sets luxli added light for ambience

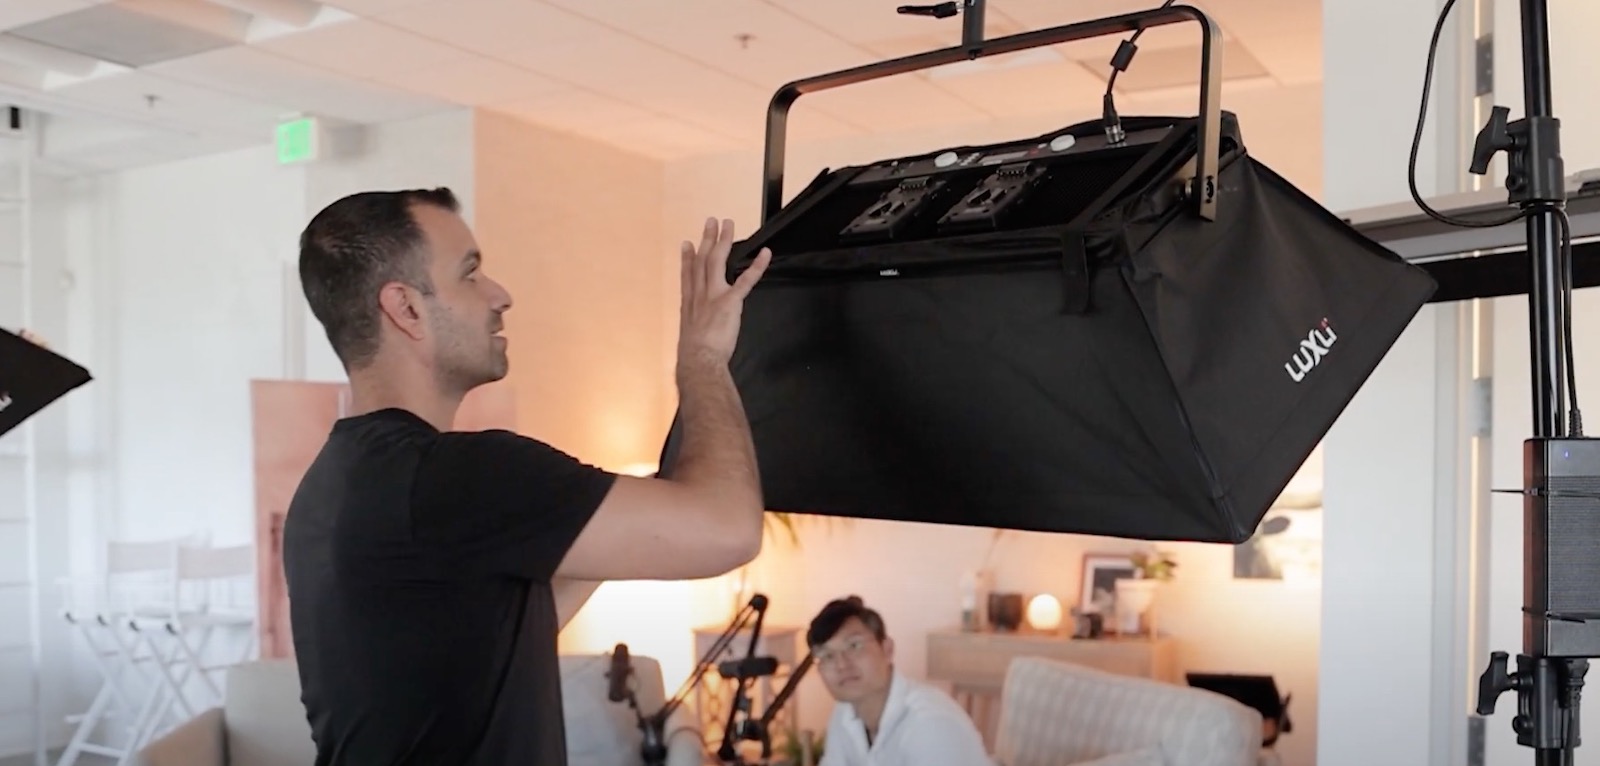
The first light we added was a Luxli Timpani 1×1, just behind the chair on camera right. Our first priority with adding this light is to simply place the light and make sure it’s lighting the scene the way we want it. Then, when the light is positioned correctly, we can dial in the colors and other details.

video lighting for YouTube or podcast sets luxli app

One of my favorite features of this light is that Luxli has a “Composer” app with 150 digital filters that allow me to control all of the lighting adjustments from my phone, including the light color, intensity, and so on. It allows me to see the adjustments in real-time, which streamlines the process.

With the ambient light exposure set, this is where you have a clear picture of how to Modify/Add light to finish out lighting our subjects on the set.

Step 3: Modify/Add Light

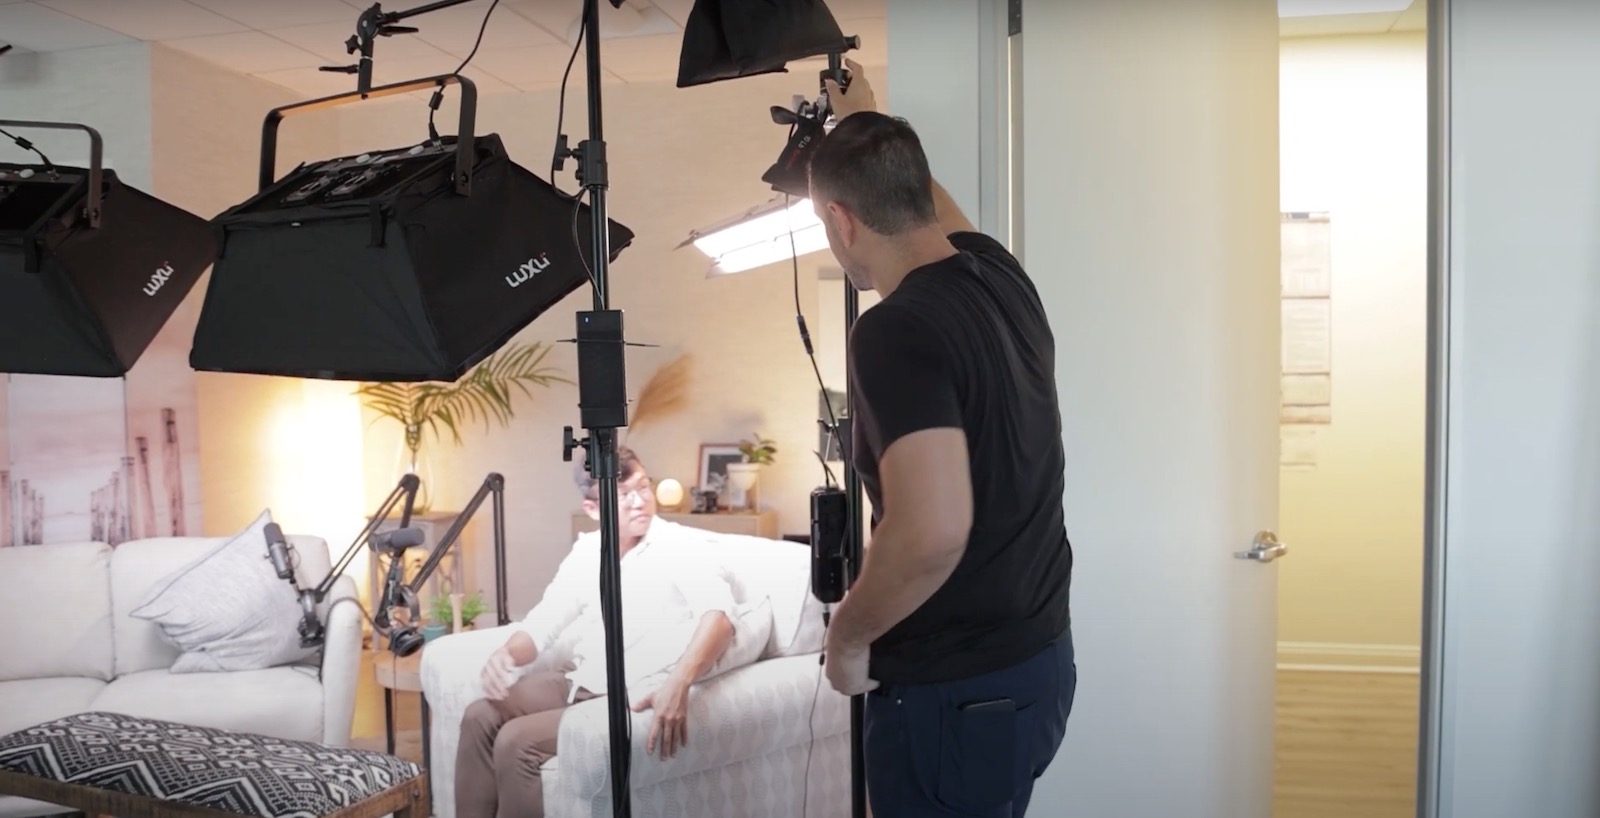
Now, with our ambient light fully dialed in we can see the light that’s necessary for our subjects. In this case, we’ll be sitting on the sofas during the podcast, so that’s the place where we need to add light. When adding light for a photograph or video, it’s important to only add one light at a time. This keeps the process simple as you’re only controlling one variable with each change.

video lighting for youtube or podcast sets luxli added light for subject 01

We started with a Luxli Taiko 1×2 in a corresponding softbox, and placed it on an Impact C-Stand. These lights might not fit within your budget, and that’s okay. You can also consider options like those we’ve included in our studio lighting guide at B&H. Luxli lights, which work with the app I mentioned earlier, make this lighting setup very convenient and easy to use if you have room in the budget to pick one up.

Grids

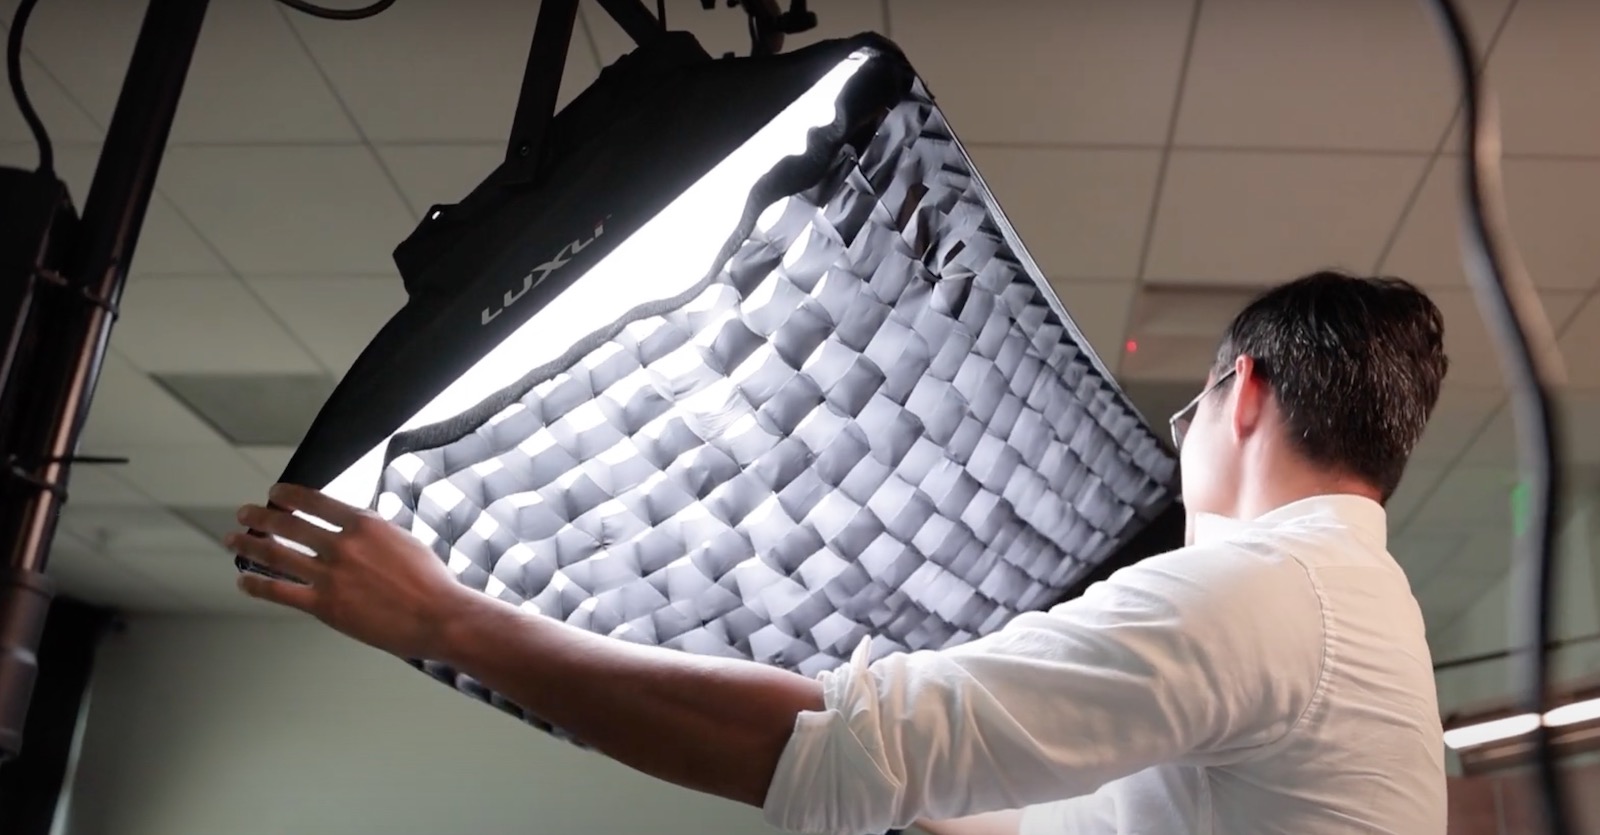
video lighting for youtube and podcast sets grid 01

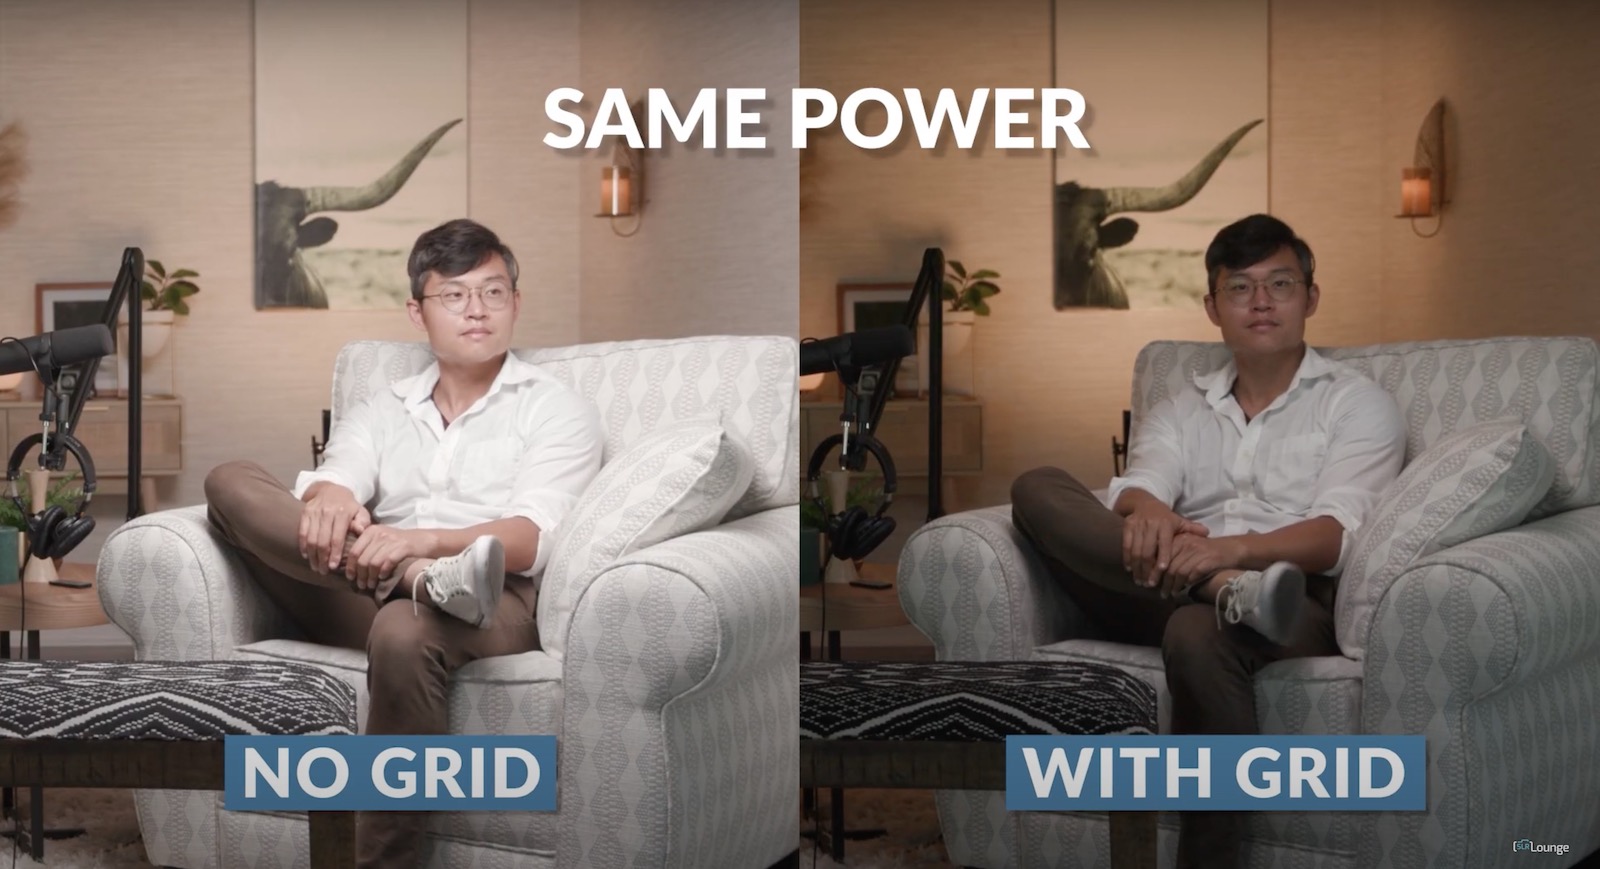
The added light looks great, but I found that too much light was spilling onto the background and affecting the overall ambiance of the room. The quick solution for this is to place a grid on the softbox.

video lighting for YouTube or podcast sets grid vs no grid

A grid will help funnel the light directly onto the chair and minimize light spill. At the same time, however, grids also impact the intensity of the light.

video lighting for youtube or podcast sets after grid
Adding a grid will reduce light output (left), so expect to bump the power to get the exposure where you want it (right)

This means we’ll have to bump the power a bit to get the exposure up to where we want it (see the images above). A way to save time here is to place the grid on the softbox before you start adjusting the light intensity. A good rule of thumb when it comes to the brightness of your main light is to light your subject so they are a little brighter than your background as you see above.

Because we’re focusing on video lighting for YouTube or podcast sets, this time featuring a two-subject set design, we will duplicate what we’ve done above and set up another light in a similar fashion for the second subject.

Accent Light

rim light

Remember, we’re still in the Modify/Add step. After setting up our main lights, I decided I wanted to add an accent light to serve as a sort of rim light for the subjects in the scene. For this purpose, I brought in a Genaray SSL-36 strip light, which is an LED light that includes features like white balance control. I placed the light just over and behind the subject.

before and after with rim light

One of the reasons I love using LED lights is that they’re generally lighter and smaller in size, and they produce much less heat than other light sources. You can dial in the rim lighting to taste or avoid it altogether if you don’t feel it’s needed.

Also, it’s worth remembering to be mindful of the angle of your light source. You’ll want to angle it onto your subject to minimize light spill (which the grid will help with), but you don’t want to use too extreme of an angle, such as a top-down angle like midday sun that can cause issues with shadows for people with deeper inset eyes.

Step 4: Photograph…or Press Record

With everything in place, this is the time to fine-tune your setup! If you need to perfect your composition or make some adjustments to the lighting setup, this is the time to do it. When you’re done, the last step in the C.A.M.P. Framework is to pose and photograph, or in this instance, press record.

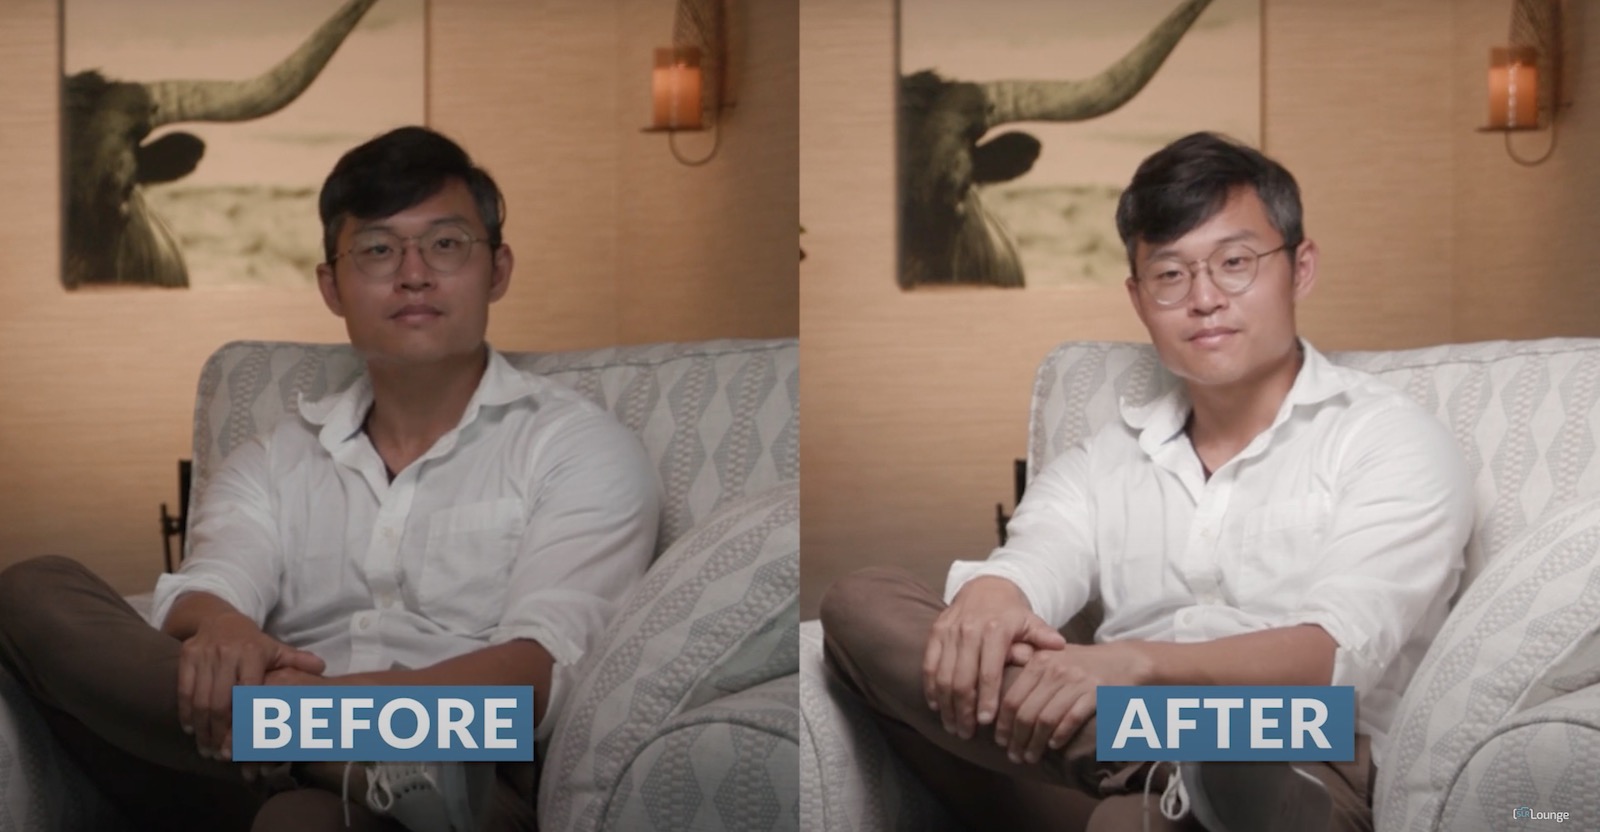
To fully illustrate the impact of these four steps on video lighting for YouTube or podcast sets, here’s a look at the before and after for the 12-Week Relationships Podcast.

no light on set
Before adding light…
video lighting for youtube or podcast sets final shot after 01
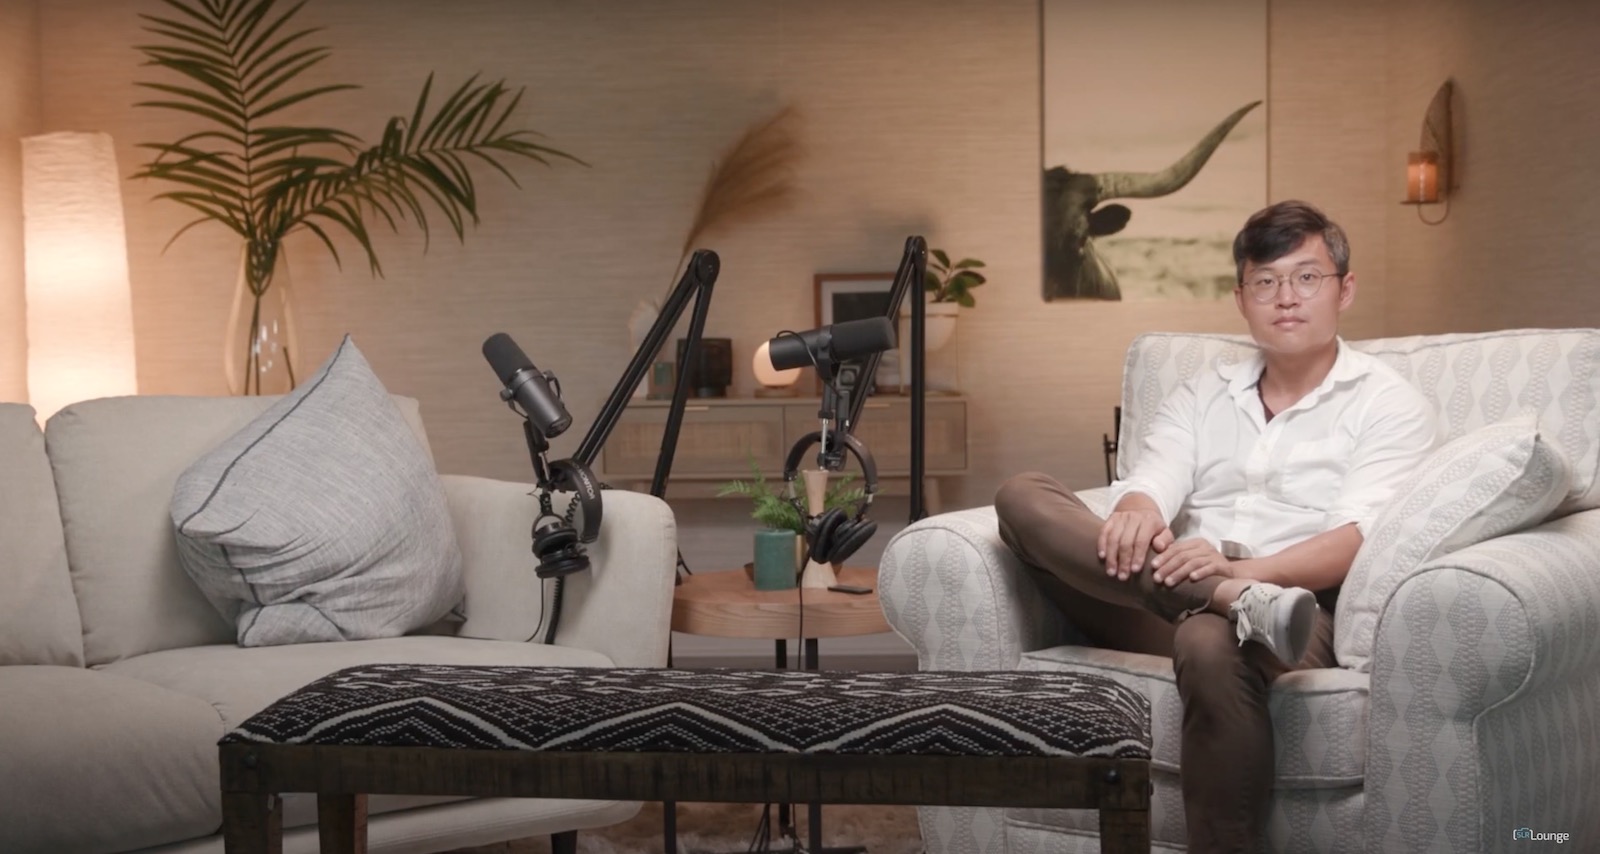
…and after adding lights.

Conclusion

I hope you enjoyed these four steps for mastering video lighting for YouTube or podcast sets. Remember, if you use the C.A.M.P. Framework when setting up your lights, you can get similar results, regardless of the actual gear you’re using. Be sure to check out our SLR Lounge Studio Build Store on B&H for the lighting gear we mentioned above as well as a host of other budget-friendly options. And, for more A-to-Z photography education, check out SLR Lounge Premium.

Create Vintage Hollywood Glam Photography In 4 Simple Steps

The golden age of Hollywood, the period between 1920 and 1960, is characterized by timeless glamour, dramatic lighting, and chic portraits of iconic movie stars. Today, this classic style continues to inspire photographers and subjects alike, offering a chance to channel the magic of stars like Audrey Hepburn, Marilyn Monroe, and Clark Gable. In this …

Read more