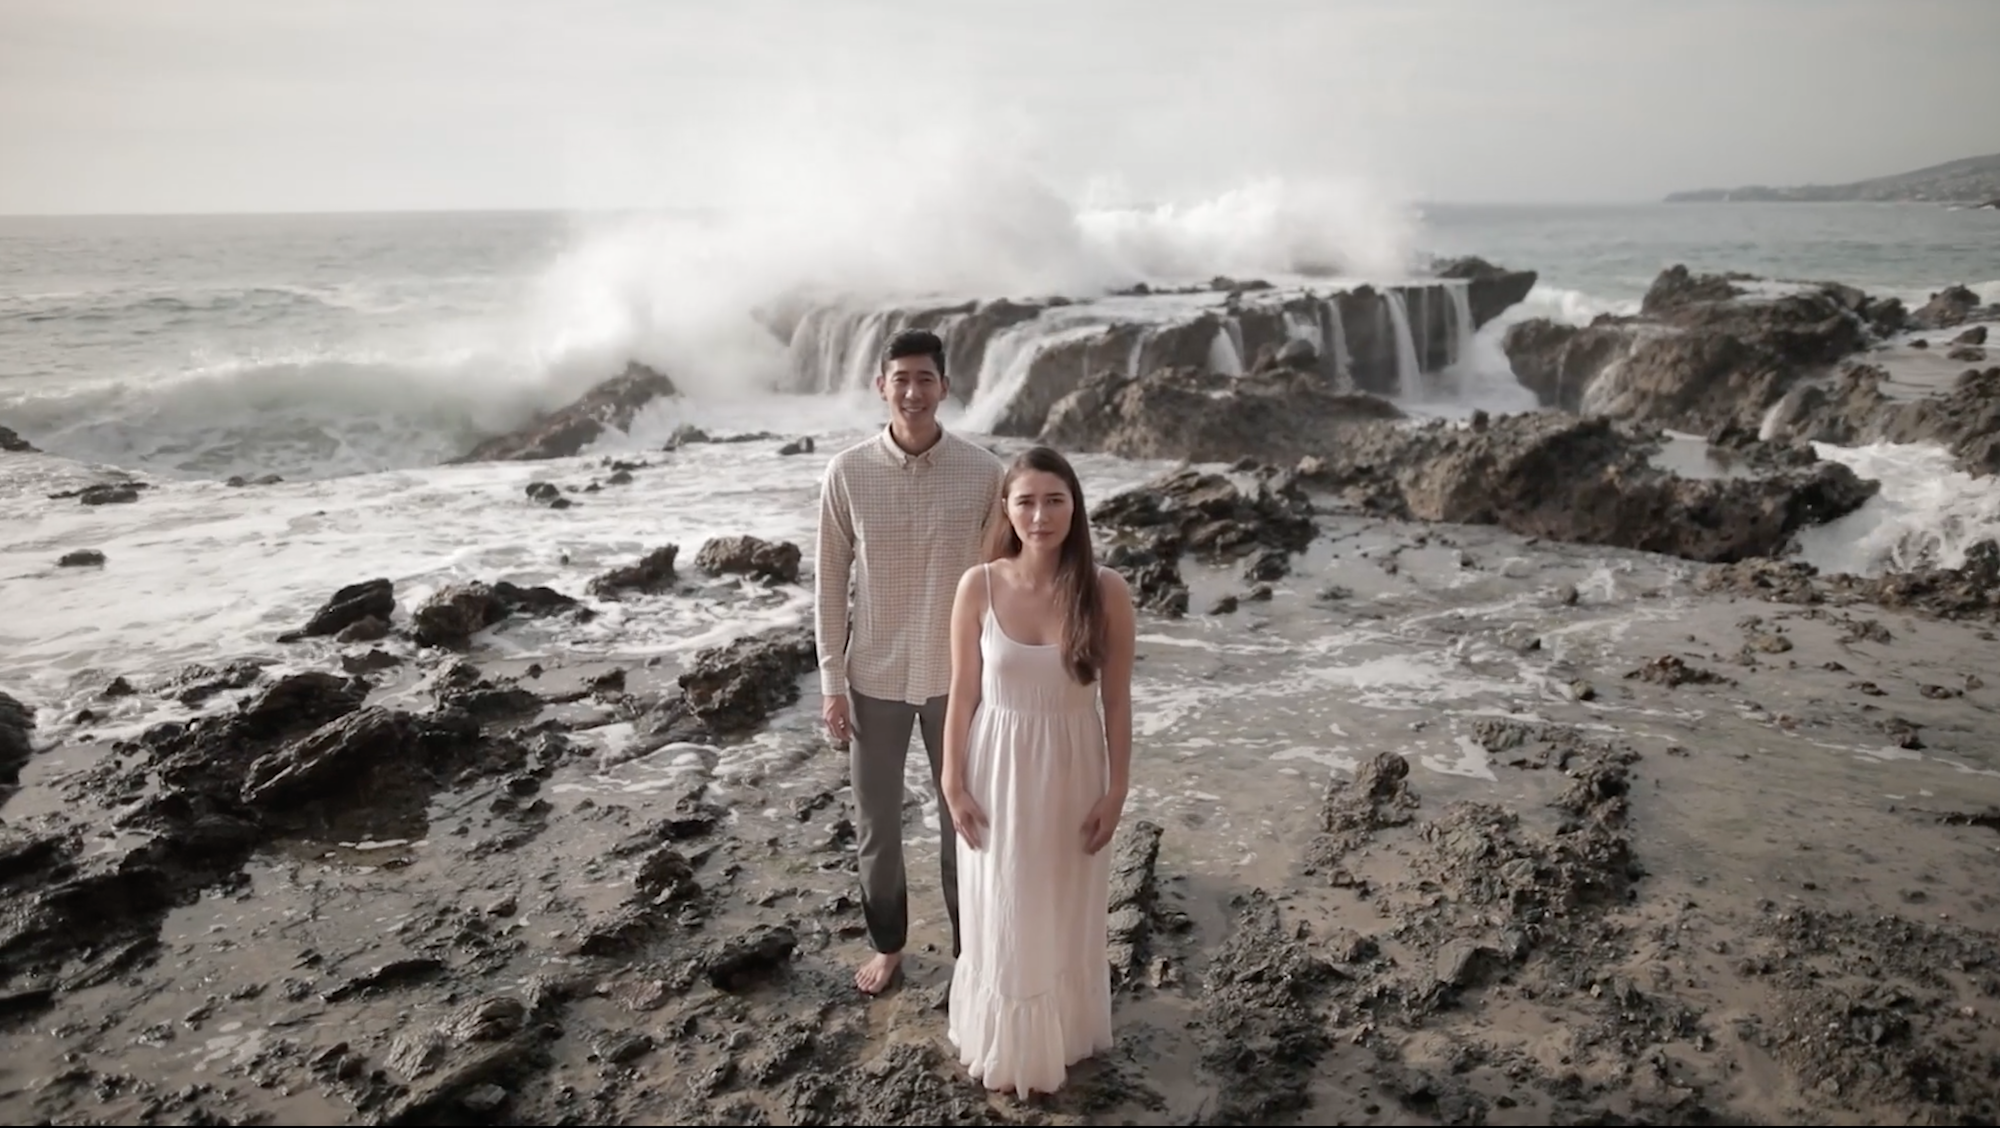
Did you know that we can use the sun as a harsh, directional light, the same way we would use a flash, to create a dramatic image? While many photographers tend to shy away from using hard light in natural light portraits, you can use it to dramatic effect to shape your subject’s body. Here’s the best part: It doesn’t matter what gear you’re using to capture the shot, whether it be a professional rig or an iPhone. The key to pulling this off has more to do with how you position and pose your subjects.
Follow these natural light portrait tips to use hard light to shape the body with an example from our new Engagement Photography 101 course, which we designed to guide you from communication to capture to create stunning engagement photography using the gear you already have.
Video: Natural Light Portrait Tips | Use Hard Light to Shape the Body
Natural Light Portrait Tip #1: Compose the Image

Because we’re using the sun as a directional light in our natural light portrait, your composition will depend in part on the sun’s location in the sky and how it affects the light falling on your subjects. In this scene, the sun was still a couple hours from setting, so its position allowed me to use the ocean as a backdrop for the light direction I wanted.
I chose a wide angle 24mm lens to include more of the ocean and rocks in the frame, but you can really use whichever focal length that best suits your needs. To minimize the effects of lens distortion associated with capturing portraits on a wide angle lens, it helps to place the subjects toward the center of the frame. The distortion becomes more obvious the closer the distance between the camera and the subjects.
[Related Reading: 5 Things to Look for When Shooting Natural Light Portraits in Urban Locations]
Natural Light Portrait Tip #2: Dial in Ambient Exposure
As I mentioned before, you can use whatever gear you have to capture natural light portraits, but you’ll still need to use your tools you have available to dial in ambient exposure. For this shot, we opted for a wide aperture (f/1.4) and shallow depth of field to create a bit of separation between our subjects and the background, and this required a faster shutter speed (1/8000) and low ISO (100). The goal is to create a dramatic natural light portrait using hard light, so the ambient exposure leans toward the left side of the histogram while still trying to maximize dynamic range.
Natural Light Portrait Tip #3: Position Your Subjects

Positioning your subjects ties into both your composition (step 1) as well as how you’re going to pose your subjects (step 4), and it holds the key for making this shot work. You want to position your subjects in a way that allows you to make the available natural light work for you while also capturing the scene, or at least as much of the backdrop as you want to reveal. In this particular scene, I positioned the female subject in front of the male subject to prevent her from falling into the male’s shadow, which would’ve happened if he stood at her side, between her position and the sun.
Natural Light Portrait Tip #4: Direct Your Subjects into a Pose


How you pose your subjects will determine your level of success for using hard light to shape the body in your portraits. All of your knowledge of foundational posing will come into play here, as well as light patterns. After moving the subjects into position (in a combination open and stacked pose), I asked the female subject to turn her face slightly toward the sun, which created nice Rembrandt lighting on her face. As hand position is also important, I asked her to hold her dress with her left hand and reach back with the other hand to hold the male subject’s hand. I then asked the male subject to step slightly to his right to reduce the overlap between the subjects. Finally, I directed his gaze to create an “x” pattern between the eye direction of the two subjects, and we were ready to capture the image.
[Related Reading: 5 Primary Light Patters and Their Purposes]
Natural Light Portrait Tip #5: Capture the Shot

To make the image more dynamic, I just needed to wait for the right moment with the crashing waves in the background so that I could capture the shot. You can continue to refine the pose and direct for multiple expressions once you’ve gotten the shot you’re after.
Conclusion
I hope you found these natural light portrait tips on using hard light to shape the body helpful. This technique proves that you don’t have to use flash to capture dramatically lit images. If you’re interested in learning more about how to photograph couples, don’t miss our Engagement Photography 101 workshop, which is available for purchase now.


Get Connected!