Learn how to capture great portraits without the hassle of lighting equipment. In this video, I’ll be walking through how to turn your garage into a professional home portrait studio!
Video: Turn Your Garage Into a Professional Home Portrait Studio
In a previous video, I demonstrated how to capture dramatic portraits in a garage by controlling the existing light. This time around, we’ll be capturing traditional style portraits by opening up the garage and creating a large soft light source for our home portrait studio. On top of that, you can create this look with any camera. I’ll be using a Canon EOS R5 with an RF 70-200mm f/2.8L as well as my iPhone.
Before we dive into the steps, head over to Instagram and give Kiara, our model today, a follow!
Step #1: Find the Right Time of Day
Our home portrait studio needs a large and soft light source. To do this, we’ll have to avoid harsh sunlight. Pay attention to where the sun is at what time of day. Schedule the shoot for when the sun isn’t directly shining into the garage or when the sky is overcast.
Step #2: Place Your Background

Place any background of your choosing about 10-15 feet deep into the garage. For this tutorial, I’m using handmade backdrops by Ethan Alex.
In just a little bit, I’ll show you how to change background exposure using subject placement.
Step #3: Choose Your Subject’s Outfit
Since we’re working with an earth-tone background for our home portrait studio, I had Kiara dress in a dark outfit with similar hues.
Step #4: Place Your Subject
This is where your subject’s distance from the light source will make a big difference. When Kiara is further from the light source, the light will fall more evenly on her and the background. However, when we bring Kiara closer to the garage opening, she’ll be more brightly lit. Then, once adjusting the exposure, the background darkens significantly.


By simply moving our subject closer and further from the light source, we can adjust how bright or dark the background is.
Step #5: Modify the Light

A bonus tip for adding drama to the scene in your home portrait studio is to add negative fill on both sides of your subject. I’m using V-Flats from V-Flat World to block out any light on either side of Kiara.
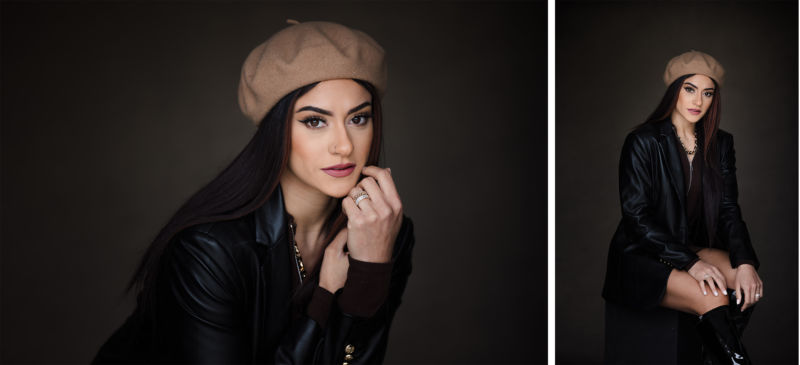
Check out our final images.
Conclusion
I hope you enjoyed this article/video. Great natural light is everywhere and with just a few basic tools, you can quickly be on your way to taking great photos your home portrait studio! For full courses on photography topics such as Lighting with Flash and Lightroom editing, check out SLR Lounge’s Premium Library. For powerful and intuitive presets for any lighting condition, visit VF Presets.
Don’t miss our next episode of Mastering Your Craft on Adorama’s YouTube channel next week! If you want to catch up on all the episodes, make sure you check out our playlist!


Get Connected!