
If you’ve ever been on a photo hike, you know that it’s hard to strike the right balance between hiking light-weight and having all the stuff you need. While there’s no magical, one-size-fits-all solution, the folks over at DIYP have composed the ultimate checklist for your next one-day photo hike. If you plan to extend your adventure and camp overnight, you’ll need to consider adding camping gear, permits, and so on.
Video: The Ultimate Checklist for Your Next Photo Hike
Of course, some of the items may not prove relevant for you, while others may be missing altogether. For example, we’ve included mosquito repellent and sunscreen, which may not be relevant if you live where it’s cold. At the same time, we’ve left products for frost byte treatment off of the list. Still, this list is a great baseline to create a checklist that you can verify before you go out. This list comprises 33 items, and they all fit in one Lowepro PhotoSport bag.
Quick Reference List
- Basic Camera Gear
- Extra Camera Gear
- Food and Water
- Self-Care & Gear-Care
- Creative Toolkit
- Miscellaneous
- Tarp & Towel
Basic Camera Gear for Your Photo Hike

Of course, any photo hike would not be a photo hike if you did not have at least one camera and one lens. Now, depending on your style, you may want to have a few more items. Maybe a macro lens? Maybe swap the strobe for a third lens, or just go out with one lens. At the end of the day, this part will vary based on your style and the gear you own. The point is to keep your gear as minimal and lightweight as possible. So, you might consider taking a mirrorless camera vs. a DSLR, and so on.
- Lowepro PhotoSport 24L AW III
- Camera: Sony Alpha a7 III
- Lens Option 1: Sony Sonnar T* FE 55mm f/1.8
- Second Lens Option: Sony FE 28mm f/2
- Manfrotto Befree Tripod (Multiple Options Available)
- Your Phone
[Related Reading: PHOTOHIKER | Is This the Ultimate Adventure Camera Backpack?]
Extra Camera Gear
Once you’ve packed the basics, here are a few items that you may want to add to protect your files and ensure that you can keep shooting. Consider this the “peace of mind” portion of the list.
- Extra Memory Cards
- Spare Batteries (OEM Recommended)
- Powerbank
- USB cable
Food and Water for Your Photo Hike
If your hike for more than a few hours, you want to make sure that you have some food and water with you. If there is one thing you’ll take from this list, please make sure to take plenty of water. Getting dehydrated is not fun. On the flip side, a nice gulp of water can be super refreshing. Depending on your diet, you may want to pack some “real food,” like sandwiches. DIYP also recommends some high-protein food like power bars, dried fruits, or a small bag with nuts and raisins. Also, take a trash bag so you have a place for all the trash. You know the saying, “Take nothing but photos, leave nothing but footprints.”
- Water
- Sandwiches
- Protein Bars and/or Nuts & raisins
- Trash Bag
Self-Care and Gear-Care
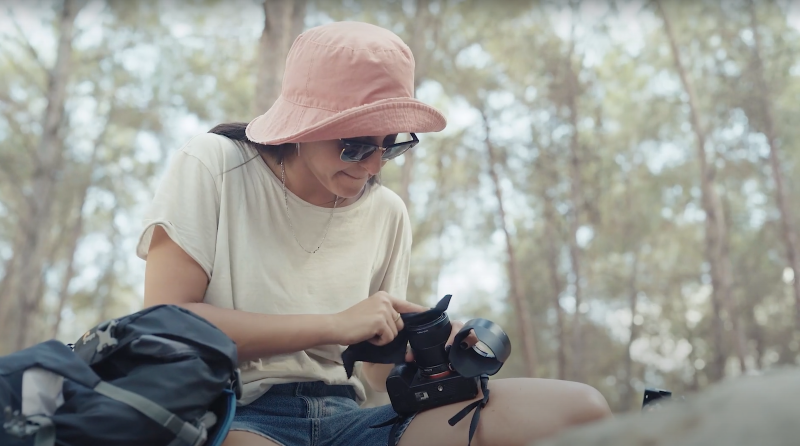
Both you and your gear may need some basic first aid during the photo hike. Or, you may just want to make sure you’re comfy. That’s fine, too. The less you have to worry about distractions like mosquitos, the better. Instead, you can focus more on enjoying and photographing your environment. The items below will help you stay a happy camper.
- Hat
- Sun Glasses
- Sunscreen
- Mosquito Repellant
- Headache Meds
- Lip Balm
- Small Towel
- Headphones
And these items will help your gear stay happy.
Creative Toolkit for Your Photo Hike
If you are a minimalist, you may just hang a camera on your neck and start your hike. If you are willing to carry just a little bit of extra gear on your photo hike, you can open up a lot of creative options. Again, consider those as options. You don’t have to take them all. This is highly dependant on your shooting style and the images you want to create.
Miscellaneous
Lastly, here are a few things that are definitely not a must, but they can make a difference in weird situations. Have a look at the video on how DIYP suggests packing Gaffer tape (it’s on 4:06). It’s clever.
- Small Notepad
- Business Cards
- Gaffers Tape
- Pen/Pencil
A Tarp & Towel

I am going to borrow from the great Douglas Adams here and say that a towel, and in this case, a tarp, “is about the most massively useful thing an interstellar hitchhiker can have.” You can use a tarp as a makeshift sitting area, you can place things on it without them getting dirty, and you can even use it as a makeshift staging zone. Put everything on the tarp when unused, and return them to the tarp after use. This way, nothing gets lost during your photo hike and you don’t have to ask yourself where you put the F#*%ing lens filter.
Conclusion

Here’s a quick look at everything included on this list from DIYP for a relatively short, one-day photo hike. Again, while it might not cover everything for everyone, it’s a helpful overall guide that will help make the photo hike more productive and enjoyable. What are some other things you like to take with you? Let us know in the comments below.
**Featured Image by Andre Furtado.


Get Connected!