When you’re working with gels, you’ll find that dialing in the right colors in post can be quite tricky. In this video, I’ll be walking through a 6 step Lightroom color grading guide for these types of stylized portraits.
Video: 6 Step Lightroom Color Grading Guide for Stylized Portraits

Our goal is to emphasize the complementary colors in this image through Lightroom color grading and arrive at the final result above.
To see how this image was captured, check out our tutorial and behind the scenes here.
Step #1: Temperature / Tint
Getting the right color temperature when working with color gels can get tricky. A good tip while shooting is to keep your color temperature neutral in order to capture the colors as they really are.

Then, in post, you can use the eyedropper tool to select the areas that you want to be neutral. You can see the differences when I:
- Select the shirt, which has a teal tone.
- Select the red background.

Since we’re aiming to bring out both colors, I settled on more subtle adjustments.
Step #2: Tones

I want to reveal the highlights in the scene, however, I don’t want to brighten the entire image. To do this, I used the Highlights and Whites sliders to isolate those tones. I then made subtle adjustments to the shadows and clarity to help lift out some detail.
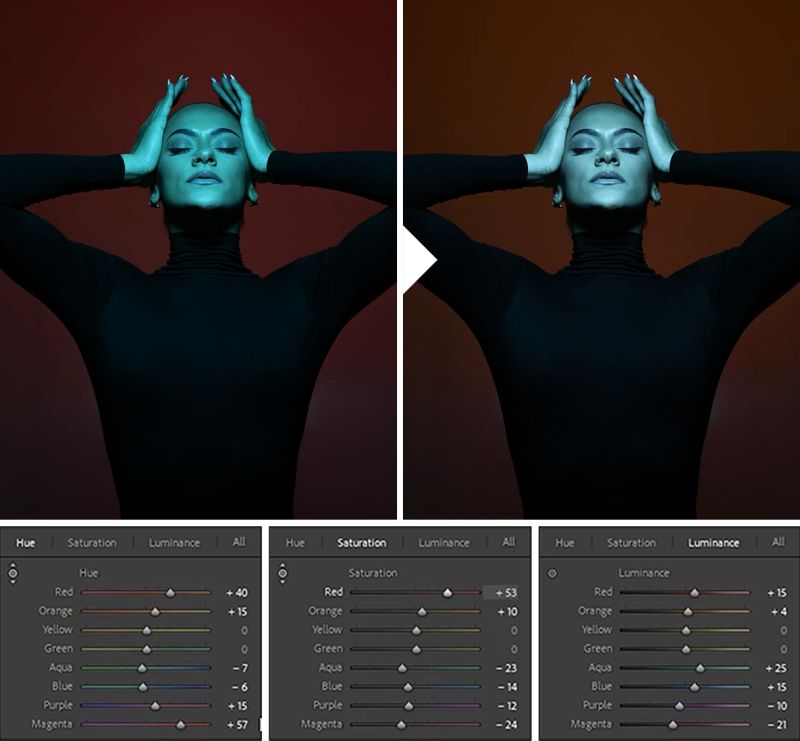
Steps #3-5: Hue / Saturation / Luminance

Here, I’ll be dialing in precise colors using HSL. Check out the adjustments in each of the steps above.
Step #6: Fine Tune

There are two Lightroom color grading tools you can use on your image. The Color Grading tool is most common but I’m actually going to use the RGB Curves. The curves tool is usually used for basic contrast but we can tweak each channel to bring out certain colors in our shadows and highlights.
Variations

Afterwards, we can rewind back to Step 1 where we selected different color temperature settings and create unique variations following the same steps. Check out our final Lightroom color grading variations!
Conclusion
I hope you enjoyed this tutorial on Lightroom color grading. For a complete course on Mastering Lightroom Editing, visit SLR Lounge Premium where you’ll find complete courses on photography topics including Photographing Weddings and Building a 7-Figure Photography Business. You can also check out Visual Flow for an entire library of Lightroom presets and retouching tools for your post-production workflow.
Don’t miss our next episode of Mastering Your Craft on Adorama’s YouTube channel next week! If you want to catch up on all the episodes, make sure you check out our playlist!


Get Connected!