Some people are born with more natural creativity than others, but that doesn’t mean that creativity can’t be trained and developed like a muscle. With the right tools and enough practice, anyone can learn how to capture impressive, impactful creative photography. For those moments that you find yourself in an artistic rut, we’ve compiled a list of creative photography ideas below.
Idea #1: Pano Stitching (AKA Brenizer Method)

Also known as The Brenizer Method, wide aperture panoramic stitching allows you to create a narrow depth of field and focus on your subject while still showing every detail of the environment. Perfect for scenic shots, this is a great way to mix it up when you’ve got an incredible scenic background to show off. Usually created by stitching 9 to 24 (or more) images together, this technique takes some practice and specific settings to pull off.
Panoramic images have such a dynamism about them – they hold the ability to capture an expansive space and compress it into a single image. Create high resolution environmental portraits via the Brenizer Method that showcase your subjects and their surroundings. Wide aperture panoramic stitching works best with lenses that give you a shallow depth of field and greater compression. Watch our full course on conceptualizing & executing the Brenizer method here.
Creative Photography Idea #2: Spray Bottle
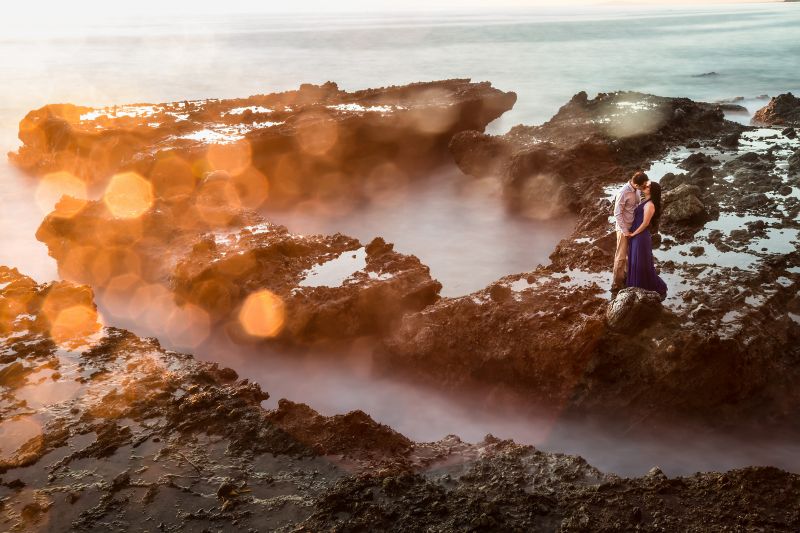
A spray bottle is a simple tool that you would never think to use for photography, mostly because we stay clear of all water whenever given the chance. Essentially, the water droplets on the lens catches light coming into the lens and creates interesting bokeh patterns across your image. If you’re worried about damaging your lens, try doing this creative photography idea with a lens filter over the lens.
See the full spray bottle tutorial here.
Directions:
- Spray water on desired part of the lens
- Control the size of the foreground bokeh by adjusting your aperture (wider aperture = bigger bokeh)
- Make sure there’s no dirt on your lens, because you can scratch your lens while wiping the water off
Creative Photography Idea #3: Mixed Lighting

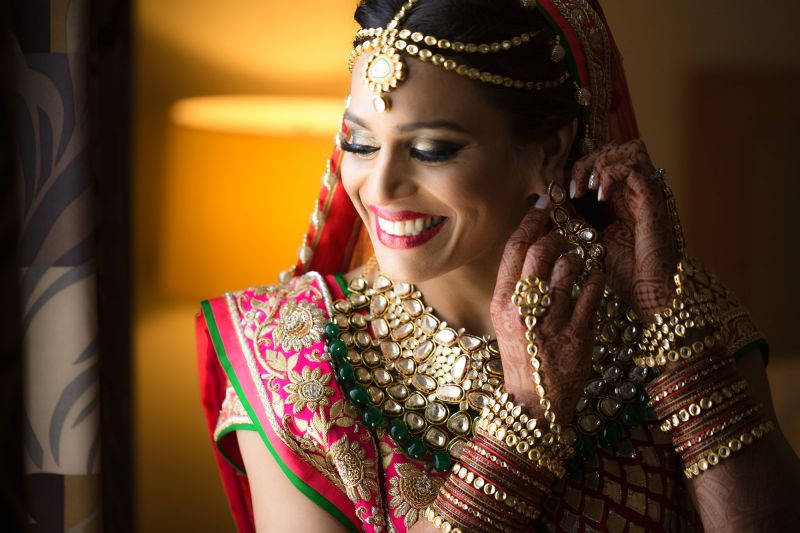
Although most shooters tend to stay clear of mixing lighting to avoid discolored skin-tones, the effect can actually increase the interest of your image when done correctly.
The trick is to separate the light sources so the temperatures don’t mix unintentionally or over the subjects’ bodies. Mixing daylight and tungsten, for example, and then correcting for the skin tones can send your backgrounds into an interesting and moody orange, as you see in the image above.
The opposite is true when you light your couple with a tungsten light during blue hour. The mixed lighting sends the skies into a deep blue, adding interest, as you see in the image below.

For more information, see our articles on White Balance and Color Temperature.
Creative Photography Idea #4: Long Exposures

A sky full of stars as a backdrop is bound to leave your clients impressed and is quite possibly one of easier tricks as it requires no gimmick, just a little extra time in post production. These shots can either be composited with a starry night sky or if you choose to do a single shot long exposure, you can use Rear Curtain Sync on your off-camera flash.
Creative Photography Idea #5: Free Lensing

This technique requires some DIY-ing but it creates a look that brides are sure to love. Free lensing is a technique that uses broken lens to let light bleed through the edges of the frame, creating different flares and color. We’ve used a broken Canon 50mm f/1.8 for the shot above, holding it off the camera body allowing light to flare through. Aperture doesn’t play a role in the photo considering the lens has been stopped down to a specific number prior to usage and it’s disconnected from the camera body. This gives images a slight tilt-shift effect without the cost of a tilt-shift lens. See how we post-produce these images here.
Idea #6: Tilt Shift

A tilt-shift lens is meant to throw the focus plane off, helping you focus on multiple subjects to create interest or correct perspective. At first, it is difficult to navigate the functionality of a tilt-shift lens, but like any other technique it’s a matter of trial and error. Understanding how the focus plane works is the main hurdle to cross because it is such a non-traditional perspective. The image above was created using a Canon 90mm f/2.8 Tilt Shift lens.
Creative Photography Idea #7: Shoot Throughs

Here is a technique that requires you to think outside the box no matter what location you are in. Shooting through objects can yield you with a variety of unique compositions, flares, and perspectives. We have a full special effects course outlining the various accessories that can be used to create dramatic and uncommon light flares.
For example, you can snag one of these crystal bookmarks on Amazon or at your nearest craft store. These will give us a different characteristic of flare appearing more streaky and linear in camera. See more examples in the video below.
Idea #8: Atmospheric Aerosol/Fog

A little bit of fog in some places can add a lot of depth and texture to a scene. Fog machines would be the ultimate tool for a trick like this, however, they are often too cumbersome to carry around on shoots, and they do cost a pretty penny. Here’s where Atmosphere Aerosol comes to the rescue: these cans of fog are extremely affordable and allow you to spray the areas you want the fog. Of the creative photography ideas listed in this article, using this product is one of the easiest and most straightforward.
Directions:
- Fill the scene with the desired amount of fog
- Using a reflector (or any thin, broad object), waft the fog around to control the spread
Idea 9: Whip Pan

Having a lens with built in IS (image stabilization) will create a straighter line going across the image. Watch the full tutorial of the whip pan technique.

Directions:
- Slow shutter speed to 0.5-1 seconds
- Loosen tripod head
- Press shutter button then quickly pan in one direction
- Use rear curtain sync to freeze subject
Idea #10: Reflections

A prism can be used to add unique reflections, change your composition, or even add a flare. The best part is that it’s portable, and you can bring it to any shoot. See how we created the image above in this behind-the-scenes video! At around $20, adding a prism to your toolkit will give you an easy way to add creativity to your images. Like any of these ideas, just be sure to not overuse it, as it can become too identifiable and cheesy if you do.
Directions:
- Bring the prism up to your lens, twist and turn until you find your desired composition
- Keep note of which photos you like and how you held the prism, so you can easily re-create the look later
#11 – Double Exposure

I’ve always been fascinated with double exposures. Whether you create them in-camera (which is challenging but a lot of fun) or later in post production software like Photoshop, you can create some cool effects and communicate surreal and conceptual ideas. The possibilities are endless with this one. Read more about how to create double exposures in-camera and in Photoshop in these two articles:
Idea 12 – Composites & Overlays

It’s fun to get creative in Photoshop with overlays and composite elements. Whether you add a simple cloud overlay to add interest to the sky, a texture overlay to bring some life and feeling into your images or elements that are difficult or impossible to capture live (like smoke, lighting, fire, water splashes, etc.) overlays and composite elements can help take your images from regular to extraordinary photo illustrations. Read my tutorial for creating the above composite here:
Conclusion
Having a few of these creative photography ideas up your sleeve can help you distinguish yourself from other photographers. They can help you transform average or boring scenes into interesting ones. And, of course, they’re fun to try and practice. So get out there and try them!


Get Connected!