-
Term: Camera Twist
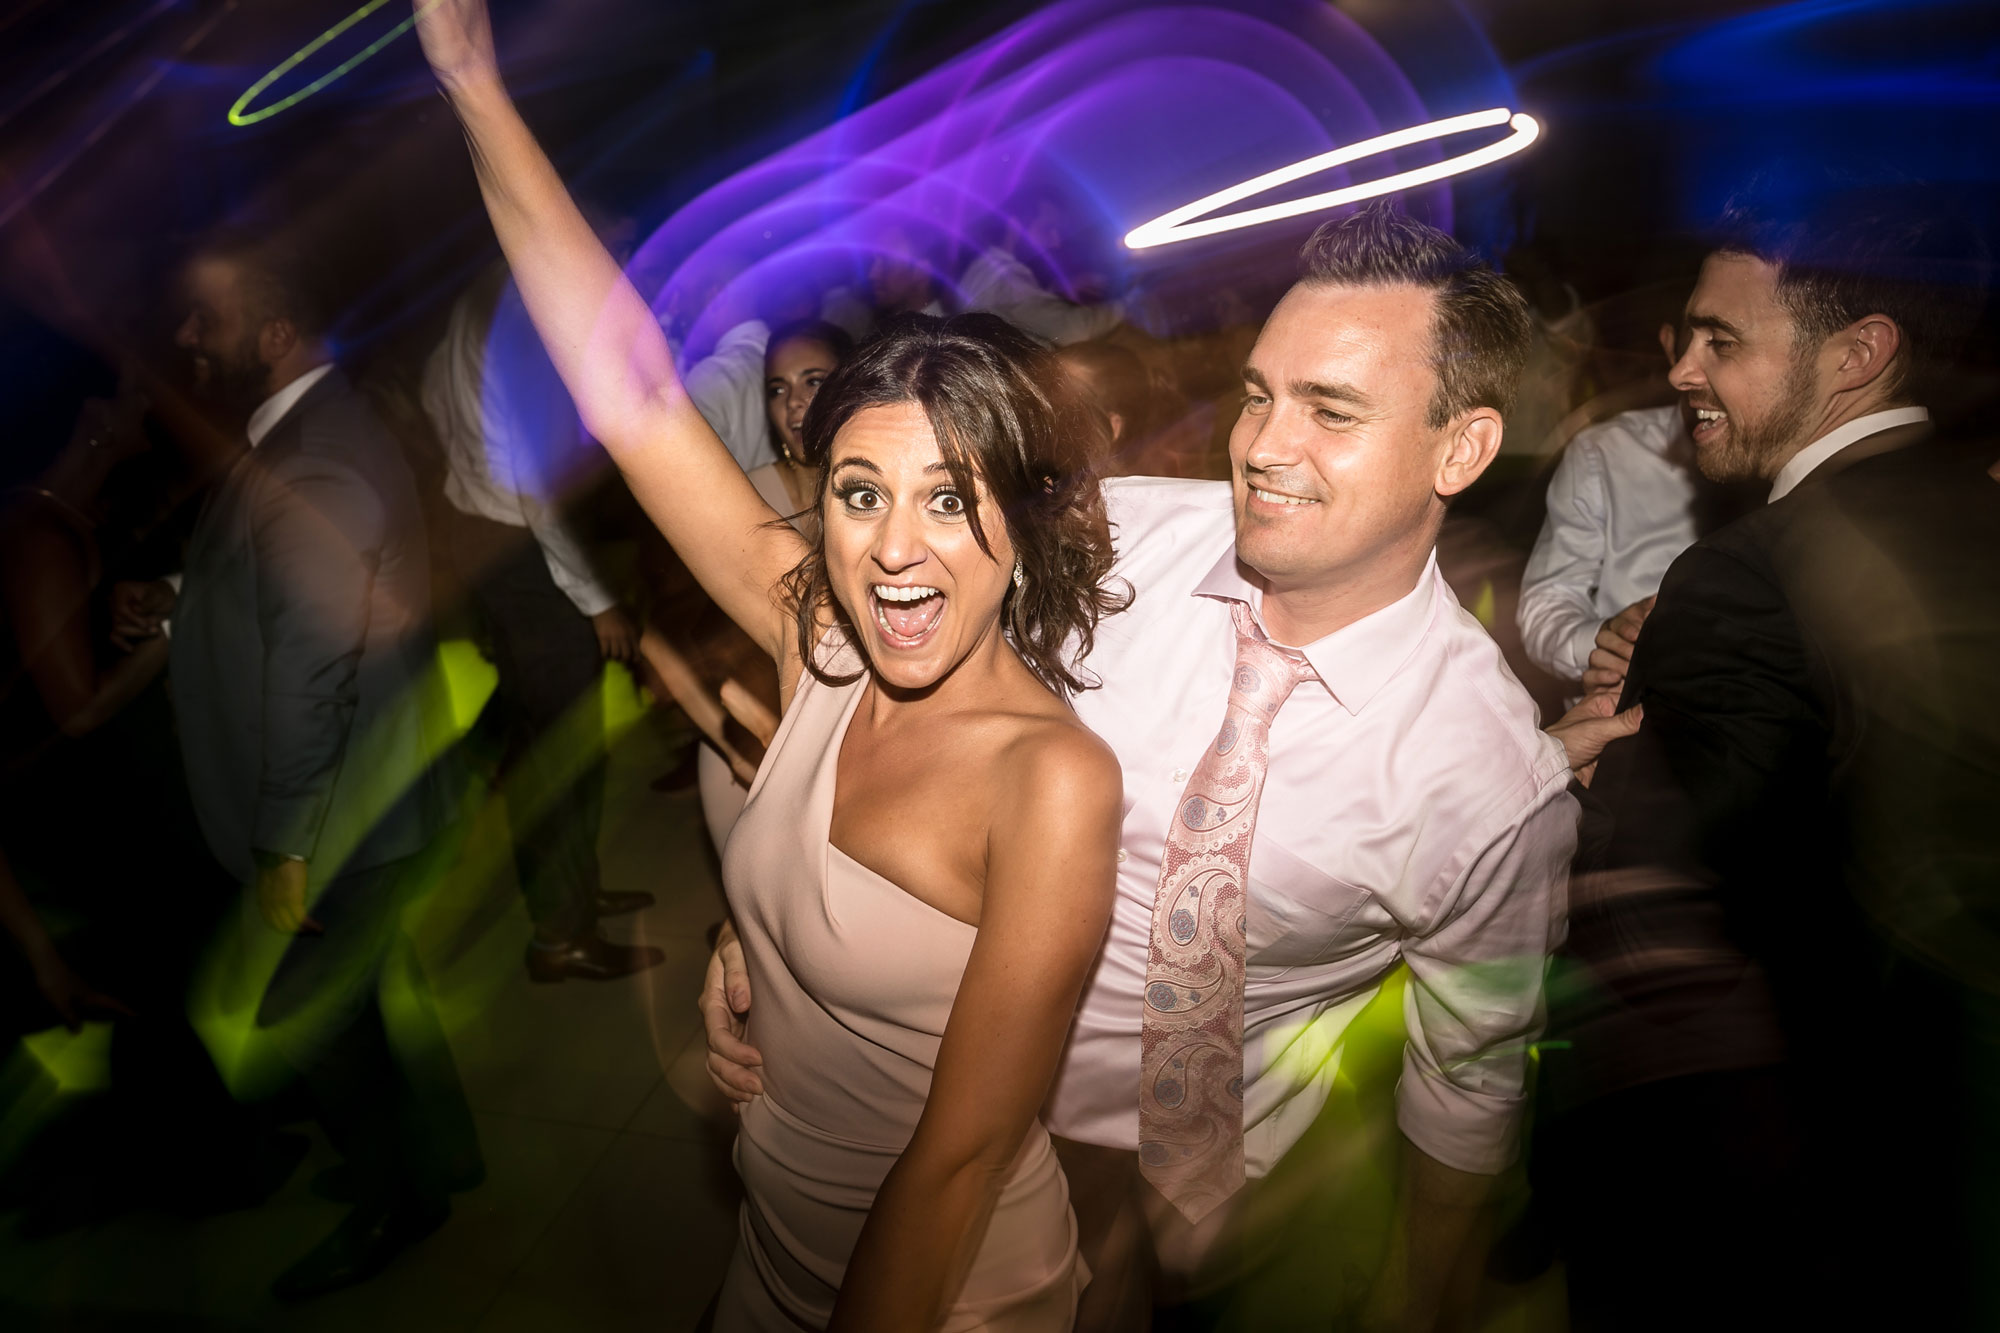
Description:Camera twist is a technique for capturing motion at the edges of the frame while freezing subject motion in the center for effect. It combines long exposure with direct flash.An example of where the camera twist technique can be useful is when photographing wedding guests dancing at a reception. By using direct flash and twisting the camera, interest is added to an otherwise static shot.
Camera Twist
Dance Floor Camera Twist
Motion can add excitement to typically bland dance floor photography. When you are working a lackluster ballroom, why not try and add some interest? Learn how to create in-action dance floor shots that are going to impress your clients!we wanted to touch on another camera technique that will spice up your dance floor pictures (or really any picture) by adding a little twist, literally.
While you can create twist and zoom effects in Photoshop, creating these images straight out of the camera saves you time as well creates a much more natural image. So, without further adieu, here is how you go about creating the camera spin effect.

Note: This article is part of our YouTube video series, Minute Photography, where we explain photography tips & tricks, myths, and techniques all within 60 seconds!
Watch the Dance Floor Camera Twist Video
Step By Step Instructions
Here are some standard settings for direct flash dance floor twists:
- 1/5th, f/4.0, ISO 100 (starting)
- 1/8th flash power, 70mm zoom (starting)
It’s important that the lighting (such as the DJ’s lighting) is positioned behind the subjects on the dance floor. That way, when twisting the camera to create light streaks (which occurs because of the slow shutter speed), the color from the lights illuminates only the background, not the subject. The flash will freeze the subject, making the motion blur effect complete.

Step 1: Dial in your camera settings
You will want to adjust your camera’s exposure settings to capture background colors and lights. The easiest way to do this is to simply meter on the background, and to set your camera’s exposure settings to expose the background to be properly exposed or 1 stop under exposed as we prefer. We typically will under expose the background a bit since we want the lights and background colors to show up in the picture, but not to over power the subjects. This technique requires you to drop your shutter speed quite low, to around 1/15th of a second.
Step 2: Flash Settings

Because the shutter speed is so low, you will need to use a flash in order to freeze your subjects motion. While you can use a built in flash, this technique works best using an on a DLSR using a camera flash such as a Canon 580EX II or Nikon SB900. Yes, point your flash directly at the subject (as much as that pains you), and dial a proper flash power that doesn’t overpower the scene or cause heavy highlights on your subjects face. We recommend starting out at 1/16th – 1/32nd flash power, using your flash either in manual or TTL.
Step 3: Choose your Method of Twist

Point your camera at your subjects, and add movement into the image by shaking, twisting, zooming, or panning your camera. Rather than firing the shot at the beginning of the twist, wait until about half way through your twist to shoot the shot. This will ensure that the twist motion is smooth. In combination with the slow shutter speed, the ambient lights(mostly from the DJ’s up-lighting), will create a blurred effect while momentarily freezing your subject with the flash.
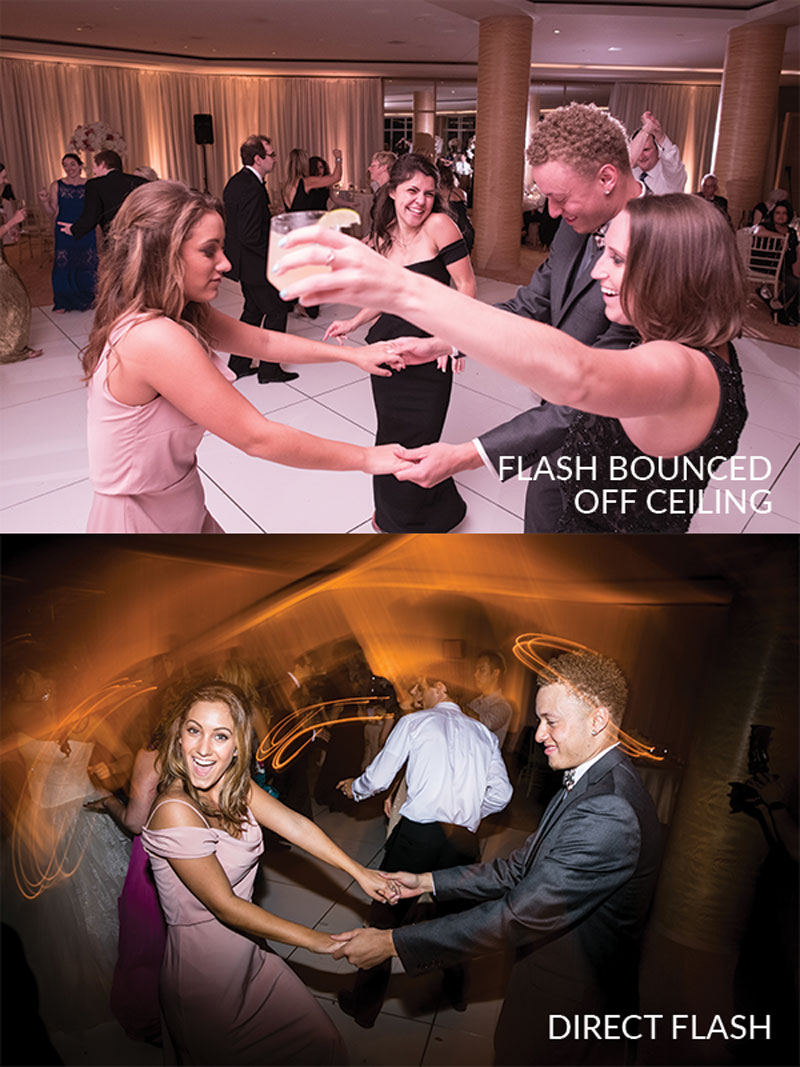
And there we have it; an instant upgrade from the flatly-lit dance floor action shots that were taken with a flash bounced towards the ceiling. Try this trick the next time you are out on the dance floor capturing candid moments and show the guests and your clients the back of your camera so they can see the effect in action!
Dance Floor Motion Blur Case Study
Every wedding photographer ought to know how to create this type of image. Even if it’s not your style, or if you only use the technique sparingly for a small number of photos, it is still an important technique to master!
The Photos

- Canon 5D mk3
- Canon 24-70mm f/2.8 L mk1 @ 34mm
- 1/6 sec @ f/5.6 & ISO 1600, hand-held
- On-camera flash plus 3x Wireless Flashes (see below)

- Canon 5D mk3
- Canon 24-70mm f/2.8 L mk1 @ 24mm
- 1/3 sec @ f/10 & ISO 3200, hand-held
- On-camera flash plus 3x Wireless Flashes (see below)

- Nikon D700
- Tokina 16-28mm f/2.8 ATX-PRO @ 16mm
- 1/30 sec @ f/6.7 & ISO 3200
- Manual Exposure, Manual WB, RAW
- On-Camera flash, Nikon SB700
- 3x wireless flashes , Nikon SB80DX (not always easy to find, but a great value!)
- Radio triggering and flash power controlled via RadioPopper JRX triggers
How We Shot It
The concept is simple – capture the excitement and the action of the party by carefully combining crisp sharpness and crazy motion blur!
The trick is to not over-do it, to avoid completely ruining your images. Too much blur and your image just becomes an abstract that looks more like a mistake than a creative choice…
So, let’s build this image from the ground up…
First, before we start creating motion blur we should talk about wedding receptions and dance floors in general. They’re very dark! Usually we find ourselves with an ISO around 3200, an aperture around f/2.8, and a shutter speed around 1/100 sec. or 1/200 sec. We’ll shoot 90% of our reception and dance floor images around this range, usually with 2-3 wireless flashes and one on-camera flash that is bounced off the ceiling of the venue.
Really, we only want to shoot with motion blur for a couple images very briefly, so we want to avoid messing up all our camera settings. The quickest way to do this is change only three settings: Your shutter speed of course, then your aperture, then your on-camera flash.
Shutter Speeds – 1/3-1/30 sec.
The best shutter speeds for this type of action blur are usually 1/3 sec. to1/30 sec. With a flick of your wrist, you’ll get considerable motion blur even at the faster end around 1/20 sec or 1/30 sec; this is where we recommend starting out.
ISOs – 1600-3200
To compensate for such a slow shutter speed, we recommend leaving your ISO where it is and dialing your aperture instead. Especially for Nikon users, because ISO control is a left-handed thing. Usually, somewhere between f/5.6-f/8 is good, again depending on the ambient light overall.
On-Camera Flash – 1/32-1/128, straight-on
Finally, since you’ve closed your aperture by 3-4 stops and your on-camera flash probably can’t keep up with that, you might want to stop bouncing your flash off the ceiling and just point it straight forward. This will make your light kinda harsh, but it will conserve your flash power. Depending on which flash you have and how far away your subject is, try somewhere between 1/32 power and 1/128 power…
Avoid Ambient Light on Subjects
All of these settings should give you everything you need to create the shot, however we still need to talk about one more important aspect of the ambient light. You need to look for opportunities where your subjects are dark with little or no ambient light shining on them, so that the flash is the only thing shining on them. Otherwise, you’ll just be combining your flash with the ambient light, and your image will be over-exposed and half-blurry, half-sharp. If there is a bright ambient light shining on the dance floor, try and maneuver around to the other side of your subjects so that it isn’t shining directly on them.
This way, you’ll get cool blurry lights around the edges of your image, with a relatively sharp subject towards the center. If you’re still having trouble with your subjects blurring or “ghosting” even when you use flash, try raising your shutter speed to cut down on the ambient light. Or if you don’t want to lose any blur, raise your aperture to f/8 or f/11 and bump up your on-camera flash by a stop or so. Either way your goal is to cut down on the ambient light so that only your flash is shining on the subjects.
Wireless Flashes
What about remote, wireless flashes? In this kind of situation, they really only act as an accent light, a sparkle that is cool to have in the background.
What About Rear-Curtain Sync?
A lot of people have asked about the flash curtain sync- whether the flash pops at the beginning of the exposure, or at the end. The common belief is that using rear-curtain sync is better for these types of situations. Actually, this type of situation can benefit from either option. you should simply experiment and see what you like. Personally I just always leave my flash in rear-curtain sync, for all shooting conditions because it seems to help me reduce the amount of blinking shots I get when photographing groups.
Here’s what the original images will usually look like in a situation such as this- slightly fuzzy, sometimes over-exposed or under-exposed, …but hopefully capturing the excitement of the party:

The Post-Processing
Don’t obsess with perfect color correction for these types of crazy dance floor images; half the fun is having such awesome colors everywhere! Of course in most cases you’ll want to represent skin tones relatively accurately, but don’t be afraid of a little tint, or a little bit of under-exposure or over-exposure. The most important thing is to make the images pop; maybe drop the shadows / blacks down a bit and/or bump up the contrast, then maybe add a little bit of burning & dodging to emphasize the subjects and/or de-emphasize other areas in the image that are too bright or too dark.
And, there you have it!
Again, remember that you don’t want to over-do it. These types of shots are fun and creative and artistic, but you probably don’t want to be shooting an entire wedding reception like this. My personal rule is to shoot no more than 5 mins worth of dance floor action with this technique, and then I switch back to regular types of images with less blur and more even exposures…


Get Connected!