Whether you’re shooting a product, person, pooch or child, there may come a time when you want to change the color of your background. I’ve seen lots of different methods of doing this over the years and most are unnecessarily llex. The method I’ll show you today is quick, easy, and works perfectly. I’ll be demonstrating this on a product photo, but the same technique can be applied to any subject shot on a solid color background.
The more complex your subject, the harder it will be to change the color of the background, and the reason for this is you must create a very accurate mask. Things like hair and clothing can be problematic to cut out. However, there are loads of tutorials floating around with guidance on that.
How To Change Your Background To Any Color And Make It Believable
When changing the color of a background, it almost goes without saying that your mask will need to be very good. If not, you’ll have the outline of your old background around your subject. A dead giveaway that something has been done. You also might want to consider how your lights will be affecting the background. For this image, I’m not too fussed. It’s a product shot, and our eyes are used to seeing this type of thing. However, if it were a person I was placing on this background, it would look weird if the background didn’t vary a little, as though it had picked up some of the light from your strobes.
A similar point can be made when it comes to the brightness of your subject in relation to the background. A bright, evenly lit subject will look odd on a dark background. Thus editing the subject is often necessary.
Having created an accurate mask around your subject, you can change the background to any color – that’s obvious and easy; although mask creation can be very time-consuming. Shadows, on the other hand, are another matter. How do you transfer the shadow from one image to another? I’ve seen people do this using Luminosity masks to select dark areas, painting shadows on, all sorts.
Transfer Shadows From One Background To Another

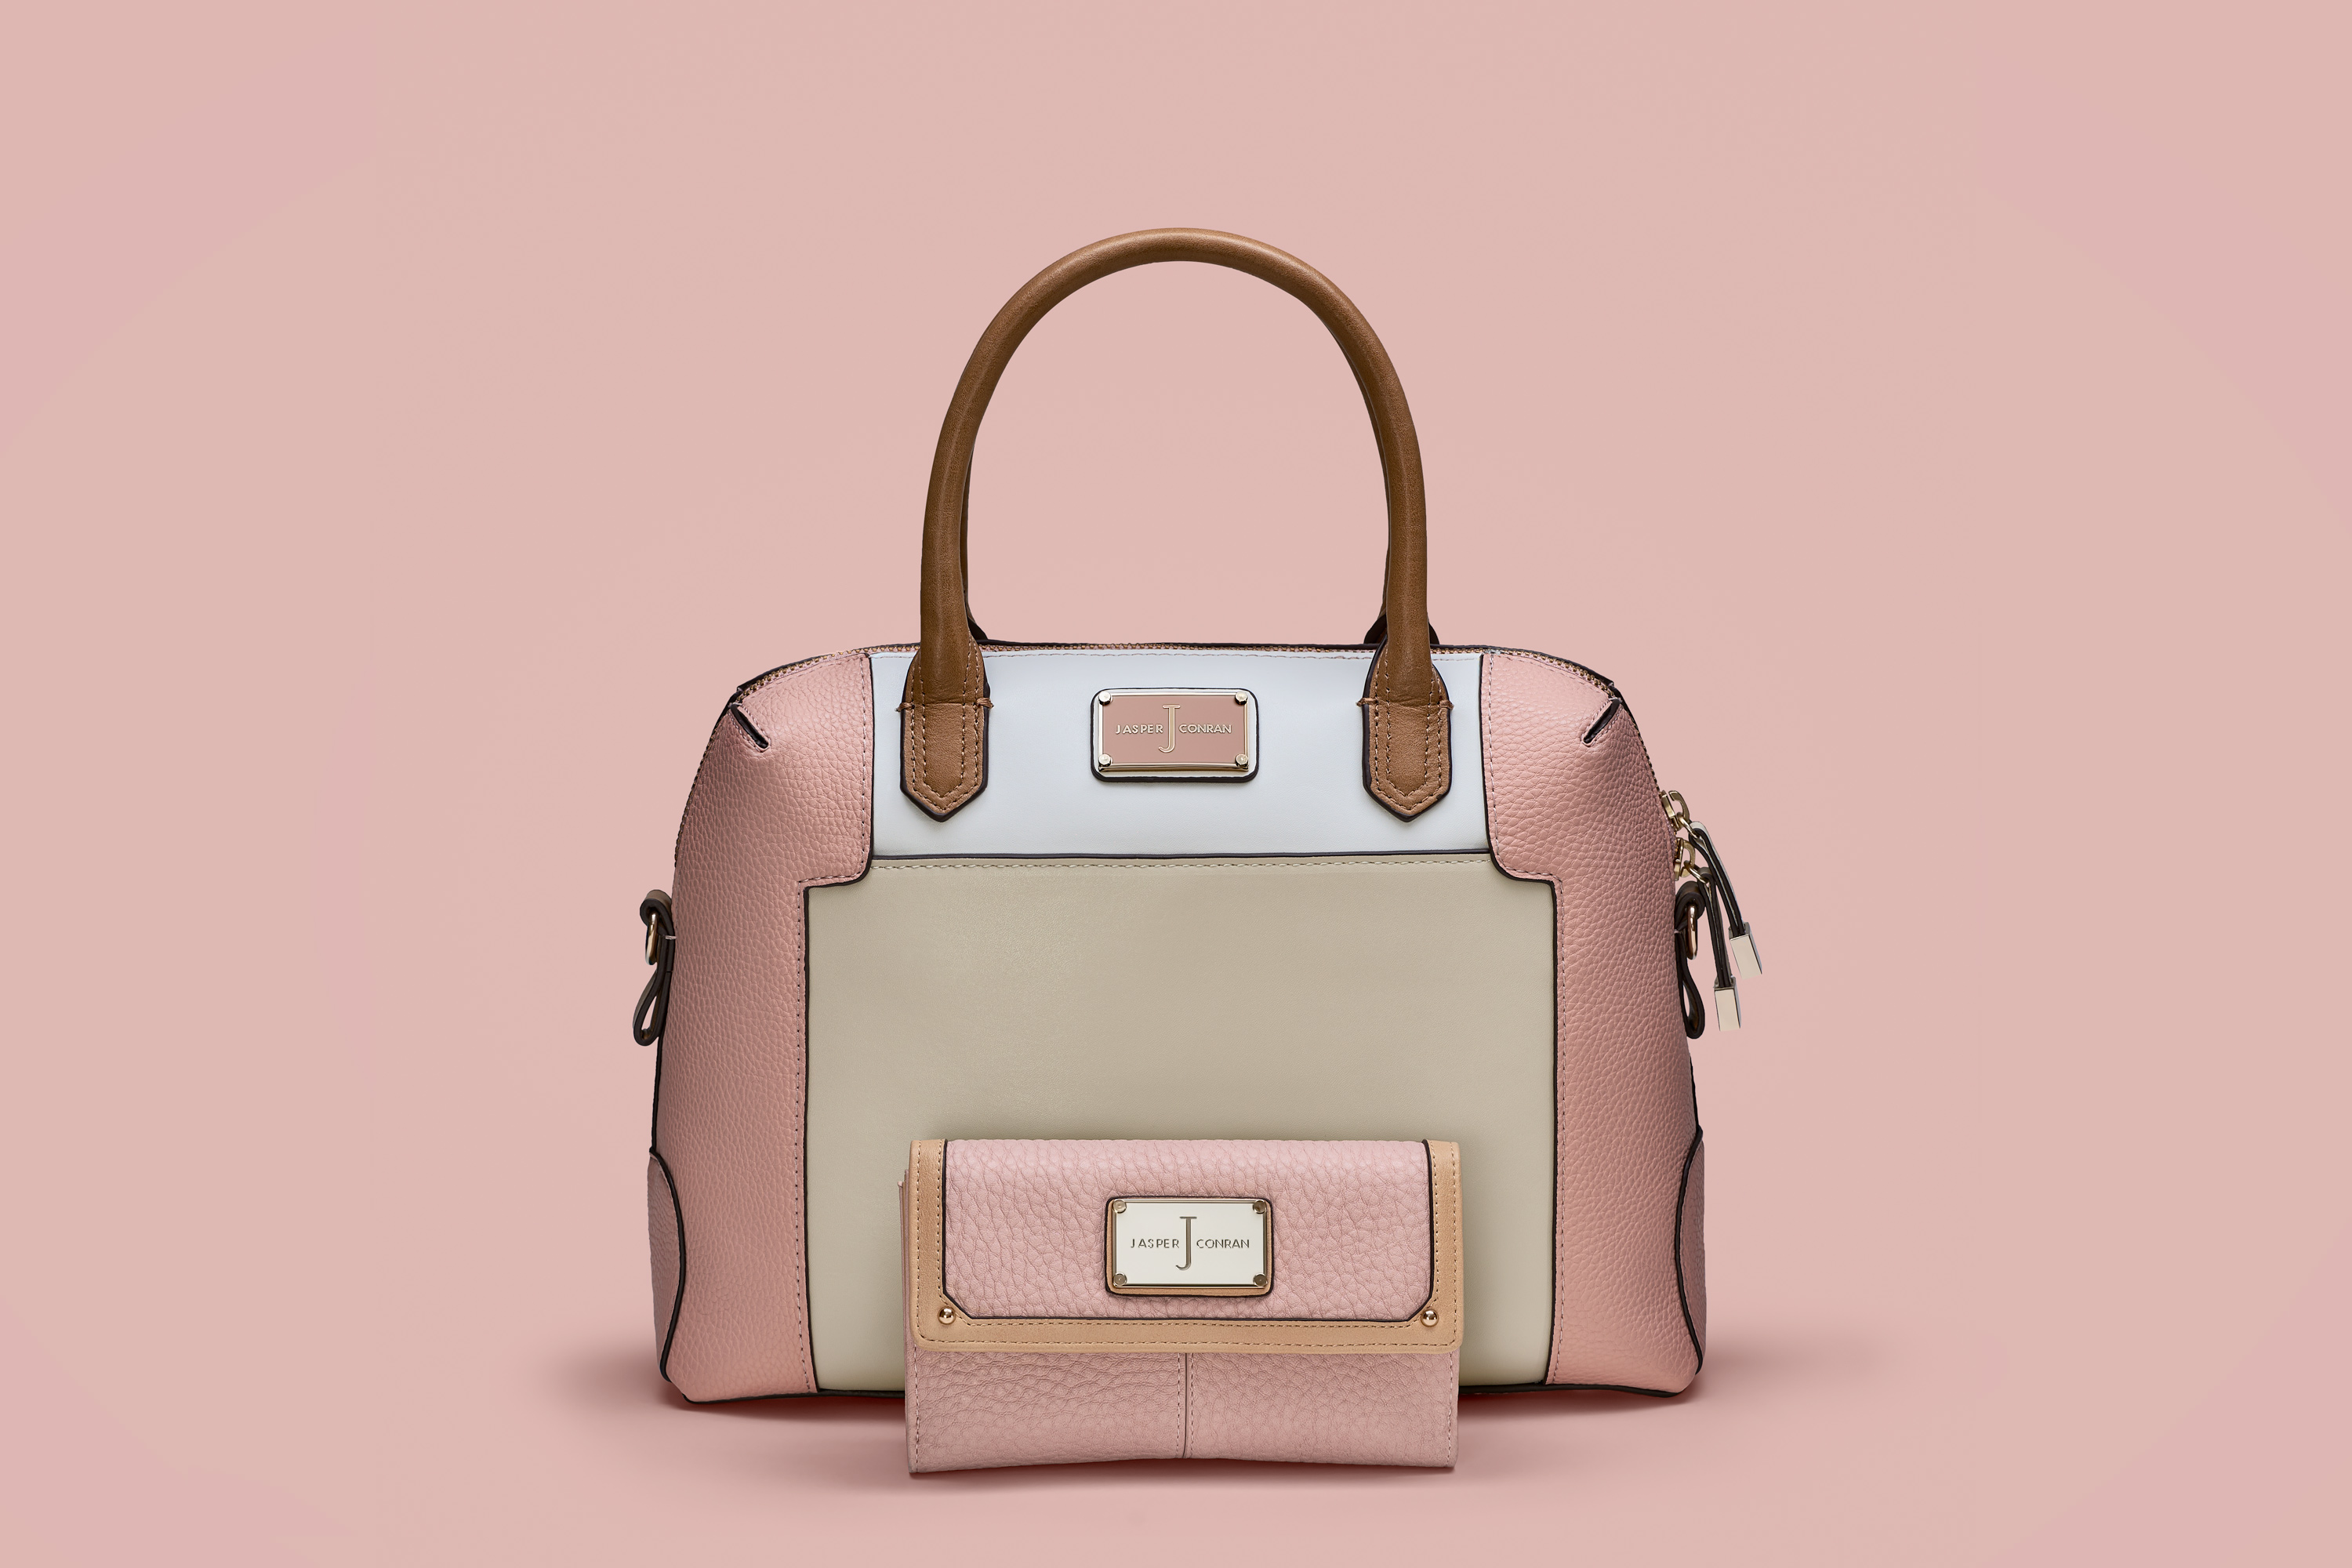
As you can see the SOOC image above is thoroughly uninspiring. My intention was always to cut it out and place it on a more vibrant background which complimented the bag. The first step with anything like this will always be to create your mask. I do not care how you do it; luminosity masks, pen tool, select focus area, select color range. Whatever. However you choose to do it, it MUST be accurate.
Having created your mask, I’d advise switching the background to a drastically different color and scanning around to see if you missed any edges. If you have, go to Select > Refine Mask (or selection) and make some adjustments outputting them to the selection. Finally, paint on your adjustments until the mask is perfect everywhere.
If you’d like more advice on the various methods to use for creating selections have a read of this article which I wrote a little while back. It covers everything I just said and goes into much more detail.
[REWIND: HOW MUCH DO YOU KNOW ABOUT MASKING IN PHOTOSHOP? YOU MAY BE SURPRISED]

In the photo above you can see my image, cut out, with no shadow. Notice how the edge is perfect. What do I mean by that? What’s a perfect edge? There are no halos, all you see is the bag no hint of the old background. The edges are not jagged, suggesting poor masking. And it is obvious the mask does not cut in too far. From memory, I think I used a combination of Focus Area Select, Refine Edge, and the Pen Tool to create this mask.
Mask done, I now had to go through the extremely easy task of adding the shadow. Heading back over to the SOOC image, I made a rough selection around the shadow allowing for plenty of breathing room. With this layer underneath your cut out image, change the blend mode to luminosity. Add a black layer mask and paint the shadow back. You don’t need to be precise with your painting as it will be limited by the luminosity blend mode AND the next step.

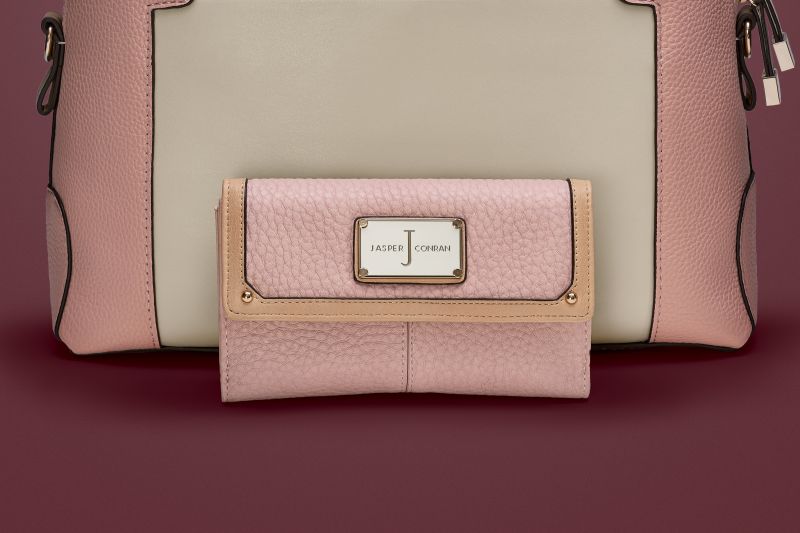
If you’ve shot something on a light (ish) background and then attempt to add the shadow to a darker image, You’ll run into an issue which I have highlighted above.

Because your original background is lighter than the new one, we see it. Hence the lighter edges. If you’re familiar with blend modes, in this instance, Luminosity is acting similar to Darken or Darker Color. The only advantage we gain from using Luminosity over those two is that only the luminance info is taken, not any color data. As such, rather than a grey shadow (my SOOC background was very grey) I just pull out the luminosity of the shadow, not its color. Therefore, it can be applied to any color background.
[REWIND: THE POWER OF USING BLENDING MODES IN PHOTOSHOP | AARON NACE]
To make it blend better with backgrounds of varying luminosities, add a Curves layer and clip it to the Shadow layer we’ve been working on. Depending on the lightness of your background you’ll need to adjust your curve to either darken or lighten the original background. I used the curve you can see above to darken and was left with a perfect shadow.
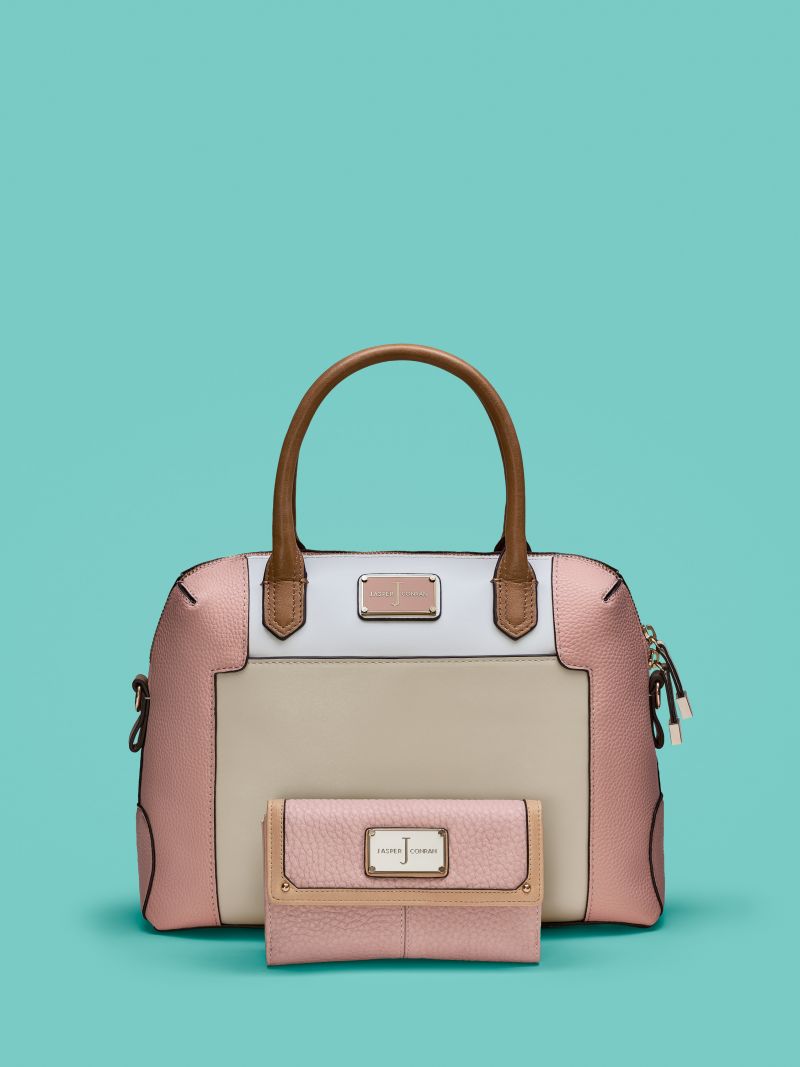
That’s it! Using the same technique I quickly altered the background of this image to show you the possibilities. The first image is my final version of this edit, and the others show the background a few other ways.


Summary
I hope you found this technique useful. It’s one of those simple but effective methods which can really come in handy. Remember, your mask must be accurate and you will need to tweak that curves layer a little to make it perfect. You also need to take into account the color / luminosity of your original background Vs. the new. For example, the darker backgrounds above look still look wrong. Why? Because the darker colours would be adding some negative fill to the bottom of the bags. It’s little details like that which will make your alterations believable.
If you have a technique you prefer or any questions, use the comments below. Itching for some Lightroom and photography education? Check out everything on offer in the SLR Lounge Store, click here. We have tonnes of useful tutorials. Make sure you look over the newly improved SLR Lounge Preset System. I find it immeasurably useful when I need a quick and efficient workflow which produces excellent results. Click here to take a look.


Get Connected!