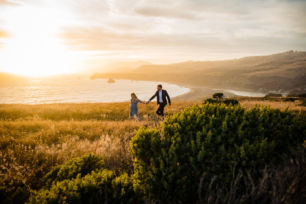
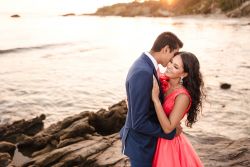
20+ Posing Cues for Couples from Professional Photographers

Photographers often hear their clients say, “We’re awkward, but we want to be natural, fun & romantic.” This common challenge underscores the importance of mastering posing, a skill that blends technical knowledge with creative communication. The art of posing is more than just positioning subjects; it’s about crafting authentic, emotive stories through images.  This guide …

Read more

4 Effective Communication Skills Photographers Need to Succeed

couple poses for photographer

When we think about jumping into photography as a career, we often focus on our hard skills, or the technical aspects of shooting. It’s the part we fall in love with while learning to use our gear and discovering new techniques to capture incredible images. Knowing how to take beautiful photos, however, does not automatically …

Read more

Learn the Art of Visual Storytelling Through Photography

thepowerofstorytelling notext

Storytelling in photography is an invaluable tool that allows us to communicate beyond words and deliver a visual narrative that touches our hearts and minds alike.  An image, or a set of images, that tell a story can have a profound impact on the viewers, connecting with them on a level beyond the aesthetics of the photograph. In this video, I’ll be talking about the art of visual storytelling and how you can turn your photography into beautiful artwork that tells a story.

Video: The Art of Visual Storytelling Through Photography

When I look at the scene like this, I see a perfect opportunity for storytelling. A lot of us might think there’s only one or two shots we can get out of this scene. Instead, what I see is a whole bunch of details waiting to be captured. A landscape like this has so many pieces we can use to craft a story and I’ll show you how. We also apply the art of visual storytelling when we shoot weddings and engagements. Then, later in the video, I’ll walk through my editing process in Adobe Lightroom. At the end, we’ll have a beautiful collage of images worthy of printing or hanging up on a wall.

For this tutorial, I’ll be shooting with my trusty Canon EOS-R5 with the RF 28-70mm f/2. Also, be sure to download the exercise files here and follow along as we edit later on. Let’s dive in.

Wide, Medium, Tight

“Wide, Medium, Tight” is a technique we use to capture all the details in the scene. We start off with a wide shot to establish the scene. Then, we capture the medium shots to capture the story. Lastly, we get the tight shots that showcases the intricate details. We’ll be following this exact process as we photograph this location.

Wide: Establishing the Scene

I’ll take our first image based on the example in the last video about How Your Phone Will Make You a Better Photographer. I tilt the camera down to get most of the landscape in the frame. Then, I closed up to f/5.6 to get that wide depth of field. Timed with the waves, we get our wide establishing shot.

Medium & Tight: Capturing the Details

First, I got a shot of the waves and the mist by the horizon.

art of visual storytelling image compilation

Don’t move on just yet! Look at the details in the rocks, or the way the water crashes against the sand. All we have to do to tell a story is recognize what’s already in front of us. Here are some of the images I got from this location.

Before moving on, I got some photos of the surfers. Since the 70mm wasn’t telephoto enough, I relied on the 45mp sensor of the R5. Then, in post-production, I can crop in and still have more than enough detail left over. Now that we have all of our shots, let’s take it into post and select out our images.

Post-Production

Before we begin, if you haven’t already, go ahead and download the exercise files here to follow along as I edit.

The first thing I want you to notice is that none of the images are particularly interesting on their own. If you have a hard time selecting out good photos from your own shoots, you can fall back on this technique. We’ll be creating a sequence of images that all work together to tell a story. Together, they create a visually interesting piece of art.

Step #1: Edit All the Images

The first step is to make sure all the images are cohesive with Visual Flow‘s new Black & White Mixer Presets. We’ll be using these to edit our photos to bring out the dramatic look. I began with  the Cinematic HDR Landscape preset. Then I lifted the whites to get that pop.

art of visual storytelling vf presets 1

art of visual storytelling vf presets 2

Then, select the rest of the images and apply the same settings across the board. Press Ctrl/Cmd + Shift + S to copy all the settings (Excluding local adjustments, crop, and spot removal). Scroll through the photos to match the appearance of each image. Here are the final settings for each image.

Use Survey View to review the images altogether. Keep an eye out for the white and black points. Make sure they match.

I also added in a Medium Film Grain as an extra touch.

Step #2: Cropping the Photos

I imagined these to be arranged as square wall art pieces. So, I’ll make the crop on each photo. For your own images, crop them to your liking.

Step #3: Arrange the Layout

art of visual storytelling collage

art of visual storytelling collage 2

art of visual storytelling collage 3

Select three at a time. Choose a wide, medium, and tight shot. Here are some trios I picked out.

The goal is to showcase the details from far to close. You can apply this technique to any genre. Here are some samples from some of the weddings we’ve shot.

Conclusion

I hope you enjoyed this video/article. Next time you’re out on a shoot, keep an eye out for all the details around you. Follow the Wide-Medium-Tight principle to capture every bit of your scene. Then, watch the story unfold in post as you combine all the photos together instead of relying on just a single image. For the Black & White Mixer presets, be sure to visit Visual Flow and check out all the other available presets!

Don’t miss our next episode of Mastering Your Craft on Adorama’s YouTube channel next week! If you want to catch up on all the episodes, make sure you check out our playlist!

Sitting Pose Tips, Ideas and Common Mistakes

sitting poses

You can have the best, most perfectly prepared subject with phenomenal hair, makeup and styling and have gorgeous light at your disposal, but bad or mediocre posing will make it all moot. Even an experienced model who knows how to work the camera can use a little coaching to look best from the camera’s perspective …

Read more

Easiest One Light Portrait Setup for Professional Headshots

one light portrait setup

How many lights does it take to create a great, pro quality image? In my early career, my answer was “as many as I can get.” But over time, I learned that some of the most beautiful portraits are captured using simple setups. No need for multiple lights, sets, and gear to get gorgeous results. In this video, I’ll walk through an easy one light portrait setup for photographing professional level headshots.

Video: Easiest One Light Portrait Setup for Professional Headshots

Let’s jump right into it. For this one light portrait setup, you’ll need a flash and a camera with a portrait lens. Here’s my setup for today’s photoshoot:

  1. Canon EOS R5
  2. Canon RF 70-200mm f/2.8L Lens
  3. Profoto A1 On/Off Camera Flash
  4. Profoto Umbrella
  5. Manfrotto Nanostand
  6. MagMod MagShoe

Keep in mind that this one light portrait setup setup can work with practically any light and camera setup, so remember to not let cost be a barrier.

The guest of honor today is my friend Kiara and you can check out her Instagram here.

Step #1: Composition & Ambient Light

I like my headshots with a simple background, so I placed Kiara in front of this dark wall. This way, the focus of the image is directly on your subject.

At 1/200, f/5.6, ISO 200, the image is nearly blacked out.

Now let’s dial in the ambient light settings. To achieve this one light portrait setup, I need to nix all the natural light from the window and rely on only the flash. At 1/200 sec, f/5.6, and ISO 200, we’ve practically cut out all natural light.

Step #2: Add & Modify Light

one light portrait setup one light

This one light portrait setup is incredibly simple. I attached an umbrella to my Profoto A1 and set the light beam to wide in order to fill the entire umbrella. This will provide the softest light possible. I raised the light as high as it can go and keeping it center, aimed it down at Kiara. This center lighting is called “Paramount / Butterfly Lighting”

Related Reading: 5 Common Key Light Patterns Every Portrait Photographer Should Know

one light portrait setup test shot

Here is our first test shot. An important part of portrait photography is the catchlight in the eyes. A catchlight is the highlight reflection in the eyes that gives them that “sparkle.” To get a stronger catchlight, simply lower the light a touch.

One tip to get the maximum softness from a modifier is to measure the width of the modifier and place the subject that same distance away. For example, the umbrella is roughly 3 feet wide. Therefore, I placed Kiara approximately the same distance away.

one light portrait setup fill light

You can also add fill light from below by placing a reflector just underneath your subject.

Step #3: Pose & Photograph

one light portrait setup finals

Now it’s time to photograph away! Here are some of our final shots using this one light portrait setup. Edited using VF Presets.

Conclusion

If you’re thinking that buying more lighting will automatically take your work to another level, I challenge you to take a step back and explore all of the ways you rock your next photo shoot with just one light and modifier! No more complex and expensive setups. The gear that you have and a fun subject are all you’ll need to capture incredible portraits.

For those serious and want to take the next step, check out the Flash Photography Training System at SLR Lounge Premium. There, we introduce more advanced lighting setups and styles for complex portraits, weddings, editorials, and more. Also, be sure to check out VF Presets for intuitive lighting based presets and retouching tools like we used here.

Don’t miss our next episode of Mastering Your Craft on Adorama’s YouTube channel next week! If you want to catch up on all the episodes, make sure you check out our playlist!

5 Creative Accessories to Conceal Distracting Backgrounds

We’ve all been there: you have great clients but a less-than-superb background. How do you deliver the high-quality, creative imagery that your clients have come to expect? Creative accessories are perfect when you need a spark of creativity or need to block distracting elements in your scene. These simple tools can transform an ordinary shot …

Read more

How to Fix a Photo With Bad Lighting in Post Using Adobe Lightroom

fix a photo with bad lighting

Photography is all about capturing the perfect moment, but sometimes the lighting just doesn’t cooperate. When this happens, it can be frustrating to have a photo that doesn’t showcase your subject as you intended. Fortunately, with the right tools and techniques, you can fix bad lighting in a photo and bring it to life. In this article, we’ll explore how to fix bad lighting in a photo using Lightroom, one of the most powerful and popular photo editing tools available. Whether you’re a professional photographer or just starting out, these tips and tricks will help you transform your photos from dull and lifeless to vibrant and captivating.

Video: How to fix bad lighting in a photo

Bad lighting on a photo? Don’t toss it out just yet. You might still be able to bring it back alive. In this video, I’ll be walking through 9 easy steps to fix a photo with bad lighting in Adobe Lightroom Classic.

Let me preface this by saying that you should always, always, strive to get the shot right in-camera. This means taking the time to get the right settings and properly lighting your subjects. However, there are many reasons to learn editing techniques to save imperfect images. As photographers, we face countless different scenarios and it’s nearly impossible to get the perfect shot 100% of the time. Understanding what’s possible in post-production can help you still achieve a professional result nonetheless.

Before we dive in, be sure to download the exercise file here and follow along as I edit.

Getting the Image Right In-Camera

fix a photo with bad lighting taking the photo

You can see how this image was shot in a previous video where I talk about why the Canon RF 28-70 f/2 is my favorite lens. Even if the conditions aren’t the best, you want to try and get the best shot that’s possible by:

  1. Shoot in RAW format to capture as much information as possible.
  2. Expose properly to preserve as much detail in the shadows and highlights as possible.
  3. Work with the natural lighting.

Step #1: Raise the Exposure

The first step to fix bad lighting in a photo. is to roughly set the exposure to the subject. For imperfectly lit images such as this, it’s okay to let the background blow out. The priority is to make sure the subject is well exposed.

Step #2: Set the White Balance

Use the eyedropper to set the white balance. I selected Kiara’s shirt. Notice the green color cast from the surrounding leaves and grass still persists. We’ll fix that shortly.

Step #3: Base Tone Adjustments

The third step to fix bad lighting in a photo is to settle on your overall base tones.  I used the basic tones to make subtle adjustments that brought out more detail in the highlights and shadows.

Step #4: Set the Tone Curve

fix a photo with bad lighting curves

The next step to fix bad lighting in a photo is to adjust the tone curve.  I started off with a basic S-curve to add contrast. Then, I created a matte look by pulling the white point down and black point up.

Step #5: Color Calibration

fix a photo with bad lighting color calibration

Step 5 to fix bad lighting in a photo is color calibration.  The color calibration panel is a great tool to make corrections for unwanted color casts. I focused on restoring the skin tones.

Then, I went back to fine tune the white balance to match the updated colors.

Step #6: HSL Adjustments

fix a photo with bad lighting hsl

This is where we can continue to separate the skin tones and remove the green tint we started out with. Start with the hues and focus on the color. Then move onto saturation and luminosity.

Step #7: Split-Tones

The seventh step to fix bad lighting in a photo is to use split toning.  I used the eyedropper tool to select a the shadow hue from a color already in the image. I did the same for the mid-tones and highlights to bring out the skin tones even more.

Step #8: Tweak Your Adjustments

Go ahead and make your final tone adjustments here. I tweaked the basic adjustments to add a touch more contrast.  However, fixing the bad lighting will be different depending on the lighting issue.

Step #9: Local Adjustments

Lastly, I added a subtle radial filter from the Visual Flow Retouching Toolkit. This adds a subtle vignette around your subject.

The Final Image

fix a photo with bad lighting final

Let’s see the final image compared to where we first began. The difference is huge!

How to Create a Home Portrait Studio

Photography home studio cheap

Creating a home portrait studio doesn’t require an elaborate setup or a massive budget. Whether you’re converting a spare room, clearing space in your garage, or finding a nook in your living room, there are affordable ways to transform any area into a versatile photography studio. In this guide, we’ll explore tips for building a budget-friendly home studio, from selecting simple lighting setups to creative backgrounds, and we’ll cover how to make the most of smaller spaces. With some creativity and a few affordable tools, you can capture stunning portraits right from your home. In this article, we’ll explore simple lighting setups:

Video 1 – How to Create a Home Portrait Studio for Under $20

Step 1. Find a Door

find a door photography home studio cheap

People often come up with excuses about things they don’t have that they need to get the shot, but it should be pretty easy to “knock” out this first step. Simply put: find a door. Any door in your home portrait studio should work, especially if it leads outside. We’re going to open the door and use the incoming light to create a nice, flat light pattern on our subjects.

Step 2. Get a Background

get a background photography home studio cheap

Inside of every 5-in-1 reflector,  you’ll find a scrim. Grab that scrim and take it out. If you don’t already have a $20 reflector, now’s the time to buy one. It’s a useful tool and you should have one. If you’d rather not spend any money, then you can always use a bed sheet (white, black, etc.).

Either way, you’ll need to hang your scrim (or sheet or whatever) near the doorway. For this exercise, I used a chair to hold up the scrim. You can use an A-Clamp (or something similar) from Home Depot to adjust the height and hold it in place. Viola! You have a background.

Step 3. Face Your Subject Toward the Open Door

face the light clamp the backdrop cheap home studio
The subject is positioned to face the light (see the clamp used to hold the scrim to the back of the chair)

Facing your subject toward the open door will allow a nice, flat light to fall on your subject.

Step 4. Dial In Your Exposure Settings

Once your subject is in place, dial in your exposure settings. For this shot, I’m using the Canon EOS-R with a 50mm f/1.2 RF lens. However, any 50mm prime lens on pretty much any camera should yield similar results. If you don’t have a dedicated camera, we’ll go over how to do this with your phone as well.

Assuming you do have a camera and a prime lens, I would recommend shooting this with a wide-open aperture, ideally somewhere between f/1.2 to f/2.8.

Step 5. Shoot on Your Phone if Necessary

Most phones should work, and if your phone camera features portrait mode, even better – turn it on. All that’s left, really, is to zoom in and snap away.

Screen Shot 2020 10 28 at 5.34.48 AM

If you look at the images above, it’s probably hard to tell which one was shot with a phone and which was shot using a dedicated camera. Most people will not recognize the difference between the images. In other words, use whatever camera you have to get the shot.

Step 5. Edit the Photo

Before After home studio cheap 01

Video 2 – Create a Home Photography Studio With Window Lighting

In this video, we’re here to show you how to create a $20 photography studio that you can use anywhere, and the best part is, you won’t need to go out an purchase new camera gear. In fact, you can even use your smartphone camera to produce quality portraits with an affordable, portable setup.

Step 1: Turn Off the Ambient Light in the Room

Create photography studio take anywhere 20 dollars too much ambient

We began by placing our subject in front of the window with the curtains open and the room lights were on (see the diagram and image above). The lighting from inside and outside the room combined to create mixed lighting, which we want to avoid. To correct this, simply turn off the lights in the room.

Step 2: Close Down the Curtains

After we turn of the room lights, we need to minimize the light coming in through the window(s). To be clear, we still want to place our subject in front of the window and use window light, but we don’t want too much light pouring in. By adjusting the curtains, we can create a strip box of sorts, leaving only as much light as we need to get the shot.

Step 3: Use Sheer Curtains (If Possible)

If you have sheer curtains, now’s the time to use them to further soften the light coming through the window. If you don’t have them, you can always use a white bed sheet to create a similar effect.

Create photography studio you can use anywhere 20 dollars lower exposure richer tones
Before and after reducing ambient exposure.

By closing down the curtains, using sheer curtains when possible, and lowering your ambient exposure, you’ll allow less (and softer) light to fill the room. As a result, the walls in the background will get darker, regardless of what color they are. The darker backdrop will then render a rich tone that we wouldn’t get with a brighter exposure or highlights (see the image above).

Step 4: Choose Your Background

create studio you can use anywhere choose your backdrop

I found an affordable, hand-painted backdrop online from @backdropsbyethanalex and placed it directly behind my subject. Really, you can use anything as your backdrop: a black cloth, a piece of fabric, or even a studio backdrop.

Step 5: Add a Fill Light

create studio you can use anywhere add a bounce light

I noticed that half of my subject’s face was getting lost in the shadows, so I brought in a reflector (a white poster board) to bounce light back onto my subject and fill in the shadows a bit. You might not have a C-stand at home to hold up your backdrops and reflectors, so grab a chair or employ a family member or friend to hold up the backdrop or reflector while you capture your shot.

Where you place the reflector will control the type of light you have. If you want to use the reflector to create more of an edge light, place it slightly behind your subject and angle it towards him/her. If you want to fill in more of the shadows on the face, position the reflector towards the front of the subject and angle it slightly back towards him/her.

create studio you can use anywhere before edit

If you compare the starting image to our properly lit portrait, you can already see much improvement. However, we can take it even further with our edit.

Step 6: Edit The Photo

create studio you can use anywhere radial burn technique
Adjustments for the “Selective” Radial Filter
create photography studio you can use anywhere Journey to final image
Walk-up shot (left), final image un-edited (center), final image edited (right)

Video 3 – Turn Your Garage Into a Professional Home Portrait Studio

Learn how to capture great portraits without the hassle of lighting equipment. In this video, I’ll be walking through how to turn your garage into a professional home portrait studio!

In a previous video, I demonstrated how to capture dramatic portraits in a garage by controlling the existing light. This time around, we’ll be capturing traditional style portraits by opening up the garage and creating a large soft light source for our home portrait studio. On top of that, you can create this look with any camera. I’ll be using a Canon EOS R5 with an RF 70-200mm f/2.8L as well as my iPhone.

Before we dive into the steps, head over to Instagram and give Kiara, our model today, a follow!

Step #1: Find the Right Time of Day

Our home portrait studio needs a large and soft light source. To do this, we’ll have to avoid harsh sunlight. Pay attention to where the sun is at what time of day. Schedule the shoot for when the sun isn’t directly shining into the garage or when the sky is overcast.

Step #2: Place Your Background

Place any background of your choosing about 10-15 feet deep into the garage. For this tutorial, I’m using handmade backdrops by Ethan Alex.

In just a little bit, I’ll show you how to change background exposure using subject placement.

Step #3: Choose Your Subject’s Outfit

Since we’re working with an earth-tone background for our home portrait studio, I had Kiara dress in a dark outfit with similar hues.

Step #4: Place Your Subject

This is where your subject’s distance from the light source will make a big difference. When Kiara is further from the light source, the light will fall more evenly on her and the background. However, when we bring Kiara closer to the garage opening, she’ll be more brightly lit. Then, once adjusting the exposure, the background darkens significantly.

The further the subject is from the light, the more even the light.
Placing the subject closer to the light allows us to darken the background.

By simply moving our subject closer and further from the light source, we can adjust how bright or dark the background is.

Step #5: Modify the Light

home portrait studio v flats

A bonus tip for adding drama to the scene in your home portrait studio is to add negative fill on both sides of your subject. I’m using V-Flats from V-Flat World to block out any light on either side of Kiara.

home portrait studio final looks
Edited with VF Presets > Modern

Conclusion

I hope you enjoyed this article/video. Great natural light is everywhere and with just a few basic tools, you can quickly be on your way to taking great photos your home portrait studio! For full courses on photography topics such as Lighting with Flash and Lightroom editing, check out SLR Lounge’s Premium Library. For powerful and intuitive presets for any lighting condition, visit VF Presets.