It’s Coachella, again, so our Instagram feeds, Tumblr rolls, and Facebook pages are just flourishing with vintage hipster cool. Or uncool. I forget which. So it seems only fitting to share something many of a Coachella persuasion will love. But to be fair, so will many others, who will likely use it with prudent discretion. I’m talking about film burns.
No doubt many of you are familiar with VCSO filters and presets, those on apps like Snapseed and Instagram, and many of which can really deliver some surprisingly artistically pleasing effects. The only problem is, they do seem to be a bit cookie cutter. You can add a similar look to your photos, and have them be entirely original, and each unique. I’ll show you a very simple and effective way to add an edge burn to your photos using Photoshop’s Quick Mask.
Without further ado.
How To:
Open Photoshop and open an image of your choice. In my experience this work on any photo, but it tends to favor photos that have an area already with a brighter, to blown out side. I’ll show you a few examples.
Press (Q) to enter the Quick Mask mode and you’ll see a shift in screen on the bottom left. Select the Brush tool and engage a round brush, and typically larger works best, though for small areas, a smaller size is fine.

Next, exit Quick Mask but hitting ‘Q’ again, and then invert your mask by pressing Command, Shift, and ‘I’ together. Your selection will now have an ant-line.

Add a ‘Curves’ layer and highlight, and adjust, all four settings; RGB, RED, BLUE, GREEN separately. Sometimes, just using red will be enough. Typically you want the red, orange, yellow hues to be more apparent, which would suggest lowering the output of the Blue and Green, but sometimes a nice effect can be had by leaving them level, or even mildly bumping them up. This is really it. You can fully adjust the layer which is nice, and if you wanted to you could add another Curves layer, or Hue Saturation layer, or even a Levels layer to fine tune it even more.


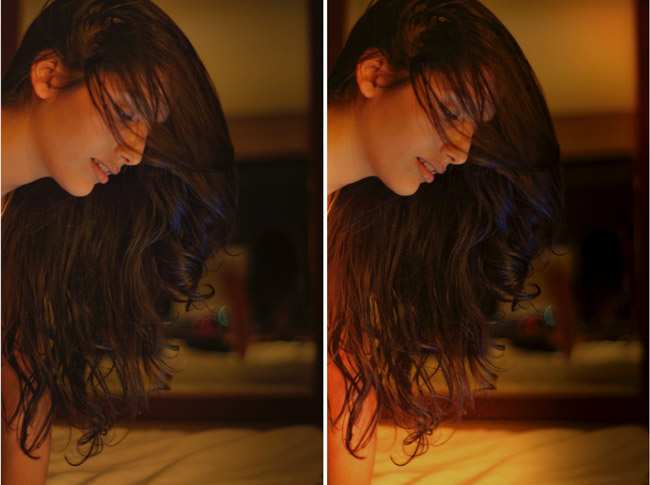
Here is the finished example, and another I did which took no time at all.
[REWIND: Getting The Commercial Editorial Smooth Hair Look Is Easier Than You Think]


Thoughts
I’ll fully admit I don’t favor doing this often, but when timed right and done to the right degree, it’s hard to argue with the result. As I always do in Photoshop, I usher caution and to use this tool moderately. Too much and it will look very off. People will know it’s added, usually, but they won’t mind if it’s done well. If you really want to up the ante, add some film grain to it, and hipster it up.
PS – Ill timed hipster joke: q) How do you drown a hipster?
a) In the main stream


