Get ready for a sneak peek into the SLR Lounge Premium educational library. We’re going to share iPhone camera app tricks and tips for better photos taken directly from Creative Photography 101, a course we designed to teach you how to shoot and edit pro-quality images using only a smartphone. By the end of this article, you’ll learn everything you need to know about using the standard iPhone photo app in regular photo mode.
Video: iPhone Camera App Tricks and Tips for Better Photos
How to Use the Standard iPhone Camera App
We’re going to focus on the standard photo mode. If you’re using an older version of the iPhone and some of these functions are not available to you, don’t worry. Most of the concepts covered here will still apply to you. The same is true if you’re using a different phone altogether, such as a Google Pixel or a Samsung Galaxy. All you have to do is look up a specific function online to see how to access that particular mode.
You may notice in the images that I’m using a stylus, but it’s only because it makes it a little bit easier for you to see what I’m doing from the top down. Know that you do not need a stylus for these iPhone camera app tricks and tips. Simply use your finger to do everything you need to do on the post-production side.
Okay. Let’s jump in.
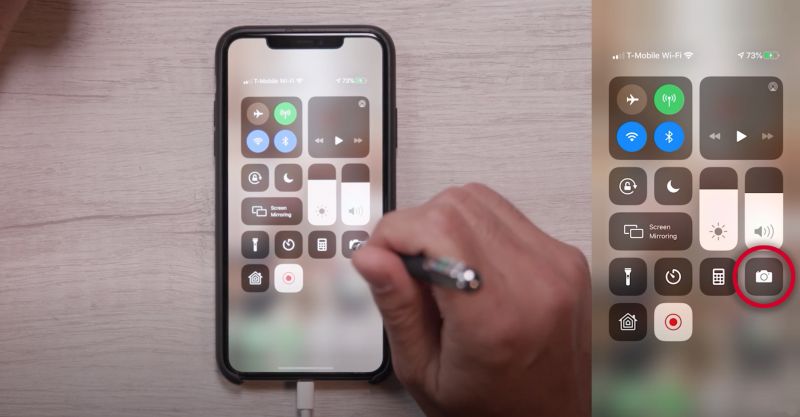
To start, tap on the iPhone camera app to access the standard camera mode. My favorite way of getting there is to swipe left from the top right of the screen. This simple action bipasses the security code and quickly opens the camera app. (I should note that I’m using the iPhone 11 Pro, so newer and older versions might differ.) When the app opens, press the camera button and it’ll take you to the camera. At the bottom, you’ll notice several different modes available to you.
Before we move on to anything else, I would highly recommend sticking with the standard camera app on your iPhone, and here’s the reason: Apple’s computational photography is incredibly good, from portrait mode to bringing back dynamic range. The quality that you’re getting out of Apple’s standard camera app is much better than most other apps.
For those who are slightly more advanced, arguing that you can shoot raw with the other apps, understand that shooting raw is not necessarily a good thing when it comes to an iPhone. In most cases, you’ll get better quality out of the computational photography available to you in the standard camera app. I rarely open up a separate camera app unless it has a specific function that I actually need.
[Related Reading: iPhone Photography Fundamentals & Tips]
Zoom Functionality

The first thing that I want to show you is the zoom functionality.
Just over the shutter button and “Photo” mode option, you’ll notice three numbers: 0.5, 1, and 2. Each number correlates with one of the three lenses available on the iPhone 11 Pro. These different optical lenses give me a wide, medium, and tight lens option.
0.5 is your widest lens, 1 matches up with the medium lens, and two syncs to the tightest lens. It’s important to choose a lens based on what works best for your composition. You don’t want to have to crop the image in post. Instead, if you choose a lens based on what you want to achieve compositionally, you’ll get maximum resolution. When you crop in post, you cut down the resolution and overall quality of your image.
AE/AF Lock

Now, let’s go to AE/AF Lock. To use this function, press and hold anywhere on the screen. As soon as you see that box flash, you’ll see the AE/AF Lock option appear at the top. From here, you can press anywhere, hold, and swipe up or down to adjust the brightness.
Normally, depending on where I point the camera, it will automatically adjust the overall exposure to make sure that everything is properly exposed. The camera will also automatically focus on whatever I’m pointing at. So, if I want to lock the focus or lock the exposure so that it’s not constantly changing, this is how to do it. Once I press the AE/AF Lock, I can press on the sundial and pull it up and down to adjust the exposure and it’ll stay put.
This is a big deal and we’re going to use this feature often. In almost any scene, we’re going to lock exposure and focus so that we can recompose however we like and take the shot. We’re also going to use it creatively to control the exposure.
Burst Mode

Burst mode allows us to capture multiple high resolution images, one after another, at somewhere around 10 frames per second. To start, set your exposure. Next, go into burst mode by holding down the shutter and dragging to the left. At this point, you should see the counter climbing. This means your camera is capturing in burst mode and the number represents how many images you’ve captured.
After capturing burst mode images, you can go back and tap on the photos you want to keep. When you press “Done,” you’ll be asked if you want to keep everything or just your favorites. This is a great function when it comes to sports/action photos.
Live Photo

Let’s talk Live Photo. Although the functionality may seem similar to Burst Mode, it’s not the same thing. You can find the Live Photo option on the top, right hand side (see the image above). If you see a little slash through it, then it’s disabled. Tap on the icon to turn it on and it’ll say “Live.”

After capturing a Live Photo, you can swipe up on the image and reveal a hidden menu of effects, including loop, bounce (which is like a boomerang effect), or long exposure. Long exposure captures multiple images and allows you to create shutter drags, which you can use to smooth out waves in the ocean and so on.
The only real issue with the Live Photo feature is that there’s only one high resolution shot in the bunch, and what comes before and after consists of lower resolution video. While you can select a single frame, it will not print nearly as well as a Burst Mode image. If you’re looking to capture a printable photograph, you should use Burst Mode. If you just want to capture cool action, then Live Photo will give you a higher frame rate.
Flipping the Cameras

Now let’s talk about flipping the cameras. If you want to use one of the front-facing lenses, press the swap button at the bottom right (see the image above). Tapping this button will switch cameras from the front to the back camera and vice versa. Remember to always clean the lens whenever you switch. All it takes is a little bit of oil to smudge the lens and create an unwanted haze. If you’re worried about using your shirt to clean the lens, then by all means, get a lens cloth.
Flash
You can find the Flash icon in the top left corner. Simply tap the icon to activate the flash. If the scene you’re trying to photograph is dark, the flash should automatically fire. It’s just a standard phone flash. I prefer using natural or existing light, or else setting up my own lights. Anything is probably going to be better than that flash, unless you’re in a situation where you just have to use it.
Night Mode

If you encounter a dark scene with Night Mode enabled, you’ll get a suggested time for the shutter speed. When you press the shutter button, Night Mode will keep the shutter open for the suggested period of time. Apple’s computational photography will then do its magic and align the image and minimize the shaky footage you undoubtedly captured if you weren’t using a tripod for such a long exposure. It’s the best way to get a nice and sharp image.
[Related Reading: 20 Tips and Tricks for iPhone Photography]
Function Menu

You might notice a little menu at the bottom. This is your function menu for all the functions we’ve covered, which you can access by tapping on the arrow in the top center of the phone (see the image above). If you close the menu, the phone will bring up your camera modes.
Crop Mode & Timer

Within the function menu, you’ll find a crop option. If we tap it, we can actually change the crop in-camera and change the aspect ratio that we’re shooting. I recommend sticking with 4×3 versus square or 16×9.
You have access to a timer in case you ever want to do selfies with the camera placed on a stand. Just use the timer option to set a 3-second or a 10-second timer. Once you click the button, you’ll have the time you selected to get ready for the shot.
You can also edit photos with the iPhone camera app, but I recommend using Lightroom Mobile. It’s a free app and it’s far more powerful than the standard editor. It’s also very easy to use and I use it throughout the entire Creative Photography 101 workshop.
Camera Settings
Lastly, let’s go to our settings to save our preferences. Open up your settings, and instead of scrolling through to find your camera app, pull down from the top and press on the search option. Then, just type in “camera.” This will bring up additional options, such as “Preserve Settings” to keep the camera in the last mode and creative control set that you used. This will come in handy if you don’t want the camera to keep resetting each time you exit the app.

Grid: Older iphones are not going to have the Grid function, but it is what makes it possible to see the grid on your phone when using the camera app. Having the grid enabled will really help when composing your shots. I recommend keeping it on.
Scan QR Codes: They’re useful. Keep it on.
Record Video: I like to do 4k at 60p just so I have the highest frame rate and resolution. For slo-mo, I keep it at 1080p and 240, but if you want additional video options here, you have them.
Record Stereo Sound: Yes, you do want stereo sound for the camera. I choose the “high efficiency” option in terms of the file type. This is an HEIC file type. Keep it as an HEIC file as you can always export to jpeg later.
Photos Capture Outside the Frame: This is a cool feature and function, but you have to be careful with it. When you’re using certain lenses, you no longer have all the computational power of the iPhone available to you. For example, if I’m using the wide angle lens, I can no longer use night mode. Once I flip to a standard lens or a telephoto lens, night mode capability returns. Similarly, if you’re using a wide angle lens, then you’re not getting Deep Fusion, which is Apple’s computational photography.
This feature uses the wide-angle lens to capture the shot and it shows the areas of the image that are outside of your composition. It’s the phone’s attempt to try to help you dial in a better composition. Unfortunately, you lose additional quality on the computational side because you’re using the wide angle lens. I recommend composing your shots the way that you want them and not leaning on the phone for help.
Videos Capture Outside the Frame: Same as above. I keep this off as well. You don’t want your camera to decide your composition. I capture a variety of shots that use negative space and so on, and the built-in AI isn’t really designed to understand.
Smart HDR: Keep this on. This will help you better capture a high dynamic range scene and automatically bring in more detail, recover highlights, etc. This is one of those functions, alongside Portrait Mode, Smart HDR, and Deep Fusion, that you don’t get in other apps. You might get the ability to capture light trails or control your shutter speed, but unless you absolutely need it, stick to the standard app.
Conclusion
I hope you all enjoyed these iPhone camera app tricks and tips for better photos. If you did, I’d love for you to check out Creative Photography 101. This is the first course that we designed and priced specifically for consumers. It’ll show you where to begin in photography and how to shoot pro images with nothing but the camera that you already have: your phone.


Get Connected!