In early November, Adobe announced some updates and new features that would be coming to Lightroom on the most recent software update and there was one in particular that stood out. We now have the ability to Multi-Batch Export in Lightroom – you can now perform multiple export jobs for the same set of images all at once! This is going to save a huge amount of time which is why we wanted to create a video tutorial showing you exactly how to do so in Lightroom:
Why is This Update Important?
The Lightroom Export process is familiar to many long-time users of the program. This is best described as slowly and patiently waiting for all your images to export and bog down your entire computer only to have to repeat this process for different image sizes. Now, with the new November 2019 Adobe update, we received Multi-Batch Export where you can now perform multiple export jobs for the same set of images all at once to save you time in Lightroom. We will
Multi-Batch Export for Lightroom
Before you dive in, ensure you’ve updated to Lightroom Classic 9.0 to see these new features. In addition to showing you how to export with multi-batch settings, we will give you the best export settings to use for print and web-sized versions of your images.
1. Select Images and Open up Export Settings
In this video, I am editing a portrait session from a recent shoot using the Visual Flow presets with developed in partnership with DVLOP. Once I have applied the same edit to all my images in the scene, I select them all and hit Ctrl/Cmd + Shift + E to open up the Export Dialogue Box.
2. Create Desired Export Presets & Select Which Ones Apply

In order to multi-batch export you’ll need at least 2 different types of Export Presets. The two most common you’ll find are Full Size/Print and Web Sized. With most of our photos being used predominantly on websites and social media, the Full-Size Export is mainly for client and print purposes. Since many of your may not have a Export Preset already dialed in, we thought we would break down these two best export settings for Lightroom here:
Print/Full Size
- Image Format: JPEG
- Quality: 100
- Color Space: sRGB
- Resolution: 300 ppi
- Sharpen for: Screen, Amount: Standard
- Include all Metadata
- No Watermarks
Web/Social Media
- Image Format: JPEG
- Quality: 80
- Color Space: sRGB
- Resize to fit: Long Edge, 2,000 pixels
- Resolution: 72 ppi
- Sharpen for: Screen, Amount: Standard
- Include all Metadata
- Watermark (not mandatory)
Adjust these two Export Presets how you see fit and then save them out so that they appear in the left-hand column of your Export Dialogue box. Now, whenever you export a batch of images, you can toggle on and off each Export Preset that you need without having to do multiple exports.
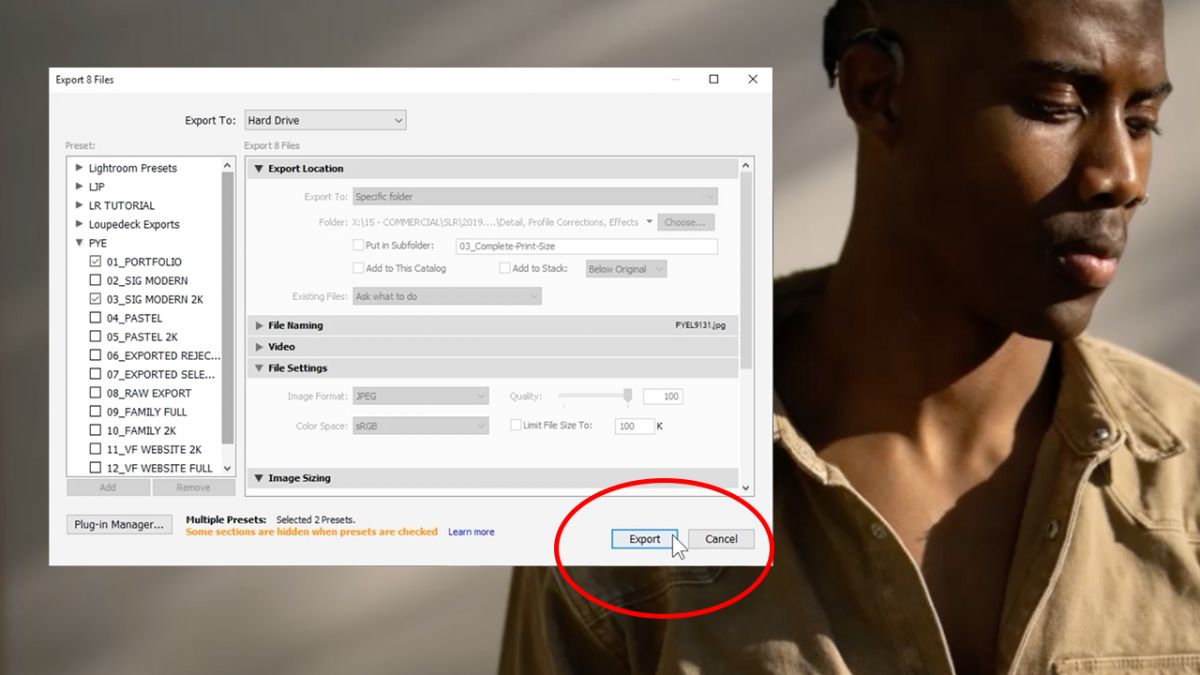
3. Export Images and Select End Destination Folder
Once you’ve created your necessary Export Presets go ahead and select the boxes that apply on the left-hand column and hit Export. Lightroom will ask you which folder you want each batch export to end up in so make sure you separate them accordingly as to not confuse yourself.
Big thanks to Adobe for this release, and along with it we also got the Fill Edges option when we do panoramic merge, exporting of develop presets, and more. Here is a summary of the full update. We hope your exporting life is become significantly better due to this update and our tutorial!
If you like our education, we’ve everything you need to know to become a portrait and wedding photographer in SLR Lounge Premium. In addition, if you are a Lightroom user, be sure to check out our new presets that we’ve just launched with Visual Flow that offer a new approach to processing, Lighting Condition Based Development. Both SLR Lounge Premium and our new Visual Flow presets that we made in partnership with DVLOP are currently on sale for Black Friday so grab them while they are at their lowest rate!


Get Connected!