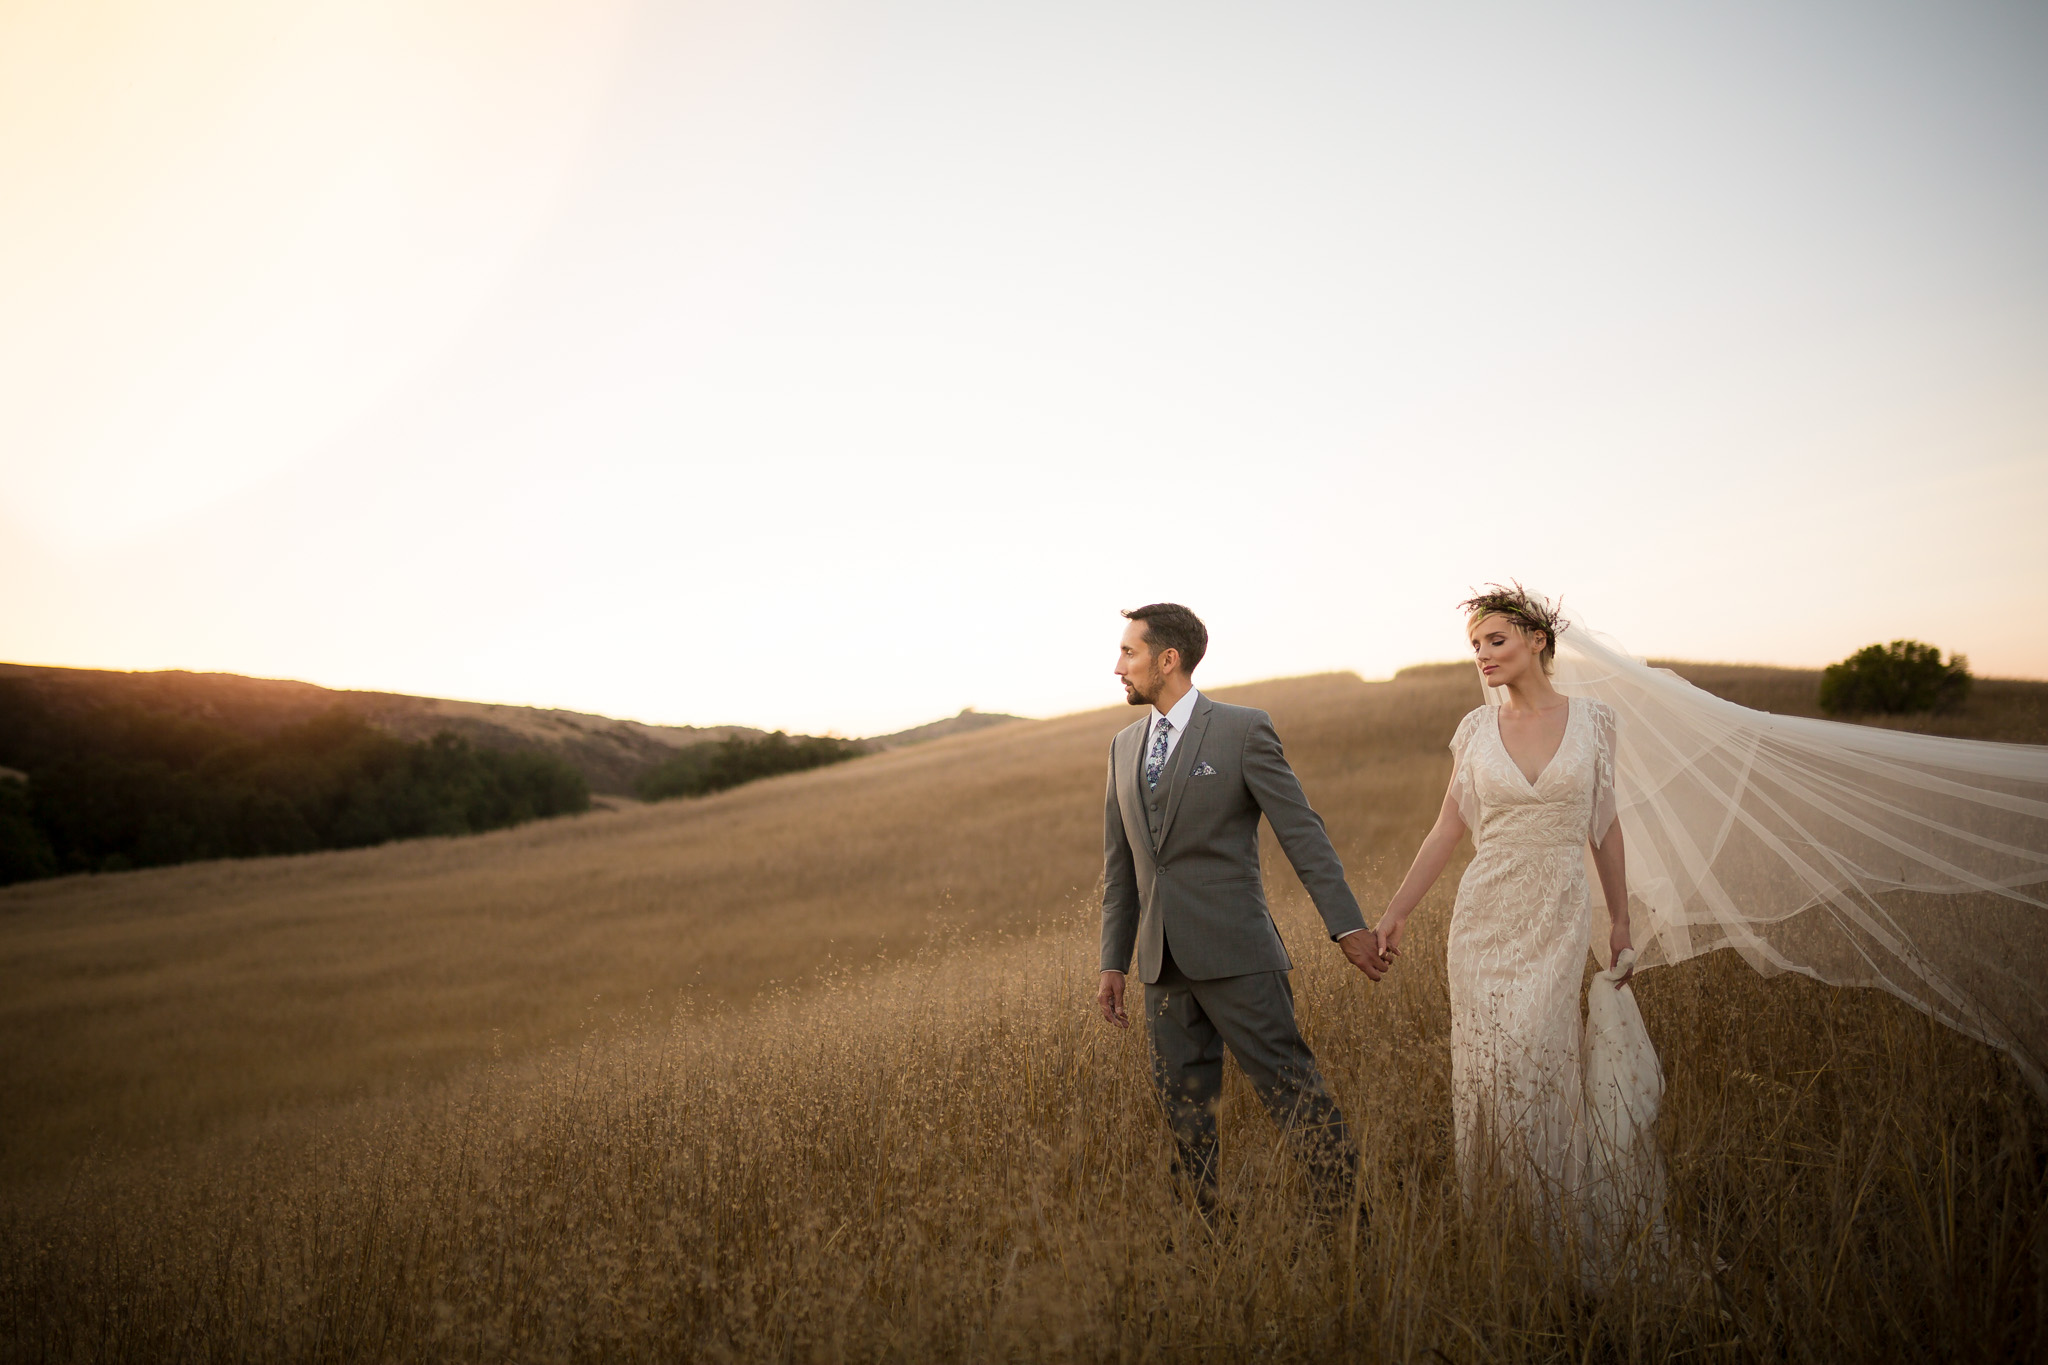
Golden hour gets all the glory, but after the sun has set there is still about a 20-minute window that can yield some great shots. When the sky is still colorful but the golden hue has faded, a gentler, more subdued light exists and though it may be dim, it can be used to create some lovely natural light portraits.
In this light, however, a photographer must be mindful of their equipment’s capabilities and plan ahead, keeping post-processing in mind as they shoot. We’ll go over some shooting tips and tell you how to get these outcomes using the SLR Lounge Preset System in Lightroom.
GEAR COUNTS

The age-old debate of whether or not the gear you use really matters has a definitive answer in this instance. To pull off a natural light, low-light shoot, you need a body which contains a sensor that allows for a fair amount of latitude in post-processing and fast glass. Some older or smaller-sensor cameras can have issues with noise at higher ISOs, and photos taken with some cameras will deteriorate quickly as you manipulate them to recover shadows in post. Fast glass will help, but the set-ups with the best results will combine both of these factors.
Be familiar with your own camera’s strengths and weaknesses in low light so you can shoot accordingly. For instance, if you know you can’t push the files much in post, you’ll want to bump up the ISO a little, but know at what point high ISO becomes unusable. Or, if your camera has no issue recovering shadows, you can use a lower exposure to save more of the highlights in the scene.
DARK IS OK


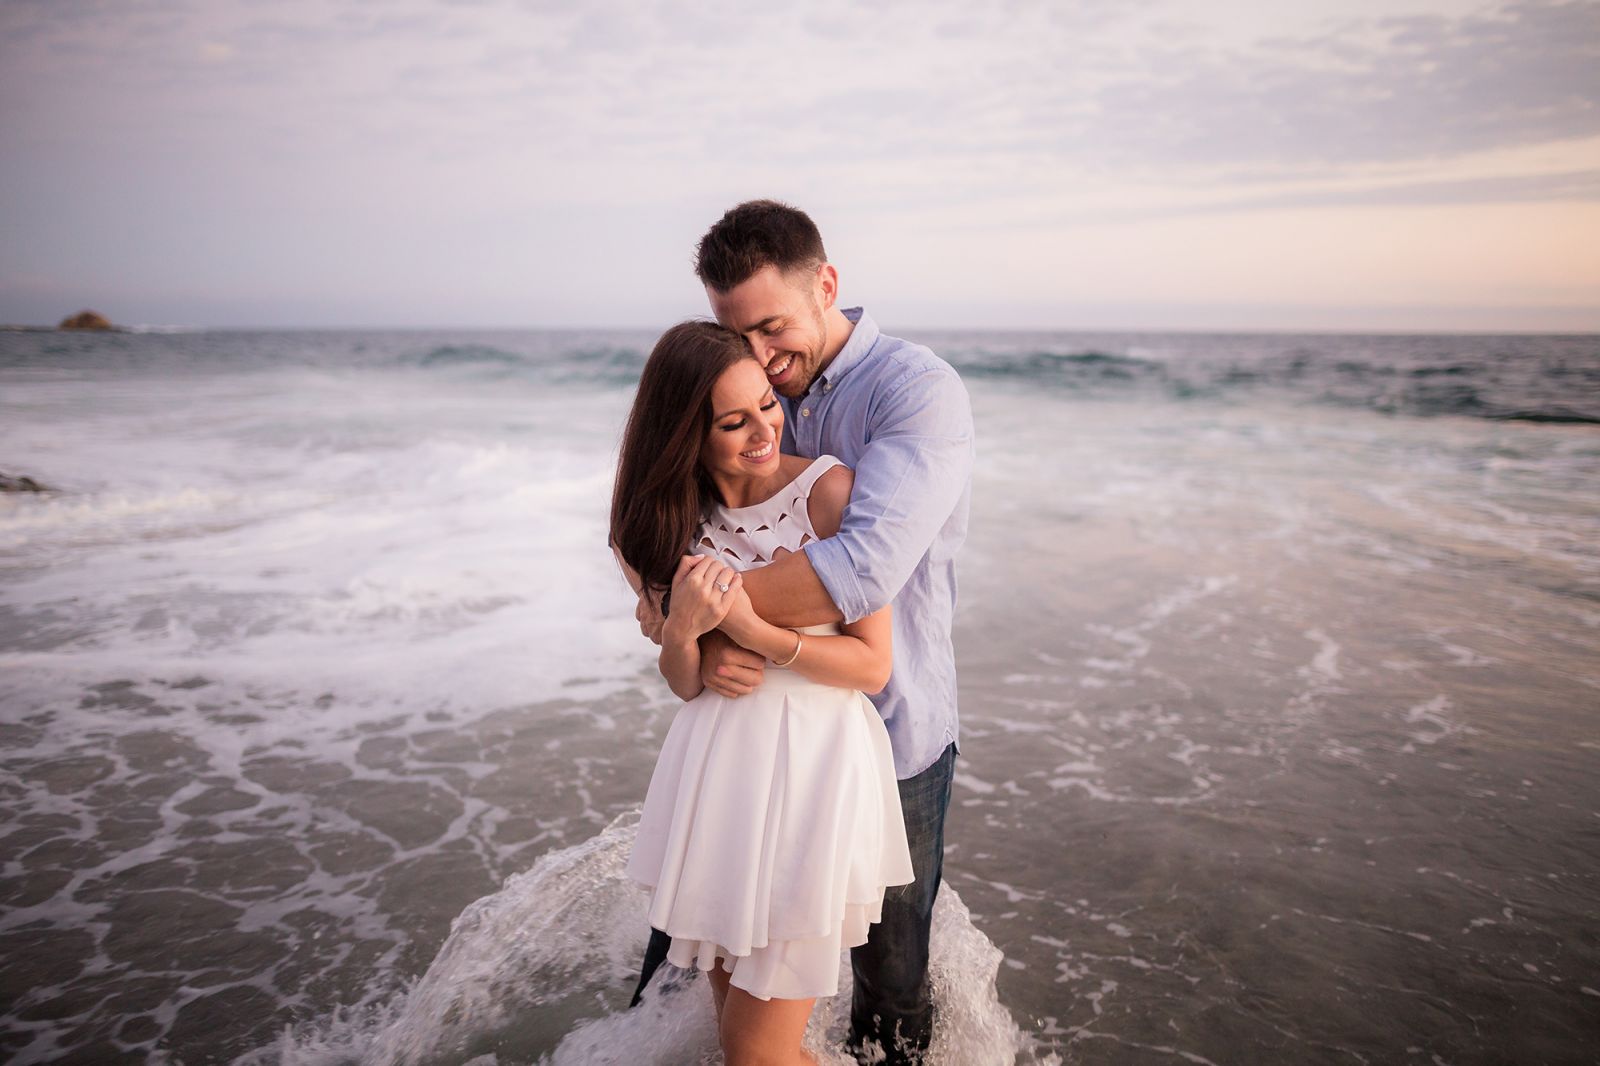
At this point it’s getting dark, and if we aren’t using lighting then that’s just what we have to work with. It’s not really necessary to crank the ISO inhumanely (the highest ISO used in these examples was 800,) but be mindful that we are limited to a degree to shutter speeds that won’t introduce camera shake. The images may look too dark straight out of the camera, but can be processed to a correct exposure.
MIND YOUR LIGHT

Though the light on the subjects isn’t bright, it’s important (as always) to pay attention to its source in relation to the subjects. Whether back, front, or side-lit, you’ve got to notice where the light is coming from and where it’s meeting the subject. It will be a soft and subdued light, sort of nature’s feather edge, and its fleeting nature makes it all the more special.
[REWIND:] PHOTOGRAPHY TIPS | FROM SHOOT TO POST: NATURAL LIGHT PORTRAITS WITH EARLY BACKLIGHTING
THE POST-PROCESSING
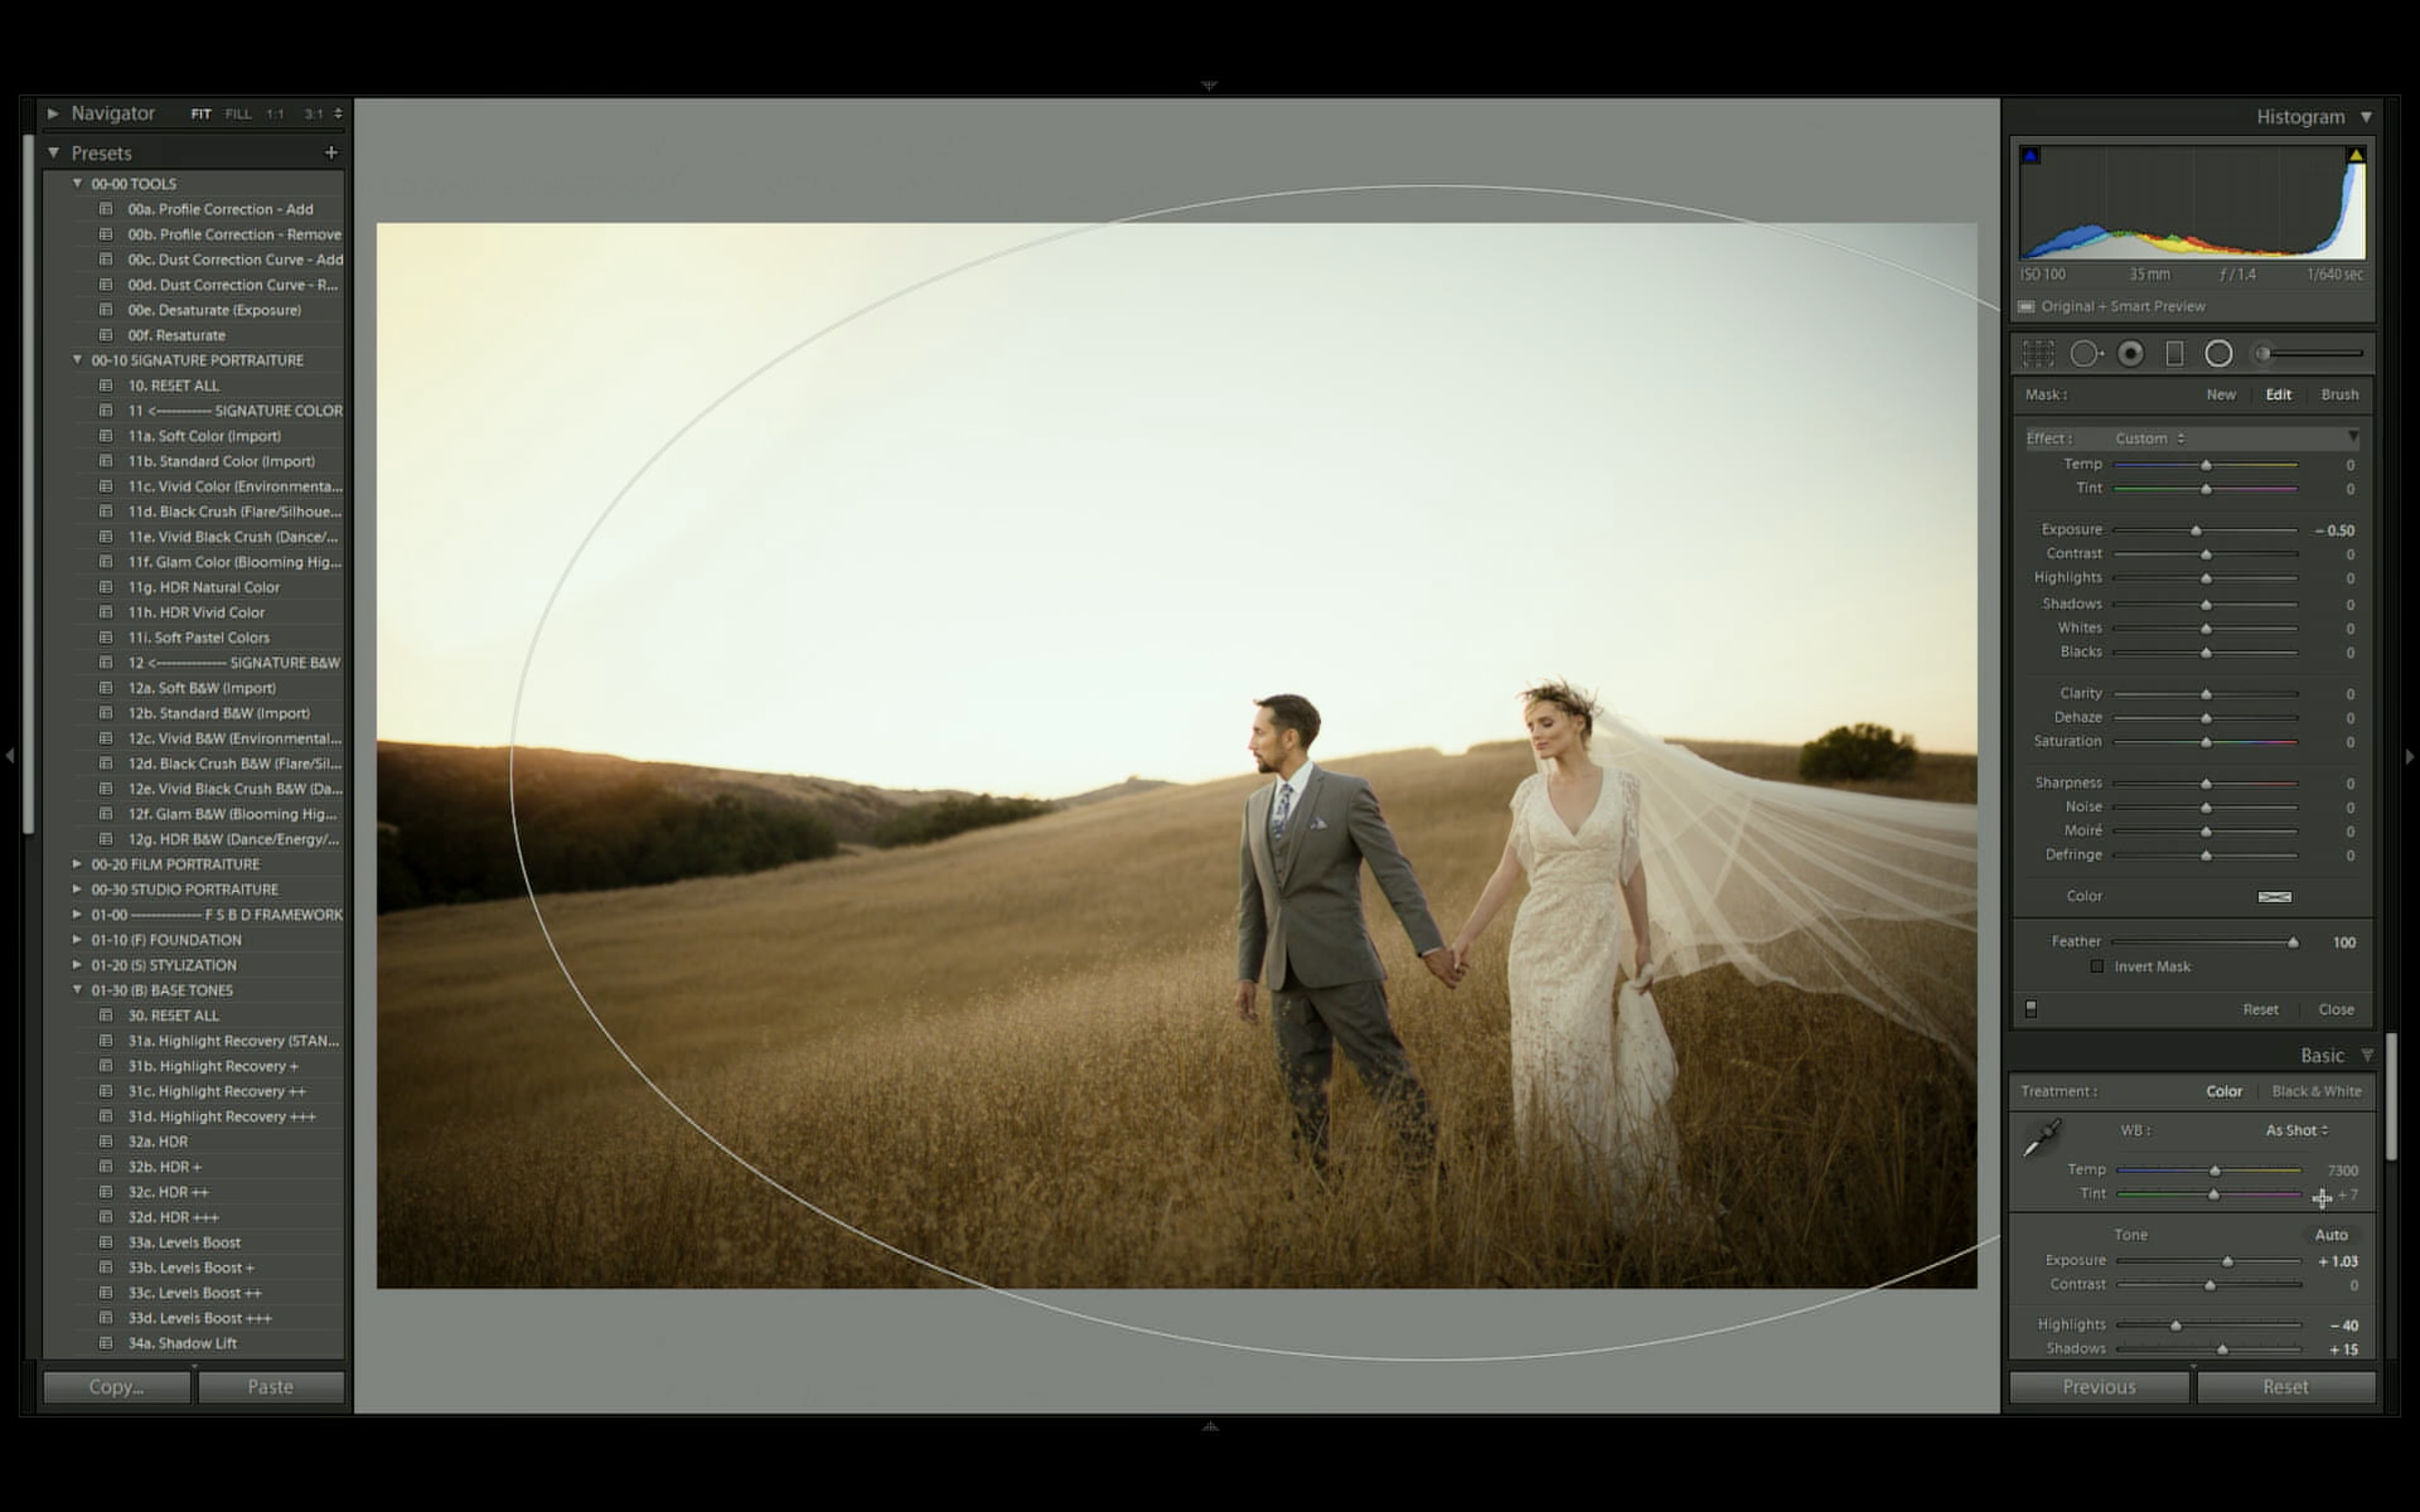
For all of these shots, we’ve used basically the same recipe using SLR Lounge Lightroom presets. It’s fast and easy, and though you can achieve similar results without the presets, they definitely simplify and speed up the workflow. This is how it’s done with the system, but you can absolutely do it without, and click here for more Lightroom Tutorials that don’t require the system.
- Apply the ‘Soft Color’ preset from the Signature Portrait collection.
- Boost exposure as needed, sometimes a stop or more for shots like these.
- Add a vignette using the SLR Lounge ‘Burn (Exposure)’ preset as a radial filter.
- Tweak white balance if needed
Simple! For more shoot-to-post content, check out our Premium workshop, From Shoot To Post. In it, we’ll walk you through a wide variety of shooting scenarios and tell you exactly how we’d approach the scene, from shoot to post. Don’t forget, you can become a Premium Member for access to all of our current and future content, and the SLR Lounge Preset System is included in your membership.


Get Connected!